
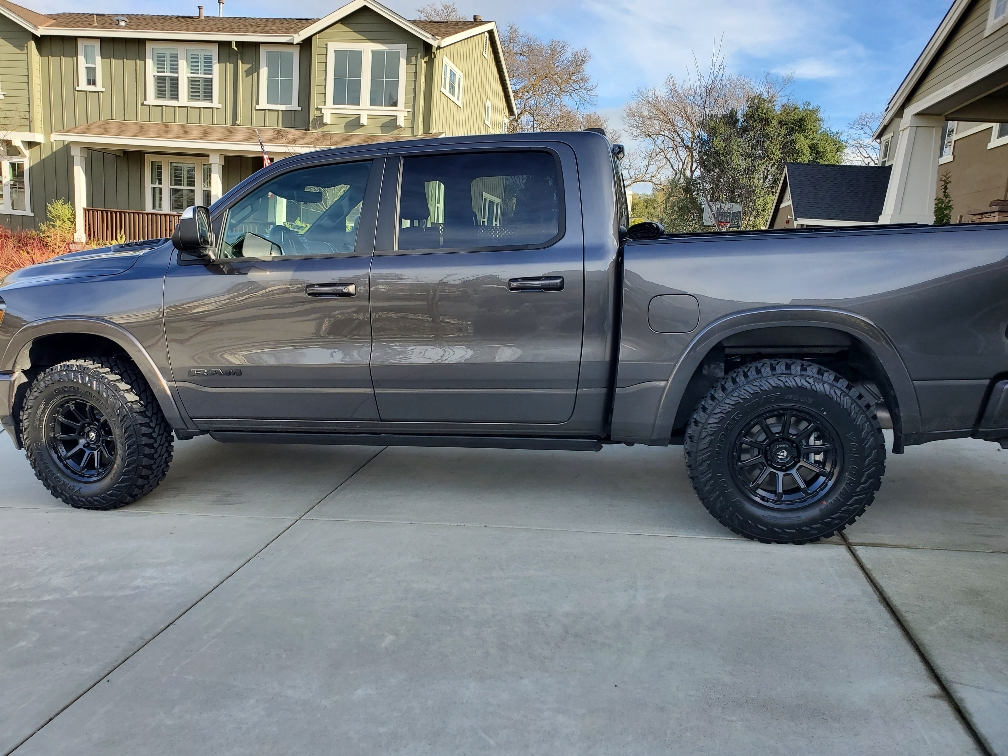
The Rebel wheels must have deeper "pockets" than the Built to Serve wheels. I had to trim my front lugs some with my 3/4" Bora spacers on the front. But I have the same 3/4" front 1" rear Bora spacersAdded Bora 3/4” front & 1” rear, stock Rebel wheels, no stud cutting required. The exact look I was after. Pretty close to flush with fender flares.


5thGenRams Forums
You are using an out of date browser. It may not display this or other websites correctly.
You should upgrade or use an alternative browser.
You should upgrade or use an alternative browser.
What did you do to your Ram today???
- Thread starter 19BlkRam
- Start date
davidn0021
Well-Known Member
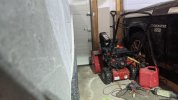
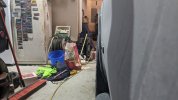
Holy crap, I need to do this too! Did you vinyl wrap everything?Upgraded my sound from the base six speaker system to something better. I managed to fit a Rockford Fosgate 750-1D and a RF R2-500X4, plus an AudioControl LC2i Pro, all under the front driver seat. My goal was to keep the new audio gear together, and with as short a run for electrical wiring as possible. Clearance is narrow, but still good at the lowest seat position. Total length of power wire is less than 7.5 feet; ground wires are about 6 inches. Only the speaker wire for the sub runs to the back, nothing mounted to the back wall (I need that for other things). Sub volume control knob and remote line run under the center console.
Removing the ANC module / bracket left a pocket area to conceal wiring under the amp locations, while also providing a 10mm frame stud on each side for the amplifier grounds. Front Speakers are REF-9633ix 6x9 & Kappa 300m 3.5 W/blockers at 2ohm for 125 watts, with 75 watts at 4ohm for the rear 96333ix’s. I used hi-level inputs front and rear to the R2-500X4 via a clipped iDatalink bCH3 bypass.
I originally ran an RCA line out from the R2-500X4 pass through to the sub amp. However, this caused some low feedback in the line (the RF amp was likely not designed for hi-input to low RCA output). So, I tapped the rear speaker lines to add the LC2i Pro to fix the issue (the Pro has a ground selectable circuit).
View attachment 82685
View attachment 82686
I transport gear in the cab when traveling so I did not want to install an under seat sub box that I would have to move or pull for trips. Instead I built a custom box for a Kicker 10” L7T to replace the folding center armrest. To make sure the box has the correct sized cubic footprint, I ended up having to relocate the entire rear seat group forward 1.35 inches at the frame mounts. I still need to steam heat and work out some leather wrinkles from the Katzkin covers, and I haven’t had a chance to fine-tune the sound system yet, but it is definitely improved.
View attachment 82687
View attachment 82729
I’ve nearly finished my silver interior trim delete.
For the life of me I can’t figure out why RAM would leave all that silver trim in a “Night Edition” truck.
View attachment 82690 View attachment 82691
Also reupholstered the sun visors to match the Katzkin seats (an absolute time consuming nightmare), after my failed airbag safety decal removal attempt.
View attachment 82692
No you will need to get lock’erdown version for the limitedSo I am assuming a tuffy safe will not fit under it. Not much clearance with stock onw
All_Black_Lone_Star
Active Member
Upgraded my sound from the base six speaker system to something better. I managed to fit a Rockford Fosgate 750-1D and a RF R2-500X4, plus an AudioControl LC2i Pro, all under the front driver seat. My goal was to keep the new audio gear together, and with as short a run for electrical wiring as possible. Clearance is narrow, but still good at the lowest seat position. Total length of power wire is less than 7.5 feet; ground wires are about 6 inches. Only the speaker wire for the sub runs to the back, nothing mounted to the back wall (I need that for other things). Sub volume control knob and remote line run under the center console.
Removing the ANC module / bracket left a pocket area to conceal wiring under the amp locations, while also providing a 10mm frame stud on each side for the amplifier grounds. Front Speakers are REF-9633ix 6x9 & Kappa 300m 3.5 W/blockers at 2ohm for 125 watts, with 75 watts at 4ohm for the rear 96333ix’s. I used hi-level inputs front and rear to the R2-500X4 via a clipped iDatalink bCH3 bypass.
I originally ran an RCA line out from the R2-500X4 pass through to the sub amp. However, this caused some low feedback in the line (the RF amp was likely not designed for hi-input to low RCA output). So, I tapped the rear speaker lines to add the LC2i Pro to fix the issue (the Pro has a ground selectable circuit).
View attachment 82685
View attachment 82686
I transport gear in the cab when traveling so I did not want to install an under seat sub box that I would have to move or pull for trips. Instead I built a custom box for a Kicker 10” L7T to replace the folding center armrest. To make sure the box has the correct sized cubic footprint, I ended up having to relocate the entire rear seat group forward 1.35 inches at the frame mounts. I still need to steam heat and work out some leather wrinkles from the Katzkin covers, and I haven’t had a chance to fine-tune the sound system yet, but it is definitely improved.
View attachment 82687
View attachment 82729
I’ve nearly finished my silver interior trim delete.
For the life of me I can’t figure out why RAM would leave all that silver trim in a “Night Edition” truck.
View attachment 82690 View attachment 82691
Also reupholstered the sun visors to match the Katzkin seats (an absolute time consuming nightmare), after my failed airbag safety decal removal attempt.
View attachment 82692
What are you using to black out the trim? That looks amazing, I was never tempted to change the silver trim on my night edition truck until now.
My_first_RAM
Active Member
- Joined
- Aug 16, 2020
- Messages
- 125
- Reaction score
- 147
- Points
- 43
- Age
- 46
Got the same tires. I really like the Yokohama’s!Well was yesterday...but, got it lifted and new wheels/tires!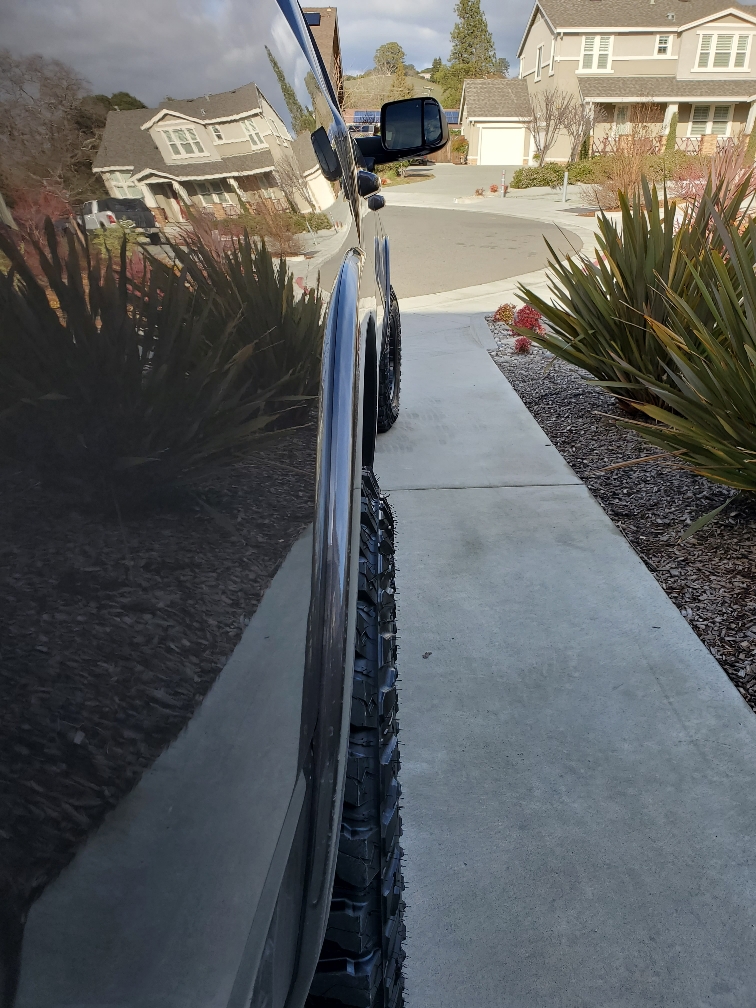
Sent from my SM-G973U using Tapatalk
Psyonic64
Active Member
Installed a Console Vault today. Took a clutz like me all of 15 minutes. Simple install and very impressed with the build quality.

securityguy
Legendary member
For anyone interested, I put a group buy together for the best console vault on the market...Lock'erDown. See the thread under the INTERIOR section.

 5thgenrams.com
Awesome Console Safe...
Mine came in today. I got the extreme with the push button lock and am very pleased with it. Warning: you are operating blind to get the two long screws in the back. My Ram has drawn blood! o_O Pro Tip: I f you will want a custom foam insert, use the vault to draw an outline on cardboard to...
5thgenrams.com
Dang I have the 26 gallon tank and I’ve driven probably a good 10-15 miles on “low” (I think even the “low” turned off and was just a “—“ but I’m not positive) and I was only able to squeeze 25 gallons in lolI pushed the reserve so far that it went from telling me 10, 9, 8 miles remaining to simply "Low". I filled up 32.5 gallons in the 33 gal tank. My goal was door to door, Atlanta to Indianapolis on a single tank, and I didn't make it. Perhaps if I'd driven 65 mph, I'd've made it.
traveller09
Active Member
I am assuming that isn't big enough for a small laptop?Installed a Console Vault today. Took a clutz like me all of 15 minutes. Simple install and very impressed with the build quality.
View attachment 82761
securityguy
Legendary member
Just finished prepping my truck for the rear bumper reverse flood lighting I purchased. All wiring was done with a CURT harness and all wiring has been installed in split loom tubing. Once the mounting bracket arrives, I'll finish her up and post pics!
UPDATE: OK...off to a great start being that it rained on and off today and my hitch bracket just came about an hour ago. I have the bracket installed; the lights mounted; the CURT harness connected up to the truck; the 5-pin extension cable wired up; and all wiring is in a split-loom jacket. If the weather holds out tomorrow (calling for more rain), I plan to get everything wired up and functional. Pics so far:


UPDATE: OK...off to a great start being that it rained on and off today and my hitch bracket just came about an hour ago. I have the bracket installed; the lights mounted; the CURT harness connected up to the truck; the 5-pin extension cable wired up; and all wiring is in a split-loom jacket. If the weather holds out tomorrow (calling for more rain), I plan to get everything wired up and functional. Pics so far:
Last edited:
z0n3
Ram Guru
- Joined
- Jun 16, 2019
- Messages
- 1,722
- Reaction score
- 1,377
- Points
- 113
- Age
- 33
No photos... but took the truck out in the Seattle snow storm to run some errands. Factory wild peaks did great in the wet heavy snow. Also, what would a Seattle snow storm be without some spun out priuses in the ditches.
WReckeR
Well-Known Member
I have seen lots of owners adding all sorts of additional lighting. The ones that seem the most useful are bed length LEDs under the tonneau and reverse lights so you can see from the camera in the 12" when backing up.Just finished prepping my truck for the rear bumper reverse flood lighting I purchased. All wiring was done with a CURT harness and all wiring has been installed in split loom tubing. Once the mounting bracket arrives, I'll finish her up and post pics!
Knowing nothing, I would've guessed it would be possible to tie in to the lights in the Bed Utility Group for bed LEDs. There's a switch there, and you only start with the small lights on either side near the tailgate. And for the reverse lights, it looks like you have a nice starter kit. I really need to see how you're going to hook it up though. So I'm looking forward to your photos. Please be sure to include a good representation of the wiring.
The brand I saw more than once in this thread was Luyed.
gzgg99
Active Member
interesting. I have the limited with the 22" option wheels. Not sure how deep or if it has pockets...I'll have to check- once this annoying freezing rain stops.The Rebel wheels must have deeper "pockets" than the Built to Serve wheels. I had to trim my front lugs some with my 3/4" Bora spacers on the front. But I have the same 3/4" front 1" rear Bora spacers
CMil527
Spends too much time on here
Yeah im curious as well as i have 22's on my Laramie as well and would love the wider track the spacers would provide but as mine is a lease i dont want to have to cut studs!interesting. I have the limited with the 22" option wheels. Not sure how deep or if it has pockets...I'll have to check- once this annoying freezing rain stops.
Holy crap, I need to do this too! Did you vinyl wrap everything?
Only the door handle covers, climate control knobs, and dash speaker grill outer rings are vinyl wrapped, the rest have been painted.
Last edited:
What are you using to black out the trim? That looks amazing, I was never tempted to change the silver trim on my night edition truck until now.
A few parts are wrapped with Vivvid vinyl due to the type of plastic the parts are made from. 90% of the parts are painted, which had to be block sanded (the sides of most of the aluminum and plastic bits have a rough texture). Primed with an etching primer, then painted with House of Kolor BC25 Jet Black and clear coated. Some items could be completely dissembled, very time consuming.


I used some 5% window tint to darken the LED buttons and park selector light areas (some of the LED dash lights do not fade when adjusting the factory knob)
Other parts required careful masking as they could not be taken apart, or I didn't want to take the chance of breaking something.

Zero interest in wanting to disassemble an airbag.


securityguy
Legendary member
I updated post 14,570. Here are the lights I bought. Cheap Amazon lights, but solid reviews. If they don't pan out, going to upgrade to Lumens, Rigid or Hella.I have seen lots of owners adding all sorts of additional lighting. The ones that seem the most useful are bed length LEDs under the tonneau and reverse lights so you can see from the camera in the 12" when backing up.
Knowing nothing, I would've guessed it would be possible to tie in to the lights in the Bed Utility Group for bed LEDs. There's a switch there, and you only start with the small lights on either side near the tailgate. And for the reverse lights, it looks like you have a nice starter kit. I really need to see how you're going to hook it up though. So I'm looking forward to your photos. Please be sure to include a good representation of the wiring.
The brand I saw more than once in this thread was Luyed.
Drumnut14
Active Member
- Joined
- Oct 4, 2020
- Messages
- 40
- Reaction score
- 82
- Points
- 18
- Age
- 58
I had to do my drive and re torque, measured my Rebel pockets at a full 1” deep, with a 3/4” spacer, I had a 1/4” to spare, lucky me!The Rebel wheels must have deeper "pockets" than the Built to Serve wheels. I had to trim my front lugs some with my 3/4" Bora spacers on the front. But I have the same 3/4" front 1" rear Bora spacers
RickWaz
Well-Known Member
Those are fantastic console vaults!!! I have the digital, keypad one and it does provide serious peace of mind for storing valuables, if needed.For anyone interested, I put a group buy together for the best console vault on the market...Lock'erDown. See the thread under the INTERIOR section.
Awesome Console Safe...
Mine came in today. I got the extreme with the push button lock and am very pleased with it. Warning: you are operating blind to get the two long screws in the back. My Ram has drawn blood! o_O Pro Tip: I f you will want a custom foam insert, use the vault to draw an outline on cardboard to...
KRField
Well-Known Member
20x9 -12mm Pro comp Rockwell’s
Aluminum Hub centric rings
285/65/20 Falken Wldpeak AT3W
Rough Country rear wheel well liners
I ceramic coated the wheels before install. I also cleansed the rotors of surface rust, and applied a film of anti-seize prior to the wheel install.
I have a 2.5” top hat level. Future plan is to get the rough country 3.5” lift with the 3.5” lift struts.


Sent from my iPhone using Tapatalk
Aluminum Hub centric rings
285/65/20 Falken Wldpeak AT3W
Rough Country rear wheel well liners
I ceramic coated the wheels before install. I also cleansed the rotors of surface rust, and applied a film of anti-seize prior to the wheel install.
I have a 2.5” top hat level. Future plan is to get the rough country 3.5” lift with the 3.5” lift struts.
Sent from my iPhone using Tapatalk
Last edited:


