5thGenRams Forums

Register a free account today to become a member! Once signed in, you'll be able to participate on this site by adding your own topics and posts, as well as connect with other members through your own private inbox!

Hard-wire Dash Cam Install

Sonnie

5thGenRams Supporter
Site Supporter
Joined
Jul 9, 2019
Messages
357
Reaction score
244
Location
L.A. (Lower Alabama)
You'll be happy with your purchase. I've had mine for quite a while and have zero complaints. It works every time that I turn the truck on and takes very good video. I will warn you of one thing: Every 60 days it wants to format the card. That isn't a problem, you just turn it on one day and it beeps and asks you if you want to format the card; then you hit "ok" and it only takes seconds. My problem was that I didn't realize it was the camera beeping at my one day and I thought my truck was broken. Something just kept beeping and I didn't know how to make it stop.....I started the truck, shut off the truck, started again, opened and closed doors, locked and unlocked it and it kept trying to figure out where the noise was coming from...then I disconnected and reconnected the battery and it stopped. Later that night as I thought about what the beeping might have been I realized it was probably the camera because it had been a while since it did the format. Boy, did I feel stupid. At least I was the only one who knew about it.....until now.:oops:
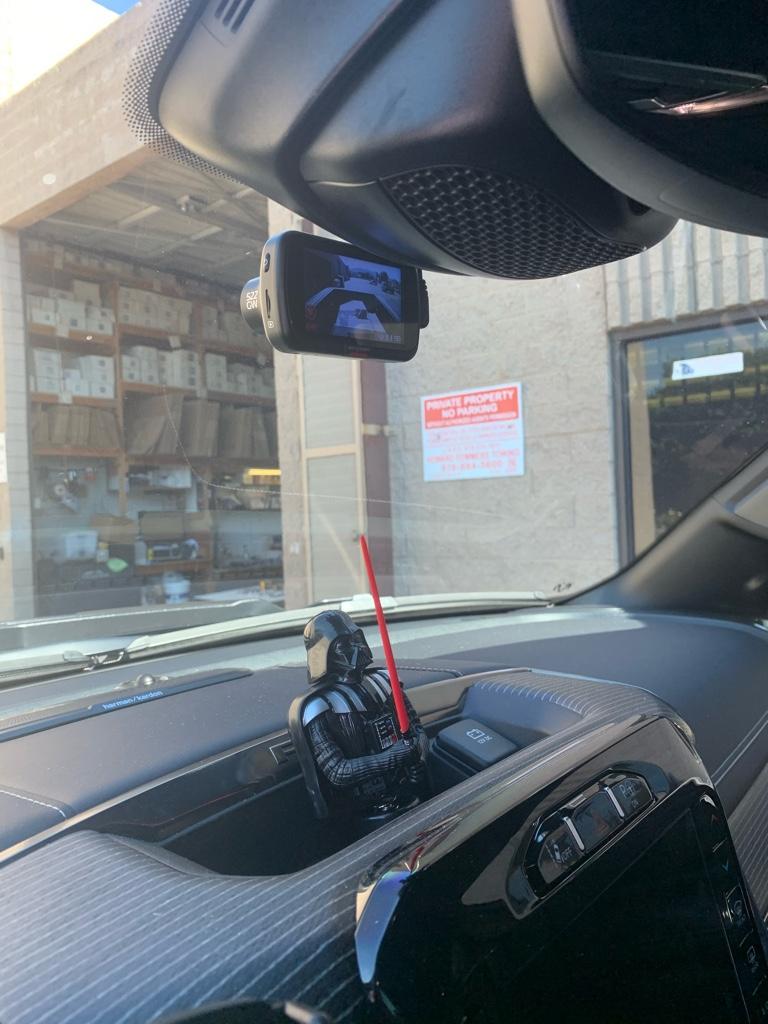
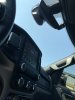
lol... that would drive me crazy not being able to figure out where the beeping is coming from. I hope I remember and don't go bazonkers trying to figure it out.

Looking forward to getting it all in and installed. Never really thought about having a dash cam, but it seems like a smart thing to do these days, with all the craziness going on.
 

Extole

Active Member
Joined
Nov 20, 2019
Messages
59
Reaction score
43
Hi Guys! so I tried hard wiring my mirror dash cam and utterly failed (I SUCK AT THIS KIND OF STUFF). It looks like the stereo guy that installed my subwoofer used the f66 slot by wrapping one of the prongs on the 10a fuse with wire. When i tried hardwiring my kit it wouldnt turn on the dash cam/mirror but i think thats cause of my stupidity in trying to ground it somewhere where dumb. I also needed constant power to this so I plugged it into the f33 slot using the hard wire kit. BUT, upon looking for more fuses and another micro2 cable I came across this obd hookup.. Will this accomplish everything i need? it seems so much easier too for about the same price. Any downsides to using this? will i still have my parking mode surviellance? it also looks like it has the preventive battery drain option.


Dash Cam

hard wire kit I tried attempting
 
Last edited:

securityguy

Legendary member
Joined
Feb 17, 2019
Messages
5,581
Reaction score
4,224
Location
North Florida
I just get in a routine with all of my dash cams (I have 4) that on the first of every month I reformat them all.
 

securityguy

Legendary member
Joined
Feb 17, 2019
Messages
5,581
Reaction score
4,224
Location
North Florida
Hi Guys! so I tried hard wiring my mirror dash cam and utterly failed (I SUCK AT THIS KIND OF STUFF). It looks like the stereo guy that installed my subwoofer used the f66 slot by wrapping one of the prongs on the 10a fuse with wire. When i tried hardwiring my kit it wouldnt turn on the dash cam/mirror but i think thats cause of my stupidity in trying to ground it somewhere where dumb. I also needed constant power to this so I plugged it into the f33 slot using the hard wire kit. BUT, upon looking for more fuses and another micro2 cable I came across this obd hookup.. Will this accomplish everything i need? it seems so much easier too for about the same price. Any downsides to using this? will i still have my parking mode surviellance? it also looks like it has the preventive battery drain option.


Dash Cam

hard wire kit I tried attempting
What make/model dash cam do you have?
 

Extole

Active Member
Joined
Nov 20, 2019
Messages
59
Reaction score
43
What make/model dash cam do you have?
This is the dash cam mirrror i have
Vantop h612t
 

Sonnie

5thGenRams Supporter
Site Supporter
Joined
Jul 9, 2019
Messages
357
Reaction score
244
Location
L.A. (Lower Alabama)
I ordered an upgraded higher capacity battery (Northstar) for my truck audio system, which I had been planning on doing anyway. I got to thinking, this should be some help for parking mode. It's a starting/reserve battery combined, so it should provide better performance with the dash cam... and better allow the setting to be 11.8 volts before cutoff without doing any damage to the battery. The battery cycles over 900 times at 50% depth of discharge, which I can't see me ever discharging it to 50%.. It may actually never get low enough to turn off the dash cam with as much reserve as it has, considering the truck is my daily driver.

1596759682993.png

I was looking at the Cellink NEO specifically for the dash cam, but those are nearly as much as the Northstar. Now I don't think I'll need it.
 

trindadi84

New Member
Joined
Apr 19, 2019
Messages
1
Reaction score
0
I actually ended up using a different one for accessory power because the fuses located just above 66 (56, 57, 58) interfered with the fuse tap seating all the way into the slot for 66. I just poked around with a multimeter to test which ones were constant/ignition/accessory power and which ones were constant, then looked up what each one was for to make sure adding an amp of load wouldn't cause a major problem.

If you have a multimeter with nice sharp probes, you certainly don't have to take the fuse out to test them. On the top of each fuse (where it says 10, 15, 20, etc.), there are two tiny indents where you can touch your multimeter to the fuse and see whether it's powered (just ground your black lead to ground somewhere on the truck). Makes it very easy to test fuses quickly. I stuck my black lead up into he middle of the spring that's above the fusebox so I didn't have to hold it in place, then used the red lead to probe each fuse to determine if it was constant, accessory, or ignition power.

B
I'm having this problem as well with f66 fuse. Which switched fuse did you end up using? Thanks!
 
Joined
May 18, 2019
Messages
567
Reaction score
282
Location
Whitby, Ontario
I just bought the VIOFO A129 PRO 4K front and rear camera set-up for my daughters SUV. For the price, it is rated as the best 4K camera on the market and I was very impressed. The picture quality is superior to that of the Blackvue DR900 which is almost twice the cost. The cables that come with the newer units are thick and shielded which will prevent all interference issues. The only change I wish they would make is to have right angle plugs for the top of both cameras so you can get the cameras higher up on the windows versus the cables sticking straight out of the top.

For anyone looking for a high quality dash cam that is top ranked at a reasonable cost, I highly recommend the VIOFO A129 series.


Question regarding the VIOFO A129 PRO front and rear setup, this is the setup I plan on running and I already have a 256K card that I got Samsung EVO. Do you have any pictures of where you mounting both the front and rear cameras?

Would the best spot on the front be under the mirror mount directly in the middle of the mirror? I see a lot of installs where the camera is up behind the the rear view mirror either on the driver side or passenger side. So slightly off center of the windshield. My issue is, I also have A 6” eyebrow there and don’t think it would be a good idea to stick it on the tint. I could still come just just below that on one side or another if there is a reason why not to stick it under the mount. Blocks your view of the right side of the vehicle I would maybe think is why it may be a bad idea.

Also the rear camera, I have seen install pictures and everyone has it on the passenger side of the back window. Is it not possible to mount the sticky tape on the plastic trim where it gets thick near the middle window and still have the camera hand low enough to get the view from directly in the middle of the back window? On a plus side if you can, you’ll get a nice clear picture with the window open and a tint window not blocking the camera. Or will the camera not hang low enough or will the cable prevent it from sticking in the location?

I will be having my camera installed professionally by someone I have used many times for alarms and autostarts on various vehicles over the years. Usually a dash cam I would do myself, and I have many other times (not including the many times I have wired/installed big stereo systems, lights etc..) but I just rather pay for it to be done on this truck. They are pros, I don’t need to worry about breaking my interior during the installation and messing with routing the cable all the way to the back of the truck. Above all, his pricing is a little cheaper on compared to me just buying everything from Amazon plus he is giving me an additional 5% discount. So it means, I will be saving money that could go towards paying for the install and only end up paying about $40-50 to have it installed.
 

securityguy

Legendary member
Joined
Feb 17, 2019
Messages
5,581
Reaction score
4,224
Location
North Florida
Do you have any pictures of where you mounting both the front and rear cameras?
I installed the VIOFO in my daughter's Subaru and not my RAM. My RAM has a Blackvue DR750S that I installed right behind my rear view mirror. There are plenty of pics of my install in another thread but here are a few. Super easy install and you can't break anything.

Ramcam1.jpg RamCam5.jpg
 

RamVader

Active Member
Joined
Mar 28, 2020
Messages
123
Reaction score
264
I decided to bypass the truck battery and run the wires inside the center console. I hooked it up to an 11 amp hour battery pack because I want to use parking mode and not worry about draining the truck battery. It works out great because I was lucky to have a 120 V plug in there so the battery pack is charging when the truck is running. Everything is totally hidden when the drink holder tray is slid all the way forward
4cb37425d4f43a202baf12b9843aafee.jpg
eedee5bd01812f6c7cdc7a7901d6a7e3.jpg
240b28dd04675d29768b21a0f1e0982b.jpg
99eaea6aad41bdb49f89937d1d0381b5.jpg


Sent from my iPhone using Tapatalk
 
Joined
May 18, 2019
Messages
567
Reaction score
282
Location
Whitby, Ontario
Yeah I am going to have mine professional installed, from a guy I have been dealing with for like 12 years or so. The price for me to buy the stuff compared to him supply the stuff plus install only equals $36(CDN) difference in price. So basically install is costing me $36, I think I can say that measly amount makes it very easy to have it installed by a professional.
 

securityguy

Legendary member
Joined
Feb 17, 2019
Messages
5,581
Reaction score
4,224
Location
North Florida
I decided to bypass the truck battery and run the wires inside the center console. I hooked it up to an 11 amp hour battery pack because I want to use parking mode and not worry about draining the truck battery.
You can buy several devices like a Power Magic Pro cheap that will cut the power off once the battery reaches a voltage level you select. I think you went WAY overboard and made your installation far more complex then it needed to be and introduced several failure points that don't need to be there.
 
Joined
May 18, 2019
Messages
567
Reaction score
282
Location
Whitby, Ontario
You can buy several devices like a Power Magic Pro cheap that will cut the power off once the battery reaches a voltage level you select. I think you went WAY overboard and made your installation far more complex then it needed to be and introduced several failure points that don't need to be there.

I was thinking the same thing, why go through all that trouble when you can get simple battery cut off harness to do the same thing. Without the introduction of plugging into the 110volt socket in the console.

The Viofo has a hardwire harness specifically needed to run the parking mode, the harness would work with all types of cameras. Just make sure you don't get the cheap ones that have cut-offs as low as 11v or so otherwise you may come out to a dead truck. The Viofo has several cut outs, ones that I feel are a good cut off point 11.8v, 12.0v, 12.2v and 12.4v.
 

jcarcueva

Active Member
Joined
Oct 5, 2019
Messages
43
Reaction score
23
Yeah I am going to have mine professional installed, from a guy I have been dealing with for like 12 years or so. The price for me to buy the stuff compared to him supply the stuff plus install only equals $36(CDN) difference in price. So basically install is costing me $36, I think I can say that measly amount makes it very easy to have it installed by a professional.

Where in Canada are you based?
 

dtlrshp

Active Member
Joined
Aug 18, 2020
Messages
51
Reaction score
32
Location
bay area, ca
Aukey DR02D
128gb micro SD
Mini USB Hardwiring kit + fuse tap
Blackvue power magic pro
Fuse 66
 

Attachments

  • 2020-08-25 15.23.11.jpg
    2020-08-25 15.23.11.jpg
    88.5 KB · Views: 106
  • 2020-08-25 15.23.40.jpg
    2020-08-25 15.23.40.jpg
    87.7 KB · Views: 107

securityguy

Legendary member
Joined
Feb 17, 2019
Messages
5,581
Reaction score
4,224
Location
North Florida
I highly recommend that any one looking to purchase a mid-level dash cam look at the VIOFO A129 series. Excellent reviews and I am extremely pleased with the A129 Pro Duo 4K model I installed in my Daughter's 2019 Subaru Forester Sport.
 
Joined
May 18, 2019
Messages
567
Reaction score
282
Location
Whitby, Ontario
I did a Hardwire install of the Viofo A129 Duo this weekend and I'm pretty happy with the results so far. The only problems that I had was that the rear camera cable is so thick that it is difficult to tuck behind the headliner; and I had to make a few adjustments to get enough length for the rear camera cable (ran along passenger side).
I spent an hour walking around Home Depot looking for a solution to mount my rear camera. I wanted a nice clean install in the center of the rear window; but needed to work around the sliding rear window. I saw that someone here manufactured a mount from aluminum; but I wanted something that was easy, light. and didn't have to be painted. So after walking the entire Home Depot twice trying to find something to "MacGyver" the rear cam install; I came across what I thought would be a good solution. And IT WAS FREE! I picked up a 4"x4" vinyl floor sample that had a pattern similar to the woodgrain trim on my Laramie (the sample is black on the back). I cut it down to 2" x 3". I heated the cutout and put a bend in it at 3/4". After it cooled, I attached the camera to one end and used double sided adhesive to attach the manufactured mount to the trim above the rear window. It worked perfectly. The sample is pretty thick, so it is plenty stable.
The Viofo camera seems to be pretty good. The Video is incredible and the camera itself is very easy to setup and use. Here are the pictures of my rear camera install:

I know your post is like over 1 year old but I really like that install you did a good job and I think it looks clean. I also want my camera to be centred, most installs people just stick it on the passenger window. To far off centre if you ask me.

Anyhow I want to pick you brain a little.. I just have the A129 Pro Duo installed on my truck, but my installer buddy doesn’t have rear cameras in stock right now so he just installed the front and will be doing the back shortly. I’m looking at mounting options, do you think if I got a USB mini to USB mini right or left angle adaptor to turn the cable on a 45 degree. Do you think that I could mount the camera directly on the black trim? Do you think the black line that is on the slider at the top would hinder the view of the camera? Or do you think it would clear it?

If all else fails, I want to make a bracket if that first idea doesn’t work and I will definitely be using your idea. I’m going to walk around and see if I can find something similar that you got. I’m in Canada so I don’t know if they will have the same thing or not. I seen the metal bracket but it’s too expensive, shipping to Canada is like 2x the price of the bracket price itself lol. NOPE! Too much money for a small metal bracket. Your idea is simply enough and I have a heat gun and vise so that I can bend it. Your measurement of 3/4“ will be helpful. Just need to get the angle correct.
 

securityguy

Legendary member
Joined
Feb 17, 2019
Messages
5,581
Reaction score
4,224
Location
North Florida
I know your post is like over 1 year old but I really like that install you did a good job and I think it looks clean. I also want my camera to be centred, most installs people just stick it on the passenger window. To far off centre if you ask me.

Anyhow I want to pick you brain a little.. I just have the A129 Pro Duo installed on my truck, but my installer buddy doesn’t have rear cameras in stock right now so he just installed the front and will be doing the back shortly. I’m looking at mounting options, do you think if I got a USB mini to USB mini right or left angle adaptor to turn the cable on a 45 degree. Do you think that I could mount the camera directly on the black trim? Do you think the black line that is on the slider at the top would hinder the view of the camera? Or do you think it would clear it?

If all else fails, I want to make a bracket if that first idea doesn’t work and I will definitely be using your idea. I’m going to walk around and see if I can find something similar that you got. I’m in Canada so I don’t know if they will have the same thing or not. I seen the metal bracket but it’s too expensive, shipping to Canada is like 2x the price of the bracket price itself lol. NOPE! Too much money for a small metal bracket. Your idea is simply enough and I have a heat gun and vise so that I can bend it. Your measurement of 3/4“ will be helpful. Just need to get the angle correct.
Confused...if you bought an A129 Pro Duo, both cameras come INSIDE the box. How could the rear camera be missing??? In addition, with the field of view of the camera, it does not have to be mounted centered on the glass as the camera will still see what it needs to see. I have been installing dash cams professionally for quite a while and I am happy to help you if you like. The biggest issues with the rear cams on these "cheaper" cameras is the mounting location of the cables which prevent you for mounting higher on the glass. Not sure if a right angle adapter will work but it cannot hurt to try.
 
Joined
May 18, 2019
Messages
567
Reaction score
282
Location
Whitby, Ontario
Confused...if you bought an A129 Pro Duo, both cameras come INSIDE the box. How could the rear camera be missing??? In addition, with the field of view of the camera, it does not have to be mounted centered on the glass as the camera will still see what it needs to see. I have been installing dash cams professionally for quite a while and I am happy to help you if you like. The biggest issues with the rear cams on these "cheaper" cameras is the mounting location of the cables which prevent you for mounting higher on the glass. Not sure if a right angle adapter will work but it cannot hurt to try.
Actually I was just reading that the mirco-USB on these cameras 10pin and right angle adaptors are 5 pin. They have their own system.

As for the Camera. I don't have to DUO box just the A129pro and adding the camera later basically. Which is the same thing just isn't packaged as the DUO.

Yeah I guess with the field of view you don't need to center. But I still think the image would be off centered regardless. Wouldn't it be? It would see more of the one side compared to the other.

In any case I'm going to make a mount like the one I seen posted in here with the vinyl samples from Homedepot which are free. So making the mount will cost me nothing anyhow. Already got the free same with me
 

Users who are viewing this thread

Top