R
Rob5589
Guest
Question for you guys; how much front suspension sag, if any, did you notice after install?
Mine has air suspension, so it adjusts and there's no sag at all.Question for you guys; how much front suspension sag, if any, did you notice after install?

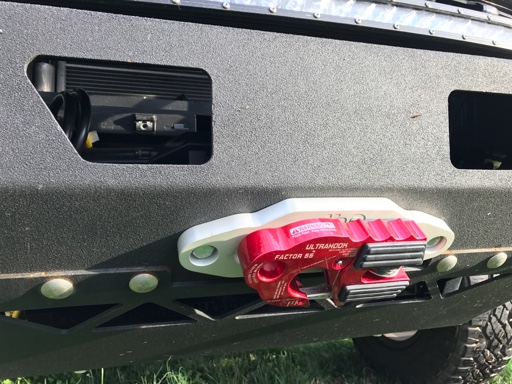
Did a little customizing to the fairlead mount bracket as I wanted more of a factory+ look. About an inch was removed from the leg supports and then welded back in place. Powder coated the bracket with texture black to match the original finish and BAMM......now it fits behind the factory grill. Had to do some minor trimming to the grill as it is bowed while the fairlead mount bracket face is flat.
Here is where I am at right now. Rest will be finished tomorrow.
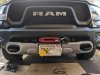
Ok, all done. Powder coated the clutch handle and the head of the hook handle bolt with more texture black so it would blend in better. Primed and painted the base for the clutch handle and the screws that hold the clutch cam as they were already rusting. Also installed a small portion of rock guard where the hook comes in contact with the silver painted portion of the bumper. Came out just the way I wanted it.
Ok, all done. Powder coated the clutch handle and the head of the hook handle bolt with more texture black so it would blend in better. Primed and painted the base for the clutch handle and the screws that hold the clutch cam as they were already rusting. Also installed a small portion of rock guard where the hook comes in contact with the silver painted portion of the bumper. Came out just the way I wanted it.
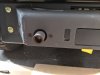
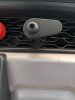
I just used industrial-strength Velcro.For those that relocated the controller to the top of the fuse box, how did you end up mounting it?
I've got steel spacers cut to length, around 1/2", that have the same interior diameter to match up with the bolts. So the grill has about a mm gap and the fairlead doesn't crush it.No doubt it’s the best looking install so far. You’re not worried about having the facia plastic sandwiched between the mount and the fairlead or did you put a more substantial spacer of some sort between them?
I'll have to check the dimensions. Since the fairlead sits in the grill that large of a flatlink may be too tall.If I end up adding a winch this is exactly what I will do, thanks for proving it out, great job. Only thing I would change is cut that hook off and install a Factor 55 flatlink or ultrahook, cleans things up even more.
Sent from my iPad using Tapatalk
Ok, all done. Powder coated the clutch handle and the head of the hook handle bolt with more texture black so it would blend in better. Primed and painted the base for the clutch handle and the screws that hold the clutch cam as they were already rusting. Also installed a small portion of rock guard where the hook comes in contact with the silver painted portion of the bumper. Came out just the way I wanted it.
Yes, just before the final picture. Hooked up to my Jeep, dropped the truck in to neutral, walked around to the front of the truck and activated the winch.Did you spool the line under tension yet with that setup?
Nicest install so far for sure. I think it should of came this way from vice to install rather than sticking out so far and having to use the filler panel. Bang head hereOk, all done. Powder coated the clutch handle and the head of the hook handle bolt with more texture black so it would blend in better. Primed and painted the base for the clutch handle and the screws that hold the clutch cam as they were already rusting. Also installed a small portion of rock guard where the hook comes in contact with the silver painted portion of the bumper. Came out just the way I wanted it.
Nicest install so far for sure. I think it should of came this way from vice to install rather than sticking out so far and having to use the filler panel. Bang head here
I also think that the use of their filler panel would make the installation easier. Modifying the grill, extending the clutch handle attachment, extending the winch hook arm, added a substantial amount of time to the installation. Granted now a template could be provided if I wanted to remove the bumper again.I wonder if the length of the fairlead mount and filler panel was a requirement to allow one kit for both rebel and non-rebel.