5thGenRams Forums

Register a free account today to become a member! Once signed in, you'll be able to participate on this site by adding your own topics and posts, as well as connect with other members through your own private inbox!

What did you do to your Ram today???

WReckeR

Well-Known Member
Joined
Jan 10, 2021
Messages
374
Reaction score
348
Location
Indianapolis
You only need to use the WHITE and BLUE leads to hook up the two lights. If you look closely at the pic below, I took the grounds from both lights and tied them together. Did the same for the +12V leads. I then took the WHITE lead from the CURT to the BLACK leads of the lights and the BLUE lead from the CURT to the RED leads of the lights and soldered them and then heat shrinked them individually. One individually heat shrinked, I then took a larger diameter heat tube and encased the two together. After all was buttoned up, I added split loom and self-sealing silicone wrap for a 100% water tight connection.

Never considered the Luyeds because I don't like them and they look cheap. I thought the beefier solution that @saylor did looked awesome and more befitting of a large 4X4 truck. Personal opinion, but the small lights just didn't do it for me. The wiring I did would also to apply to the Luyed light installation so no differences there.

View attachment 82845
View attachment 82846

View attachment 82848
thank you. I've only worked a little with heat shrink tubing. I assume you had the tubing over the wires before you began to solder. Obviously you can't put the tubing on once the lines are permanently connected.

Backup camera lighting has made it into my top 5 most essential mods.
 

securityguy

Legendary member
Joined
Feb 17, 2019
Messages
5,581
Reaction score
4,224
Location
North Florida
thank you. I've only worked a little with heat shrink tubing. I assume you had the tubing over the wires before you began to solder. Obviously you can't put the tubing on once the lines are permanently connected.

Backup camera lighting has made it into my top 5 most essential mods.
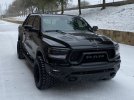
You are correct Sir! You have to place the tubing on first before soldering. I am extremely happy with this mod and that it all came in under $75. Very surprised at the quality of the $16 lights too and they have a 2-year warranty. I had an issue with one of the brackets. Emailed them and a full install kit showed up in 3 days...excellent customer service and I do recommend these lights!
 

WReckeR

Well-Known Member
Joined
Jan 10, 2021
Messages
374
Reaction score
348
Location
Indianapolis
You only need to use the WHITE and BLUE leads to hook up the two lights. If you look closely at the pic below, I took the grounds from both lights and tied them together. Did the same for the +12V leads. I then took the WHITE lead from the CURT to the BLACK leads of the lights and the BLUE lead from the CURT to the RED leads of the lights and soldered them and then heat shrinked them individually. One individually heat shrinked, I then took a larger diameter heat tube and encased the two together. After all was buttoned up, I added split loom and self-sealing silicone wrap for a 100% water tight connection.

Never considered the Luyeds because I don't like them and they look cheap. I thought the beefier solution that @saylor did looked awesome and more befitting of a large 4X4 truck. Personal opinion, but the small lights just didn't do it for me. The wiring I did would also to apply to the Luyed light installation so no differences there.

View attachment 82845
View attachment 82846

View attachment 82848
SG,
Sorry, one more thing...blue and white are (-) and (+)...and you tied the grounds together. Are you not grounded then? Why not? Isn't there a ground on that flat 5?
 

silverWS6

Ram Guru
Joined
Apr 20, 2020
Messages
684
Reaction score
1,417
Location
EPTX
If you buy a new TRX you’ll find the same lights equipped on them. Nothing Raptor about them they are a DOT requirement once your truck gets beyond a certain width.


Sent from my iPhone using Tapatalk

I'm with you, I don't consider them specifically Raptor lights. Hell, even Tacomas have them! Lol
 

PaulieWalnutz

Active Member
Joined
Dec 7, 2020
Messages
191
Reaction score
118
at what speed did you travel? And how many miles do you have on the truck? And do you have the 3.21 or 3.92? I've only driven cross country once, a couple weeks ago when I first picked up my truck. I did over 500 miles and got less than 16mpg, but I also passed through the mountains of Appalachia. I'm really, really hoping my fuel economy improves. I'm under 1000 miles at the moment.
About 65-77 mph depending on the roadways I was on, I have the 3.21 gearing and I presently do not have a tonneau cover on. I also stopped for 10 min with truck running to change and feed the baby..
 

PaulieWalnutz

Active Member
Joined
Dec 7, 2020
Messages
191
Reaction score
118
About 65-77 mph depending on the roadways I was on, I have the 3.21 gearing and I presently do not have a tonneau cover on. I also stopped for 10 min with truck running to change and feed the baby..
And that was up north of lake George and alil into adirondacks
 

securityguy

Legendary member
Joined
Feb 17, 2019
Messages
5,581
Reaction score
4,224
Location
North Florida
SG,
Sorry, one more thing...blue and white are (-) and (+)...and you tied the grounds together. Are you not grounded then? Why not? Isn't there a ground on that flat 5?
The white coming off the 5 pin CURT is the GROUND wire and that gets connected to the black lighting wires to complete the ground. Feel free to PM me and we can chat via phone if you need more insight.
 

Gitter

Well-Known Member
Joined
Jan 24, 2019
Messages
250
Reaction score
369
Location
Texas
You only need to use the WHITE and BLUE leads to hook up the two lights. If you look closely at the pic below, I took the grounds from both lights and tied them together. Did the same for the +12V leads. I then took the WHITE lead from the CURT to the BLACK leads of the lights and the BLUE lead from the CURT to the RED leads of the lights and soldered them and then heat shrinked them individually. One individually heat shrinked, I then took a larger diameter heat tube and encased the two together. After all was buttoned up, I added split loom and self-sealing silicone wrap for a 100% water tight connection.

Never considered the Luyeds because I don't like them and they look cheap. I thought the beefier solution that @saylor did looked awesome and more befitting of a large 4X4 truck. Personal opinion, but the small lights just didn't do it for me. The wiring I did would also to apply to the Luyed light installation so no differences there.

View attachment 82845
View attachment 82846

View attachment 82848

Good stuff!

I have the Luyeds (to supplement the 60" Putco Lightbar), and for the price, I am surprised at the quality of them. The housing is metal (aluminum) and the LEDs are quite bright with a good beam pattern. They probably aren't as bright as the ones you have, but the Luyed's are very good as a backup lights.

Personally, I would not want to go too bright as it might washout the camera view (especially now with all the snow).
 

securityguy

Legendary member
Joined
Feb 17, 2019
Messages
5,581
Reaction score
4,224
Location
North Florida
Good stuff!

I have the Luyeds (to supplement the 60" Putco Lightbar), and for the price, I am surprised at the quality of them. The housing is metal (aluminum) and the LEDs are quite bright with a good beam pattern. They probably aren't as bright as the ones you have, but the Luyed's are very good as a backup lights.

Personally, I would not want to go too bright as it might washout the camera view (especially now with all the snow).
I look forward to testing them out tomorrow to get a view from the cameras perspective and will post a pic of my 12" screen. Never considered snow and the white issue...nice and warm here in Florida:p
 

WReckeR

Well-Known Member
Joined
Jan 10, 2021
Messages
374
Reaction score
348
Location
Indianapolis
The white coming off the 5 pin CURT is the GROUND wire and that gets connected to the black lighting wires to complete the ground. Feel free to PM me and we can chat via phone if you need more insight.
Sorry, I misread it so it seemed like you had 3 wires and not 2, from the lights.
 

securityguy

Legendary member
Joined
Feb 17, 2019
Messages
5,581
Reaction score
4,224
Location
North Florida
Sorry, I misread it so it seemed like you had 3 wires and not 2, from the lights.
2 RED wires, 1 from each camera. 2 Black wires, 1 from each camera. 1 white common ground (CURT). 1 blue +12V when in reverse (CURT). So a total of three wires for the ground that got soldered together and 3 for the +12V that got soldered together. Camera only has 2 wires on it (+12 and Ground).
 

WReckeR

Well-Known Member
Joined
Jan 10, 2021
Messages
374
Reaction score
348
Location
Indianapolis
2 RED wires, 1 from each camera. 2 Black wires, 1 from each camera. 1 white common ground (CURT). 1 blue +12V when in reverse (CURT). So a total of three wires for the ground that got soldered together and 3 for the +12V that got soldered together. Camera only has 2 wires on it (+12 and Ground).
Yup, I got it. It's simple. My confusion was when you first said the grounds from the lights, then the BLACKs from the lights. These are the same wires, you just called them different things. No worries. I'm actually a product manager for electrical automation components, so I'm familiar with wires, colors, grounds, terminology. I have 2 motorcycles as well, with some mods. I really appreciate your expertise, clarity, and discipline. I definitely don't want to start splicing or crimping into wire insulation anywhere. So I'm paying attention to how everyone is adding their electric/electronic mods.
 

WReckeR

Well-Known Member
Joined
Jan 10, 2021
Messages
374
Reaction score
348
Location
Indianapolis
So for those of you adding LEDs to the bed to light it up under a tonneau...
I have the BUG, and the OEM lights are only near the tailgate. I like the long strip LEDs. I'd like to have them switched, and to be able to turn on the lights with the truck off, so I'd need an always-ON wire.

I haven't played with my OEM bed lights. I'm assuming they're always able to be turned on. Has anyone added LEDs to this existing source? Given that LEDs are low power, I'd like to confirm that this voltage source could support the extra LEDs. The folks I've seen add bed LEDs didn't already have the BUG.

Not that I've done an exhaustive search of all installations. But I have looked.
 

securityguy

Legendary member
Joined
Feb 17, 2019
Messages
5,581
Reaction score
4,224
Location
North Florida
So for those of you adding LEDs to the bed to light it up under a tonneau...
I have the BUG, and the OEM lights are only near the tailgate. I like the long strip LEDs. I'd like to have them switched, and to be able to turn on the lights with the truck off, so I'd need an always-ON wire.

I haven't played with my OEM bed lights. I'm assuming they're always able to be turned on. Has anyone added LEDs to this existing source? Given that LEDs are low power, I'd like to confirm that this voltage source could support the extra LEDs. The folks I've seen add bed LEDs didn't already have the BUG.

Not that I've done an exhaustive search of all installations. But I have looked.
You’ll be fine adding leds to the BUG lighting...no issues at all.
 

davidn0021

Well-Known Member
Joined
Jan 4, 2019
Messages
271
Reaction score
148
Location
SoCal
You’ll be fine adding leds to the BUG lighting...no issues at all.
^^ This. I just ordered some Recon LED bed lights and will hook it up to the super dim OEM bed lights directly so it operates off the single switch and whatever power source it's using. Here's what I bought: https://gorecon.com/product/universal-bed-rail-high-power-led-light-kit-in-white/

Would've gone for the cheap Amazon LED strips but I feel they're mixed bags with some poor reviews. Plus, I prefer having the guarantee/warranty that Recon offers.
 

Users who are viewing this thread

Top