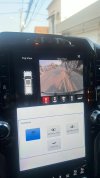
After installing the 360 Surroundview Camera System, I decided to put this together to help others. I know there are several others who have done this. If you have any extra input, please let me know. I will start with the parts list first. Make sure to read the notes. You may need to find the correct part number depending on your configuration or color. It was about $1200 using used items. About $2200 new.
Parts List
1 of CVPM - 68318033AI (Uconnect 4) or 56029964AF (UConnect 5)- This goes in the passenger kick panel. It comes with the mounting bracket.
4 of Camera - 68144068AD - It is the same camera. To save money, I bought used mirrors off of eBay and took the cameras out of them. The mirrors don't need to be in good condition.
1 of Driver Side Mirror - 68276511AG - These vary depending on blind spot monitoring, cap colors, and other options. I bought used ones from eBay.
1 of Passenger Side Mirror - 68276510AH - These vary depending on blind spot monitoring, cap colors, and other options. I bought used ones from eBay.
1 of Front Camera RAM Mount - 68341467AC - This could be different depending on the grill you have.
1 of Front Camera Bracket 1 - 68341480AB - Holds the front camera in the RAM mount.
1 of Front Camera Bracket 2 - 68365873AB - Holds the front camera in the RAM mount.
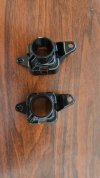
1 of Tailgate Handle - 6RN80GW7AA - This will vary depending on the color and type of tailgate you have. Replace GW7 with your color code that you can find on the placard on the inside of the driver side door.
1 of 68529657AA - Tailgate handle spacer. This holds the camera in the tailgate handle.
1 of 16.5' Fakra Z - Male to Female
Amazon.com - Front Camera to CVPM
1 of 10' Fakra Z - Female to Female
Amazon.com - Driver Side Mirror to CVPM
2 of 6' Fakra Z - Female to Female
Amazon.com - Pass Side Mirror to CVPM, CVPM Output to Radio
1 of 6' Fakra Z - Male to Female
Amazon.com - Rear Camera from Radio to CVPM
1 of 3' Fakra Z - Male to Female
Amazon.com - Tailgate Camera Adapter
2 of #6 3/8 Stainless Screws - These are needed to install the front camera in the RAM
1 of Front Camera Jumper Harness - 68322480AD - This isn't really necessary, but it allows you to disconnect the camera easier when removing the grill.
1 of Wiring Harness for CVPM - Jimmy07 can make this for you. Just send him a PM.
Diagram of OEM Surround View Camera System. Contains Module forward facing camera. [surround view for Surround View Camera System. Fits 1500.
www.factorychryslerparts.com
Keep in mind that some of the parts listed above need to be researched depending on options on your truck.
The install is pretty simple, but time consuming. I am not going to go into detail on each item. I will give an overview. You can find videos and instructions on removing the items on YouTube and here.
Front Camera:
You need to remove the grill. Once it is removed, you need to remove the RAM letters and replace it with the new one with the camera. Too me, this was the longest part of the build. You can install the jumper harness now too.
Rear Camera:
You need to remove the tailgate handle and replace it with the one with the new camera. And NO, you cannot use the old camera. The new cameras have a wider degree of view. Use the Tailgate Camera Adapter cable in between the factory cable and the new camera.
Driver's side and Passenger side:
Replace the mirrors with the new ones. You will need to install the cameras in the mirrors unless you bought used ones off that already have them installed.
Running the cables:
I ran the front cable down the driver's side and went through one of the firewall rubber gaskets. Make sure to seal it back. I then ran the driver's side mirror and this one together under the dash over to the CVPM. The passenger side doesn't need much running as it is right there. You need to remove the radio. You will unplug the rear camera and plug in the cable to run it to the CVPM. Then plug the other cable into the radio and run it to the CVPM.
CVPM Install:
Remove the passenger side kick panel and install the CVPM. You can hook up all the cables. The CVPM is labeled for the different cameras. Then hookup the wiring harness and run it over to the fuse box. Make sure to plug it into one that comes on with remote start.
AlfaOBD Changes:
You will need an MX+ or switch the cables around. Again, I am not going to go into this as there is information about it already. If you have issues finding the settings, use the search in AlfaOBD.
VehConfig 1: Rear View Camera- NO
VehConfig 2: CHMSL Camera- NO
VehConfig 7: Full Central Vision Processing Present- YES
ECUConfig 3: Rear Camera Present- NO
Radio & Connectivity: Rearview Camera Zoom Buttons Present- YES
Radio & Connectivity: Surround View Camera On/Off Softkey Present- YES
CustSetMenu 1: Rear View Camera Gridlines CSM Present- NOT PRESENT
CustSetMenu 1: Rear Camera CSM Present- NO
CustSetMenu 2: Rear View Camera Delay CSM Present- NO
CustSetMenu 2: Surround View Camera Gridlines CSM Present- YES
CustSetMenu 2: Surround View Camera Delay CSM Present- YES
Cabin Net: CVPM Central vision processing- ENABLE
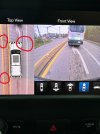
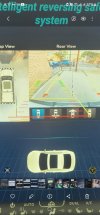
Once you do this, you should be able to at least see the front and rear cameras in the surround view display. You will now need to calibrate the surround view cameras. This is what you need the MX+ for. Plug in the MX+ using the SGW Bypass. You'll have to calibrate the cameras when you're done. Find an area that you can drive straight at about 4mph for about 400'. Connect to the CVPM in the radio module list. Run the camera calibrations individually for each camera.
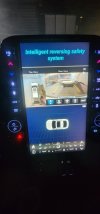
Enjoy your new camera system. If you have questions, please post them in here. If I get more time, I will add more details. If anyone has more details to add, let me know and I will add them.


