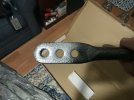
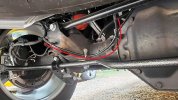
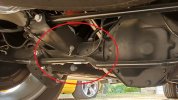
5thGenRams Forums

Register a free account today to become a member! Once signed in, you'll be able to participate on this site by adding your own topics and posts, as well as connect with other members through your own private inbox!

Hellwig? Hell, yeah!

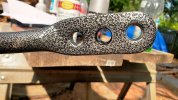
Huh, I received mine yesterday as well - but all 3 holes are uniform. Must have multiple presses and luck of the draw.
What was the manufacture date on yours? On mine, it was on the main label on the end of the box.
 
7/12/2021
Interesting. Yours was only made a week before mine and doesn't have the same issues. So we may indeed be looking at different production lines or at least a different operator doing the work. :unsure:
 
Here's the response I got back from Hellwig today on the deformities on my sway bar:

Hi, Todd.

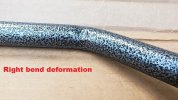
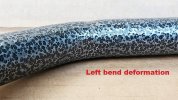
The deformities that you’re seeing on both the right and left shoulder of the bar are normal; it’s from our production team picking up the bar to put it in the quench tank, after forming. It happens more often than not, but it won’t affect the integrity/rate of the bar at all.

In relation to the right center hole, you might need to use a Dremel or other drill attachment to slightly widen the hole a bit more. We do apologize about that, but sometimes the punches do create deformed holes. This should have been caught in our QC, but this is also something you can take care of at home, if need be.

If you’d like a new bar sent it will be roughly about two months before we’re able to manufacture a new one to replace yours, unfortunately, due to production delays and material shortages. Please let me know how you’d like to proceed. Thank you, and our apologies for the inconvenience.


I don't mind cleaning up the holes. But the deformities kind of bother me. And if they are "normal" and happen more often than not, then whose to say the new batch won't have them to. If they don't matter, I guess they don't matter. I need to "pontificate" a while on this. :unsure:

Hellwig09a.jpg

Hellwig15a.jpg
 
Last edited:
Here's the response I got back from Hellwig today on the deformities on my sway bar:

Hi, Todd.

The deformities that you’re seeing on both the right and left shoulder of the bar are normal; it’s from our production team picking up the bar to put it in the quench tank, after forming. It happens more often than not, but it won’t affect the integrity/rate of the bar at all.

In relation to the right center hole, you might need to use a Dremel or other drill attachment to slightly widen the hole a bit more. We do apologize about that, but sometimes the punches do create deformed holes. This should have been caught in our QC, but this is also something you can take care of at home, if need be.

If you’d like a new bar sent it will be roughly about two months before we’re able to manufacture a new one to replace yours, unfortunately, due to production delays and material shortages. Please let me know how you’d like to proceed. Thank you, and our apologies for the inconvenience.


I don't mind cleaning up the holes. But the deformities kind of bother me. And if they are "normal" and happen more often than not, then whose to say the new batch won't have them to. If they don't matter, I guess they don't matter. I need to "pontificate" a while on this. :unsure:

View attachment 105228

View attachment 105229
Me, personally... I wouldn't worry about those, but still glad to see they gave you options.
 
Just ordered mine from AAFES. What a great deal! The Exchange Auto Parts Store is at this link:


View attachment 104958
She’ll like it
That ain't paint...it's an oval-shaped hole.

View attachment 104968
and smaller
 
It's not even comparable. They may be the same thickness, but stock bar is hollow and flexes more.

11 lbs 5oz vs 9 lbs 4 oz

Remember there are 2 different versions of the stock sway bar.

Small one with the coil springs and a large one with the air springs
 
Last edited:
I will try to remember to report back. Brought the camper on its first camping trip. A KOA about an hour away. Towing went well. I have the Hellwig on the firmest setting right now.
 
Good to know , my wife is an air force vet, i will get her to shop on the site for me. woo hoo...
All veterans are eligible. I'm a veteran and also civilian government employee so I can still get on base to shop at our navy exchange. In person, a veteran ID card from va.gov will allow you to buy everything except uniform items, alcohol, and tobacco. If you have a service connected disability (any percentage), it will allow you to buy those things as well. I'm pretty sure the exchange website will use ID.me when you register so it "should" find your military information.
 
All veterans are eligible. I'm a veteran and also civilian government employee so I can still get on base to shop at our navy exchange. In person, a veteran ID card from va.gov will allow you to buy everything except uniform items, alcohol, and tobacco. If you have a service connected disability (any percentage), it will allow you to buy those things as well. I'm pretty sure the exchange website will use ID.me when you register so it "should" find your military information.
When you register, it asks for the last 4 of your SSN or your service number. If it can't verify you that way, it asks for your full SSN. If that does not work, you are asked to upload documentation. I uploaded my DD214 and was approved as a veteran in about an hour. For DOD civilians, it might be possible to put the ID number off the back of your CAC in place of a service number. But I don't know. You can always contact AAFES and ask. Also, if you have a CAC and are prior-service too, you may be able to CAC into milConnect online and find your old military records including your DD214 or similar.
 
Last edited:
I will try to remember to report back. Brought the camper on its first camping trip. A KOA about an hour away. Towing went well. I have the Hellwig on the firmest setting right now.

so Hellwig is already installed?

You didn’t tow the camper with the stock sway bar at all?
 
After much contemplation, supplication and my sweetie asking me when her truck was going to be ready to roll, I decided to go ahead and mount the new Hellwig sway bar as is. So let's get her done! 🤠👍

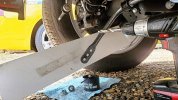
I used a stone dril point to true up the deformed whole on the left side. The right one is good enough, I guess.
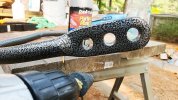
Hellwig16.jpg

I first covered the bare metal on the cleaned up hole with some Mopar PS2 silver. But it didn't match the "hammered" finish of the rest of the sway bar.
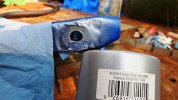
Hellwig17.jpg

Instead, I went with a semi-glass black. That and satin black are my detailing defaults. So I already had some.
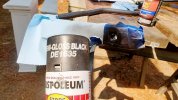
Hellwig18.jpg

It turned out pretty well. But using the stone drill point will come back to haunt me later in the project. o_O

Hellwig19.jpg

This job doesn't take too many tools. I used the following:
  • 3/8 impact with 15mm socket to remove the sway bar shackles.
  • 3/8 ratchet with 8mm socket to hold the sway bar links while removing and installing the nuts.
  • 18mm ratcheting end wrench to remove and install the sway bar link nuts.
  • 3/8 torque wrench set to 30 ft. lbs. with extention and thin-wall 15mm socket to tighten sway bar shackles.
  • Locktight for sway bar shackle bolts.
  • Plastic electrical tape and box cutter to protect left speed sensor lead.
  • Large carpeted floor mat to stay comfy while under truck.
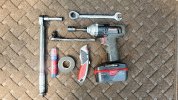
Hellwig20.jpg

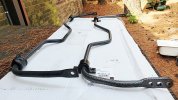
Here's the factory sway bar. It's hollow, lightweight and likely does very little to prevent sway.
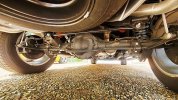
Hellwig21.jpg

I started by removing the sway bar shackle bolts with the impact wrench. This will be the only use of the impact wrench on this project. With the factor shackles, a regular impact socket works fine.
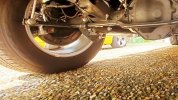
Hellwig22.jpg

Here's how to remove the nuts from the sway bar links. I held them with the ratchet and 8mm socket and removed the nut with a 18mm Gearwrench ratcheting end wrench.
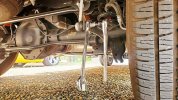
Hellwig23.jpg

Next I prepped the new Hellwig bar using the old bar for comparison. And yeah. I DO live in a pine thicket.
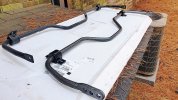
Hellwig24.jpg

I was very liberal with the supplied bushing grease. I used most of the tube and I did apply a thin layer to the shackle side of the bushing as well. Polyurethane loves to squeak. Can't have that on our new truck.
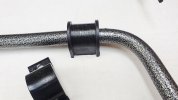
Hellwig25.jpg

*** MORE TO COME IN NEXT POST! ***
 
Last edited:
*** CONTINUED FROM LAST POST ***

Note that the sway bar needs to be turned a certain way. It has a top and a bottom. The middle bow needs to be pointed slightly down when mounted on the truck.

Hellwig26.jpg

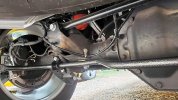
I started mounting the new Hellwig sway bar by fixing it to the rear axle with the new shackles. I used the factory bolts because on a new truck, mods that look factory are esthetically better in my ever so humble opinion. When using the factory bolts with the Hellwig shackles, I needed a thin-walled 15mm socket to tighten them. For now, I just snugged them finger tight. Also, I noticed that the left speed sensor lead rubs the Hellwig sway bar. So I had to adjust it within the factory fasteners. It appears that at the factory, plastic electrical tape was used to protect the sensor lead from rubbing the plastic fasteners. So I needed to add additional tape to protect the sensor lead in its new position in the fasteners.

Hellwig27.jpg

This is when TRAGEDY STRUCK! 😫

While straightening the deformed hole on the sway bar with a stone drill point looked great, it didn't make the hole big enough for the link end to fit through it! So I had to do a remedial step by drilling under the truck. I used a 1/2" drill bit to drill all the way through the hole making it full size. Then I painted the bare metal with a small brush, because I'm good like that. 😎

Hellwig28.jpg

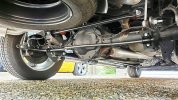
I then attached the links using the middle holes, since that's where I've read many people get the most joy. I then tightened the shackles to 30 ft. lbs using a torque wrench with extension and thin-wall 15mm socket. Afterwards, I took some dull gray primer paint and cleaned up the marks on all the bolts and nuts using a small paint brush. This matched the factory finish on the bolts and nuts pretty closely and now it all looks factory fresh. Since the truck sits high enough to easily crawl under it, I may come back later with some satin black and hit the places on the rear suspension where there is no factory paint.

Hellwig29.jpg

I will report back later after we drive the truck and describe how it feels with the new Hellwig sway bar. 🙂
 
Last edited:
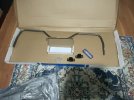
Got my bar today, only just ordered on the 4th so I’m happy about that, no issues with holes, mine was made on July 9th according to the box, but it does have the deformation at those two bends but I don’t mind. I’ll hopefully get around to installing it sometime soonCDD94CBC-DF8F-48B1-AABB-0ECF8E8F8F87.jpegE1B1B2D9-436B-428F-B2F1-51402D760C42.jpeg
 

HandyCruiser could you point to the speed sensor you mentioned above so I am sure I see the same thing?​

Nice job, I think I will save your instructions.

I believe this is the left rear wheel speed sensor lead for the ABS and/or traction control. All four wheels have one. In the first picture you can see it after I moved it up off the sway bar.

Hellwig23.jpg

Here's a photo with the original sway bar. Notice how the lead is against the sway bar which is designed to rotate somewhat when the rear axle goes up and down. This could eventually wear a hole in the lead's insulation.

Hellwig24.jpg
 
Last edited:
I believe this is the left rear wheel speed sensor lead for the ABS and/or traction control. All four wheels have one. In the first picture you can see it after I moved it up off the sway bar.

View attachment 105315

Here's a photo with the original sway bar. Notice how the lead is against the sway bar which is designed to rotate somewhat when the rear axle goes up and down. This could eventually wear a hole in the lead's insulation.

View attachment 105316
THANKS!!
That's what I figured. even if it is not a speed sensor it is something that needs addressed.

thanks again.
 

Users who are viewing this thread

Back
Top