19BlueStreakSport
Ram Guru
Correct. Stock +19mm.1.5”Spacer on a stock wheel is equivalent to a -19 offset?
Sent from my iPhone using Tapatalk
1.5" will be -19mm
2" will be -32mm (31.8 technically)
2.5" will be -44.5mm
Correct. Stock +19mm.1.5”Spacer on a stock wheel is equivalent to a -19 offset?
Sent from my iPhone using Tapatalk
Lots of people all over use Loctite on spacers.you dont lube the threads when doing torque as it changes the friction and your torque wont be really what it says you can overdo it easier
Lots of people all over use Loctite on spacers.
Are you saying not to use Loctite? Or actual like grease lube cause who would do that.


Just installed mine today.. anti seize on the back and torqued to 130 ft pounds. No loctite.
Sent from my iPhone using Tapatalk
Silver or copper anti-seize?
I've got silver kicking around here and that's what I plan on using.

doesn't matter for this purposeSilver or copper anti-seize?
I've got silver kicking around here and that's what I plan on using.
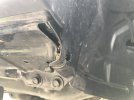
I just cut mine off and also that pointed part of the pinch seam painted it & big tie wrap then a heat gunWell I've decided I will order the 2" front and 2.5" rear from BORA.
Upon more investigations of the bracket. If I get any rubbing I am just going to bend that bracket upwards, it's almost 1/2" wide which is a bunch of space gained. All that bracket does is hold the fender liner back and the Bushwackers don't go that far. So I'm not concerned about bending it back if I need too.
View attachment 88139
View attachment 88140
I just cut mine off and also that pointed part of the pinch seam painted it & big tie wrap then a heat gun
I didn’t have to cut that corner of the pinch seam but just did it anyway, i used a dremmel rt hand cut off saw it’s kind of small & easy to cut with, then a 4” grinder to smooth out the sharp edges, then chassis black paint i have air suspension so i wanted it as flat as possible because entry/exit modeDid you need to cut the corner off the pinch seam? Didn't seem like that part was close to rubbing? Maybe once I get a 2" wheel spacer I might need to but it seems like it's far away from where the tire radius is.
What did you paint it with? I have touch up paint but I am wondering if that will prevent rusting without a primer. That is why I was debating about bending the tab off that way I wouldn't have to paint as long as the paint doesn't crack. Then if I ever want it back I can bend it back (probably would never do run into this though).
But yea I was going to do the same, bend it (or cut) and then heat gun and zip-tie to the hole.
Also out of curiosity what did you use to cut with? A hack saw?
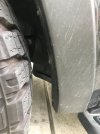
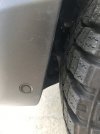
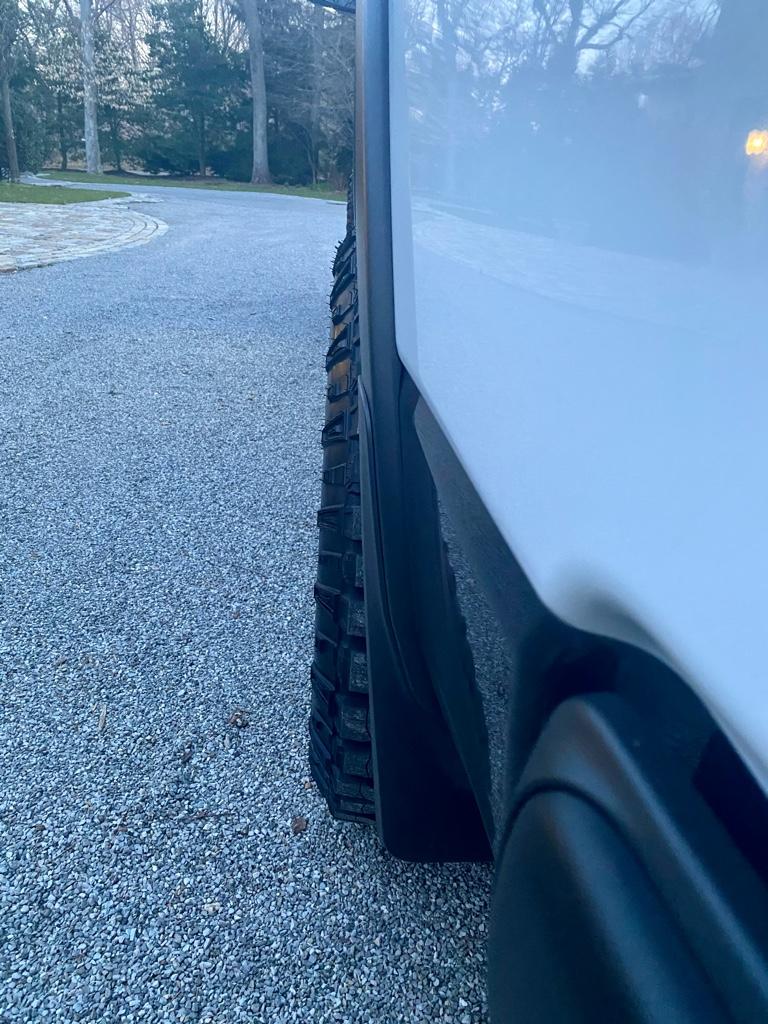
Bora 1.5”
Sent from my iPhone using Tapatalk
That looks great
Bora 1.5”
Sent from my iPhone using Tapatalk
Do you have a picture from the back as well? Front looks perfect.
Sent from my iPhone using Tapatalk
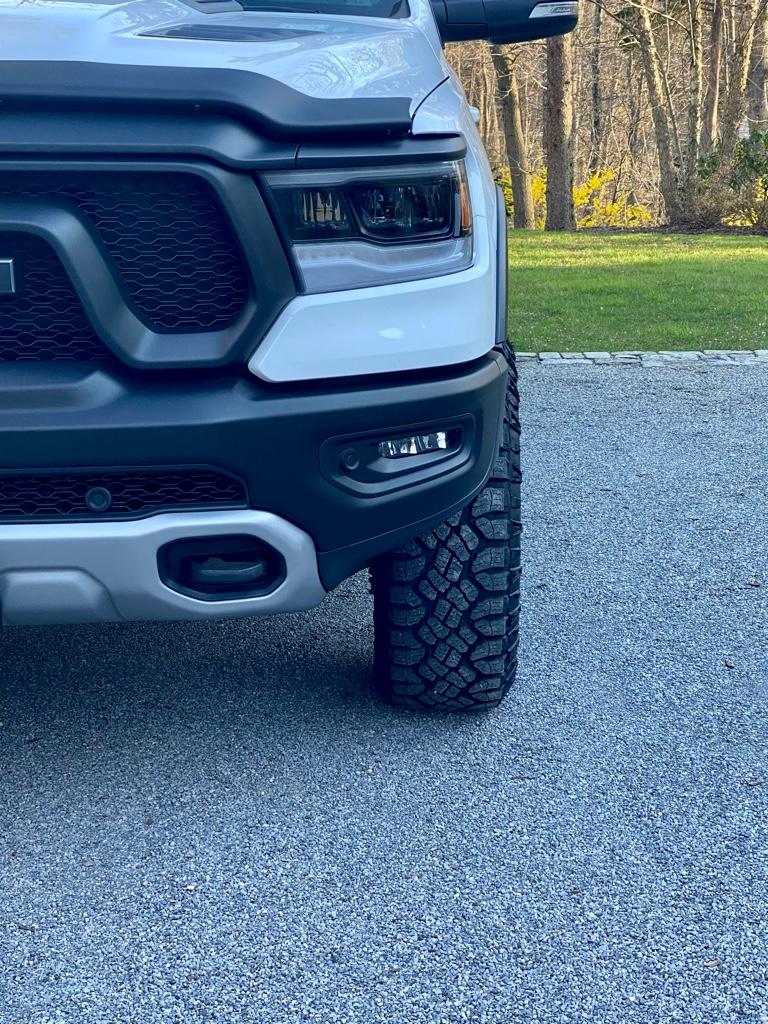
Has anyone used spacers with a 2” level and 35s on stock wheels?
I have 2” wheel spacers on my leveled ORP, using 33” Duratracs on Rebel 18” wheels. Interested in bumping up to a 34 or 35” tire, and thinking the 2” wheel spacers may cause me some issues.