Brunzca
Well-Known Member
Looks good man, I have the same ones I love the 3rd brake light and turn signals but can't tell if I like the tail lights.
Thanks, guys!I like it
Looks good man, I have the same ones I love the 3rd brake light and turn signals but can't tell if I like the tail lights.
Thanks, guys!I like it
Added tail light tint from blacked out. The product was fine, but I’m not sure if I like it. Or how I would even get it off if I don’t. Lol
View attachment 150780View attachment 150781
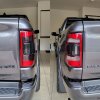
Looks great! Which product did you use?
Looks great! Which product did you use?

thats nice, really BEEFS up the front. now all u need is a lift and wheels/tires!
Can you share the link to the seals?Just installed a Bakflik MX4 on my 2023 W/rambox, an AVS ll bug shield and RAM SEALS for the tailgate.
mine as wellI would recommend this place for the taillight and turn signal tint film. Fellow 5th gen owner. Not a large company. It's here I got mine from

Blacked Out Designs
Custom Tint, Vinyl Overlays and Inlays for a number of vehicles. RAM, KIA, Toyota, BMW, Jeep and more to come. We are a small business in the USA...www.blackedoutdesigns.com
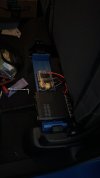
interested more in that radio mount/wiring! I have the Bulletproof mount....curious how you did it and the antenna.Finally got around to installing my FT-8900 with a Compactenna and blue LED footwell lights. Got a Blackvue DR750X-2CH front and rear camera’s coming that I hope to install next weekend. Also, have a lip mount for the Compactenna as I don’t really like the mag mount sitting on my roof.
View attachment 150799
View attachment 150800
Firecadet613, he you go. Fast service, decent price and the quality seems good. Really fills the well gap if you have ramboxes.Can you share the link to the seals?
Here's how I did mine:interested more in that radio mount/wiring! I have the Bulletproof mount....curious how you did it and the antenna.
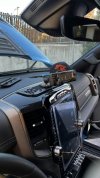
Nicely done. Thanks!Here's how I did mine:
1. I started with running power and ground to the cab since I am using a fuse block w/ ground.
2. I also ran the antenna wire from the cab to the engine bay
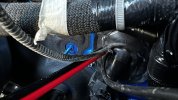
3. Both can be ran through the rubber boot on the firewall. You do need to cut the boot slight larger to let everything through easily. It will be extremely helpful if you have a piece of thinner wire or something to fish through first, zip tie/ e-tape the wires you want to fish through the boot to the thinner wire. Apply some lubricant (WD-40 works just fine) and pull.
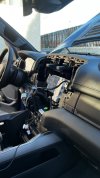
4. Now you have power and ground in the cab, and the antenna going to the engine bay, it's time to pull your head unit.
5. Drill a hole under the pen tray to feed the CAT cable for the radio display, and tuck everything under the floor console in the middle. Instead of going under the carpet like I do on customers' rigs, I just hide them under the all weather floor mat.
6. Using another CAT cable as an extension for the mic, do the same thing as step 5.
7. Reinstall the head unit, and you're good on the inside.
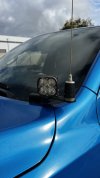
8. Install antenna to the mount of your choice. I don't recommend lip mount because I've seen lip mounts fail and damage the hood or whichever lip you're mounting it to. My recommendation is to use an extension and mount it on your ditch light bracket. If no ditch light... then lip mount or magnet mount.
9. Connect everything, and test. I also recommend plugging a 3.5mm speaker to your radio so you can hear better.
10. Sit back, relax, and pat yourself on the back for saving your money not paying half day's labor for this. View attachment 150802
You see 4 wires going through the gromet here. Power and ground for the fuse block w/ ground.
Smooth wire is the antenna wire
The one right above power and ground is my switch-pros controller wire.
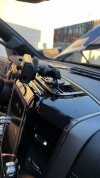
View attachment 150803
Custom made wood bracket, color matched because I ran out of black paint
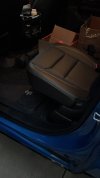
I am running a fuse block w/ ground here because I am also hardwiring a fridge.
View attachment 150805
View attachment 150806
View attachment 150807
There is a hole next to the charging port but you can't see it.
View attachment 150808
Ditch light bracket from SDHQ
Ditch light extension from Rago Fabrication.
View attachment 150809
And once you put the seat down you can't even see it's there.
looks great. man i need to look into those!So much better. White taillights on a Night Edition truck just looks wrong.
I always used Huffines in Lewisville when I lived over there and they were great!I did, I'm not one of those people that just accept poor or improper service. We'll be here till this time tomorrow if it's not fixed.
Can't wait for them to ask me for a review.
Do not use Frisco Dodge service
Friend, I live in Russia, delivery will be expensive. I can share the drawings when I'm done with them.please let me know if you're willing to make these for sale! i am interested in a pair
I just read your sig......Friend, I live in Russia, delivery will be expensive. I can share the drawings when I'm done with them.
Looks great. Best looking aftermarket bumper I've seen by far. Fits the body lines perfectly.
There are a lot of American cars in Russia, we love them!I just read your sig......
How do you buy the truck then? �
