
5thGenRams Forums
You are using an out of date browser. It may not display this or other websites correctly.
You should upgrade or use an alternative browser.
You should upgrade or use an alternative browser.
What did you do to your Ram today???
- Thread starter 19BlkRam
- Start date

BowDown
Spends too much time on here
Regular, tried ceramic on my last vehicle. No difference. And my tint guy who has done it for years shares the same opinion.
Anywho, dash lights finally came in!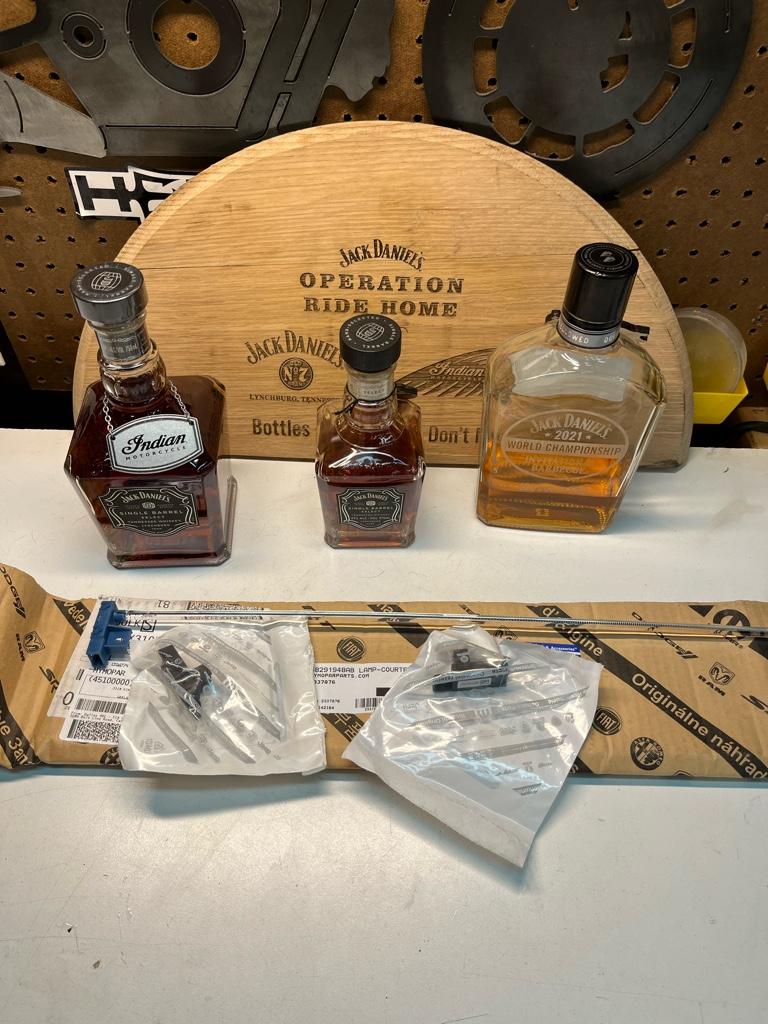
Sent from my iPhone using Tapatalk
I just had my windshield replaced, drove for a week without ceramic tint in 100°+ weather, after re-tint there was a huge difference in heat coming through the windshield. The top of my hand would get hot on the steering wheel prior, not at all after

HemiDude
Spends too much time on here
Sorry, had to look at your pic 3 times before I saw your parts .... All I saw initially was a bevy of adult beveragesRegular, tried ceramic on my last vehicle. No difference. And my tint guy who has done it for years shares the same opinion.
Anywho, dash lights finally came in!
Sent from my iPhone using Tapatalk

brenan00
Well-Known Member
There is a thread "TazerDT group buy"Where is the tazer group buy?
pitboss000
Active Member
Black with Biscuit centers and Biscuit stitching, perforated centers. $1600 out the door. Dealer wanted over 2K just to have a logo. Had it done at The Trim Shop in Newark DE. Dan Temple did an awesome job! Day and a half turnaround at a busy shop too! Two things to note: He doesn't show up on the Katzkin website as an installer (many don't - it's outdated), though he is authorized. So check with your local detailers and leather repair shops. This is what held me back from doing it for so long. I ran across a posting of his on Facebook. Secondly, go to your installer and match up colors with samples/swatches - website colors are not that accurate. I wanted to match the upper/headliner color for my inserts and thought it would be Bone, turned out to be Biscuit.Love that upgrade! Can I ask what it cost? Labor and parts separate? Did you do this through a dealer or what? I see Katzin has so many options but I really like this black with cream interior (or white?) any part numbers?
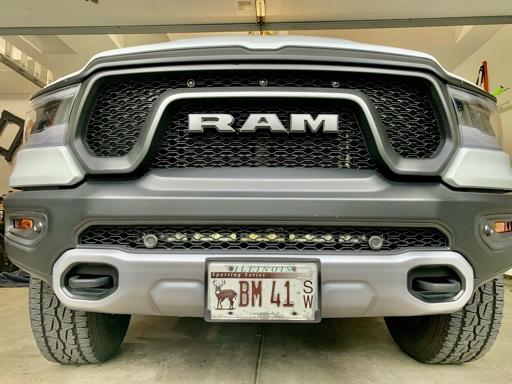
It does not. I have one installed on my truck and it is no where near it.Do you know if this works for the Laramie 1500 with the active air dam?
Sent from my iPhone using Tapatalk
It does not. I have one installed on my truck and it is no where near it.

jimothy
Ram Guru
To clarify, it does work, or does not work?It does not. I have one installed on my truck and it is no where near it.
I’m not him, but I put a full on shop work light up in that space when I was doing an oil change. There is a ton of space in there to work with for mounting a light without coming close to the air dam. All you have to do is stick your head under there when the truck is off, because when the truck is off, the air dam is as high as it will go.To clarify, it does work, or does not work?
Dogpatch
Ram Guru
Excellent tutorial as always Waterfowler41!Finally finished up my Shifts and Grins light bracket and Diode Dynamics light bar install.
Sorry for the rain in the end, filmed in between tornado warnings. Overall, I’m super happy with this combo.
Last edited:
It works. I installed a 32" amazon bar on mine a few days ago. I haven't been able to finish the install but it's on my things to do today or tomorrow.To clarify, it does work, or does not work?

Moosefire66
Well-Known Member
- Joined
- Jun 3, 2021
- Messages
- 230
- Reaction score
- 104
- Points
- 43
- Age
- 53
Nice house!First snow day! Wildpeak tires did better than I expected, but still not sure if I'll keep them all winter. Entering the next 8 months of snow season, having a topper is the best part of the truck. View attachment 107986
Sent from my SM-G991U1 using Tapatalk
SkittleRam
Ram Guru
These look amazing! I have been considering for some time now and seeing how my cloth seats have several threads that are coming out, this could be the best option
")
Amerinamese
Active Member
- Joined
- Sep 20, 2020
- Messages
- 173
- Reaction score
- 107
- Points
- 43
- Age
- 47
WE ARE!I also added 6hp today with some matte black vinyl decals
.View attachment 107861
HEMIJAKE
Ram Guru
5-1!WE ARE!
")
I only tease. Go Blue! Strongly looking forward to November 13.
U
User_63152
Guest
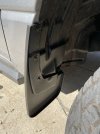
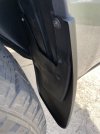
Installed the Husky mud guards. Kind of a pain. Had to put an extra screw in the rear ones. They were kind of flappy. I moved the included screws, for the rear, down towards the bottom and put the extra one up top, where it calls for the included one. I hope that makes sense. LOL
They look pretty good. I think They will work out just fine.
They look pretty good. I think They will work out just fine.
Attachments
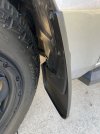
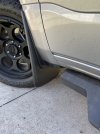
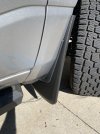
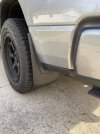
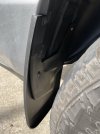
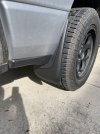
Do you mind taking a pic kind of far back from the truck so I can see how far they appear to stick out the sides?Installed the Husky mud guards. Kind of a pain. Had to put an extra screw in the rear ones. They were kind of flappy. I moved the included screws, for the rear, down towards the bottom and put the extra one up top, where it calls for the included one. I hope that makes sense. LOL
They look pretty good. I think They will work out just fine.
Also, where did you order from?
Site Vendors


