5thGenRams Forums

Register a free account today to become a member! Once signed in, you'll be able to participate on this site by adding your own topics and posts, as well as connect with other members through your own private inbox!

What did you do to your Ram today???

I was wondering why it was riding very harshly on the bumps, I just assumed that was the compromise I would have to make. I'm going to order the Sumo springs and hopefully, that will be a smoother ride. :) Thank you Jeffjad.

Thank you Snofire for recommending the sway bar, I'll be ordering that too soon.

Two new upgrades on my wish list now. :)
The sway bar makes a very noticeable improvement in ride and cornering manners. I installed mine Saturday in the tightest setting.
 
I detailed my interior out, so clean and nice now. No matter how hard I try to keep it that way, my dirt bike habit means the filth finds its way in.
What product is everyone using on the Ram leather? Got a spot of pine pitch on my driver's seat. I can just use saddle soap and water but it's there a good conditioning leather wipe that would more convenient?
 
Looks like they might have figured it out. Did you receive yours yet?
"Sorry we just discovered (in the last day or so) in this trim and the Rebel the back seat cup holders are like the quad cab in the crew cab. I can send you the liners for the back seat."
Just emailed them so will see what they say.
 
Most testimonials report that driving in a straight direction remains comfortable, while cornering results in noticeably less body roll. The sway bar has 3 positions so you have some choice on the degree of stiffness you prefer.

The price of the bar is under $270, which I think is very reasonable for the above advantages. When I enter the interstate from a circular ramp, or I travel around any of our local roundabouts, I definitely notice body roll that I'd love to dial that back. So the Hellwig is a top 5 mod for me.
Just ordered mine last night, can't wait. Should fit my driving style better as I like pushing hard in corners.
 
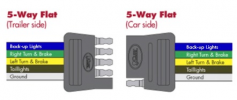
Most are using the CURT 56584 USCAR trailer wiring harness when adding supplemental LED reverse lights. This harness has a flat 5-pin onto which you are attaching your reverse LEDs.

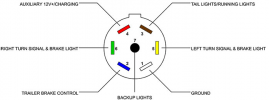
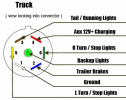
So, my question is, since you are going from a 7-wire to a 5-wire, which 2 additional wires are left out?

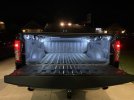
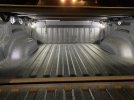
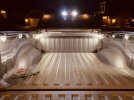
I am considering how to wire my 6 ft LED strip lights in the bed. I prefer not to compromise the existing BUG group wiring, though there are advantages there, simply because I don't want to nick factory wiring. Some have said to use an always-on lead from the trailer harness with a switch, then you can turn it on and off as you wish. I don't know if the always-on is truly in the 7-wire, or if it's one of the 5 on the 5-pin. I'm assuming the 5-pin includes 1) reverse, 2) left turn, 3) right turn, 4) ground, and one more. Security Guy said earlier, IIRC, that blue is the reverse.

Please share if you know.
this video he says he taps into the red wire which is constant 12V. Skip to 5:42.
 
Adam,
You have a serious case of cabin fever! Great to hear you like riding dirt bikes. I just bought a WR250R dual sport (hence my username) a year ago, but I'm a 25 year street riding veteran. I hope the dirt brings as much joy to my life as the street has. Super jealous of your 90 days program. I'd really enjoy that.

We have a Sales Academy that your internship program reminds me of. But every group in the front office contributes to training. You have your hands full, I'm sure!
I have been riding since I was a kid mostly in the mountains of Wyoming, Moved to sillinois, no decent riding around here and no body to ride with. Bought a Harley, but street riding does not bring me the same joy. A few years from retirement and back out west. Will sell the Harley and if in good enough shape buy a dirt bike again.
 
I detailed my interior out, so clean and nice now. No matter how hard I try to keep it that way, my dirt bike habit means the filth finds its way in.
What product is everyone using on the Ram leather? Got a spot of pine pitch on my driver's seat. I can just use saddle soap and water but it's there a good conditioning leather wipe that would more convenient?
I have done some internet research from detailers, trying to find the best answer for this.

You will find LOTS of product reviews, rankings, best of lists for products that are available. I consider all of these as product promotion / sales tools. Why? Because what I also found, from multiple authors, is that modern car leather (not the leather in your 1970 Ferrari) has plastic layers that block the absorption of any conditioners. Effectively, when you apply anything for leather conditioning, it just sits and dries or gels on the top. Maybe it collects dirt. Maybe it rubs off onto your clothes. But it definitely does nothing for the leather underneath these protective layers. Another reason not to use any goopy conditioners is because the leather seats are perforated, so you'd be getting some of that goop down into those perforations. Further, since the seats may be ventilated, you don't want any buildup there, blocking air flow.

I am inclined to believe this because of finding this information in independent articles. So, what do the authors stating this recommend? They say to clean the leather, use something simple. Specifically, Simple Green, diluted to 10:1 water / Simple Green. Simple Green is already a fairly natural product, and you're mostly going to encounter contamination against which SG will be very effective. The most important thing you need to do is to vacuum first. You don't want to be wiping abrasive grit across your seat surfaces, thinking you're cleaning. You want to break up clumps and lift them off first, by vacuuming. Then you want to get sticky sap, chocolate, dried Pepsi and such dissolved into the cleaner. It's better to spray it onto your microfiber cloth, rather than saturate the seat with the spray.

I have cleaned mine only once, since it's only 5 weeks since I bought it and I didn't drive it for a few weeks due to snow/salty roads. Mine wasn't dirt-bike dirty (I have a WR250R!), but I was satisfied. If you still want to spray something on there, maybe for UV protection or just to feel better, I'd avoid anything using luxurious sounding marketing adjectives that imply miracle emollients and emulsions like "honey", or "milk". Just make sure it has UV protection and is safe for leather.

If this seems counter-intuitive, I understand. Feel free to read up like I did and see if you find similar information.
 
I have been riding since I was a kid mostly in the mountains of Wyoming, Moved to sillinois, no decent riding around here and no body to ride with. Bought a Harley, but street riding does not bring me the same joy. A few years from retirement and back out west. Will sell the Harley and if in good enough shape buy a dirt bike again.
If you are anywhere close to southern Illinois, an ADV Rider forum user created the "Southern I's" (Indiana and Illinois) dual sport routes. There are hundreds of miles, and I can't remember if there are 7-10 segments? I am in Indiana. We have a bit of riding in the south, highlighted in some of these segments. Otherwise, I will be riding in Appalachia.

 
this video he says he taps into the red wire which is constant 12V. Skip to 5:42.
That's definitely the same application, but it did not answer which 2 wires and uses are omitted on the flat 5-pin, nor does it provide an answer for avoiding tapping into an OEM wire. Further, his shoddy black electrical tape up job is not a choice anyone should mimic.
 
If you are anywhere close to southern Illinois, an ADV Rider forum user created the "Southern I's" (Indiana and Illinois) dual sport routes. There are hundreds of miles, and I can't remember if there are 7-10 segments? I am in Indiana. We have a bit of riding in the south, highlighted in some of these segments. Otherwise, I will be riding in Appalachia.

15 miles from Wisconsin border. Plus I know no one who rides off road. I will wait until I move back to gods country. 4 years 18 days. Thanks Though.
 
That's definitely the same application, but it did not answer which 2 wires and uses are omitted on the flat 5-pin, nor does it provide an answer for avoiding tapping into an OEM wire. Further, his shoddy black electrical tape up job is not a choice anyone should mimic.
I think you're a bit confused.... unless you only want your trucks bed lights to come on when you reverse you aren't pulling power from a 5 pin connector for this application... People use a 5 pin connector to wire auxiliary REVERSE lights. For constant power tap into the red trailer wire, or run one from the battery.

Results of a google search.....
1614886412014.png1614886700956.png
 

Attachments

  • 1614886465712.png
    1614886465712.png
    42.2 KB · Views: 53
Last edited:
Installed this mount on the dash cubby and centered the radar with the 12” display. It’s perfect and looks much better than hanging from the rear view or a suction cup on the window. I do have to put the rubber tray back in though.

I love my R7!! Looks great!
 
I have done some internet research from detailers, trying to find the best answer for this.

You will find LOTS of product reviews, rankings, best of lists for products that are available. I consider all of these as product promotion / sales tools. Why? Because what I also found, from multiple authors, is that modern car leather (not the leather in your 1970 Ferrari) has plastic layers that block the absorption of any conditioners. Effectively, when you apply anything for leather conditioning, it just sits and dries or gels on the top. Maybe it collects dirt. Maybe it rubs off onto your clothes. But it definitely does nothing for the leather underneath these protective layers. Another reason not to use any goopy conditioners is because the leather seats are perforated, so you'd be getting some of that goop down into those perforations. Further, since the seats may be ventilated, you don't want any buildup there, blocking air flow.

I am inclined to believe this because of finding this information in independent articles. So, what do the authors stating this recommend? They say to clean the leather, use something simple. Specifically, Simple Green, diluted to 10:1 water / Simple Green. Simple Green is already a fairly natural product, and you're mostly going to encounter contamination against which SG will be very effective. The most important thing you need to do is to vacuum first. You don't want to be wiping abrasive grit across your seat surfaces, thinking you're cleaning. You want to break up clumps and lift them off first, by vacuuming. Then you want to get sticky sap, chocolate, dried Pepsi and such dissolved into the cleaner. It's better to spray it onto your microfiber cloth, rather than saturate the seat with the spray.

I have cleaned mine only once, since it's only 5 weeks since I bought it and I didn't drive it for a few weeks due to snow/salty roads. Mine wasn't dirt-bike dirty (I have a WR250R!), but I was satisfied. If you still want to spray something on there, maybe for UV protection or just to feel better, I'd avoid anything using luxurious sounding marketing adjectives that imply miracle emollients and emulsions like "honey", or "milk". Just make sure it has UV protection and is safe for leather.

If this seems counter-intuitive, I understand. Feel free to read up like I did and see if you find similar information.
Excellent. Pretty much what I thought. A little saddle soap in hot water is probably best. I use a lot of simple green and I've seen it etch aluminum and eat orange anodizing on a KTM. But that was in pretty concentrated form. Thanks for the info and sorry to derail the thread. Ram and Beta 300RR in NorCal.
 

Attachments

  • 20201219_151658.jpg
    20201219_151658.jpg
    131.7 KB · Views: 116
Most are using the CURT 56584 USCAR trailer wiring harness when adding supplemental LED reverse lights. This harness has a flat 5-pin onto which you are attaching your reverse LEDs.

So, my question is, since you are going from a 7-wire to a 5-wire, which 2 additional wires are left out?

I am considering how to wire my 6 ft LED strip lights in the bed. I prefer not to compromise the existing BUG group wiring, though there are advantages there, simply because I don't want to nick factory wiring. Some have said to use an always-on lead from the trailer harness with a switch, then you can turn it on and off as you wish. I don't know if the always-on is truly in the 7-wire, or if it's one of the 5 on the 5-pin. I'm assuming the 5-pin includes 1) reverse, 2) left turn, 3) right turn, 4) ground, and one more. Security Guy said earlier, IIRC, that blue is the reverse.

Please share if you know.

You don't have Trailer Brake wire (which doesn't matter to you) and the Aux 12V wire (which sounds like is what you're looking for with an "always on" when your truck is on) in a 5-wire harness.
 
this video he says he taps into the red wire which is constant 12V. Skip to 5:42.
I didn't do that. I tied to the Courtesy lights tan wire in the bundle in channel running along the door sills on the drivers side and used it to drive a relay back to the battery. That way they come on and off with the other exterior illumination.
 

Attachments

  • IMG_0033.jpeg
    IMG_0033.jpeg
    117.4 KB · Views: 96
  • IMG_0034.jpeg
    IMG_0034.jpeg
    206.3 KB · Views: 93
  • IMG_0276.jpeg
    IMG_0276.jpeg
    180.8 KB · Views: 94
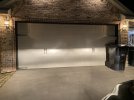
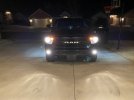
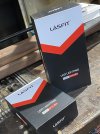
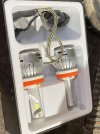
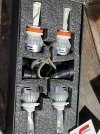
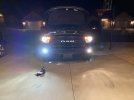
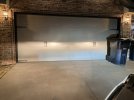
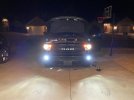
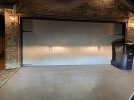
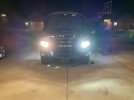
I bit the bullet and grabbed the LASFIT LED replacement bulbs for the Stock Halogens without replacing the housings. Made a HUGE difference in light output. Images posted showing difference as I replaced each bulb. Kind of sucks trying to get to that low beam, but once I decided to go through the wheel well, it wasn't too bad.
 

Attachments

  • IMG_1014.jpeg
    IMG_1014.jpeg
    140.6 KB · Views: 116
  • IMG_1015.jpeg
    IMG_1015.jpeg
    94.3 KB · Views: 114
  • IMG_1017.jpeg
    IMG_1017.jpeg
    163 KB · Views: 115
  • IMG_1018.jpeg
    IMG_1018.jpeg
    133.9 KB · Views: 113
  • IMG_1019.jpeg
    IMG_1019.jpeg
    272.3 KB · Views: 115
  • IMG_1021.jpeg
    IMG_1021.jpeg
    94.5 KB · Views: 116
  • IMG_1022.jpeg
    IMG_1022.jpeg
    126.4 KB · Views: 113
  • IMG_1023.jpeg
    IMG_1023.jpeg
    94 KB · Views: 114
  • IMG_1024.jpeg
    IMG_1024.jpeg
    128.3 KB · Views: 113
  • IMG_1025.jpeg
    IMG_1025.jpeg
    83.2 KB · Views: 115

Users who are viewing this thread

Back
Top