5thGenRams Forums

Register a free account today to become a member! Once signed in, you'll be able to participate on this site by adding your own topics and posts, as well as connect with other members through your own private inbox!

Retrofitting the 33 gallon tank

Jack.

Well-Known Member
Joined
Jul 27, 2021
Messages
398
Reaction score
116
1) First, do you have the items you will need to use AlphaOBD? (You will need an OBD reader that supports Bluetooth, a Security Gateway Bypass module and the AlphaOBD software)

OBD Readers - either of these will work as well as others, I went with the OBDLink MX+
OBDLink MX+ https://www.amazon.com/gp/product/B07JFRFJG6 Website: https://www.obdlink.com/
BAFX (for iOS) https://www.amazon.com/gp/product/B078K54MT5

Security Gateway Bypass module - again either of these will work as well as others
Infotainment link: https://www.infotainment.com/products/fca-security-gateway-module-bypass
AUGOCOM https://smile.amazon.com/gp/product/B082PTBZ6K/ref=ppx_od_dt_b_asin_title_s00?ie=UTF8&psc=1

AlphaOBD software

2) Next we need to know if you plan to use an Android phone for the AlphaOBD software or a Windows computer as the instructions are slightly different.
Will be using an android haha
 

Biesty

Active Member
Joined
Dec 8, 2020
Messages
53
Reaction score
43
Location
SE Wisconsin
Will be using an android haha

Below are directions for both Windows and for Android from a year ago. I have used the Windows version and it is very accurate. The Android version is copied from elsewhere so I can't speak to it's accuracy but it should be good enough for you to follow and get it done. There could be updates to the AlfaOBD software that may require slight adjustments to these directions.
It really is easy to do and you shouldn't hesitate to do it yourself.

AlfaOBD Windows 10 Directions:
Disconnect Secure Gateway (2 connectors) they are under the steering column. If you follow your OBD connector wiring it should lead you right to them.
Connect Secure Gateway Bypass with the 2 connectors
Connect OBD Reader to the Secure Gateway Bypass OBD port
Go to the Bluetooth settings in Windows and Bluetooth connect to your OBD reader (per the OBD reader instructions)
Now, turn your truck on to RUN (without engine running)
Open AlfaOBD app
Select Dodge/RAM for the Brand
Select Ram 1500 (DS/DX/DT) for the Model
Select Body Computer for the Function
Select MY2016-17 PowerNet for old AlfaOBD software
Select DT MY2019 PowerNet Var.3 for new AlfaOBD software for 2019 DT RAM
Select DT MY2020 PowerNet for 2020 DT RAM (note this is for a 2020 truck)
If wrong will get error: the option is not supported by the body computer modification
(should be already correct by default and you shouldn’t need to do this step) Select the type of interface you are using and find your device from Advanced Mode.
Select Connect to connect to your (OBD Reader) device
Wait for Connection to be successful (Status at top left of window)
Switch to the "Active diagnostics screen" (this is a different tab Button bar at the top)
Select "Car configuration change" on the bottom of the list.
Use the Find settings field to select the options to enable.
Type " VehConfig 3-Fuel" in the Find setting box and then select “VehConfig 3-Fuel Capacity (36-290 L)”
Enter a value of 125, Click Start and wait for successful message
(the procedure should show you the current value set to either 87 for 23 gallon tank or 98 for the 26 gallon tank and then walk you through changing it to the new value)
Shut off the ignition
At this point I walked through the process a second time once again entering 125 for the new value. As you start the process it should show you that the current value is 125 letting you know the change was successful. You can then cancel/stop the process.
After everything is turned off disconnect everything. And plug the OBD port back to the factory module. I needed to use a tiny screw driver to help the connectors get out of the Secure Gateway Bypass module.


AlfaODB Android Directions:
Now, turn your truck on (without engine running)
Open your AlfaOBD app
Select the type of interface you are using and find your device.
Connect to your (OBD Reader) device
Select RAM from the OEM options
Select Ram 1500 from the 1st dropdown
Select Body Computer from the 2nd dropdown
Select MY2016-17 PowerNet for old S/W
Select DT MY2019 PowerNet Var.3 for new S/W and 2019 DT RAM
Select DT MY2020 PowerNet for 2020 DT RAM
Select Central Gateway Module from the 3rd dropdown
Select connect
Once connected click on the little car with the hood up and navigate all the way to the bottom of this menu
Select "Car Configuration Change"
In the next menu you will need to make the following change. Be sure to validate that the change was made by selecting the option and seeing what it is set at according to AlfaOBD after you set the option. The option you need to change and the value is as follows:
VehConfig 3-Fuel Capacity (36-290 L): change to 125
 
Last edited:

Jmeesocal

Member
Joined
Mar 15, 2020
Messages
5
Reaction score
5
I did the mod from 26 gallon to 33 gallon yesterday in my driveway (did this myself, it can be done as one man job). Thanks to everyone in this forum for the part numbers and details. Thanks to Rammit for his buddies contact info for the third Mount bracket and my buddy is going to weld that in next weekend. Thanks Biesty for those instructions above, you saved me a ton of research and digging by posting that! Changed my tank via Alfa one in 5 minutes this morning and it all works perfectly.
 

Ohmario80

Member
Joined
Jun 9, 2020
Messages
10
Reaction score
3
I did the mod from 26 gallon to 33 gallon yesterday in my driveway (did this myself, it can be done as one man job). Thanks to everyone in this forum for the part numbers and details. Thanks to Rammit for his buddies contact info for the third Mount bracket and my buddy is going to weld that in next weekend. Thanks Biesty for those instructions above, you saved me a ton of research and digging by posting that! Changed my tank via Alfa one in 5 minutes this morning and it all works perfectly.
Could you privide the info to get the third strap bracket by chance?
 

Ohmario80

Member
Joined
Jun 9, 2020
Messages
10
Reaction score
3
If they discounted you over a grand, you should be able to do the swap for close to that. There’s lots of reading to do here, but it’s all spelled out in this thread. I have a friend on here as well who makes a third strap. Not sure what page it’s on but if you skim through this you will see how it was installed. He’s sold this to at least 7 or 8 members as well.
Could I get his info please? I need to get a bracket ordered for my rig. Thank you.
 

Ramhighflyer

Active Member
Joined
Nov 15, 2020
Messages
65
Reaction score
32
New member , second post..
Thanks everyone for contributing to this thread, made upgrading my’21 from 26 to 33 gallon pretty straight forward…. Parts are as described above, probably do not need the lock ring, nut or vapor hose….. fuel canister is identical in shape and size as the original, other then part number….. not sure if it would not work just fine without swapping it…. It be easy to do afterwards if it is giving issues….. got the fueltank from local dealer, shipping killed any savings from any of the online discount sellers… Mopar list was $280……the rest from moparpartsgiant.. no issues…
made up my own 3rd bracket and welded it to frame, no major complications, or any fancy fabrication skills needed..the top of the tank sits flush with the frame rail, so probably could get away with something bolt on as well….

whole project took about a day, including lots of breaks, and making the 3rd bracket took my time to corrosion proof everything in the tank area.. I do have a lift, what made it easy…

Used AlphaOBD to reprogram the BCM for the larger tank, range reads correctly…. Having that 700 mile range is nice….

interestingly there is plenty of room underneath there for probably a 50 gallon tank…..but the 33 gallon tank tapers pretty good, I am sure so it stays volumetric consistent with the 26 gallon one so they can use the same fuel pump/sending unit…
Pete
 

Rammit

Ram Guru
Joined
Aug 21, 2018
Messages
719
Reaction score
643
Location
SE Michigan
If I recall, you can use the same fuel pump from the 26 Gallon tank, but not from the 23.
 

RamHam1500

New Member
Joined
Sep 11, 2022
Messages
2
Reaction score
1
I've finally completed 33 gallon fuel tank retrofit on my 2020 RAM Rebel. I took that truck from stock inventory at the dealership, and I thought I will be OK with 23 gallon tank, which was a trade-off for a eTorque engine. Man, I love how eTorque works comparing to regular 5.7 HEMI.
My previous SUV had just 14 gallon, and while it was very inconvenient, I was living with it for few years. But then I switched to Dodge Durango with its 25 gallon tank and 21 mpg even going 80mph on a highway. So I easily was going 450-500 miles between fuel stops, and I even changed the way I do road trips taking bio-breaks in parks instead of gas stations. My dog definitely appreciated that change. 23 gallon in Rebel wasn't too small comparing to 25 gallon in Durango, but because of way lower mpg on highway speeds, I needed to stop to refuel every 3 hours. Plus when going to the wilderness, I needed to fill-up at the last gas station, and then hoping that I will have enough fuel to return back. So long story short - I realized that I really need a 33 gallon tank.

Thanks to people in this thread for valuable info. Unfortunately, I couldn't find A-Z guide how to do this upgrade, so it took some time to do my own research. Let's start.

Parts that you need:
1. 68408875AE - 33 gallon fuel tank
2. 68409160AE - fuel pump. Looks like if you have 26 gallon tank you can reuse it, but 23 gallon fuel pump is different. It comes with O-ring seal.
3. 52030458AB and 06104717AA - 3rd fuel tank strap and nut. You need this if you are lucky and you have a subframe member for the 3rd strap, closer to the front of the truck. It is not clear why some trucks with 23 or 26 gallon tanks have it, and some don't.
4. 52029888AC - vapor canister (EVAP). It is longer then vapor canister of 23 gallon tank.
5. 52029909AC - hose from vapor canister to fresh air filter. It is different than the hose from 23 gallon tank.
6. 52029908AB - hose from vapor canister to vapor tube
7. 68307831AB - vapor tube. Connects hose 52029908AB with another vapor tube, going to the engine. It is shorter than 23/26 gallon tank tube.
8. 52030443AB - fuel line bundle. Connects vapor canister, fuel pump and exhaust port on the fuel tank. It is longer than 23/26 gallon tank bundle.
9. 04721916AA - lock ring for fuel pump. Small addition that will save you a lot of time. Instead of reusing the lock ring from an old tank, just put a fresh one to a new tank. Few backs worth the pain of trying to remove an old ring from old tank from my perspective.
10. 68408875AE - skid plate for 33 gallon fuel tank. If you have a skid plate on your 23/26 gallon tank, it is shorter and won't cover ~1 feet of the longer 33 gallon tank.

I was upgrading from 23 gallon tank, I don’t have a frame crossmember for the 3rd strap, and I've decided to keep my short fuel tank skid plate since I don't plan to do crazy rock crawling. Total for parts before tax for me was less than $600, which is OK since 33 gallon tank as an extra option when you order the truck costs $450. Plus 2-3 hours of work if you know what to do.

1. First things that you need to do is to burn as much gas in the tank as you can. When I returned back to my garage, trip computer was showing 20 miles to empty, but actually it appeared that ~3 gallons were still left in the tank. So try to get it to the state when it shows "Low". It will save you time from activating fuel pump through AlfaOBD and draining the remaining gas to the bucket. Plus I didn't relieved the pressure from fuel system, I just let the truck to stay overnight in the garage. So use as much gas as you can and then leave the truck alone for 12 hours, and don't start it when you return back to remove the tank.
2. Remove fuel tank skid plate if you have it by unscrewing 4 bolts.
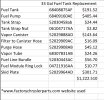
3. Follow Fuel Tank Replacement Guide to remove the tank. I've skipped steps #1 and #4. I used 4 jack stands to lift the vehicle 0.5 feet above the ground - that was enough to work on this. Then I used floor jack with a piece of 2x6 stud to carefully lower the tank to the ground. With few gallons of gas inside, I think total weight was over 30 pounds, so I suggest to use a buddy to help you with this. Check Fuel Connector chart for more details how to disconnect each connector type.
4. Install new fuel pump by following steps #1-#7 from Fuel Pump Replacement guide.
5. Install new vapor canister on a new tank. Install 52029908AB hose and 52030443AB bundle on the tank, use old tank as a reference how to connect everything.
6. Swap heat shield from old tank to new tank by unclipping 4 plastic clips.
7. Go under the truck and remove vapor tube going to the engine, and replace it with shorter vapor tube (68307831AB). You will need to unclip the plastic mounts holding break lines and a fuel line, be careful not to damage them.
8. Then replace hose that goes from you've disconnected from vapor canister, that goes to fresh air filter. New one is 52029909AC.
9. Install new tank, which is directly opposite to tank removal procedure, nothing special there.
10. If you have a frame crossmember for 3rd strap, install that 3rd strap. My truck didn't have it, and I can't say that tank with 2 straps is not secured well - it is not moving anywhere, and majority of the weight is carried on default two straps just fine. Tank is made of a thick high-density plastic, so it will not crack even under its own weight.
11. Install the skid plate.
12. Lower the truck and fuel it up. I poured 2 gallons from the canister and checked for leaks. Start the truck and make sure it runs well and nothing is leaking. Water drops from the exhaust are water, not gas, so don't freak out if you see them :)
13. Connect with AlfaOBD and change VehConfig-3 Fuel Capacity to 125, which is the 33 gallon tank volume in liters (default setting for 23 gallon tank is 87). Check this post for details, thanks Dixit.
14. Go to the gas station and fill up. Enjoy 500+ miles to empty on the trip computer!

If you find this guide useful, check my Amazon influencer page for other items that I use with my RAM: bit.ly/RAMStuff
What did you do for the third strap mine does not have ability to add
 

RamHam1500

New Member
Joined
Sep 11, 2022
Messages
2
Reaction score
1
I've finally completed 33 gallon fuel tank retrofit on my 2020 RAM Rebel. I took that truck from stock inventory at the dealership, and I thought I will be OK with 23 gallon tank, which was a trade-off for a eTorque engine. Man, I love how eTorque works comparing to regular 5.7 HEMI.
My previous SUV had just 14 gallon, and while it was very inconvenient, I was living with it for few years. But then I switched to Dodge Durango with its 25 gallon tank and 21 mpg even going 80mph on a highway. So I easily was going 450-500 miles between fuel stops, and I even changed the way I do road trips taking bio-breaks in parks instead of gas stations. My dog definitely appreciated that change. 23 gallon in Rebel wasn't too small comparing to 25 gallon in Durango, but because of way lower mpg on highway speeds, I needed to stop to refuel every 3 hours. Plus when going to the wilderness, I needed to fill-up at the last gas station, and then hoping that I will have enough fuel to return back. So long story short - I realized that I really need a 33 gallon tank.

Thanks to people in this thread for valuable info. Unfortunately, I couldn't find A-Z guide how to do this upgrade, so it took some time to do my own research. Let's start.

Parts that you need:
1. 68408875AE - 33 gallon fuel tank
2. 68409160AE - fuel pump. Looks like if you have 26 gallon tank you can reuse it, but 23 gallon fuel pump is different. It comes with O-ring seal.
3. 52030458AB and 06104717AA - 3rd fuel tank strap and nut. You need this if you are lucky and you have a subframe member for the 3rd strap, closer to the front of the truck. It is not clear why some trucks with 23 or 26 gallon tanks have it, and some don't.
4. 52029888AC - vapor canister (EVAP). It is longer then vapor canister of 23 gallon tank.
5. 52029909AC - hose from vapor canister to fresh air filter. It is different than the hose from 23 gallon tank.
6. 52029908AB - hose from vapor canister to vapor tube
7. 68307831AB - vapor tube. Connects hose 52029908AB with another vapor tube, going to the engine. It is shorter than 23/26 gallon tank tube.
8. 52030443AB - fuel line bundle. Connects vapor canister, fuel pump and exhaust port on the fuel tank. It is longer than 23/26 gallon tank bundle.
9. 04721916AA - lock ring for fuel pump. Small addition that will save you a lot of time. Instead of reusing the lock ring from an old tank, just put a fresh one to a new tank. Few backs worth the pain of trying to remove an old ring from old tank from my perspective.
10. 68408875AE - skid plate for 33 gallon fuel tank. If you have a skid plate on your 23/26 gallon tank, it is shorter and won't cover ~1 feet of the longer 33 gallon tank.

I was upgrading from 23 gallon tank, I don’t have a frame crossmember for the 3rd strap, and I've decided to keep my short fuel tank skid plate since I don't plan to do crazy rock crawling. Total for parts before tax for me was less than $600, which is OK since 33 gallon tank as an extra option when you order the truck costs $450. Plus 2-3 hours of work if you know what to do.

1. First things that you need to do is to burn as much gas in the tank as you can. When I returned back to my garage, trip computer was showing 20 miles to empty, but actually it appeared that ~3 gallons were still left in the tank. So try to get it to the state when it shows "Low". It will save you time from activating fuel pump through AlfaOBD and draining the remaining gas to the bucket. Plus I didn't relieved the pressure from fuel system, I just let the truck to stay overnight in the garage. So use as much gas as you can and then leave the truck alone for 12 hours, and don't start it when you return back to remove the tank.
2. Remove fuel tank skid plate if you have it by unscrewing 4 bolts.
3. Follow Fuel Tank Replacement Guide to remove the tank. I've skipped steps #1 and #4. I used 4 jack stands to lift the vehicle 0.5 feet above the ground - that was enough to work on this. Then I used floor jack with a piece of 2x6 stud to carefully lower the tank to the ground. With few gallons of gas inside, I think total weight was over 30 pounds, so I suggest to use a buddy to help you with this. Check Fuel Connector chart for more details how to disconnect each connector type.
4. Install new fuel pump by following steps #1-#7 from Fuel Pump Replacement guide.
5. Install new vapor canister on a new tank. Install 52029908AB hose and 52030443AB bundle on the tank, use old tank as a reference how to connect everything.
6. Swap heat shield from old tank to new tank by unclipping 4 plastic clips.
7. Go under the truck and remove vapor tube going to the engine, and replace it with shorter vapor tube (68307831AB). You will need to unclip the plastic mounts holding break lines and a fuel line, be careful not to damage them.
8. Then replace hose that goes from you've disconnected from vapor canister, that goes to fresh air filter. New one is 52029909AC.
9. Install new tank, which is directly opposite to tank removal procedure, nothing special there.
10. If you have a frame crossmember for 3rd strap, install that 3rd strap. My truck didn't have it, and I can't say that tank with 2 straps is not secured well - it is not moving anywhere, and majority of the weight is carried on default two straps just fine. Tank is made of a thick high-density plastic, so it will not crack even under its own weight.
11. Install the skid plate.
12. Lower the truck and fuel it up. I poured 2 gallons from the canister and checked for leaks. Start the truck and make sure it runs well and nothing is leaking. Water drops from the exhaust are water, not gas, so don't freak out if you see them :)
13. Connect with AlfaOBD and change VehConfig-3 Fuel Capacity to 125, which is the 33 gallon tank volume in liters (default setting for 23 gallon tank is 87). Check this post for details, thanks Dixit.
14. Go to the gas station and fill up. Enjoy 500+ miles to empty on the trip computer!

If you find this guide useful, check my Amazon influencer page for other items that I use with my RAM: bit.ly/RAMStuff
This is an awesome post. where did you get your parts? The fuel pump alone is $425 and the others less strap and skid plate priced out about $700. So about $1200 with shipping
 

eyerocks

Active Member
Joined
Jun 9, 2021
Messages
37
Reaction score
14
I just did this on my 19 ram 1500. I have the part list I used and will post it. But I did not replace my fuel pump. Over all I think I spent around $600. Sadly I had the fuel filling issue with mine and just decided to make the swap since it wasn’t under warranty
 

31RamIt

Ram Guru
Joined
Oct 25, 2021
Messages
1,102
Reaction score
1,087
I just did this on my 19 ram 1500. I have the part list I used and will post it. But I did not replace my fuel pump. Over all I think I spent around $600. Sadly I had the fuel filling issue with mine and just decided to make the swap since it wasn’t under warranty
Please post it. I am strongly considering doing this for my next big project. Would really like to stop less when going on long camping trips.
 

eyerocks

Active Member
Joined
Jun 9, 2021
Messages
37
Reaction score
14
Ask your dealer for discount and they’ll give you 10% off
 

Users who are viewing this thread

Top