5thGenRams Forums

Register a free account today to become a member! Once signed in, you'll be able to participate on this site by adding your own topics and posts, as well as connect with other members through your own private inbox!

Is it possible to add Blind Spot?

Well yea don't just use a 3 inch screw :D However there must be enough of a void (especially along the bottom) to be able to use the same size screw that would mount the "proper" heat sink.
 
Consider modifying the plastic vs cutting the heat sink tabs. It looks like you should be able to melt/cut a semi-circle for the bottom mount pretty easy. You might even be able to screw in the one tab that will be sticking out.
Well yea don't just use a 3 inch screw :D However there must be enough of a void (especially along the bottom) to be able to use the same size screw that would mount the "proper" heat sink.
I was thinking about what you said about cutting a notch for one of the ears. With a mirror, I can’t see what is behind the spot I need to cut so I would probably have to split the case from the lens to check. Also, I think I’d have to silicone the cut area since the back of the tailights get a steady stream of water/ salt/ etc., when it’s wet on the road.
 
Good point. And the backs of these housings get a lot of road splash. Min were filthy when I took them out to get a look at the 2 jumpers.

The screws that come with the sensors are like maybe 3/8”-ish. But even at that length, I’d still be careful to make them dodge (hey-ohhhh!) the circuit boards in there. Hahha


Sent from my iPhone using Tapatalk
 
Last edited:
Good point. And the backs of these housing s get a lot of rod splash. Min were filthy when I took them out to get a look at the 2 jumpers.

The screws that come with the sensors are like maybe 3/8” ish. But even at that length, I’d still be careful to make then dodge (hey-ohhhh!) the circuit boards in there. Hahha


Sent from my iPhone using Tapatalk
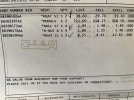
So it turned out to be a disaster. I’m just ordering a heat sink and extra sensor from ebay for $150. Shame that my parts guy can’t even find the left-hand heat sink since it only cost me $6.41 for the right hand one.

Edit: I may have just found the right part number. It looks like it could be 68396592AA since my paperwork shows the other numbers.

image.jpg
 
To add insult to injury, I just had to temporarily seal up the gaping hole with house tape because it might be a a month before I get the right part.

D424800D-6662-4B35-8F14-E21C7A6DFED7.jpeg
 
Oh snap!!!! So how was it cutting that tho?

And that’s the same part number I found that had the ambiguous description. Lemme know if it IS actually the left one… in a month. That sucks that that’s the lead time.


Sent from my iPhone using Tapatalk
 
Oh snap!!!! So how was it cutting that tho?

And that’s the same part number I found that had the ambiguous description. Lemme know if it IS actually the left one… in a month. That sucks that that’s the lead time.


Sent from my iPhone using Tapatalk
I’m just going off of the amount of time it took me to get 1 of the 2 heat sinks- I haven’t been able to try to order yet. (discovered that part# right before my last couple posts)

Cutting the metal was easy. In fact, so easy that I think anyone would be able to cut it with a hacksaw. I messed up by using a 4.5” grinder with a cutting wheel. As soon as it dug in, I could tell it was extremely soft metal. After I saw that, I used a file to cut/shape the rest.
 
Oh I was actually referring to the cutting of the backside of the light housing where the heat sinks attach. The part you tyvek’d up.

But yes the heat sinks seem like some soft aluminum.


Sent from my iPhone using Tapatalk
 
Oh I was actually referring to the cutting of the backside of the light housing where the heat sinks attach. The part you tyvek’d up.

But yes the heat sinks seem like some soft aluminum.


Sent from my iPhone using Tapatalk
Oh, that was pretty easy with an oscillating tool and a couple drywall bits. The cuts were pretty straight, and I cleaned up any high spots with a dremel and a thin carbide bit on medium speed. When I was dremeling, I held a shop vac up to my cutting area to not send a bunch of tiny hot plastic pieces everywhere.
 
The canbus wires will always be missing from under the driver seat to the star can block on non equipped trucks.
Jimmy, if you are still making the harnesses that go from the under seat to the Can system for BSM, can you PM me with a quote? I appreciate it.
 
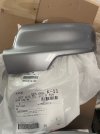
For anyone ordering mopar mirrors: If you use a VIN to order mirrors, they will come with painted skull caps so the images in the dealer’s parts search are incorrect. However, the painted skullcaps are only $40 each.

Someone was talking about removing the blue weatherpack plugs to add the XY harness, so here’s a youtube video of me removing a plug. It sounds and looks like I’m being rough on the plug, but they’re pretty resilient- I had no tears or holes after removing them.

Between the mirrors and tailights, I have almost $1700 in the conversion.

Big thanks to @Jimmy07 for the wiring harnesses for the tailights and XY connector. You do an excellent job with these.

76A6F99F-8B62-48D9-9A6D-79F688C4E935.jpeg
53CCB901-8723-4D50-BB0B-C68D649240DF.jpeg
 
Last edited:
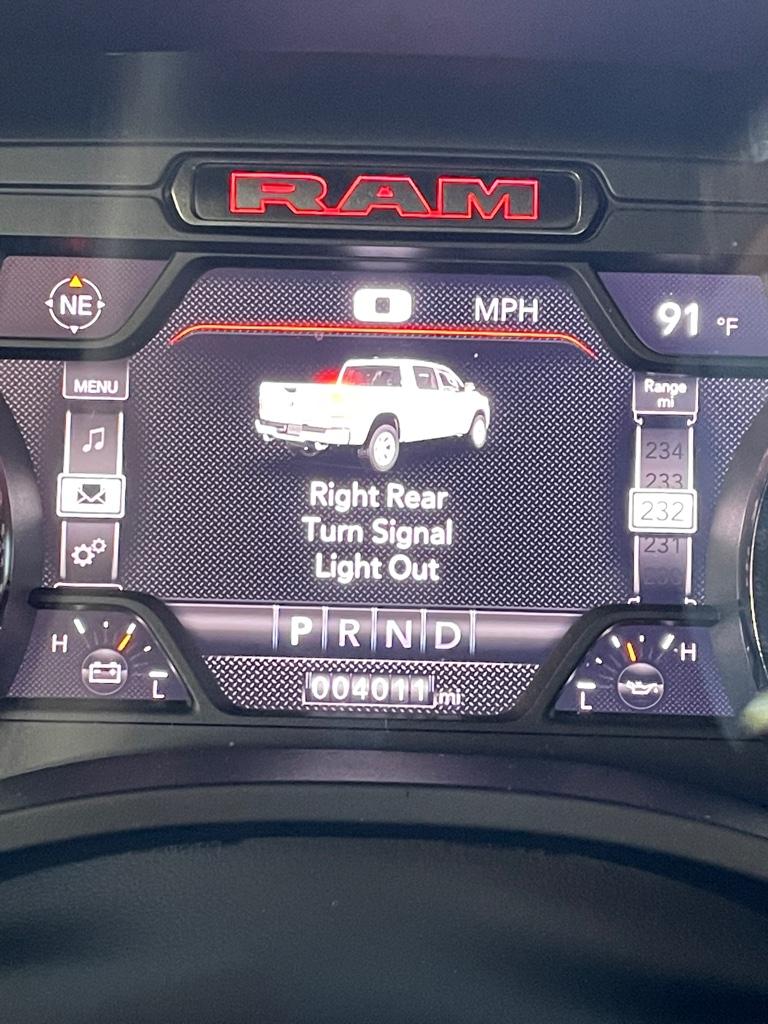
Ok so literally all I did here was cut the back out of the passenger housing, wire the twist lock molex connector, plug in the BSM sensor, screw it into the housing and reinstall in the truck, and now my right turn signal isn’t working. No programming no nothing.

Any ideas guys??

It just barely flickers when I turn it on.


Sent from my iPhone using Tapatalk
 
Here’s a vid.


@Jimmy07 anything I’m missing here? I didn’t think adding it would do anything but now I’ve unplugged the sensor and the directional still isn’t working.


Sent from my iPhone using Tapatalk
 
Started it up and now i got this on the dash.
a2cc0497d186a55a520557505784282d.jpg


Sent from my iPhone using Tapatalk
 
Started it up and now i got this on the dash.

a2cc0497d186a55a520557505784282d.jpg


Sent from my iPhone using Tapatalk
Check your wiring and also check that you didn’t cut one of the circuit boards in the tailight.
 
The only wiring I did was for the blind spot sensor tho. I didn’t de-pin anything that had to do with the lights themselves and I looked really good in there at all the boards near the cut and there’s no damage.

No stripped wires etc. and I didn’t drop anything so I can’t figure it.

I’m not about to take the whole housing apart (I don’t even think I could if I wanted to, (those 4 screws on the housing hold internals still.)

This just might be the point at which I abandon this mod. It’s already at least a $400 mistake, and it’s the first light. ¯\_(ツ)_/¯ if these LEDs are that sensitive I’m not even trying the other one. As it is it’s not even safe to drive and I def won’t get any replacement by Tuesday which is the next time I have to drive it. 🫤


Sent from my iPhone using Tapatalk
 
I guess now that I think about it, this light is junk anyway so I should actually try to fully open it and see if I can figure out what’s going on, anyone have any tips of separating the plastics on these??


Sent from my iPhone using Tapatalk
 
I guess now that I think about it, this light is junk anyway so I should actually try to fully open it and see if I can figure out what’s going on, anyone have any tips of separating the plastics on these??


Sent from my iPhone using Tapatalk
I haven’t tried yet, but am curious. I’ll let you know in 5 minutes though
 
I think the tail light might have some kind of adhesive on it in addition to the screws- if the screws are even to assist in holding the cover on. (Which I’m unsure of)
 
I think the tail light might have some kind of adhesive on it in addition to the screws- if the screws are even to assist in holding the cover on. (Which I’m unsure of)

Yeah it’s def got some adhesive in there. I took out the 4 screwed and Just the internals came loose. They could be helping hold it together but I have no idea where to start with the adhesive. There’s a guy in this thread who got one apart before. I’ll edit this and tag him and see if he has any ideas.

[mention]tdb0021 [/mention] any suggestions on how to take the whole housing apart like you did? Did the light survive?


Sent from my iPhone using Tapatalk
 

Users who are viewing this thread

Back
Top