5thGenRams Forums

Register a free account today to become a member! Once signed in, you'll be able to participate on this site by adding your own topics and posts, as well as connect with other members through your own private inbox!

Comma.ai

Trooper4

Ram Guru
Joined
Feb 14, 2019
Messages
1,579
Reaction score
1,673
Location
Ellensburg, Washington
Along with testing different forks, I usually run the C3beta1500 fork, which is awesome. Steers to zero in traffic, and has a 20mph+ set speed. It resumes well from zero, and does well in town and freeway.
 

392DCGC

Ram Guru
Joined
Aug 1, 2018
Messages
565
Reaction score
378
Thanks for all the info.!

So, if I purchase the Comma dev kit from Comma.ai, and then the harness and the mount from you is that all I need? Is it just plug-and-play with nothing else to purchase? Just install in the truck as per instructions, load stable software and it's done?
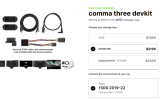
You don't even necessarily need the dev kit because it includes a harness connector you can't use without modifying. You can a la carte the items you need - the harness box and comma power v2 will run you $120. You can also buy their $20 RJ45 Ethernet cable, or get a cheaper one from elsewhere. The C3 includes a USB-C in the box. So really you'd be at $160 including their RJ45 and Dave's harness vs $220 buying the dev kit.

It's what I did. Got my C3 running this past weekend and it's great. Also recommend paying with a credit card that has a a built-in extended warranty benefit.
 

StuartV

Ram Guru
Joined
Jun 27, 2019
Messages
1,087
Reaction score
851
Location
Lexington, SC
Do any of you know what the status of RAM support is in terms of community effort versus Comma effort?

I mean, it seems like maybe Castle Hill has been doing a lot of work to make OP work with RAMs. Is anyone at Comma actually working on it?

I'm really wondering what's going to eventually shake out as far as having all the features (Steer to Zero, in particular) supported on all RAMs (that have ACC+LKA).

Castle Hill put out a build for me to try last week and it didn't work (for S2Z). So now I'm wondering if I'm just completely out of luck, or if Comma will eventually put resources on it to get it working for me and everyone else that isn't fortunate enough to have it just based on Castle's work.
 

Malodave

Ram Guru
Joined
Oct 4, 2020
Messages
1,113
Reaction score
605
Location
Rindge NH
Do any of you know what the status of RAM support is in terms of community effort versus Comma effort?

I mean, it seems like maybe Castle Hill has been doing a lot of work to make OP work with RAMs. Is anyone at Comma actually working on it?

I'm really wondering what's going to eventually shake out as far as having all the features (Steer to Zero, in particular) supported on all RAMs (that have ACC+LKA).

Castle Hill put out a build for me to try last week and it didn't work (for S2Z). So now I'm wondering if I'm just completely out of luck, or if Comma will eventually put resources on it to get it working for me and everyone else that isn't fortunate enough to have it just based on Castle's work.

We do have to have it 100% working. I think we are at 97% for the Comma3. Then it gets sent to Comma to approve and add it to the Main code.

We found one of the Glitches with reversing. I believe there is one more to make it 100%. Then he can port it to the Comma2.

The code I tested last night work flawlessly on my commute to work this morning. Steered to Zero twice, resumed to speed from 0.
Two Brake uses due to cross traffic, could reengage OP under 32 MPH. Set the ACC speed to 20 for 90º turns(I had to steer those).

Malodave
 

StuartV

Ram Guru
Joined
Jun 27, 2019
Messages
1,087
Reaction score
851
Location
Lexington, SC
We do have to have it 100% working. I think we are at 97% for the Comma3. Then it gets sent to Comma to approve and add it to the Main code.

We found one of the Glitches with reversing. I believe there is one more to make it 100%. Then he can port it to the Comma2.

The code I tested last night work flawlessly on my commute to work this morning. Steered to Zero twice, resumed to speed from 0.
Two Brake uses due to cross traffic, could reengage OP under 32 MPH. Set the ACC speed to 20 for 90º turns(I had to steer those).

Malodave

Thanks, Dave. I saw your reports on the Discord about it. I'm very excited at the progress.

I just have not been clear on whether I could hope for S2Z to come to my Comma 2 or not. More specifically meaning, if the current stuff doesn't work for me on a C2, what are the chances that anybody will actually work on fixing it to work for me? How likely am I to end up being told "if you want that, buy a C3. Otherwise, sorry."

Thus my questions about who really owns the responsibility for getting it to work. I'm getting the impression that nobody really owns it. It's just a matter of whether there is some generous soul like Castle who takes it on because they just want to.

That said, your statement about getting it dialed in that last little bit and then porting it for the C2 does give me a lot of hope!

Last: Why did you have to steer your truck with you set ACC to 20 for 90 degree turns? The truck doesn't have enough steering torque for those turns you were making?
 

Malodave

Ram Guru
Joined
Oct 4, 2020
Messages
1,113
Reaction score
605
Location
Rindge NH
There is the HD trucks to work on too. So Castle will do his best. I thing the HD trucks will need a relay box and some extra wiring.
 

tdb0021

Well-Known Member
Joined
Mar 17, 2020
Messages
231
Reaction score
199
Location
Denver, CO
Castle and I have been working all week to get the code ready for C2. I'd guess by the weekend it'll be ready for further testing. It'll allow for all trucks regardless of the firmware to steer to 0. When we are done, the c2 code will be up to par with c3, allowing for easier updates in the future. Virtually everything the c3 can do will be possible on the c2. Eventually there will reach a point to where the c2 can no longer support the updates, but that's a while off.
 

StuartV

Ram Guru
Joined
Jun 27, 2019
Messages
1,087
Reaction score
851
Location
Lexington, SC
Castle and I have been working all week to get the code ready for C2. I'd guess by the weekend it'll be ready for further testing. It'll allow for all trucks regardless of the firmware to steer to 0. When we are done, the c2 code will be up to par with c3, allowing for easier updates in the future. Virtually everything the c3 can do will be possible on the c2. Eventually there will reach a point to where the c2 can no longer support the updates, but that's a while off.

Tackleberry, 'zat u? LOL!

I am SO happy to see this post!

I have been biting my tongue/fingertips to not sent Castle a message and ask the questions that you just answered. I know he/y'all are busy working away on it and I didn't want to pester him.

That is such a relief - to know it is coming for the C2! OP is so awesome as it is working now, but it makes it even more frustrating to not be able to use it in stop-and-go traffic. Constantly paying attention to whether I need to actually steer or just monitor can be tiresome.

Now I can quit fretting about it and pay attention to other things for a few days. :D
 

Malodave

Ram Guru
Joined
Oct 4, 2020
Messages
1,113
Reaction score
605
Location
Rindge NH
Last: Why did you have to steer your truck with you set ACC to 20 for 90 degree turns? The truck doesn't have enough steering torque for those turns you were making?

ACC has a minimum set speed of 20MPH, so you can only set that as your lowest speed. OP can steer down to 0 but the RAM firmware limits the torque available above 5 mph.

There is 2000 counts of torque to make the truck do Assisted Parking, above 5 MPH the limit is 350 counts. We need about 50 more counts to to the sharper turns and to recover from them.
90º turns are not capable with OP yet. When it does Stop Signs and Stop Lights, then it adds End to End Navigation it should be able to handle the 90º turns.

Malodave
 

Trooper4

Ram Guru
Joined
Feb 14, 2019
Messages
1,579
Reaction score
1,673
Location
Ellensburg, Washington
ACC has a minimum set speed of 20MPH, so you can only set that as your lowest speed. OP can steer down to 0 but the RAM firmware limits the torque available above 5 mph.

There is 2000 counts of torque to make the truck do Assisted Parking, above 5 MPH the limit is 350 counts. We need about 50 more counts to to the sharper turns and to recover from them.
90º turns are not capable with OP yet. When it does Stop Signs and Stop Lights, then it adds End to End Navigation it should be able to handle the 90º turns.

Malodave
Just did some 90+ turns at 20/25 to get on the freeway. truck wanted to turn in too much, but doable.
 

bucolic

Active Member
Joined
Jan 17, 2020
Messages
164
Reaction score
215
Location
New York Upstate Not the City!
On the Comma.ai site this AM I see you can select the harness for the Ram. I know it was there then they took it down a couple of weeks ago. Can anyone confirm it is available now? Great news if it is!

comma.png
 

Bpebler

Ram Guru
Joined
Jan 7, 2021
Messages
813
Reaction score
443
Are there videos for install & operation on their website that is specific to our Ram 1500’s? Some of this info sounds a little foreign & overwhelming to us who aren’t so tech savvy.
 

Malodave

Ram Guru
Joined
Oct 4, 2020
Messages
1,113
Reaction score
605
Location
Rindge NH
Are there videos for install & operation on their website that is specific to our Ram 1500’s? Some of this info sounds a little foreign & overwhelming to us who aren’t so tech savvy.
There is a Youtube Video one of the Discord members produced.


I would remove the Drivers "A" Pillar (2 x 10mm bolts) And pull the Door Weatherstripping away from the Body next to the Dash
to route the Ethernet Cable to the OBD port. Also get a set of Plastic Pry tools from Harbor Freight. Removing the DASM cover
is probably the most difficult for the installation. There is a small panel just above the Mirror Stalk that needs to be removed. Then
the DASM cover has a notch on the Passenger side front corner to remove the Cover.

Malodave
 

Bpebler

Ram Guru
Joined
Jan 7, 2021
Messages
813
Reaction score
443
There is a Youtube Video one of the Discord members produced.


I would remove the Drivers "A" Pillar (2 x 10mm bolts) And pull the Door Weatherstripping away from the Body next to the Dash
to route the Ethernet Cable to the OBD port. Also get a set of Plastic Pry tools from Harbor Freight. Removing the DASM cover
is probably the most difficult for the installation. There is a small panel just above the Mirror Stalk that needs to be removed. Then
the DASM cover has a notch on the Passenger side front corner to remove the Cover.

Malodave

Thank you!! Man, even though I’m pretty confident I could do myself I still wish a local shop was experienced with installing these just to put the responsibility on them. I accidentally break stuff a lot & don’t wanna screw up the cover or the stalk itself.
 

StuartV

Ram Guru
Joined
Jun 27, 2019
Messages
1,087
Reaction score
851
Location
Lexington, SC
I watched that video before I installed mine. It was very helpful, but still left a bit to be desired.

Mainly, I have not see any instructions anywhere (including that video - he broke his) on how to get the little trim piece that is just above and behind the rearview mirror out without breaking it.

I got mine out without breaking it, but with no thanks to any help from anywhere EXCEPT for seeing in that video how the piece is actually held in. That was definitely key, so props to that video for showing that.

The only tools I used for the whole install were a wide slotted screw driver, a small, thin slotted screwdriver, and a 10mm socket and ratchet.

The are 4 tab hooks that hold that trim piece in. I used a very skinny slotted screwdriver to stick in the crack where each tab was and just pry a little to release the hook. 4 times of that and the piece came out without breaking. I had already popped the big trim ring out before doing that, so I'm not sure if my technique would work with the big trim ring still in place or not.

I used the wide slotted screwdriver to insert into the slot at the front right corner of the big trim piece and twist to start it popping off. Once started, it was easy to get it the rest of the way off. And once the front, small trim piece is out, the big trim ring comes right off.

To route the Ethernet (aka RJ-45) cable, I used the small slotted screwdriver to pry out the two panels that are on the driver's side grab handle. Then, the 10mm socket went in to loosen the two bolts that hold it on. I didn't remove the handle or those bolts. Just loosened them up good.

Once that handle was loose, it was easy to run the Ethernet cable. I plugged it into the power adapter and into the OBD II port first and then routed the cable from the bottom up. With the grab handle loose, it was easy enough to push the cable in behind the moulding/trim/weatherstripping without loosening it or pulling it out at all. Then, it just pushed in between the ceiling and the headliner at the top of the windshield to get it hidden all the way over to the rearview mirror area. So, really, to run the Ethernet cable, it was just popping off the bolt covers on the grab handle with a small screwdriver, loosening the grab handle bolts, and that's it as far as tools needed.

Other notes:

The rearview mirror can just be pulled to pop it right off the ball of the mounting stalk that is on. But, I don't know if it needs to be popped off or not. I did pop it off and I think it probably makes it a lot easier to get to the area where you insert the small screwdriver in order to release the tab hooks that hold that small trim piece on.

However, getting the mirror to pop back onto its stalk is a huge pain. Knowing what I know now, I would definitely try to get that little trim piece off first without taking the mirror off its stalk.

The stalk that the mirror mounts on is, in turn, easy to pop loose from where it is attached to the rest of the truck. I accidentally did that, too, when trying to put the mirror back on the stalk.

If you do that, to put the stalk back on its mount to the truck, you turn the stalk 45 degrees (either direction) from being straight up and down. Then, push it onto the nut that it mounts on. While pushing it, you turn it to straight up and down and it locks in place. You have to push hard while twisting it. And, you have to push straight or it won't grab on and seat properly.

I got mine on and then tried to put the mirror back on the stalk and couldn't do it. I had to take the stalk back off its mount and pop the mirror back onto the ball on the end of the stalk first, then re-attach the stalk to the its mount with the mirror mounted to it, which just made it that much harder. I was really worried about breaking the LCD screen in my mirror while trying to push it back onto the ball, but I got it on without breaking it.

Still, all said, the whole install, from scratch, took me less than 1 hour from parking in front of my garage to driving way with the Comma working.
 

Bpebler

Ram Guru
Joined
Jan 7, 2021
Messages
813
Reaction score
443
I watched that video before I installed mine. It was very helpful, but still left a bit to be desired.

Mainly, I have not see any instructions anywhere (including that video - he broke his) on how to get the little trim piece that is just above and behind the rearview mirror out without breaking it.

I got mine out without breaking it, but with no thanks to any help from anywhere EXCEPT for seeing in that video how the piece is actually held in. That was definitely key, so props to that video for showing that.

The only tools I used for the whole install were a wide slotted screw driver, a small, thin slotted screwdriver, and a 10mm socket and ratchet.

The are 4 tab hooks that hold that trim piece in. I used a very skinny slotted screwdriver to stick in the crack where each tab was and just pry a little to release the hook. 4 times of that and the piece came out without breaking. I had already popped the big trim ring out before doing that, so I'm not sure if my technique would work with the big trim ring still in place or not.

I used the wide slotted screwdriver to insert into the slot at the front right corner of the big trim piece and twist to start it popping off. Once started, it was easy to get it the rest of the way off. And once the front, small trim piece is out, the big trim ring comes right off.

To route the Ethernet (aka RJ-45) cable, I used the small slotted screwdriver to pry out the two panels that are on the driver's side grab handle. Then, the 10mm socket went in to loosen the two bolts that hold it on. I didn't remove the handle or those bolts. Just loosened them up good.

Once that handle was loose, it was easy to run the Ethernet cable. I plugged it into the power adapter and into the OBD II port first and then routed the cable from the bottom up. With the grab handle loose, it was easy enough to push the cable in behind the moulding/trim/weatherstripping without loosening it or pulling it out at all. Then, it just pushed in between the ceiling and the headliner at the top of the windshield to get it hidden all the way over to the rearview mirror area. So, really, to run the Ethernet cable, it was just popping off the bolt covers on the grab handle with a small screwdriver, loosening the grab handle bolts, and that's it as far as tools needed.

Other notes:

The rearview mirror can just be pulled to pop it right off the ball of the mounting stalk that is on. But, I don't know if it needs to be popped off or not. I did pop it off and I think it probably makes it a lot easier to get to the area where you insert the small screwdriver in order to release the tab hooks that hold that small trim piece on.

However, getting the mirror to pop back onto its stalk is a huge pain. Knowing what I know now, I would definitely try to get that little trim piece off first without taking the mirror off its stalk.

The stalk that the mirror mounts on is, in turn, easy to pop loose from where it is attached to the rest of the truck. I accidentally did that, too, when trying to put the mirror back on the stalk.

If you do that, to put the stalk back on its mount to the truck, you turn the stalk 45 degrees (either direction) from being straight up and down. Then, push it onto the nut that it mounts on. While pushing it, you turn it to straight up and down and it locks in place. You have to push hard while twisting it. And, you have to push straight or it won't grab on and seat properly.

I got mine on and then tried to put the mirror back on the stalk and couldn't do it. I had to take the stalk back off its mount and pop the mirror back onto the ball on the end of the stalk first, then re-attach the stalk to the its mount with the mirror mounted to it, which just made it that much harder. I was really worried about breaking the LCD screen in my mirror while trying to push it back onto the ball, but I got it on without breaking it.

Still, all said, the whole install, from scratch, took me less than 1 hour from parking in front of my garage to driving way with the Comma working.

Care to snap a quick & easy video explaining how to properly get the trim piece out without breaking? Just a visual walkthrough obviously, no need to actually take it off & put it back on or anything.

That’s pretty much why I’d rather a shop do it, so that if they break it then they can replace it. I’m also just burnt out from working on my Jeep & my free time is severely lacking. Plus it sounds like this is right up my alley (from previous experience) of something I will break no matter how careful I try to be. Would rather pay someone.
 

Malodave

Ram Guru
Joined
Oct 4, 2020
Messages
1,113
Reaction score
605
Location
Rindge NH
Care to snap a quick & easy video explaining how to properly get the trim piece out without breaking? Just a visual walkthrough obviously, no need to actually take it off & put it back on or anything.

That’s pretty much why I’d rather a shop do it, so that if they break it then they can replace it. I’m also just burnt out from working on my Jeep & my free time is severely lacking. Plus it sounds like this is right up my alley (from previous experience) of something I will break no matter how careful I try to be. Would rather pay someone.
You have to pry from the top next to the Headliner.

Malodave
 

Users who are viewing this thread

Site Vendors

https://www.jasonlewisautomotive.com/

Members online

Top