5thGenRams Forums

Register a free account today to become a member! Once signed in, you'll be able to participate on this site by adding your own topics and posts, as well as connect with other members through your own private inbox!

Catch Can Install - Hemi

JK47TheWeapon

Active Member
Joined
Jan 17, 2019
Messages
75
Reaction score
95
FYI: It's been 32 days since I ordered a BT Catch Can from Moe's, and they still haven't shipped it. They haven't refunded as they said they would 2 days ago either. Luckily I used paypal, so I am having to open a dispute.
 

AndreiV

Well-Known Member
Joined
Sep 17, 2018
Messages
242
Reaction score
171
Location
Southern CA
FYI: It's been 32 days since I ordered a BT Catch Can from Moe's, and they still haven't shipped it. They haven't refunded as they said they would 2 days ago either. Luckily I used paypal, so I am having to open a dispute.
I ordered BT catch can directly from BT 9 days ago, stillhas not been shipped, now they have 20 days lead time just for standard one, no fancy finishes.
 

Kidder

Well-Known Member
Joined
Jul 29, 2018
Messages
393
Reaction score
237
Location
DFW, TX
I ordered BT catch can directly from BT 9 days ago, stillhas not been shipped, now they have 20 days lead time just for standard one, no fancy finishes.
That's what I did, as well. It took awhile. It's worth it, IMO.
 

cotonymopar

Well-Known Member
Joined
Mar 2, 2019
Messages
374
Reaction score
181
Location
Northern Colorado
here is a picture of my $50 oil catch can... has the same baffles as the expensive.... if it separates the oil from the air, I am good to go with the cheaper, and goes with my black edition
 

Attachments

  • IMG_2818.JPG
    IMG_2818.JPG
    153 KB · Views: 108

Nails

Ram Guru
Joined
Nov 21, 2018
Messages
1,563
Reaction score
762
Location
San Antonio
^^^ make sure the screw is tight on drain lever. Mine ended up on the road somewhere :mad:
 

securityguy

Legendary member
Joined
Feb 17, 2019
Messages
5,576
Reaction score
4,218
Location
North Florida
I strongly suggest you "locktite" it...I ordered two ball-**** valves off Amazon and used Locktite on the screws that hold the handle to the stainless steel valve body.
 

securityguy

Legendary member
Joined
Feb 17, 2019
Messages
5,576
Reaction score
4,218
Location
North Florida
I say to jump in on the pre-order for the Mishimoto...best can on the market IMPO and I have two in two different cars. Yes, it cost $179 and you can buy one on eBay for $50 but the baffling design and air filtering media in the Mishimoto is well worth the difference.


wildh24

Ram Guru
Joined
Dec 23, 2018
Messages
558
Reaction score
300
I just received my Billett Technology Catch Can for the Hemi. I had one on my 2011 so installing this was very similar to that one.

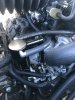
First, remove the intake tube along with removing the connector. You can set it to the side as it you don't have to remove it completely. It just makes access easier.
Intake%20Tube.jpg

Intake_Connector.jpg


Second, remove the Hemi plastic cover. It has two torx screws which takes a T30 socket/T-handle.
Torx.jpg


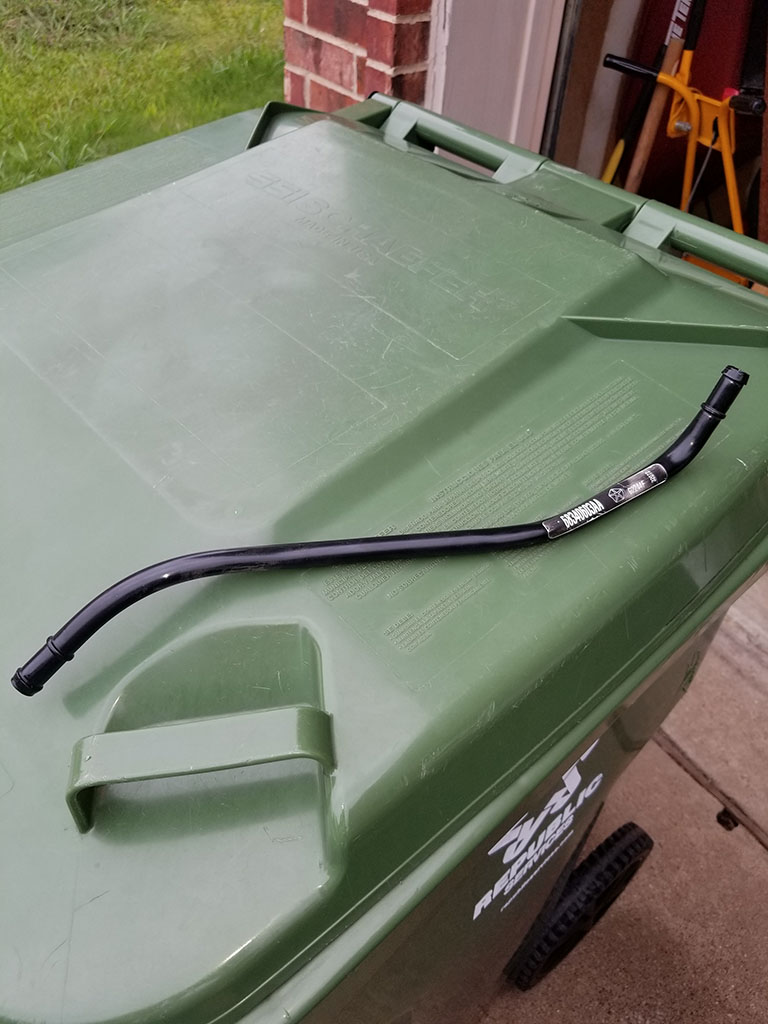
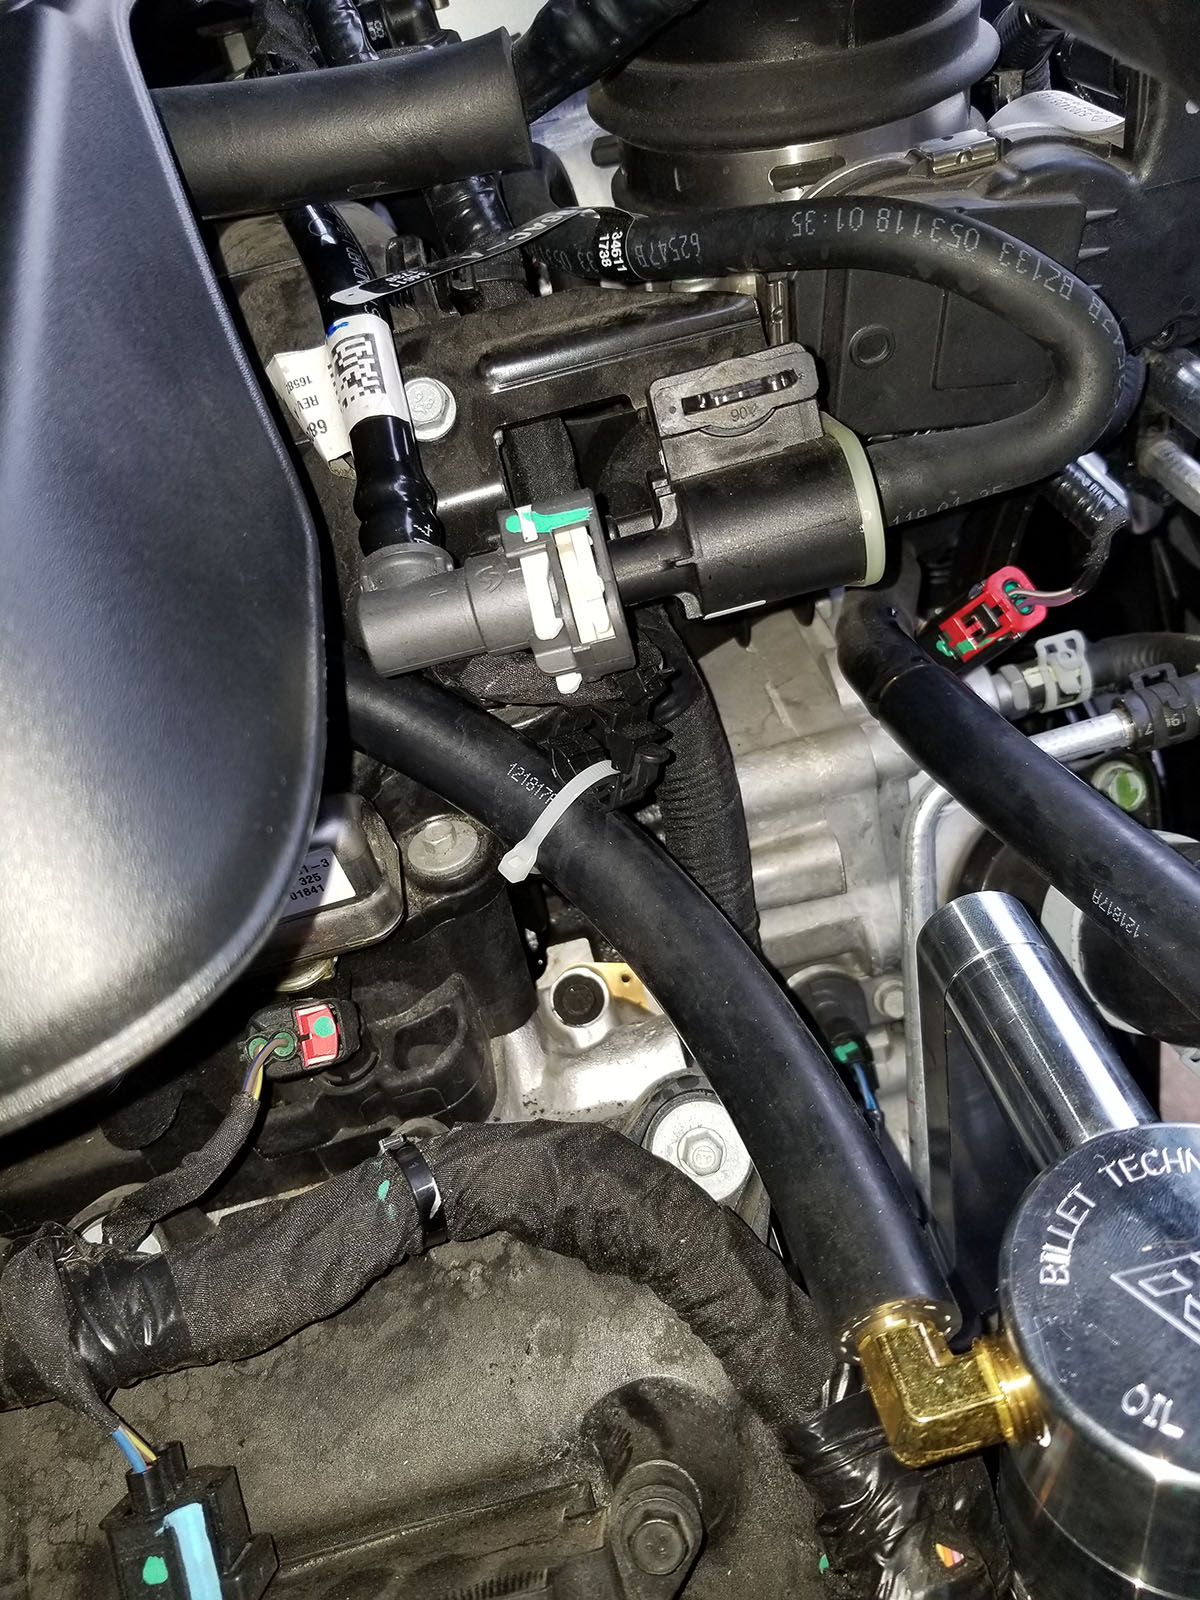
Third, remove the PCV hose, it slides out of each end with a little bit of force. Be careful on the rear one especially. Make sure you support the elbow rubber connector so you don't rip it.
PCV%20Hose.jpg


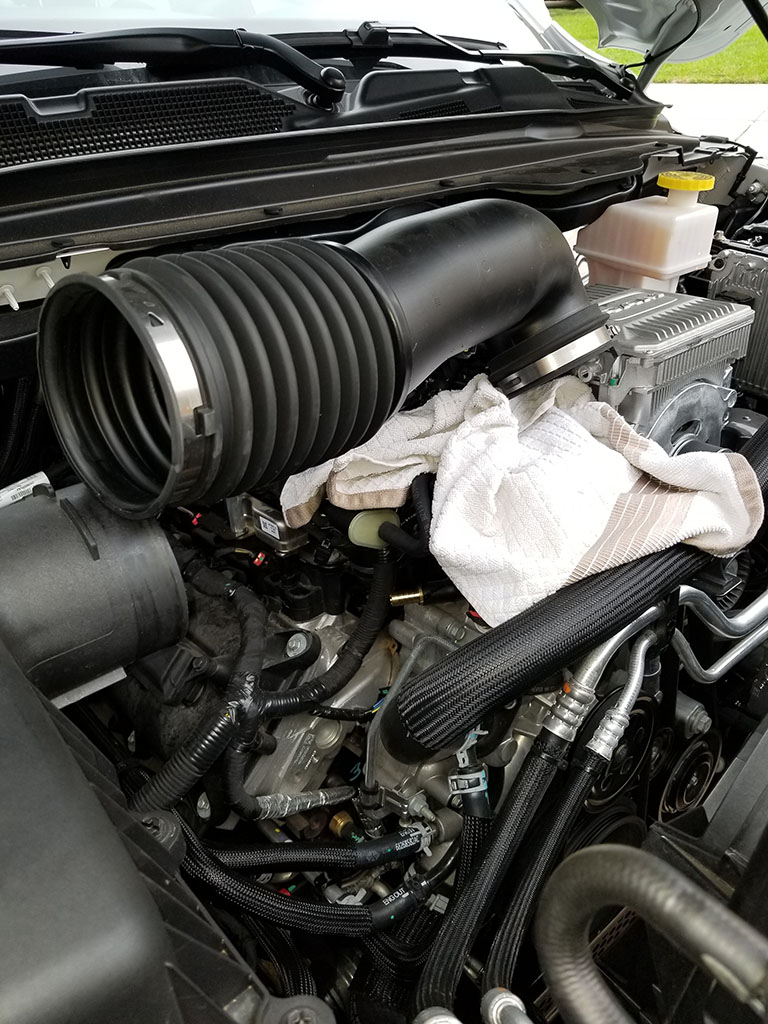
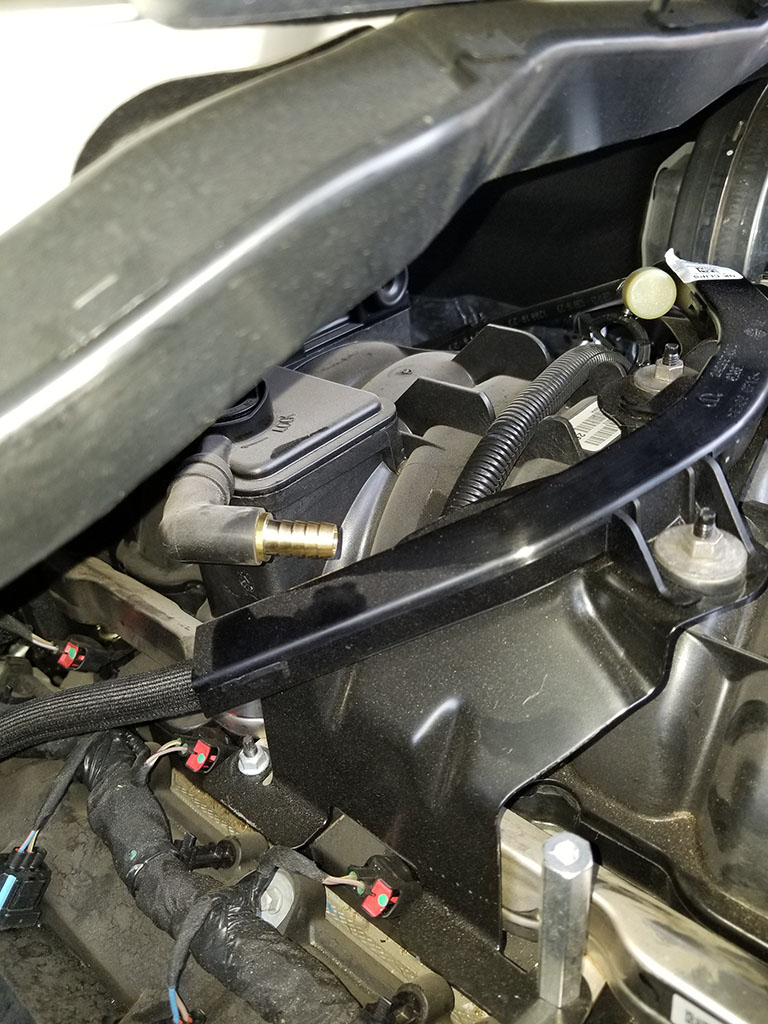
You can do the next steps in various order. I ended up dry fitting the hose connections which you can see in the pic. of the rear connection here. However, it is much easier if you insert into one end of the hose to ensure it goes completely on.

Rear_connection.jpg


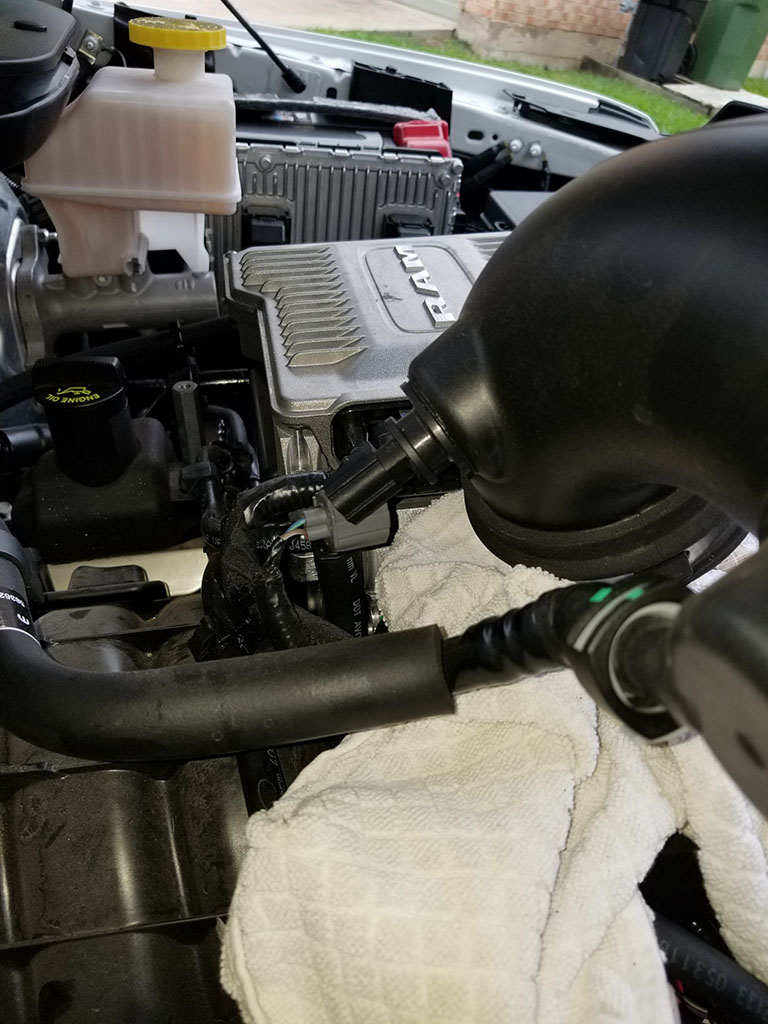
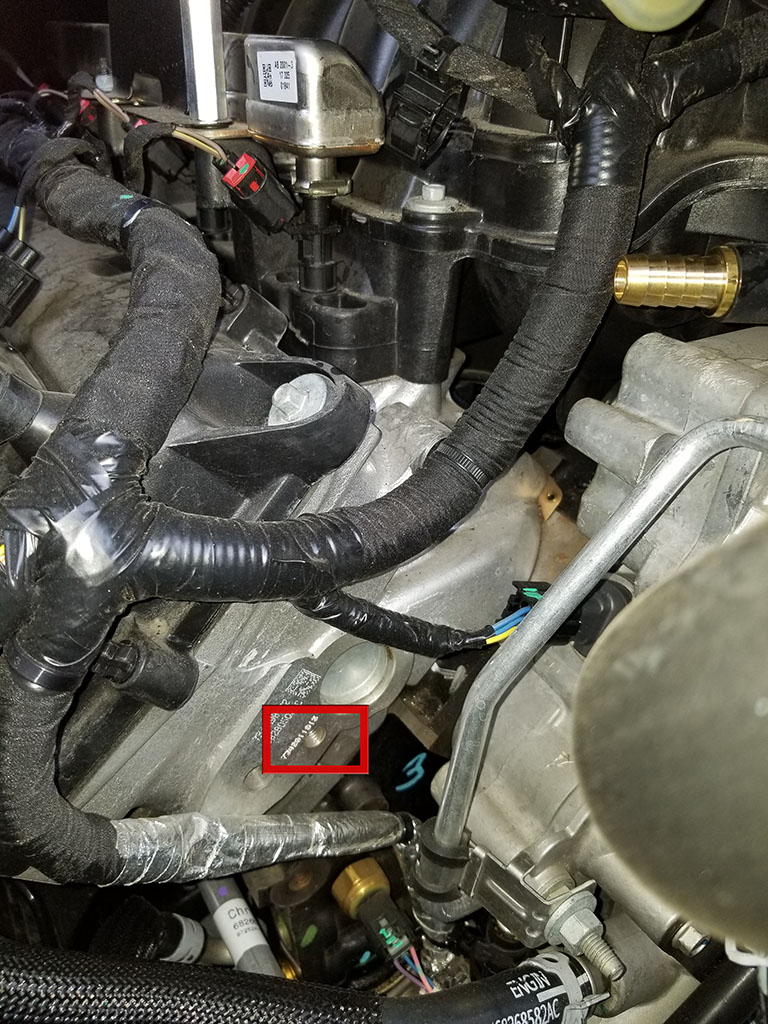
Next, install the Z bracket which installs with the spacer on the engine block. I didn't tighten it completely because I wanted to see how the hoses line up. Once you're satisified, go ahead and tighten the bolt which is a 13mm.
Spacer_Bolt.jpg


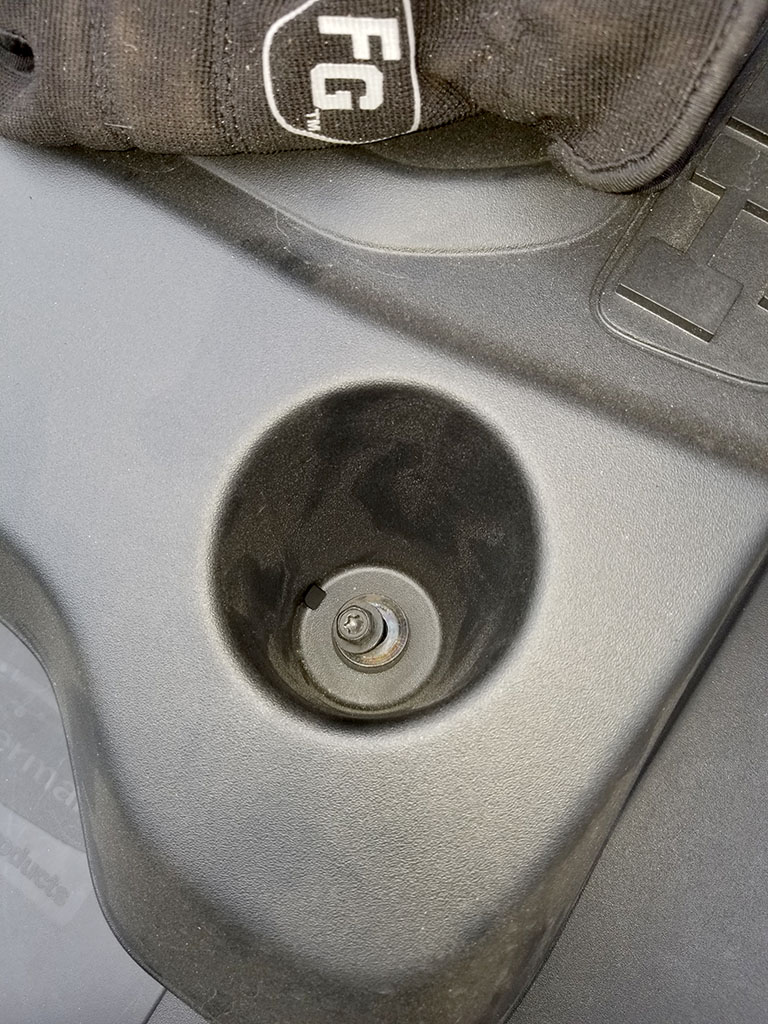
The red box shows the threaded hole where the bolt screws into.
Front%20connection_mount.jpg

Top_hoses.jpg


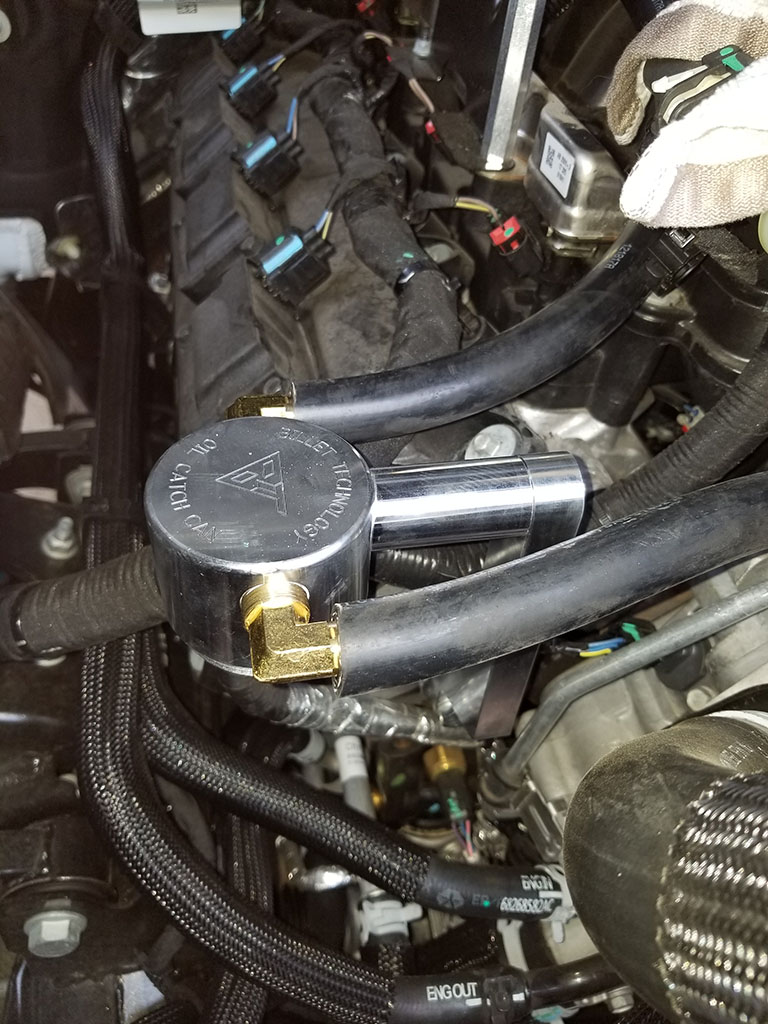
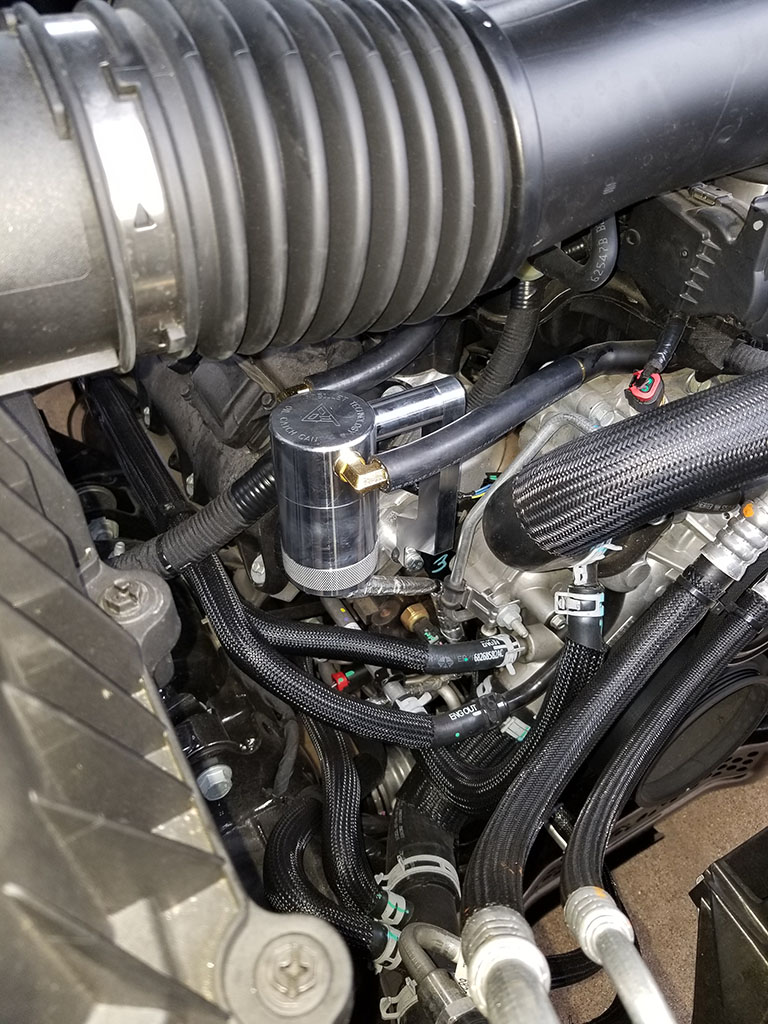
I then trimmed the hoses to fit on the catch can fittings. I used a PVC pipe cutter that I use for sprinkler repair. Don't cut them too short (duh)!
I used the loop that keeps the PCV tube secure as an anchor point with a zip tie to keep everything secure.
Zip.jpg


I then installed the catch can itself.
Installed.jpg


Now reinstall the intake tube and don't forget the connector!
And the hardest part for me was to get that **** cover back on. It's hard to line up the rear posts into the rubber grommets because you can't see back there. After a few choice words I got it back in place. Reinstall the screws and you're done.
I did start the engine to ensure I didn't get a CEL which I did not.

Hope this helps.


Thanks for the pictures and write up. Helped me get it installed in less than 30 minutes.
 

macallien

Active Member
Joined
Feb 9, 2019
Messages
113
Reaction score
57
Hi Guys! I am having a hard time removing the hard PCV tube from the back. Any suggestion?
 

AndreiV

Well-Known Member
Joined
Sep 17, 2018
Messages
242
Reaction score
171
Location
Southern CA
Hi Guys! I am having a hard time removing the hard PCV tube from the back. Any suggestion?
Just be patient, take your time, remove front first, play it around, eventually it will come off. I struggled with it as well and eventually used flat screw drivers or similar tool to help creat movement between hose and plastic tube part.
 

Users who are viewing this thread

Top