Thanksgiving weekend update (part 3):
Today was somewhat of an productive day, but not as productive as yesterday.
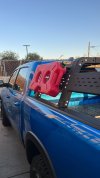
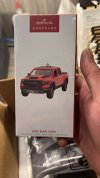
I woke up late, went to the dealer to pick up my bed racks and dash trim. When I returned to my truck i realized the dash trim was wrong. The part number I got was for trucks with wireless charging pad, but I need the part number for non-wireless charging. I guess I'll return it some day.
When I got home it was around 230PM already and I was running out of day light. But luckily I didn't have a whole lot to do today.
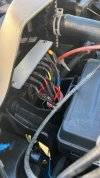
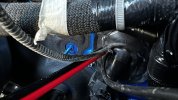
First, I installed the breaker for the cab power distribution and confirmed it's working as it should. I forgot to take a picture for that today, so if I remember tomorrow I'll snap a pic and post here. But basically I used a self-tapping screw to tap into the battery box behind the driver headlight. It comes with the rubber hats to cover the terminal posts, but in my experience they come off too easily. I sent Blue Sea an email to see if they make any covers. I'll wait for their response.
*The purpose for the breaker switch is to act as a kill-switch AND an safety for the whole harness; it would stop the flow of power should there be overload or shortage somewhere in this added power distribution system. When installing breaker switch, it is highly recommended to place it as close to the power source as possible. This way, there will be less cable distance between the power source and the breaker switch, and thus reduce the chance of further damage on the truck since the power is stopped right next to the battery.
**Goes without saying, check the orientation of the breaker switch when you do the install. Blue Sea ones are marked "bat" and "acc" telling you which terminal you should use for battery.
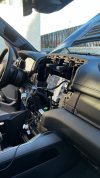
Then, I removed the head unit to install ICS Dash Mount and Ham Radio display. I had to drill the dash mount and the pen holder plastic right next to 12V socket to feed the HAM display cable through, and drilled more holes on the pen holder plastic to utilize the included additional bolts and nuts to make it more sturdy.
*Pro tip: Technically, 2 additional holes toward the front of the vehicle is enough, as there's a support plastic piece under the dash and the included bolts are not long enough to go through them.
**Pro tip: When marking where to drill, cover the dash trim with a piece of blue painter's tape and use sharpie to mark. Then, use a small drill bit to punch a pilot hole, then gradually increase bit size until 1/4 inch. For the HAM radio cable, since it's the ethernet cable type, I used the same method and test fit until the connector bit goes through. I ended up having to go all the way up to 1/2 inch. If you have a step bit it will save you a lot of time.
***Pro tip: When drilling metal, switch over to "high torque" option on your drill and slowly yet firmly press down. Don't go too fast on this because you'll break the bit. Let the tool do its job.
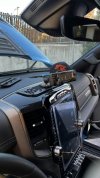
Install complete. I may change the position of the RAM Mount once I put the tablet mount in. I use an Android tablet to run Gaia GPS as dedicated offroad navigation. Gaia is great on iphone, but not so great when it's projected on CarPlay. On the other hand, Gaia on Android is acceptable at best, but I ran into problems running both Gaia and Google Map together on a trip to Moab in 2020.
Reason why I chose Android over iPads is because iPad Wifi do not come with GPS sensor built it; it is only available on iPad with data and my 8 years old iPad is wifi only. The Android tablet only cost me ~$100 and I only use it for Gaia and watching YouTube anyways.
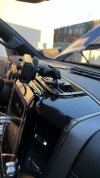
Another angle for the dash mount. I'll leave the cable like that for now until I finalize the location and dash mount setup, then I'll zip tie it to the RAM arm.
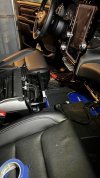
The third thing I did was remove the floor console to install the Switch-Pros control panel.
There are 2 covers on each side of the floor console, pop those open and remove the 10mm bolts. Then, pop the trim pieces next to the floor console out (below gear knob on the driver side and next to the lower glove box on the passenger side). First time is always hard and tight, but you just gotta do it

Remove those 10mm bolts, and you can lift the floor console up and back. Undo the two harness, and pull the Christmas fastener out to disconnect the harness. You'll break the Christmas tree clip, but I wouldn't worry about it. It's only for cable management and you don't really need it, but if you're OCD then you can just get one from the dealer to replace it.
*Pro tip: slide the seats forward to reveal the two covers in the back of the floor console.
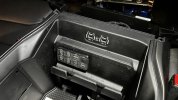
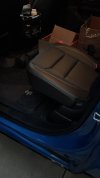
To install the panel, you will need to drill more holes. Follow the template provided in the Switch-Pros instruction. I did it using a blue paint marker to mark the locations of the holes and started drilling. It will be messy (as you can see from the picture) since you're drilling through rubber surface. If you have a Dremel with flexible head, this is the time to use it. You will need to make a bigger hole for the harness to go through. If you have the tools to depin the connecter, do it so you don't have to make a big hole. If you don't have the tools to depin or just don't know how to do it, make the hole bigger to fit the connector through. I made mine with 1/2" bit and I had to wiggle the bit around to enlarge the hole. And that's why I wish I had the air Dremel that we use at the shop: I'd be able to make the hole cleaner and to exact size I need.
*Pro tip: Switch-Pros studs are very short. They are too short to fully go through the plastic backing of the phone holder piece, so I recommend make your holes a bit smaller and just push your panel in place.
*Note: My initial testing shows the force of plastic trim biting on the stud is sturdy enough, but I'm not sure how it will hold in offroad situation with lots of vibration. I am looking for longer stud options to correct this issue.
**Pro tip: the available space here is very limited even if you move the cup holders all the way back. If you have a big drill like I do, you will not be able to drill the holes with the bit perfectly perpendicular to the surface. You can try to jam the drill in there, but use blue tape to protect the cup holder tray surface.
**Note: For that big hole to pass the connector, it doesn't have to be perfectly rounded. In face, if you can make a rectangular hole to fit the harness through that'd be perfect. Again, your life will be a lot easier if you have a Dremel to do this.
***Note: it doesn't have to be pretty; your panel will cover the imperfections. Just in case you're OCD about it.
I routed the Switch-Pros controller harness under the dash and followed the factory USB harness. I then bundled the extra length harness and hid it under the blower motor.
Reverse the disassembly steps and you're good!
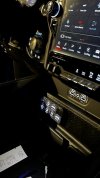
Everything put back together here. I will need to remove all the old legends and put in new ones when I start putting lights in. I did not use the Switch-Pros' built in dimmer function, as I couldn't find the right fuse to tap into under the dash. I just used the app to dim the display brightness, and given that its current mounting location it's not going to affect me driving at night. Coincidentally, the color I set for the 4Runner matched the USB plug lights of RAM. Maybe I knew I was going to go this route 5 years ago

*Note: I used a piece of e-tape to cover one of the switch while I used it on the 4Runner. That switch was not wired to anything, but set up as a master switch to turn all the frontal lighting on and off. It is helpful at night time since I don't have to toggle each switch individually to turn them on or off. I used e-tape to cover it because there's no suitable legend for it and it'd be too bright if I didn't cover it.
**Installer note: When installing these panels for my customers, I like to cover the blank switches with e-tape for the same reason: too bright when left naked. E-tape is a good alternative because it's easy to peel off and blocks the light.
That's pretty much it for today. Tomorrow, as it is the last day for the long weekend, I am going to clean up the floor console area to get rid of all the shavings. Then, I will crawl under the truck to check if my planned way to route chase light will get in the way of sliders install or not. If not then I'll try to knock that out, if it will affect the slider install then I'll wait till sliders are on to run the wires. Also, I'll try to get the bed rails in as well.
