5thGenRams Forums

Register a free account today to become a member! Once signed in, you'll be able to participate on this site by adding your own topics and posts, as well as connect with other members through your own private inbox!

Boogielander Build

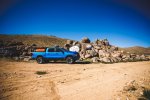
On Christmas Eve I decided to go to Johnson Valley the next day to do some photoshoot, have lunch, and do some testing.
One of my buddies decided to go with me (single guys, no Christmas thing to do lol)
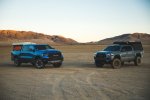
IMG_2053.jpg
Every time I look at that GFC it just makes me want to get one too, but I can't cough up that much for a camper tent :cry:
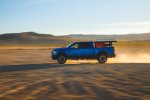
IMG_1997.jpg
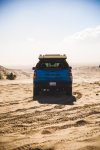
Got to JV at around noon-ish and tried some trails. Found some problem with bed rack/ roof tent setup: when going on rutted trails, the weight of the tent would create this side-to-side motion which shakes the rack and the side panels are not staying where they are. This is due to a few things:
  1. Weight of tent. The tent, given that it is motorized hardshell with solar panel on top, is at least 160lb. For camping and fire road this is fine. But if I want to tackle King of Hammers desert trails (not the crawling section) or attempt to do TRX/ Raptor things, this is a problem. And I want to attempt TRX/ Raptor things.
  2. Rack is not boxed frame, so structural rigidity is not enough to handle the constant shifting weight of the tent.
  3. Side panel hardware are not tight or the weight of the accessories are dragging the panels down when going through whoops.
Proposed solutions:
  1. Get rid of the tent. For day runs or high speed runs I remove the tent and only put it back for overnight camping trips.
    1. This is only a band-aid solution, as I am certain I will be going on trips where going through rutted trails when I do extended days trips. And I will be facing the same problem again.\
    2. Get rid of roof tent and sleep on the ground. This is not ideal either because I don't want to deal with getting myself all dirty while pitching or putting away ground tents. Also I don't want to be dealing with pitching tent after a day of driving or extra time to pack up ground tent in the morning.
    3. Sell this tent and get a lighter weight option. This is the solution I decided to go with. I am looking at light weight options such as GFC Superlite V2 or Inspired Overland options as they are lightweight and relatively affordable. So if anyone local in SoCal is looking for a motorized roof tent for cheap please let me know (or if you know anyone looking for one, please send them my way!)
  2. This problem is more complex. I need to find a way to "box off" the top portion of the rack to provide more structural rigidity. Basically right now the tent is sandwiched on the bed rack, while I tried my best to tight down the nuts and bolts, it is not enough. Here's the situation:
    • The more I tight the nuts and bolts, the top cross rails just end up splitting due to the clamping force. Which then make the whole sandwich not as tight as it should be.
    • So this will be a two-part solution:
      • First, I need to get another 2 sets of tent mounts. One set will be sitting on top of the cross rails running parallel to the existing tent mounts and tightened with nylon nuts. This will create a clamping force that's not solely relying on the weight of the tent. In addition, I will also need to add another pair of mounting for the middle cross rails and do the same sandwich.
      • Second, I need to box off the top. Reason is that currently the top portion is a C channel frame, and as we know C channels are not as rigid as boxed channel. One example is early Toyota Tacoma that suffer from bent frame just with daily work use. They are just not as strong. That's why most trucks built to last (like ours) have boxed frame instead of C-frame. I will need to get in contact with Chassis Unlimited to see if they can cut something for me and correct this issue.
  3. This should be a simple fix: Tighten all the carriage bolts and use locking washers to grab on to the slot opening. The nylon nuts are not loose at all, as the reference markers have not moved. So I know it's not the nuts getting loose but more of a hardware not tight enough or not grabbing to the rails. My two-step plan to attack this problem should prevent similar issues from happening again.


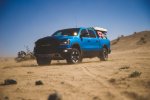
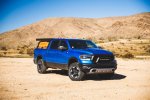
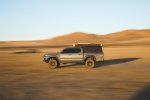
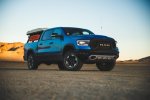
Aside from these discouraging findings, the day went well. We had steak in the middle of the dry lakebed, chilled for a bit while waiting for golden hour. I started positioning the trucks and snapped away when the light was right, and managed to taught my buddy how to take rolling shots.
IMG_1978.jpg
One of the shots I took for his taco.
IMG_2044.jpg
Ended the day with a beautiful shot like this.

Tomorrow I will be going under the truck to check every nut and bolt that I've turned when I installed the Fox, and hopefully nothing is missing/ loose;)
I mean, everything should be fine because I drove ~100 miles home and the truck felt fine!
 
I thought I had fixed the rack and tent issue, but apparently not quite... more on that later.
IMG_2080.jpg
For last day of the year a few of my friends went to Superstitious OHV area just to practice overlanding. This was the first time I went out for legit "overland" style trip in over 6 months, so I was rusty.
Let's see what I did wrong:
  • Forgot my RTT ladder
  • Forgot my buddy heater
  • Forgot to bring all of my ammos
  • Forgot to bring my portable toilet and TP (luckily I didn't have to drop the deuce till we encounter some vault toilet)
  • Overcooked 2 out of 3 pieces of steaks by accident. Instead of rare, they were medium rare. Also over salted one piece.
But man, it was great to be out on dirt and camp again!

IMG_2091.jpg
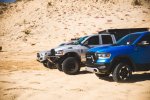
For this trip, we had the three major types of trucks: mid-size (the taco), light duty (me), and heavy duty (my friend's third gen 2500, with over $10k in suspension upgrades
I was the only one without GFC, and now I'm questioning my decision to go bed rack and RTT. Yes, they are that great.
IMG_2104.jpg
Got to play a bit in the dunes before the problem from last week came back to haunt me. After more poking around by my HD friend (he has engineer background) we arrived at the conclusion that carriage bolts are the culprit. I will contact Chassis Unlimited to report this problem and see if they can get me flanged bolts instead of carriage bolts instead.
This issue killed the day for me. I was constantly looking over my mirror to make sure the bed rack and roof tent are not vibing on their own pace too much. This also prevented me from fully enjoy the high speed section of the trail where the other two trucks were doing 40-50 MPH while i was stuck at no more than 30 MPH on smoother sandy sections and 15MPH on slightly rutted terrains. I need to go back for redemption!
IMG_2114.jpg
The OHV area was so windy today that sand was blown everywhere. Every time I opened the truck door I just get sandblasted and my interior is caked with sand too. A 2000 miles truck with sand inside!
 
I thought I had fixed the rack and tent issue, but apparently not quite... more on that later.
View attachment 147613
For last day of the year a few of my friends went to Superstitious OHV area just to practice overlanding. This was the first time I went out for legit "overland" style trip in over 6 months, so I was rusty.
Let's see what I did wrong:
  • Forgot my RTT ladder
  • Forgot my buddy heater
  • Forgot to bring all of my ammos
  • Forgot to bring my portable toilet and TP (luckily I didn't have to drop the deuce till we encounter some vault toilet)
  • Overcooked 2 out of 3 pieces of steaks by accident. Instead of rare, they were medium rare. Also over salted one piece.
But man, it was great to be out on dirt and camp again!

View attachment 147614
For this trip, we had the three major types of trucks: mid-size (the taco), light duty (me), and heavy duty (my friend's third gen 2500, with over $10k in suspension upgrades
I was the only one without GFC, and now I'm questioning my decision to go bed rack and RTT. Yes, they are that great.
View attachment 147615
Got to play a bit in the dunes before the problem from last week came back to haunt me. After more poking around by my HD friend (he has engineer background) we arrived at the conclusion that carriage bolts are the culprit. I will contact Chassis Unlimited to report this problem and see if they can get me flanged bolts instead of carriage bolts instead.
This issue killed the day for me. I was constantly looking over my mirror to make sure the bed rack and roof tent are not vibing on their own pace too much. This also prevented me from fully enjoy the high speed section of the trail where the other two trucks were doing 40-50 MPH while i was stuck at no more than 30 MPH on smoother sandy sections and 15MPH on slightly rutted terrains. I need to go back for redemption!
View attachment 147616
The OHV area was so windy today that sand was blown everywhere. Every time I opened the truck door I just get sandblasted and my interior is caked with sand too. A 2000 miles truck with sand inside!
nice setup/truck and again cool pics, thanks for sharring with us :)
 
it feels surreal that i've done everything I planned to do regarding building the truck in less than 1.5 months.
Aside from waiting for a few more items that I ordered for black friday (sliders, mountain hatch) and waiting for my BD LP6 to arrive, I'm basically done!

Probably won't have much to update in the build left, so I'll be focusing more on my personal thoughts, reviews, and any technical stuff from now on.
Ill also be publishing more on my personal site here.
The build thread will remain a more "summarized" version of my blog though, just so that if anyone's interested in the details. Trust me, they will be great read to waste time at the office ;)
 
Thursday I drove to my friend's place to drop off the heavy RTT. Both of us don't have a lot of friends who were free during weeknights to do what I call as workouts, so we only had 3 guys and I was the tallest one (more on that in a bit)
I had help from 4 guys when I put the tent back on a while back, when the truck was stock height. And it was a struggle already. Now I only had 3 guys, and the truck is lifted by another 2 inches or so. We had to get creative on getting the tent off, and we finally settled on having the shortest guy pushing the tent up and to the back from the bed with his legs and feet, while the other guy and I grab on to the tent from behind. Eventually we got it off, carried it up his drive way, and put it down on some trashed tires on the ground. Being the tallest one did not help at all, as I had to carry the most load with my arms and back to make it stay leveled. And we almost dropped it when we were setting it down too.

With the tent off and Carli HD springs in, the rear end felt more bouncy and firm than I like. I think cranking down compression could help, but I'll just stick with it for now because the new lightweight tent will go on pretty soon.

Friday night I replaced all 112 nuts and carriage bolts with Grade 8 yellow zinc plated nuts, washers, and bolts. I had determined instead of using carriage bolts with square shanks that could be too tall for my applications, I would change all of them to regular bolts instead. I then torqued each and every 112 nuts and bolts to 35 lb/ft, and marked all of it. The only ones I did not replace were the 24 carriage bolts on the mount, because the plates were thick enough to cover the square shanks and not caused me any trouble. Whole process took me a few hours, but when I shook the bed rack it felt more tight than before.
I also inspected the hardware I replaced; most washers had imprints from the square shanks of the carriage bolt, and most bolts and some kind of scarring on them. This proved my suspicion true: that carriage bolts' square shanks were too thick for the plates that they were creating gaps between the washer and the plates, so they felt like they were tight but there were actually rooms for play.

Saturday I was recovering from the soreness that resulted from Thursday and Friday.

Sunday I decided to clean the interior of the truck. We basically spent most of the day on Sunday in sandstorm over the new year weekend trip, and I had a lot of sand blown into the cab whenever I opened and closed the door. We also did a "sound system shootout" over that weekend with people coming in and out of my truck, and lots of sand were carried in on people's boots. I did a quick wipe down when we were airing up, but today I finally had time to rip out all the floor mats, washed them all, and vacuumed the floor, seats, and every nook and cranny that I could fit my shop vac's nozzle through. I also did a full interior wipe down as well, and paid special attention to the steering wheel. It was disgusting and satisfying to see white baby wipes turn brown from all the dirt lol
Finally, I wiped the interior of windshield and the front windows. I vape when I drive (I'm trying not to smoke inside the truck to preserve the new car smell for as long as I can) and vape clouds stick to windows. Normally they are invisible, but not in winter when windows fog up easily. It is annoying to see. I also wiped the windshield and applied some 10 years old RainX in preparation for my drive to NorCal in the storm next week to have my new tent installed.

I don't know why, but when I received the truck when it was new, whenever it rained the windshield does not bead water. Rain water would just splatter on my windshield and smear everything. But after I washed the truck back in November that problem went away, and now it returned again. I applied some RainX hoping to make water bead, so the drive up at night would be less tiring.
I don't know if the 10 years old RainX will work or not, but at this point it couldn't get any worse than without.
 
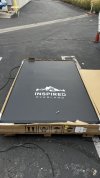
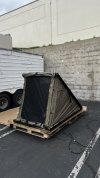
Well my Inspired Overland lightweight RTT finally arrived.

thumbnail_IMG_3276.jpg

Originally I was going to Bay Area to pick it up and have the team install it for me, but since weather wasn't on their side this past week and my work schedule does not allow me to take more days off to drive there in the next couple weeks, they offered to ship it to me.
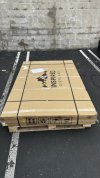
thumbnail_IMG_3277.jpg
I unboxed it on the floor on top of the pallets and opened it up to check everything. It does comes with mounting hardware, mattress, and ladder in a ladder bag. Pretty good deal for the price to be honest.
I also installed a new solar panel from Renogy. This new solar panel is the "soft" type and I secured it with 6 pairs of neodymium magnets since the top cover is technically a "soft cover." I was skeptical about using magnets as anchoring device for the solar, but at 70MPH the magnets held and the panel didn't move at all. Regardless, I will triple the magnets for even stronger hold in case of strong wind.
Read on for my initial impression of the tent.
thumbnail_IMG_3279.jpg
Initial impressions on the ground:
This is my first clam shell type RTT. I like the size of the opening, as it is way bigger than the old tent I had. I don't really have to crawl to get in if I go in from the back.
In addition, the side windows are also entrance/ exit points and there are brackets for the ladder, if I saw the right thing.
Tent also comes with two additional foldable poles that are used as additional support when wind picks up.
Two shoe bags are attached as well. I no longer need to bring my dirty shoes in the tent and put them away in shoe bags inside.
Mattress is only 1.5", a little bit thin for my liking. However, if I keep my sleeping bag and pillow inside, I doubt I will be able to fit a 3 in mattress and be able to close it.

Now the most important part: weight
Marketed as a 87lb tent, I could feel the difference between this tent and the old tent I had when I lifted it off the pallet to check the bottom side. One person can easily lift one end of the tent up, where as my old tent required two people to do the same task. When we were mounting, I enlisted 3 additional pairs of hands just so we can lift it up and adjust the position at one shot without me climbing up and down the stool.
And it was a breeze! It was like 4 people lifting 25lb each, whereas the distributed weight on 4 people would be about 50lb or more each!
The lightness also translate to truck performance as well. When I put on my old tent, I immediately felt the weight of the tent on the truck. This time, the truck handled it like it wasn't there in terms of cornering, acceleration, and braking. I was able to put in a pair of 39" Geolanders in the bed and the suspension didn't squat!
I am looking forward to my desert shakedown trip next weekend to see how it performs.

Driving experience:
Like mentioned above, the weight saving improved my driving experience by a lot since I don't feel the heaviness in the bed area.
Also, I have the habit of checking my mirror constantly with the tent on, a habit that I picked up from my old tent. You know, just checking to see if the tent's still there or if it has shifted during driving. But with the this tent, since it's a few inches narrower than my old tent, I couldn't see it from both my outside mirrors. That caused me to panic a bit today, as I thought my tent had fell off the rack (more on the reasons for that later).
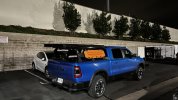
Additionally, the IO tent is also a lot slimmer than my old tent. Top of my old tent was sitting about 5 inches taller than my cab, so it kind of messed up the aero of the truck. The IO tent, on the other hand, even with the solar panel installed, sits about flush if not an inch or so over the cab. This helps with highway aero, as there's no brick sticking out in the bed area. The aero aspect is neglectable though, as my truck is basically a brick in the wind with FOX lift, and MPG improvement was not drastic enough to celebrate.

The issues I faced:
Mounting solution is basically industry standard 2 t-slot rails and U-shaped brackets of various sizes. However, there are two issues in my application:
1. Provided mounting brackets don't fit. Even though I had double checked with IO that their brackets would fit my rack and the IO representative assured me they would, the brackets didn't fit. They were off by maybe a quarter inch or so. I had to buy 1/4" thick aluminum bars and bend them to omega shape to use as mounting brackets. And because my crossbars are a lot taller than the bolts IO sent me, I had to use my own bolts and nuts. That was the exact reason I wanted to go to them and have them do the install, as it would be their problem to deal with instead of my problem. But at the same time, I'm glad I didn't go because the worst case would be they couldn't get it mounted and I would be sh*t out of luck but to return home empty-handed.
2. The T-Slots are not full length. I understand the reason why they didn't use full length T-slot rails: for weight saving and most applications don't require full length rails. However, in my application, I need the T-slot rails to the hinge end of the tent (or all the way to the front) because that's where the most forward pair of cross bars are. So I ordered additional t-slot rails and I will have to extend them myself for a 100% secure mounting.
As of right now, my custom mounting solutions are freeway-ok, but definitely not off-road ok. Hopefully weather gets better tomorrow so I can install the hardware I ordered and get the mounting to my spec!
thumbnail_IMG_3282.jpg
Yes, I know there are wiring hanging, but since I'll be moving the tent forward with parts coming in, I'll wait till the tent's position is final before I clean up the wiring.
 
This won’t help with the short t-slots, but take a look at the tent mounts from Wheel Every Weekend. I used them with my Roofnest Falcon XL and Xtrusion Overland rack, and they are a huge upgrade over the stock mounting hardware.

Nifty tent. That’s about half the weight of my Falcon.
 
This won’t help with the short t-slots, but take a look at the tent mounts from Wheel Every Weekend. I used them with my Roofnest Falcon XL and Xtrusion Overland rack, and they are a huge upgrade over the stock mounting hardware.

Nifty tent. That’s about half the weight of my Falcon.
oh yeah i checked them when I had my old tent. Unfortunately my rack's dimension does not match anything they offer. My crossbars are about 4" wide and 2 1/8 inch tall.
 
I thought I had fixed the rack and tent issue, but apparently not quite... more on that later.
View attachment 147613
For last day of the year a few of my friends went to Superstitious OHV area just to practice overlanding. This was the first time I went out for legit "overland" style trip in over 6 months, so I was rusty.
Let's see what I did wrong:
  • Forgot my RTT ladder
  • Forgot my buddy heater
  • Forgot to bring all of my ammos
  • Forgot to bring my portable toilet and TP (luckily I didn't have to drop the deuce till we encounter some vault toilet)
  • Overcooked 2 out of 3 pieces of steaks by accident. Instead of rare, they were medium rare. Also over salted one piece.
But man, it was great to be out on dirt and camp again!

View attachment 147614
For this trip, we had the three major types of trucks: mid-size (the taco), light duty (me), and heavy duty (my friend's third gen 2500, with over $10k in suspension upgrades
I was the only one without GFC, and now I'm questioning my decision to go bed rack and RTT. Yes, they are that great.
View attachment 147615
Got to play a bit in the dunes before the problem from last week came back to haunt me. After more poking around by my HD friend (he has engineer background) we arrived at the conclusion that carriage bolts are the culprit. I will contact Chassis Unlimited to report this problem and see if they can get me flanged bolts instead of carriage bolts instead.
This issue killed the day for me. I was constantly looking over my mirror to make sure the bed rack and roof tent are not vibing on their own pace too much. This also prevented me from fully enjoy the high speed section of the trail where the other two trucks were doing 40-50 MPH while i was stuck at no more than 30 MPH on smoother sandy sections and 15MPH on slightly rutted terrains. I need to go back for redemption!
View attachment 147616
The OHV area was so windy today that sand was blown everywhere. Every time I opened the truck door I just get sandblasted and my interior is caked with sand too. A 2000 miles truck with sand inside!
This is a awesome thread! I definitely want to add a tent and rack to mine for my kiddos. Keep up the great work and thank you for keeping us informed!
 
This is a awesome thread! I definitely want to add a tent and rack to mine for my kiddos. Keep up the great work and thank you for keeping us informed!
You're very welcome!
I try to be as detailed as possible and this thread serves as a journal where I scribble thoughts and processes to help fellow DT owners to see what products are good to go from the box and what needs modifications to be up to my spec so people know what to do!
 
Enjoyed reading through your build thread. Hydro Blue is great color on the Rebel. I have a Rebel in Granite, it's my first ever truck ! I have the EcoDiesel motor, and enjoying it so far. Quite interested in Overlanding, although my aim would be to get to remote spots for hiking, rather than for the fun of the driving itself. Been tent camping for years. Got a 23Zero RTT for the truck late last summer and got a few trips out in it. Much heavier than yours I think, it's 170lbs. It's roomy, and being a clamshell design ( their Kabari model ) it closes up real quickly which I wanted for getting out of camp quick for an early morning drive to a hiking trail head. I went to Overland Expo for the first time last summer - there was one in Bend, OR, 4 hrs from home for me so went over there, and was blown away with all the gear and gadgets ! Planning on putting an RSI SmartCap on the truck this year and mounting the tent on that.
 
Enjoyed reading through your build thread. Hydro Blue is great color on the Rebel. I have a Rebel in Granite, it's my first ever truck ! I have the EcoDiesel motor, and enjoying it so far. Quite interested in Overlanding, although my aim would be to get to remote spots for hiking, rather than for the fun of the driving itself. Been tent camping for years. Got a 23Zero RTT for the truck late last summer and got a few trips out in it. Much heavier than yours I think, it's 170lbs. It's roomy, and being a clamshell design ( their Kabari model ) it closes up real quickly which I wanted for getting out of camp quick for an early morning drive to a hiking trail head. I went to Overland Expo for the first time last summer - there was one in Bend, OR, 4 hrs from home for me so went over there, and was blown away with all the gear and gadgets ! Planning on putting an RSI SmartCap on the truck this year and mounting the tent on that.
this is my first truck truck too lol. I've been calling my T4R a truck since I used it to haul things quite often. Your tent is lighter than my old tent. That thing was north of 200lbs and i feel the weight when i drive.

i used to hike until I found overlanding lol now i just let the truck do the hiking for me.
 
So this past Friday I fixed the IO tent mounting issue by ordering additional T-slot rails and hardware from McMaster and extended the original T-rails that came with the tent. I also added more mounts so now all crossbars have one pair of omega shaped custom mounts (that my friend and I bent ourselves). With the help of my friends we also finalized the location of the tent on the rack. I then tore off all the LED strips within the crossbars and reapplied 3M VHB tapes to properly secure them, and tucked all the wirings and ziptied them.

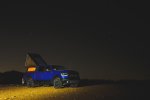
Over the weekend my friend and I went up to Stoddard Wells area to practice overlanding and do some high speed testing.
IMG_2186.jpg
We rolled into camp at night, and immediately after hitting the dirt I realized I need a lot more forward lighting. I am starting to think that the LP6s are not going to be enough, and perhaps I need to swap my Squadron sports to XL spot and aim them forward. I can then move the ditch lights to the rack and aim them forward and down to serve as ditch lights.

Overnight it was about low 30s and very windy in the desert, and I realized I need to bring my portable toilet and toilet tent out again. My stomach don't like being exposed to cold weather, especially after a good meal. But the downside of using toilet tent would be... wind. Perhaps I should just bite the bullet and get a GFC instead. Or I can just eat less when camping in the cold too.

About the IO Tent:
Setting up and putting away was easier than my old tent. I just unzip the zippers and push the lid up, unhook the bungee cord that help to fold the tent, and let the struts do their thing. Putting it away just do everything in reverse.
Due to the wedge shape, the actual length of the tent was not as great as my old tent. I found myself having to sleep diagonally to fit, which was ok as I got used to it pretty quick. I am sure it would work fine if I sleep straight, but my head would be touching the entrance of the tent.
In addition, for some reason the tall entrance side has no zipper on the bottom, so the only way to keep the tent closed was to fold the bottom of that flap in. Once folded in, the rear entrance flap stays in even in high wind conditions. Color me amazed.
The built in zipped access port is a great feature. I was able to feed my propane line into the tent to hook up to my buddy heater and zip the access port close. That is a feature I didn't have in my old tent, and I find that convenient. I can see myself hooking up my diesel heater's port in there in the future winter trips and portable AC in summer. Another great feature is the built in storage panels. I now finally have a place to put my glasses, keys, and headlamps when I go to bed. I also welcome the integrated shoes bags; they are large enough for me to fit a pair of size 12 shoes, and gone are the days where I need to put my shoes inside the tent. I can keep my tent clean, finally.
However, throughout the night I had cold wind constantly blowing into the tent from some openings at the end of the zippers on all 3 sides. I learned to block them off with my jacket, hoodie, and jeans, and the cold wind stopped. I will also need to add a bungee strap to keep the pull down strap secured to the provided wind poles, too. That pull down strap was flapping around the whole night, and I couldn't really sleep until the wind died down at dawn.
Future modifications: For sure I will need to add string lights in the tent to help me see at night.
Overall, I am quite happy with the tent. The lightness, the wedge style (I've been wanting a wedge style since my T4R days, but I couldn't shell out whatever manufactures were asking for when my friend was selling his for $600), the 3 side access, the features, and the price. Would I recommend it to my friends? Yes, absolutely!

IMG_2200.jpg
The next day, we hit the trail to visit the painted rock. I parked on the side because my other friends whose rigs have sliders and armors took the spots on the rocks, while I wasn't comfortable putting my truck on anything that could lead to damage. I also sat out on a few hill climbs too, since I am not a big fan of steep slopes and off camber, and some of the "bonus points hill climbs" they did have a combination of both. The truck is too new for me still, and I'm still learning the dimensions and all the electrical nannies of it. I will continue to sit out steep slopes and off camber until I am 100% sure that I know this truck.

But on the high speed section, oh boy what a treat! I was hitting mid 50s on the high speed section, and the Fox 2.5 did their job. There were a few sections that was kind of rough, but not once did I lift off due to lack of confidence in suspension. The 2.5 soaked up everything and screamed for more! I paid special attention to the bed rack as well. I observed that the rack still shakes, but it wasn't the kind of shake that I had from before. I realized it was the bed shaking (as it should), and because the top of the rack is further away from the source of movement (the bed), the vibration/ shaking gets amplified. But it was a controlled shaking, so I am not as worried. However, I do believe some bed stiffeners are needed, since the bed rack, tent, full rotopax, and recovery boards add up to about 200lbs.
All in all, I think my previous issues are all fixed and I'm happy to say that the truck is ready for some long-term expeditions!

If anyone know where I can get bed stiffeners for the DT platform please let me know!
IMG_2264.jpg
 
Awesome to see the boogielander get out there and boogie! Awesome thread and great updates.
thanks buddy.
I cried of joy when I was doing 50 on dirt and skipping through the smaller whoops, like finally after almost a month I finally got it dialed in.
There are still some vibrations in the bed area but I think it's the bed vibrating, and I was told that's completely normal.

Im gonna need to figure out what to do next to be able to eat bigger whoops.
 
well since i have nothing to do i've been toying with the idea of swapping out my ditch lights, just because the squadrons are so small on a full size truck.

been considering doing XL80 or XL with spot pattern for forward PLUS a S1 in cornering pattern for ditch. The only thing I fear is that may be cutting it too close to the weight limit of the SDHQ bracket and I have an antenna mounted on the ditch light that wiggles when driving...

hmm decision decisions. :unsure: :unsure:
 
Quite productive this weekend.
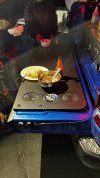
My Mountain Hatch Tailgate Insert was delivered on Tuesday and I put it on Friday. Within 30 seconds of installation my friends and I were enjoying our dinner on the newly install dinner table
thumbnail_IMG_3364.jpg
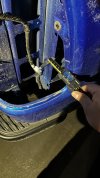
Then, I measured the distance between bed support and the outer shell of the bed per SDHQ's request. We are trying to figure out if the TRX bed support brackets will work with the rebel, but it seems like it won't fit. Well, I guess the quest for bed stiffeners continue!
thumbnail_IMG_3362.jpg
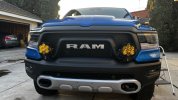
I then pulled front bumper to install Dark Dune's front bumper light brackets. These brackets had been sitting in the Decked since November and now that my LP6s are delivered, it's time to get them on.
I followed the first video instruction I found on how to install these, but struggled with removing the "cheeks" under the headlights. I spent probably 40 minutes on attempting to remove the driver side cheek without breaking anything, and eventually figured there must be a different way to do this.
So I searched more. This time, I found out that I don't need to remove the cheeks, but rather loosen the nuts and bolts and harness and remove the bumper carefully would do the trick. From then on, it was smooth sailing and I managed to finish the whole install and wiring in about hour and half. Then, with my OCD kicking in, I proceeded to move the accessories around to make the switches location more logical.

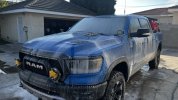
On Saturday, I gave the truck its first wash since November.
thumbnail_IMG_3367.jpg
Nothing fancy, just a rinse and blast with foam canon. My primary goal was to prepare the underside for my rock sliders that are estimated to be ready this month.
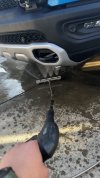
On my previous trip to the desert, I drove over a couple mud puddles and the underside was caked in mud. I hate working on dirty customers' trucks, especially when I have to get under them and then get caked in mud. Since I'm not paying myself to install my sliders and rock lights, I am not going to get caked by my own truck. So I broke out my trusty undercarriage nozzle and blasted away.
thumbnail_IMG_3366.jpg
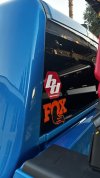
Then, I applied some stickers.
thumbnail_IMG_3370.jpg
Those are not all the stickers I have, but the ones I have plenty of. I stopped after 2 because I need to figure out a way to make sure I put them on as straight as possible, and that's an issue I'm going to tackle later.
I also admired my LP6s. But I honestly wish I went with LP9 Pros instead. Size does matter, and the bigger the better (that's what she said)
thumbnail_IMG_3369.jpg

Sunday
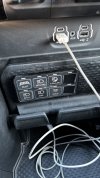
While my friends went to play hill climbs in the desert, I took the time to redo my Switch-Pros legends. I had the 4Runner configurations on the whole time, but now that I got majority of my lightings done on Switch-Pros already, it's time for me to properly redo the legends to match where each switch controls.
thumbnail_IMG_3371.jpg
Yeah i know it's not perfectly lined up but it's hard to line it up when i'm bending over and plus I don't really need to look at the legends when I use the panel anyways. The two black tape covered ones are the ones I have nothing wired to at the moment but I probably will later on. So instead of using the blank legends I just used e-tape for easier removal.
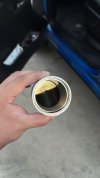
I also checked my catch can while I was wiping my engine bay.
thumbnail_IMG_3372.jpg
I think I only put on about 800 miles between catch can installation and today, and that is quite a lot of oil than I anticipated.
thumbnail_IMG_3374.jpg

Next week:
additional red bed lights and white cooking lights
possible BD S2 for bed rack side shooters
Hopefully my rock sliders and rock lights.
 
Last edited:

Users who are viewing this thread

Back
Top