5thGenRams Forums

Register a free account today to become a member! Once signed in, you'll be able to participate on this site by adding your own topics and posts, as well as connect with other members through your own private inbox!

Boogielander Build

I won a raffle for $700 off any set of 4 tires about 2 weeks ago, so I guess the universe heard my whining about 33s being insufficient LOL
I decided to go back to what I had good experience with: Falken Wildpeak AT3W, but this time it's 35x12.5R18
View attachment 157847
I asked the shop that did the raffle but their price was no match to what I could get from MY shop, so I ordered the 5th one from my shop.
I also ordered a set of Method 305 NV Bronze, because I was going for the classic color combo from Subaru Impreza 22B.
View attachment 157848

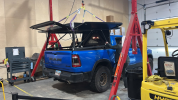
I started at around 1PM on Saturday, when we close the gate to the shop.
First I dismounted the TPMS sensors from the OE wheels and set them aside. I much rather deal with swapping over sensors than buying new ones and program them to my truck lol.
View attachment 157849
Then, I put the new wheel on the machine to install TPMS sensors back before mounting the tire.
This is where I say "be very very liberal with lube application." I used a lot of WD-40 on the rim to make mounting tire and seating the bead easier.
Make sure you align the yellow dot with the valve stem as close as possible or else you will need to put a lot of wheel weight.
(I aligned one at the orange dot and ended up needing 7oz of weights. After debead and realign it with yellow I only needed 1.75oz)

View attachment 157850
Balance it. Usually I put the wheel weight toward the inner edge of the wheel, but this is no go on our truck. 18in wheels barely fit due to our big brakes, and I found out about this after I balanced all 5 and fitting them onto the truck.
I had to rebalance them all by moving the wheel weight toward the face.

Oh wells, you live and you learn.

View attachment 157852
View attachment 157851
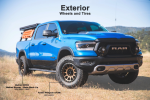
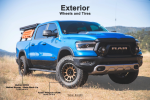
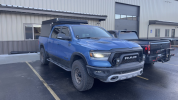
The end result. Not going to lie I was slight disappointed when I dropped it down to the ground. I was expecting a big difference in ground clearance but honestly it wasn't much. Maybe, just MAYBE, a high clearance front bumper will give me the illusion that I have a lot of ground clearance lol

View attachment 157853
And the spare doesn't fit stock location due to bore size. That's the part I need to figure out now. For now, it will stay in the bed.

View attachment 157863
View attachment 157862
Also trimmed A LOT to achieve maximum clearance
nice picture :) the wheels looks good

for trimming you can always use a heat gun (heat protection glove) heat the trim and reshape them, cool them down quickly, works well :)
 
Last edited:
nice picture :) the wheels looks good

for trimming you can always use a heat gun (heat protection glove) heat the trim and reshape them, cool them down quickly, works well :)
oh yeah that's always an option but i figured the plastic parts are all replaceable and the last thing I want is to deal with rubbing while out on the trail lol

on Toyota platform (where I started from) we had to do body mount chop to fit 33s. Yes, chop the body mount, push it in, weld it to close the gap, just to fit 33s. We've done so much that I'm actually indifferent to cutting the body loll
 
any way you can show a better picture of where u placed the weights? And what raffle is this i need to grab some spots... lol
the weights are now toward the spoke of the wheel.

the raffle was for a charity hosted by my local outdoorsman group lol
 
Looks good brother! Sounds like you got a perfect excuse to get that high clearance bumper if you ask me lol.
i do and i'm thinking about that lol

but im gonna take a break first; i've yet to see any existing designs that i like. I'm gonna go bother the companies focused on yota platform and try to see if they are willing to do some R&D loll
 
oh yeah that's always an option but i figured the plastic parts are all replaceable and the last thing I want is to deal with rubbing while out on the trail lol

on Toyota platform (where I started from) we had to do body mount chop to fit 33s. Yes, chop the body mount, push it in, weld it to close the gap, just to fit 33s. We've done so much that I'm actually indifferent to cutting the body loll
thats crazy trimming lol
 
thats crazy trimming lol
oh yeah lol
we got to the point where we (our shop) can get away without doing body mount chop but we had to set the adjustable UCA a certain way. But even then there is NO guarantee that it will not rub while wheeling.

and our body guy got so good at it that it's impossible to tell the chop had been done.
 
So went on a long trip this Memorial Day weekend. 1328 miles to be exact.
1685498577701.png

I was quite impressed with my MPG, as I was constantly fighting head wind while going 80+ and uphill in addition to offroading. Had I not drive it like I stole it on pavement I think I'd see 16+ or even 17+. But I was way too ambitious with my trip planning lol
1685498891960.png
Overall, camping experience was great. I added a Gazelle T4 as a reserve tent, but will primary use it as a hangout tent during summer months.
I tried the EcoFlow Wave AC that I bought, and even though it is heavy, it is worth the weight.
1685498960233.png
The offroading experience was great too, at least for the first night. The campsite is on the bottom of Grand Canyon, right by Colorado River. The trail in was graded, and was a smooth ride once tire pressure's dropped. The tribal ranger and other visitors, on the other hand, were all saying the trail was rough because they didn't drop tire pressure since they don't have air compressor.
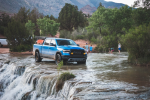
The speed limit for the trail was 10MPH and supposedly the trail should take bout an hour or so to complete each direction, but only took me about 20 minutes each way. There were several "river" crossings and I had a blast (see what I did there) going through each of them.
This is also the first time these 35s get aired down to go on trail. Can't say much about the performance though, since the trail was way too easy to find what the tires can or cannot do. Suspension was dialed in perfectly, and I didn't even touch the adjustment knobs. Let's just say I also managed to kick the rear end a couple times accidently giving it too much gas while cornering.
1685499404253.png
I also installed air compressor mount by @NH Overland a while back. Panel is great and the design and finish are of high quality. I used my old Moorflate from my 4Runner, and as you can see, I probably need the longer kit or to remember to find a carabiner to hang it on the hood. I think I'll go with a carabiner since I might have one in the garage.

Then it was another 6.5 hours of driving through Flagstaff, Fredonia, Colorado City, Hurricane, and Toquerville to Toquerville Falls, UT. I could've gone through Vegas and up through I-15, but I wanted to take a scenic route.
1685499829530.png
This trail, although not exactly technical, is way harsher compared to the day before (or when I went 2.5 years ago).
I didn't really put my 4Runner in 4L last time, and no stacking rock or get out and walk the trail to find a line was needed. However, this time, I basically ran the entire trail in 4L, got out multiple times to check the line, stacked rocks a few times, and went really close to the edge. I think it is a combination of long wheelbase and slightly low ground clearance that gave me extremely limited on my line choices. Had I went with a taller lift (which sacrifices desert driving capability) I wouldn't have this problem....
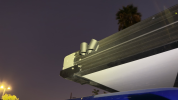
Anyways, I scraped the slider on the way up and the left side exhaust tip on the way down.

I also installed Desert Does It Seat Jacks a few weeks before the trip, and I wanted to test them out this trip. I am happy to say that whatever amount I paid was worth every penny, as I basically drove till the gas tank was nearly empty before I stopped for all 3 days. No break, no back pain, no leg discomfort, nothing!
I recommend this product to whoever drives long distance.
You can find it here: FRONT SEAT JACKERS® (2019-2023 RAM 1500)
 
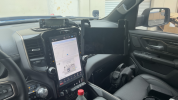
Put in my old RAM Mounts tablet holder and not satisfied with it. Going 67 Design route instead.
1686689495746.png

I use the tablet to run offroad navigation (Gaia GPS) I know Gaia works with carplay but in my experience when alternativing between Google Map and Gaia the phone/ carplay tends to crap out. So I run Gmap on my phone projected to carplay and Gaia on the tablet.

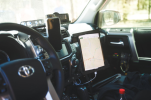
This arm and holder setup wasn't a problem before in my old rig, because it was mounted differently :
1686689467286.png
There's a center console "bridge" plate there for mounting, which fixed the vibration and stress caused by all the weight. In this application, the weight is directly transferred down to the bridge.

In the dash mounted scenario, the mass of the arm and holder are still going down (due to gravity), but now there's a leverage because the actual mounting (point of contact) is on the dash, sitting higher than where majority of the mass is. This creates vibration when going down the road and would create even more vibration when going down the trail. Vibration would then turn into forces of stress that may break my dash trim, where the dash mount is secured.

So, with the floor console in our trucks it doesn't make much sense to make a "bridge" type of panel, my only option is to reduce the weight of the tablet holder and the arms in hope of reducing vibration.


so, why 67design?
67Design is the only company that offers this kind of products with 100% Made In USA guarantee.
Sure, there are some other companies offering similar things for less, but they utilize materials crafted from china or straight made in china. I am no fan of chinese made products, since they often means cheaply made, low quality, or simply counterfeit/ copied.
So yeah...
 
Last edited:
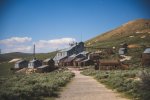
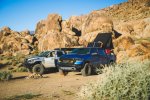
This July 4th weekend I decided to make it a long weekend for myself and went on a long trip with my friend in his 3rd Gen Cummins

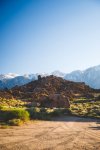
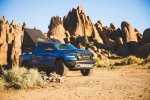
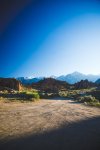
First stop: Alabama Hills, CA.
IMG_3216.jpg
IMG_3241.jpgIMG_3242.jpgIMG_3246.jpgIMG_3243.jpg

IMG_3269.jpg
Also since it's July 4th and I kept on forgetting to bring the flag to hang on the flagpole bracket I made, this will do.

IMG_3272.jpg
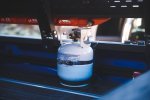
Also testing out the sturdiness of this Powertank Propane holder. I drilled two holes on it and added the last 2 T-nuts I have left from my bed power distribution box project to secure it onto the bed rail. In addition, I added a short ratcheting strap to help secure it in place when I go fast through desert.

I did hit some BIG whoops this trip and bottomed out but the propane tank didn't go anywhere.

IMG_3280.jpg
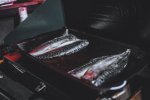
Friend's +1 doesn't eat red meat, so she brought fish. This was my first time cooking fish at camp and even though I had no idea what I was doing, my friend and his +1 approved. They were surprised the only things I cook at home are: steak, instant noodles, and hotpot. Basically anything I can whip up in less than 30 minutes.
I guess it's time for me to print cookbooks LOL

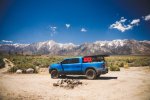
IMG_3283-Pano.jpg
Through the magic of Adobe, I was able to piece a few shots together to create this pano shot using my DSLR the next day
IMG_3304.jpg
Also went scouting for additional possible campsites for future trips.
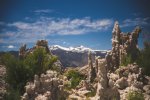
I like this site's view where you can see Mt. Whitney and the snowy mountains, but this site offered no shade.
No shade is not good, because that was the reason why I went to bed at 2 and woke up at 6. My tent was basically an oven at 6AM thanks to the desert sun.
 
Day 2 we left Alabama Hills, did some scouting, passed Reward Mine because both of our rigs were too tall for the mine, and pushed to Bishop.
There, we refilled out tank (I only used half a tank for first day; drove from Los Angeles to Alabama Hills, did a few scouting runs to find campsites, then drove to Bishop. Tank average dropped from 17 to like 14 when I was on dirt, but pavement cruising brought it back to high 15s.

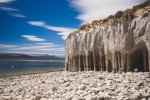
Once we resupplied (basically just me getting more energy drinks, soda, water, and some fruits) we went to Crowley Lake Columns.
Most people with regular vehicles had to leave their cars behind at the "gatekeeper," a rutted hill that only 4x4 or high clearance vehicles can go through with experienced drivers. Well, last July 4th weekend when we went the gatekeeper was nothing for our group. The jeeps went up in 2H and just let their suspensions do their jobs, the GX460s just went in 4L and walked up without breaking a sweat, and my 4Runner went up in 4L with grace.

This year, because of the wet winter, the gatekeeper got harder. The girls in their BMW X3 inquired about the trail at the trailhead while we were airing down were walking up the gatekeeper as I attempted it, and some other "hikers" were watching my attempt. I felt the pressure; the pressure of not letting the Ram family down. After all, my friend in his 3rd Gen just walked the gatekeeper like it was nothing, and I couldn't fail. So, I took the same line I took last year (the easier with no slotted ruts) and I ALMOST got stuck at the bottom of the hill. The soft sand was a lot deeper compared to last year; I tried to finesse the throttle, but I wasn't gaining speed. The pressure was on.
I knew I couldn't touch the brakes; I would be stuck for sure if I touch the brake. So I gave it more beans, and suddenly I got traction and launched myself up the hill. Holding throttle, I went through the first few ruts, then I felt my front tires taking turn lifting off. The ruts got deeper and longer, and my slider touched the ground. Still holding the throttle to keep the momentum, I asked myself if I should've engaged the locker at the bottom. But it was too late. I laid my bed, now I had to sleep in it and trust the truck to do its thing.
What must've felt like eternity was finally finished. I got to the top. The girls in the X3 looked impressed, and I continued down the trail. Later, my friend teased that I should've offered those two girls a ride, and I realized I missed the opportunity.
(As I am writing this, I am seriously kicking myself in the rear for not offering them a ride. The girl who asked me about the trail said she does have wheeling experience, and she looked quite attractive with her sunglasses on. As an Chinese American, I prefer to date within my own culture group; the only exceptions are girls with British accents - that's frigging sexy - and white girls who wheel - I don't mind them out wheeling me. I'm more of an overlander than a crawler anyways)
As we got to the columns, I let my friend and his +1 go do the hike while I relax and chill at the top. I was there a year ago, and even though we just had a wet winter, the water level at the Columns was lower than last year.
IMG_1283.jpg
Here's a photo from last year.

Then, we continued the trail instead of going out the way we came in. This turned out to be a mistake... because the bushes were so overgrown this year that I added a million more pinstripes to my truck.
But we got to the campsite that I had last year, but the river. With a view.
IMG_1299.jpg
Only to find out that it became private property for cows to graze on.
IMG_3307.jpg
So we went to my secondary campsite area.
And passed by these cows crossing the road.
One of them kept looking at me while chewing as I drove pass, so I stopped, roll down my window, and yelled "whats up! you like my truck?" and the cow mooed in agreement.

With the cow's approval, we carried on to our spot in Inyo National Forest. It's a spot that I've never been before, and was picked solely based on some internet research I did on company time.
It turned out to be great; we had view to the snow-capped Mammoth Mountains, while the temperature was decent that I had a great night sleep. The trees blocked the wind, and there was enough clear view of the sky for my Starlink to work.
Yes, I got a starlink recently. No, it's not vehicle mounted, yet.

Day 3 we left the campsite and found ourselves on a smooth dirt road. I was having a lot of fun, but unfortunately this was also where I hit a tree branch.
You can read about it here: Why you should always buy quality parts from reputable manufactures - Story and Pictures

IMG_3315.jpg
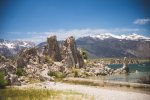
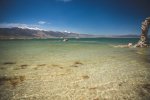
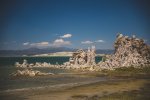
Anyways we visited Mono Lake and the Tufa tubes. I did the other shore back in winter 2018, and this time with snow-capped mounting as backdrop was a new experience.
IMG_3320.jpg
Lake water was clear, but way saltier than ocean.

IMG_3324.jpg
IMG_3350.jpg
 
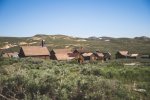
Finally, we arrived at Bodie Ghost Town right before sunset
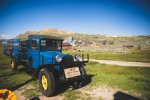
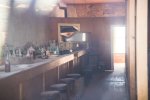
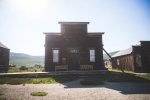
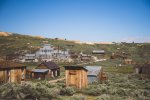
IMG_3380.jpgIMG_3422.jpgIMG_3499.jpgIMG_3576.jpgIMG_3550.jpgIMG_3529.jpg
It trips me out how things were left like that all these years. It felt like the people were living there one minute and disappeared the next.
The park ranger said there's a campground inside/ near Bodie, but now the roads are washed out but they're working on getting that fixed. I almost said I'll stay and volunteer, but realized I do need to make money to fund these adventures.
We spent almost 3 hours at Bodie, since I didn't make it there last time I came up. I will return for sure!


IMG_3599.jpg
Because we took too long at our destinations, we missed the opportunity to get to Kennedy Meadows to secure a campsite. We didn't know if the place would be packed, but that's not why I decided to call it for the trip.
The reason why I decided to pull the plug was because it'd be almost 10PM by the time we get to Kennedy Meadows, and I don't want to try our luck with those first come first serve sites at 10PM. So we pushed 4.5 hours of drive to get back home.

I think the best way to end this trip entry is to repeat what I had told my friend who doesn't like long distance pavement driving numerous times this weekend: "good views happen when you drive far."
Good views do happen when you drive far.
 
I completely forgot about my own build thread again... so here are some updates and trips I took:
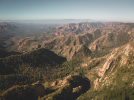
End of July, 2023:
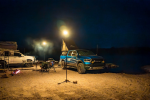
Went camping in the meadows with friends. They played in the water crossing but I said no thank you.
1705360957277.png
1705361004243.png
Labor Day Weekend, 2023:
Hit up Flagstaff and Grand Canyon South with friends. Had spicy hotpot up in the mountains when it was wet and chilly.
1705361079836.png
1705361090510.png
1705361107407.png
Sent the drone up the next day:
1705361163606.png
1705361191575.png
1705361274591.png
 
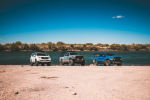
September I spent a night at the Colorado River on the United States side instead of People's Republic of Commiefornia side for air of freedom.
1705361476438.png
1705361492570.png
1705361508389.png
1705361531785.png
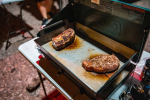
Griddle is custom made by my friend.
1705361608527.png
1705361620279.png
 
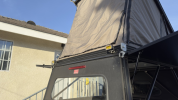
Then I went to Taiwan to visit my parents for a week in October, came back and jumped straight in to the last stretch of SEMA prep. Little did I know that trip I took to the river would be the last trip with the bed rack and roof tent combo. When I returned a customer expressed interest in my roof tent, and the plan was always to get a Go Fast Camper. So, tent came off, found a GFC for sale in Montana, scheduled an install date with GFC HQ, and off I went!
1705362059584.png
I went the week of SEMA, so... SEMA traffic.
1705362100788.png
Crossed into AZ briefly
1705362124849.png
1705362142909.png
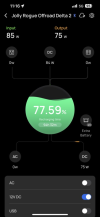
Left home with about 20% in my Ecoflow and after 8 hours only charged 50%. There was something wrong with this setup that I needed to look into.
1705362234527.png
First meal of the day, at almost midnight.
Then I passed Salt Lake City and headed north
1705361981889.png
This was Idaho
1705362290213.png
Stunning!
1705362335873.png
Nearing Bozeman, MT. Glad I picked the right week to go. It snowed the week before and supposedly was going to snow the week after.
1705362391626.png
Best Western Plus Bozeman. Costed about ~$200 a night but I used reward points for a free night.
I see that indoor pool behind glass wall and I see why it's $200 a night lol
1705362473124.png
GFC HQ bound.
 
1705362527115.png
The last time ever the truck has open bed
1705362555436.png
GFC show room. Rad people and a great place to be!
1705362579732.png
Now kith!
1705362612283.png
done.

The return trip was nothing to write home about... only got more depressed as the trip came to an end and as I neared People's Republic of Commiefornia. I really need to escape.
 
GFC is a great product but not without areas for improvement.
First item to address is the shifting @ high speed. The GFC bracket and design are good at securing the camper for 90% of the time, but when doing high speed desert runs when the rear axle bucks up and down it tend to shift the camper forward. GFC's mounting solution did not really account for that, since the only solution involves drilling into the bed and most people are not down for that.
So, made some brackets and solved that potentially expensive problem
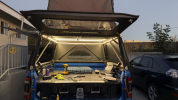
1705363173378.png
I used total of 4 brackets, one on each mount. This way it stops the forwarding momentum that cause the camper to shift.
1705363227015.png
Also added the GFC light brackets for chase lights.
1705363280893.png
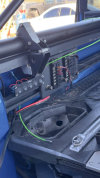
Then I took apart the power box I made and repurposed the parts using a plywood panel I made for testing purpose and wait for other parts to arrive.
1705363350141.png
Then I ran the chase lights.
1705363370928.png
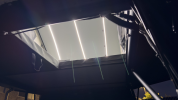
Also did version 1 of tent light
1705363389850.png
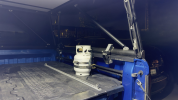
Put the propane back
1705363460182.png
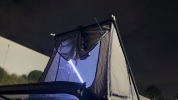
One week later I redid the tent light. This time I went with RGBW instead so I can switch between white and red and any other colors I want.
1705363556043.png
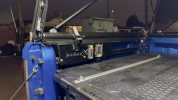
Also redid the panel. This time with a mount I made using scrap metal found at the shop.
1705363610722.png
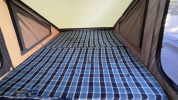
I also put in bed sheet for the tent.
1705363633534.png
And installed the RGBW lights for downstairs
 
1705363688261.png
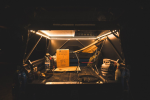
Loving this warm white. Much easier on the eyes at night.
1705363716113.png
Also installed the Starlink Dish mount, so I have better reception!
Then I went to camp for a night to see how everything goes:
1705363813257.png
It was about 37F that night, and I immediately noticed a few problems:
If I want to stay inside the camper because it's cold outside, I need a dedicated power source for camper lights. At that time, everything was wired to the starting battery.
Another one was the propane heater. Even if left on low it gets hot too quick, and the condensation build up associated with the propane heater was also an annoying thing. Plus my propane line burst early into the night.
Also, my new DC-DC charger I put in (remember when it only charged 50% of 3000wh in 8 hours when I went to MT? I found out I needed a higher output DC-DC charger so I swapped it out) was drawing too much amperage that it was melting my ST blade fuse, so it'd be better if it had its own power supply.
 

Users who are viewing this thread

Back
Top