5thGenRams Forums

Register a free account today to become a member! Once signed in, you'll be able to participate on this site by adding your own topics and posts, as well as connect with other members through your own private inbox!

Air Ride with DAYSTAR and REVEL Links!

Badass looking rebel there. When will these be available? And you are running 37s with just a level at all suspension levels? Any trimming required? Thanks in advance.


Sent from my iPhone using Tapatalk

Kit will be available in the coming weeks, feel free to call Total Chaos Fabrication for more exact timing! Slight trimming but 37s work great in all levels (except turning in entry/exit obviously)
 
I have a 2020 limited EcoDiesel with air ride suspension. Just received the daystar spacer and revel links. Was reading threads to adjust front links to 60mm but not sure I read anything on rear links. Any help is greatly appreciated.
Please excuse my ignorance just trying to level my truck and when ordering the rear links, do I order for lifting or lowering when it comes to the rear. Which package did you buy? I am looking at buying the front and rear links along with the daystar spacers.
 
Please excuse my ignorance just trying to level my truck and when ordering the rear links, do I order for lifting or lowering when it comes to the rear. Which package did you buy? I am looking at buying the front and rear links along with the daystar spacers.
either works but just got ahead and order the lifting links.
 
Here are the preliminary product release photos for the upcoming Ram 1500 Uniball Upper Control Arms from Total Chaos Fabrication Inc.. Lots of testing and R&D went into the proper fitment for the air suspension equipped trucks. Let me tell you… these arms are amazing. Pictured here is @the_rebel_voyager sporting the new arms on a 2020 Rebel with Air Suspension on a 2” level. Fitment for this vehicle includes 37x12.50 Nitto Trail Grapplers on 18” Method NV305 wheels.
What offset are your rims?
 
One last question, did you cut/trim down the bolts as the instructions say? I believe I have read where some people have and some have not.
Yep. Threaded a stock nut onto the strut before cutting down. Then used an impact after cutting to back the nut off which made threading the extenders on really easy.
 
Okkkkkkkkkkkkk, because I didn't find all the info i needed to do this I'm sharing my experience as I just completed this last night. Yes it works. Factory ride has been restored. Only once concern.

1.Drop the truck to aero to conserve as much nitrogen as possible and disconnect the battery. Electronic PS systems are sensitive.
2. You only need to drop the UCA BJ, sway bar at the frame, tie rod end, and all bolts attached to the strut. With these removed the strut easily comes out. The air line will leak when you remove it. Don't use a pickle fork. The tie rod fell out on mine and the UCA popped out with a few 3lb hammer blows to the spindle.
3. I Trimmed 1/4" off my strut studs. I believe this is needed to make sure the strut extensions sit flush and don't impact the strut hoop causing noise.
4. As far as the UCA. With the strut removed i reinstalled the UCA to the spindle and the UCA is going to smash the air ride sensor and the air strut before it binds at the BJ. The MOPAR UCA is not needed. However, know that if you go full extension you are probably going to damage that sensor depending on how great the impact. This could potentially be solved with a relocation bracket for the sensor or maybe limiting straps.

Alignment in a few days. Will update after.
Thanks for this information. I've seen people say it's easiest to remove the UCA bolts to the frame, and others just the BJ. Sounds like you recommend just the bolt at the BJ.

I went to install the spacer and links today, but had to abandon the install as I could not figure out a way to safely get the quick connect off of the top of the strut. The instructions say to separate the black connector (leaving the black elbow connected to the brass nut). I tried for about 30 minutes to do this, but couldn't do it without fear of breaking the plastic elbow. Is it OK to simply disconnect this connector using the brass nut, or does this release too much gas? Is there a special trick to disconnecting the black fitting leaving the elbow on the top of the strut?

Here’s my install and maybe the pics help clear up what you’re wanting.

 
Here’s my install and maybe the pics help clear up what you’re wanting.

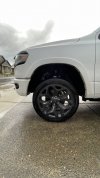
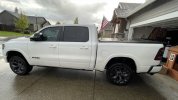
Thanks! This is very helpful. I figured out how to separate the air fitting after thinking about it a bit. I completed the install and am very happy with it. Ride is smooth, there are no error messages (Entry/Aero/Normal/OR1/OR2 - all work fine), and the truck sits 39" fender to ground at all tires in Normal mode.. it looks great!

I really appreciated seeing that you also cut the bolts down to just under an inch. Everywhere I read, people were either saying to just leave them uncut or to simply take off the top 1/4". This made no sense to me since the extenders didn't have this much thread room and would be taller than the spacer itself without cutting them down to about 7/8 inch. I feel better knowing that I'm not alone on this!
 
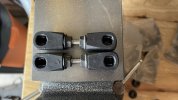
Home made air links. Some how got dead on 39” front and back on first try…(just put links on front for now). At some point when I have more time I will put the day stars on and maybe adjust the rear if I need to.

Pucks cost $96 on Amazon, total price for links was about $40 and about 10 min worth of work.

3E757F9A-E387-4D1B-8DB0-4C7AF0559FE9.jpeg04C9D988-A892-4BD1-9BA0-4444EF7E9AE8.jpeg40FA7D2F-DDB2-478E-82E8-9FEE524315D4.jpeg
 
Thanks! This is very helpful. I figured out how to separate the air fitting after thinking about it a bit. I completed the install and am very happy with it. Ride is smooth, there are no error messages (Entry/Aero/Normal/OR1/OR2 - all work fine), and the truck sits 39" fender to ground at all tires in Normal mode.. it looks great!

I really appreciated seeing that you also cut the bolts down to just under an inch. Everywhere I read, people were either saying to just leave them uncut or to simply take off the top 1/4". This made no sense to me since the extenders didn't have this much thread room and would be taller than the spacer itself without cutting them down to about 7/8 inch. I feel better knowing that I'm not alone on this!
So what is the trick to disconnecting the air line at the black plastic fitting. Thanks
 
Home made air links. Some how got dead on 39” front and back on first try…(just put links on front for now). At some point when I have more time I will put the day stars on and maybe adjust the rear if I need to.

Pucks cost $96 on Amazon, total price for links was about $40 and about 10 min worth of work.

View attachment 128045

Link to the material on amazon?
 
Link to the material on amazon?
Apparently it’s been a while since I’ve logged in here…

Beduan Stainless Steel Long Threaded Screw, Fully Threaded Rod, M6-1.0 Thread Pitch, 250 mm Length (Pack of 2) https://a.co/d/9S9OxQX
You really only need one of these…

Daystar, Dodge Ram 1500 2.5" Leveling Kit, fits 2009 to 2017 4WD, all transmissions, all cabs KC09113BK, Made in America https://a.co/d/4Nc5gd0

Qty (1) 8mm Ball Socket, Nylon End M6x1.0 Black with Black Band
 
Upper control arms from factory 2” lift kit:

68323530AA

68323531AA

I put on the daystar spacers and revel links last weekend, only took about an hour and a half. I plan on getting the UCA’s from the factory lift. Also, got some 295/55/r22 Ridge Grapplers put on. I really like the look now.
I know it's been a while, but has everything been fine with the spacers and links? Did you ever go back and put the UCAs in?
 
Thanks! This is very helpful. I figured out how to separate the air fitting after thinking about it a bit. I completed the install and am very happy with it. Ride is smooth, there are no error messages (Entry/Aero/Normal/OR1/OR2 - all work fine), and the truck sits 39" fender to ground at all tires in Normal mode.. it looks great!

I really appreciated seeing that you also cut the bolts down to just under an inch. Everywhere I read, people were either saying to just leave them uncut or to simply take off the top 1/4". This made no sense to me since the extenders didn't have this much thread room and would be taller than the spacer itself without cutting them down to about 7/8 inch. I feel better knowing that I'm not alone on this!
How did you break the air line loose and leave the 90 degree fitting installed?
 
following
I just completed the install. Here are my notes. 5 hours from start to test drive.

Got my kit from "Airlinks" with the front and rear and the daystars. Half the price of Revel and the quality is definitely as good.

Bought the UCAs fro the 2" lift kit. Didn't do any good. Couldn't get the old ones off. I got to the point I thought I was going to break something.

Cutting the studs on the struts is the crappiest part. Due to the heat and crappy threads, it's difficult to get the new stud sleeves threaded on. I did put the old bolts on before cutting, but I was still using more torque than I was comfortable with trying to thread the new sleeves on. Got them on though.

Torquing all the bolts sucks too. I didn't have a couple of deep sockets I needed (18 mm specifically) and couldn't torque some with a wrench. I've never liked crows feet, so with some of them I just put about where I think was about right.

I couldn't break the black plastic fitting. I just unscrewed the brass fitting like in the video. I don't see what benefit there is to doing it at the plastic. It's just a plastic 90.

There was a lot more nitrogen that came out than I thought there would be. It took like 30-45 seconds to slowly bleed out when I partially cracked the fitting.

I didn't take the brake calipers off, but I probably should have. There were some times when I had more strain than I wanted on the brake line.

For some reason my truck sits about 1/4" higher on the passenger side. It was that way before I did the level. I have to see if I can fix that. With everything set up just like it was in the box, have about 3/4" rake and that's exactly what I wanted.

Drove fine after I was done.
 

Users who are viewing this thread

Back
Top