5thGenRams Forums

Register a free account today to become a member! Once signed in, you'll be able to participate on this site by adding your own topics and posts, as well as connect with other members through your own private inbox!

5th Gen Stock Stereo Upgrade Options?

wildh24

Ram Guru
Joined
Dec 23, 2018
Messages
558
Reaction score
300
I suspect there will be much interest, including my own. Are your pics already posted?

Adding this link to a sweet video by @zx3junglist showing how to lean the Limited’s rear 40/20/40 seats forward (not so easy for the 60/40!), and the limited rear panel’s carpet cover: link

Here's the one I got. I'll post some more up when I get everything done and this one out.
 

Attachments

  • 20190428_101245.jpg
    20190428_101245.jpg
    231 KB · Views: 259

wildh24

Ram Guru
Joined
Dec 23, 2018
Messages
558
Reaction score
300
Here's the rough box. Needed to add a bit of height to the middle section for volume. Right at about .70 cf. Very close. Will use polyfill as well.

Tip for the hole size. Pop the grill out of 10tw1 and use it as a template. Perfect fit.
 

Attachments

  • 20190510_182253.jpg
    20190510_182253.jpg
    233.4 KB · Views: 131
  • 20190510_183211.jpg
    20190510_183211.jpg
    222.1 KB · Views: 131
  • 20190510_171341.jpg
    20190510_171341.jpg
    251.5 KB · Views: 133
  • 20190510_174119.jpg
    20190510_174119.jpg
    255 KB · Views: 133

YoAdrian

Moderator
Staff member
Site Supporter
Joined
Jun 20, 2018
Messages
1,058
Reaction score
970
Location
RI, USA.
Here's the rough box. Needed to add a bit of height to the middle section for volume. Right at about .70 cf. Very close. Will use polyfill as well.

Tip for the hole size. Pop the grill out of 10tw1 and use it as a template. Perfect fit.
Super cool! And thanks for the critical feedback about the OEM HK sub.
 

wildh24

Ram Guru
Joined
Dec 23, 2018
Messages
558
Reaction score
300
Super cool! And thanks for the critical feedback about the OEM HK sub.

Now I need to figure out how to finish it. Played with carpeting tonight. Major pain with all the angles. Maybe I'll just paint it. It's gonna sit under the back seat out of sight anyway. Hope to get it up and firing tomorrow.
 

wildh24

Ram Guru
Joined
Dec 23, 2018
Messages
558
Reaction score
300
Well 3 more hours and I'm finally done. Ended up with carpet but it wasn't easy. Recycled my RAM grill emblems. Fired it up and boom boom. Sounds great.

Goal was to get 2 x 10" subs into and enclosure that fits inside the factory underseat storage system so as to retain all factory functionality and weather mats. This is 2 x 2ohm JL10tw1 powered by a Pioneer GM-D8701. 400w per channel @1ohm. Box volume is a touch short of .70cf but with poly ...it does pretty well. Lacks a bit of the real low end, but that's going to be hard to get given the space limitations.
 

Attachments

  • 20190511_110120.jpg
    20190511_110120.jpg
    135.3 KB · Views: 187
  • 20190511_111231.jpg
    20190511_111231.jpg
    169.1 KB · Views: 185
Last edited:

mch

Active Member
Joined
Feb 24, 2019
Messages
69
Reaction score
24
Location
Henderson, NV
Well 3 more hours and I'm finally done. Ended up with carpet but it wasn't easy. Recycled my RAM grill emblems. Fired it up and boom boom. Sounds great.

Goal was to get 2 x 10" subs into and enclosure that sure inside the factory underseat storage system so as to retain all factory functionality and weather mats. This is 2 x 2ohm JL10tw1 powered by a Pioneer GM-D8701. 400w per channel @1ohm. Box volume is a touch short of .70cf but with poly it does pretty well. Lacks a bit of the real low end, but that's going to be hard to get given the space limitations.
Looks great. Too bad someone couldn't just 3d print something like this out for the masses.
 

ksn240

Ram Guru
Joined
May 18, 2018
Messages
1,273
Reaction score
800
Well 3 more hours and I'm finally done. Ended up with carpet but it wasn't easy. Recycled my RAM grill emblems. Fired it up and boom boom. Sounds great.

Goal was to get 2 x 10" subs into and enclosure that sure inside the factory underseat storage system so as to retain all factory functionality and weather mats. This is 2 x 2ohm JL10tw1 powered by a Pioneer GM-D8701. 400w per channel @1ohm. Box volume is a touch short of .70cf but with poly it does pretty well. Lacks a bit of the real low end, but that's going to be hard to get given the space limitations.
Looks great. Something like that is exactly what I am wanting. I found a guy that makes a similar box close to me. You can access the storage bins but the edge of the mats are still under the box.
 

GOATinstructor

Active Member
Joined
Mar 18, 2019
Messages
55
Reaction score
43
Well 3 more hours and I'm finally done. Ended up with carpet but it wasn't easy. Recycled my RAM grill emblems. Fired it up and boom boom. Sounds great.

Goal was to get 2 x 10" subs into and enclosure that fits inside the factory underseat storage system so as to retain all factory functionality and weather mats. This is 2 x 2ohm JL10tw1 powered by a Pioneer GM-D8701. 400w per channel @1ohm. Box volume is a touch short of .70cf but with poly ...it does pretty well. Lacks a bit of the real low end, but that's going to be hard to get given the space limitations.

Did you use the amppro? Do the bottom of the seats touch the box? Is the box bolted in?

I really really want to do this, but I just need clear instructions. I also want to sound deadener the doors and back wall, maybe the floor. Is there room behind the door panels for MLV?
 

wildh24

Ram Guru
Joined
Dec 23, 2018
Messages
558
Reaction score
300
Did you use the amppro? Do the bottom of the seats touch the box? Is the box bolted in?

I really really want to do this, but I just need clear instructions. I also want to sound deadener the doors and back wall, maybe the floor. Is there room behind the door panels for MLV?

Not bolted, but could be by attaching to the factory organizer.

Yes to PAC Amppro.

I had to remove the small plastic hooks on the underside of the seats or they would hit the grills. Otherwise it does not touch the seat.

Not sure on the MLV in the doors. I didn't try this time around. Truck was quiet enough for me as is. I think it'd be tight though.
 

LVLAaron

Active Member
Joined
Mar 23, 2019
Messages
53
Reaction score
27
Llj told me there harness has the resistors built in. Also saw a video on 5starstereo where the pac rep said they found the resistors were not needed on the 5thgens

There's no resistor pack in line. I needed to use the audio control AC-LGD to get the amps to work. The harness does have some electronics in there, I believe to trigger the "remote" line that they provide in the harness.
 

Walski

Active Member
Joined
Nov 12, 2018
Messages
33
Reaction score
28
There's no resistor pack in line. I needed to use the audio control AC-LGD to get the amps to work. The harness does have some electronics in there, I believe to trigger the "remote" line that they provide in the harness.
I have 2 harness from them at my house now..I’m gona cut into one and check it out..had issues with both..the first one using the remote trigger was constant hot so amp stayed on.the new one they sent me amp won’t turn on using remote or the gto in the lc7i. Frustrating might just pull some soeedwire to the head unit and splice in. I also have a pac lp7-4 I might use and get a Dayton dsp. Put my seats back in for now. Until I have time to get back at it
 

kirkelli

Active Member
Joined
Mar 2, 2019
Messages
29
Reaction score
16
For those interested, JL Audio has a 10% sale going on.. Crutchfield is also honoring sale.. Just wanted to let you know,, JL Audio rarely does this.
 

mch

Active Member
Joined
Feb 24, 2019
Messages
69
Reaction score
24
Location
Henderson, NV
I used Noico sound mat off Amazon. They're all pretty similar and I've had good luck with it in other projects. I don't have any pictures unfortunately.

All the stuff really does is add mass to whatever material you stick it too. It's not going to really lower ambient noise... It's not really designed to. It does however change the resonant frequency of materials so that they don't rattle, buzz, or echo as much. A metal door panel is a great example. Knock on it with and without damping material and you'll immediately notice.

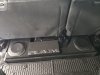
If you use it, I've found you don't have to go overboard. A couple sheets on a door panel does as much as plastering the entire thing most of time and weighs a lot less. If you removed the 6x9 you can reach into the door cavity and apply directly to the back of the outer metal door panels. The 6x9s themselves are mounted to a molded plastic barrier. I applied small pieces to the inside and outside of the mold. Again, this is simply to add mass and keep it from vibrating. I then applied pieces were I could to faces of the barrier and backside of the door panel itself. (take notice of the air bags... You don't want to cover those).

I test a lot of areas simply by knocking on panels. If it goes ding or dong, I add a bit of material to the back side and knock on it again. If it then goes thud or thump, I move on. Adding bunch more does very little.

If you want to lower road or wind nose, you need to use other materials such as MLV.

Hope this helps.

What's the trick to getting the door panels off the door frame? I got the 3 screws out, but those clips seem pretty tight. The plastic stuff I got off of Amazon flex way too much. Since I can't find my metal trim removal tool, probably head down to Auto Zone or Harbor Freight and see if they have something.
 

Patsy1099

Spends too much time on here
Joined
Jan 5, 2019
Messages
2,333
Reaction score
1,293
Location
People’s Republic of New Jersey
What's the trick to getting the door panels off the door frame? I got the 3 screws out, but those clips seem pretty tight. The plastic stuff I got off of Amazon flex way too much. Since I can't find my metal trim removal tool, probably head down to Auto Zone or Harbor Freight and see if they have something.

Get low and get leverage. I used the pry tools just to get a little space at the bottom if the door. Then I sat down on the floor/threshold of the door opening, held the bottom of the door trim where I could fit my fingers in, placed my one foot on the corner (metal) of the door and pushed with my foot while pulling the door panel toward me. You need to use force but be careful and ready to stop once you’ve popped couple of pins otherwise you risk ripping the panel too quickly and breaking a few tabs (like I did on the first door). After you do it once you get the feel for it. They are on tight though!
 
  • Like
Reactions: mch

wildh24

Ram Guru
Joined
Dec 23, 2018
Messages
558
Reaction score
300
^^^Exactly this. I found it easiest to give a quick but small pull vs grabbing and pulling hard. Sort of like using a hammer... The short sudden acceleration is better than the brute force.

I started on the bottom front of the panels. A quick pop and off the started to come. Work your way back, and then go to the upper half.
 

LVLAaron

Active Member
Joined
Mar 23, 2019
Messages
53
Reaction score
27
Yep. The clips on these guys are sturdy as hell. You need a quick short "pop" to get them out. Focus on getting one at a time or you'll rip the door panel in half if you just try to he-man the panel
 

Users who are viewing this thread

Top