Klicht87
Well-Known Member
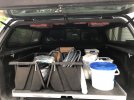
JealousOh you know what’s happening tonight!!! View attachment 89951
JealousOh you know what’s happening tonight!!! View attachment 89951

Is your truck leveled or just on OR2 air suspension?If you are looking for custom vinyl taking it to a shop would be the thing to do although they would probably charge you an hourly rate to create the decals. I would be curious as well how much the service would be. Since I started doing these myself I feel like I got pretty good at it. I did my fender flares a few months back in brushed aluminum which was a little tricky but I think they look pretty nice.
View attachment 89950
Is your truck leveled or just on OR2 air suspension?
Good luck. Did mine last Friday and it wasnt too bad. If you are doing it from the floor, recommend dropping the spare and taking the driver side heat shield off. Also depends on if you are trying to not cut the stock one off and remove it in 2 pieces like i did.Oh you know what’s happening tonight!!! View attachment 89951
Yeah the sunroof decal you can have customized, think I'll do the King's Colors. They also have certified detailers that will install them for you, one real close to me which is awesome. Thanks for the link.If you are looking for custom vinyl taking it to a shop would be the thing to do although they would probably charge you an hourly rate to create the decals. I would be curious as well how much the service would be. Since I started doing these myself I feel like I got pretty good at it. I did my fender flares a few months back in brushed aluminum which was a little tricky but I think they look pretty nice.
View attachment 89950
Same here in Vermont. Has been most of the day. Good thing my start button was an interior mod!I Can't even wash mine today. It was Snowing here in New Hampshire.
Malodave
Awesome. I have some spare 2813 and a couple ardiunos laying around. I'll have to take a look at the code.This is a Home Made Light Bar. Watching the Video and seeing the parts needed, I realized
that I already had everything Except the Silicone Tube and the Arduino Code.
You can download the Code from the links in his discription and the Silicone Tube:
Amazon.com: Muzata Silicone LED Channel System, Transparent Anti-Dazzle Flexible Tube for DIY Light Box Enclosed IP67 Water & Dust Proof for 10mm Bendable LED Strip Cabinet Shelves 16.4Ft/ 5M USC1 : Everything Else
Amazon.com: Muzata Silicone LED Channel System, Transparent Anti-Dazzle Flexible Tube for DIY Light Box Enclosed IP67 Water & Dust Proof for 10mm Bendable LED Strip Cabinet Shelves 16.4Ft/ 5M USC1 : Everything Elsewww.amazon.com
I am using the WS 2815 LED Strip. They are 12V powered and have a second Data Line.
This is useful if an LED goes Bad. With the 2811/2812 series if a LED goes out the rest of the LEDs
down the line will not work either. The 2813 is a 5V powered version with the second Data Line too.
I need to work out how to get a separate Brake and Turn Signal Tapped Wire. I am looking at
1 or 2 Electronic Relays to make that happen.
He designed it for European Cars that have the Turn Signal separate and the Running and Brake Lights
in the Same Bulb.
Malodave
I don’t have the time or patience to try lolAre you interested in maybe painting your area black so we can see it? Or using plastidip??


I really need to get around to installing the LED strip lights in the bed.So this happened
View attachment 90033
I have the Nilight Bed Light kit and wired it to the existing bed lights and used the supplied on/off switch as a kill switch so I could disable them if needed.
View attachment 90026
The two-sided tape let go and I destroyed the switch when hauling cargo last weekend. I decided to use this opportunity to upgrade that basic old switch.
I went with a water proof LED push button to fill that little hole by the tie down ring.
View attachment 90027
Completely inconspicuous when on.
View attachment 90031
Lit up when off.
View attachment 90032