5thGenRams Forums

Register a free account today to become a member! Once signed in, you'll be able to participate on this site by adding your own topics and posts, as well as connect with other members through your own private inbox!

What did you do to your Ram today???

Yeah that was my *plan* as well lol I had it assembled ready to go but that hose is literally glued onto the pipe. After I took off the clamp and tried everything to get the hose off, I ended up having to cut the hose just before it reached the pipe (I used tin snips because scissors wouldn’t work). As soon as I did this all of the coolant started pouring out so I did my best to plug the hole with my finger while cutting off the leftover rubber still on the fitting and peeling it off because like I said it was like glued on there! As soon as that was off then yeah I put the valve on and tightened the clamps and I was good to go. Definitely did not go as easily as I thought it would though since I couldn’t just pull the hose off the fitting.
You needed a radiator hose pick.
 
I had to re-tint my front door windows because Massachusetts only allows for 35%. My original tint brought it down to 11% measured with their device. I'm happy with the Galaxie (Solar Guard) product, but still liked it when the fronts matched the backs.
At least I can 'Legally' drive the roads now. IMHO there are too many happy police around here.

Next: I have sitting in the room: Mopar Vent visors and mud flaps. I'm waiting for my COVID recovery so I can get stronger to do it myself.

truck 35.jpgtruck 35a.jpg
 
Yeah that was my *plan* as well lol I had it assembled ready to go but that hose is literally glued onto the pipe. After I took off the clamp and tried everything to get the hose off, I ended up having to cut the hose just before it reached the pipe (I used tin snips because scissors wouldn’t work). As soon as I did this all of the coolant started pouring out so I did my best to plug the hole with my finger while cutting off the leftover rubber still on the fitting and peeling it off because like I said it was like glued on there! As soon as that was off then yeah I put the valve on and tightened the clamps and I was good to go. Definitely did not go as easily as I thought it would though since I couldn’t just pull the hose off the fitting.
So at that point, why not just remove the chunk of hose from the "kit" and just install the valve where you cut the heater hose?
 
So at that point, why not just remove the chunk of hose from the "kit" and just install the valve where you cut the heater hose?
Because that end was the female end not the male end so I had to slide the new hose from the kit over the fitting.
 
Had my tints put on finally today. I went with ceramics and matched what the factory did on the rear doors and back glass. Also did the eyebrow. No pic as it’s pouring rain right now lol.
 
I had to re-tint my front door windows because Massachusetts only allows for 35%. My original tint brought it down to 11% measured with their device. I'm happy with the Galaxie (Solar Guard) product, but still liked it when the fronts matched the backs.
At least I can 'Legally' drive the roads now. IMHO there are too many happy police around here.

Next: I have sitting in the room: Mopar Vent visors and mud flaps. I'm waiting for my COVID recovery so I can get stronger to do it myself.

View attachment 99206View attachment 99207


I’m curious. How many years is the inspection good for. I sure hope you don’t have to do that yearly that would totally suck.


Sent from my iPhone using Tapatalk Pro
 
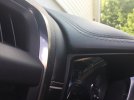
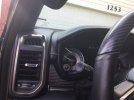
Got a warranty claim approve for the dash piece above the cluster, it’s starting to warp, getting worse with the heat. Instead of replacing the one piece of leather covered plastic, they have to replace the whole dash because they don’t sell just that piece.
 

Attachments

  • image.jpg
    image.jpg
    90.7 KB · Views: 169
  • image.jpg
    image.jpg
    106 KB · Views: 169
Because that end was the female end not the male end so I had to slide the new hose from the kit over the fitting.
Based on the picture from Amazon link, you just remove the hose clamp and hose from that side of valve and you should have been able to slide the heater hose onto the barb in valve. Which gets me back to, why buy the "kit" when you can buy just the valve for around $10, and it would just go into the heater hose.
 
Based on the picture from Amazon link, you just remove the hose clamp and hose from that side of valve and you should have been able to slide the heater hose onto the barb in valve. Which gets me back to, why buy the "kit" when you can buy just the valve for around $10, and it would just go into the heater hose.
Ok I get what you’re saying. Yeah that probably would’ve worked but here’s 2 reasons why I didn’t: I wasn’t planning on doing that so when I cut the hose I cut it right at where it meets the fitting, so there was no hose overlap for me to stick the barb into. Second, I didn’t feel like figuring out what size valve I need and clamps and I thought I needed that piece of hose too (guess I didn’t), so I figured shoot for an extra $10 might as well get a “kit” that takes all the guesswork out. I don’t regret spending an extra $10 at all
 
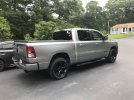
Got my bed cover and Weather Tech rain guards installed, then took it to the car wash to meet the guys who will be washing it for the next 10+ years.
 
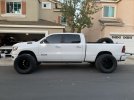
Got my 37s today😁 should be lifting the front of the truck in the morning so I can install them and then I’m still waiting on the BDS kit in the rear to be delivered so I’ll be riding with the a$$ dragging more than usual for a bit lol
 

Attachments

  • A24D41C7-006E-452B-96E9-80E3D5D2E866.jpeg
    A24D41C7-006E-452B-96E9-80E3D5D2E866.jpeg
    126.9 KB · Views: 167
Installed my paint eating 🤬 Weathertech replacement today. AVS Bug Guard Il. Very happy with the result! Also very similar to the WT, except this one does not eat paint 😉.View attachment 99289View attachment 99290
I'm surprised that most of you "guard" types don't opt for a clear wrap for your hood. No offense, but those plastic guards are just butt ugly. I'd rather have rock chips in my hood, which I do, than run a big ugly piece of plastic out front. Again, no offense. 🤣
 
I'm surprised that most of you "guard" types don't opt for a clear wrap for your hood. No offense, but those plastic guards are just butt ugly. I'd rather have rock chips in my hood, which I do, than run a big ugly piece of plastic out front. Again, no offense. 🤣
None taken... I'll go without the chips. Personal pref. Had one on every truck I've owned. Makes a big diff with and without for windshield splats.
 
Have Borla atak and Hellwig swaybar installed today. Not sure why i waited this long for hellwig swaybar. What a difference 👏. Now for borla Atak, i think my neighbors are about to hate me.
20210709_133958.jpg
 
Got a warranty claim approve for the dash piece above the cluster, it’s starting to warp, getting worse with the heat. Instead of replacing the one piece of leather covered plastic, they have to replace the whole dash because they don’t sell just that piece.

Easy fix without replacing the dash
 
Installed my paint eating 🤬 Weathertech replacement today. AVS Bug Guard Il. Very happy with the result! Also very similar to the WT, except this one does not eat paint 😉.View attachment 99289View attachment 99290
Just curious, do you have pictures of the WT of wherre it was eating the paint? As you know I already have the AVS 2 but curious as to what the difference is between the WT and AVS as they look very similar in design.

My AVS was hitting the top of my grill, but I believe that is an alignment issue on my side because it's over more to passenger side and it's the driver side hitting. So the curved cutout on driver side needs to be shifted over maybe 1/8 or so its centered perfectly and then I won't have that issue. Temporary I have adjusted the hood stop so it sits higher off the grill until I get a day without rain to readjust the deflector.
 

Users who are viewing this thread

Back
Top