
Agreed. As imperfect as these RamBox lids might be, FCA is unlikely to prioritize a redesign or source yet another supplier, especially during/following COVID-19.It would give us some hope if they did improve the 2020’s but I doubt they do anything until the Gen6 Rams
5thGenRams Forums
You are using an out of date browser. It may not display this or other websites correctly.
You should upgrade or use an alternative browser.
You should upgrade or use an alternative browser.
Update: DO NOT BUY RAM WITH RAMBOX - Warping and Alignment Issue with 2019 Rams
- Thread starter lasani1121
- Start date
Neurobit
RAM Sorcerer
Prob not. More cupholders may be a higher priority than this...Anyone know if this will be addressed in the 2021's?
The Subaru Ascent has 19 cupholders. FCA can do better.Prob not. More cupholders may be a higher priority than this...
That’s surprising. The HDs use the old beds and metal lids...much better construction than the new 1/2-tons. Has something changed in the past month or two?My '19 Power Wagon ramboxes are warping so bad that the painted panels are pulling away from the plastic lid. They are only held on with foam tape. 2 time at the dealer on Monday for this issue.
Nope, the whole lid is definitely plasticThat’s surprising. The HDs use the old beds and metal lids...much better construction than the new 1/2-tons. Has something changed in the past month or two?

Last edited:
Thanks for clarifying!Nope, the whole lid is definitely plastic
I will say, though...that thing looks like a BEAST compared to the 1/2-ton version. Maybe it's just the angle.
The rambox is the same between LD and HD trucks. The difference you're seeing is in the design between 4th gen and 5th gen ramboxes. Ram went with another vendor to supply the rambox for the 5th gens. Feels and looks much less substantial on the new ones.Thanks for clarifying!
I will say, though...that thing looks like a BEAST compared to the 1/2-ton version. Maybe it's just the angle.
Well how about that. I thought that they'd be keeping the old boxes (since RamBoxes are not made for the long-bed 1/2-tons).The rambox is the same between LD and HD trucks. The difference you're seeing is in the design between 4th gen and 5th gen ramboxes. Ram went with another vendor to supply the rambox for the 5th gens. Feels and looks much less substantial on the new ones.
(I posted about the new vendor for the 5th-gen 1/2-tons back in 2018. But I appreciate the HD info.)
Diamondback
Ram Guru
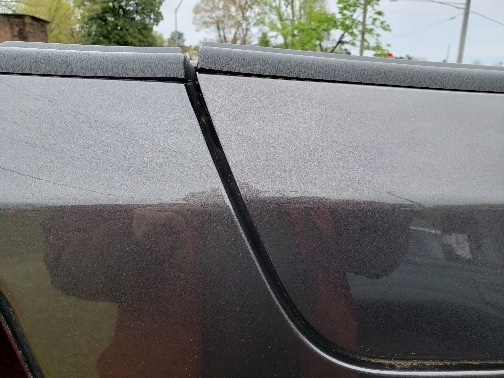
I've tested some of my "thoughts" out on how the warpage effects the thinner painted sides. Depending on the cold or heat of the day, they "warp" .. that long with the misfit of the top black plastic not properly secured to the painted instance.
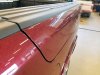
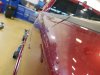
On a side note, I saw this 2020 on the lot today (yes, I had to work on a Sunday for the first time every) :
Look how clean these are (cleaner than mine when I picked mine up last Aug) ...
On a side note, I saw this 2020 on the lot today (yes, I had to work on a Sunday for the first time every) :
Look how clean these are (cleaner than mine when I picked mine up last Aug) ...
Attachments
Diamondback
Ram Guru
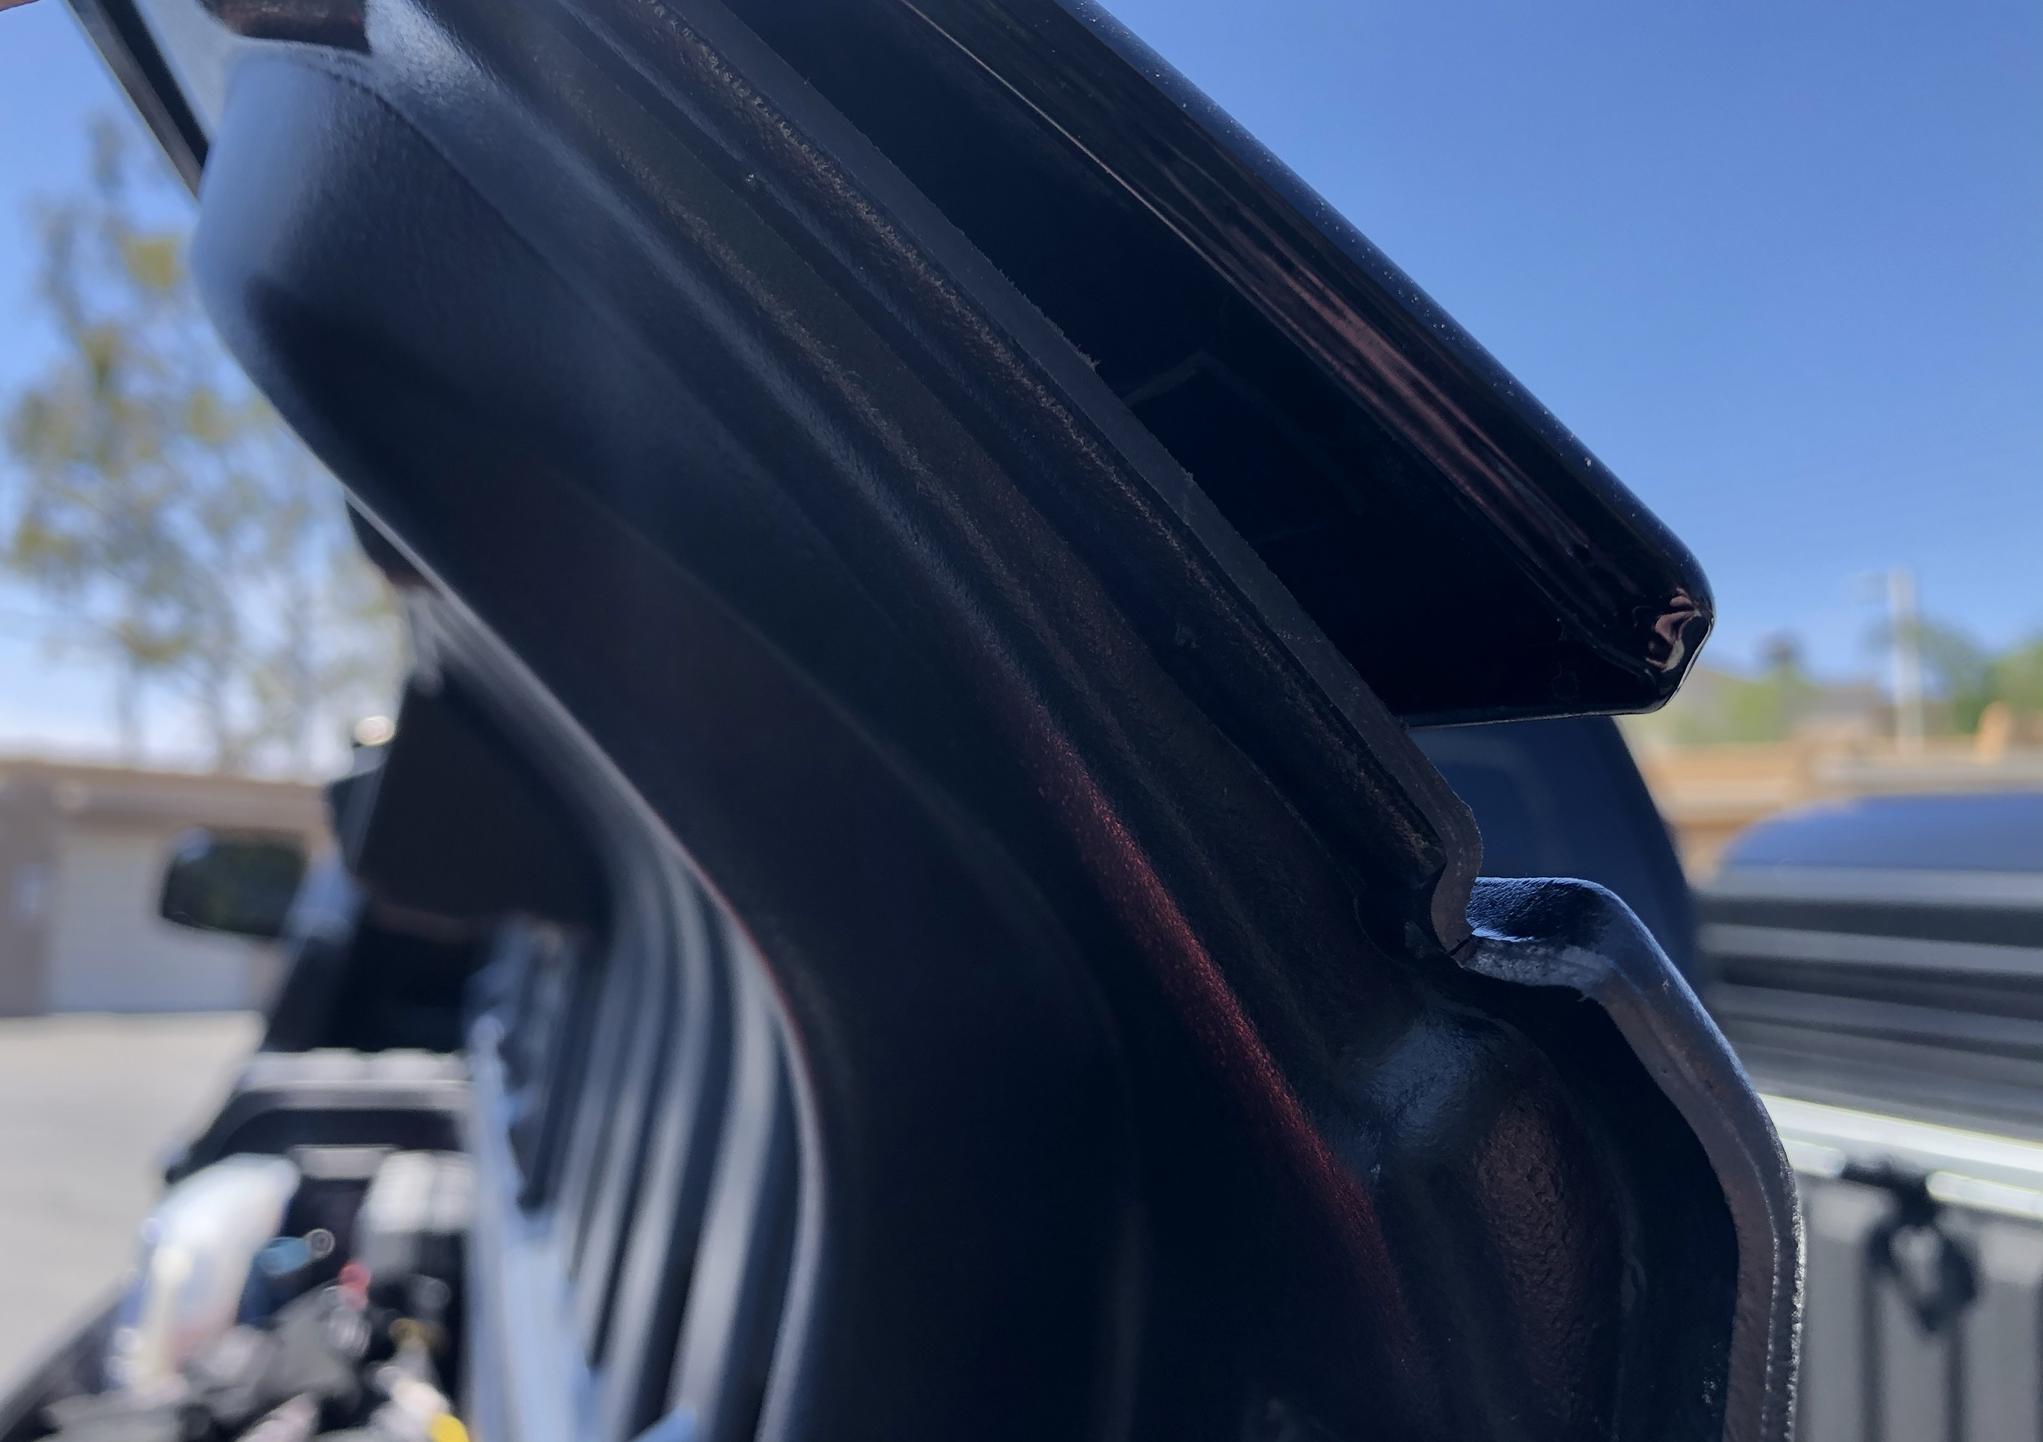
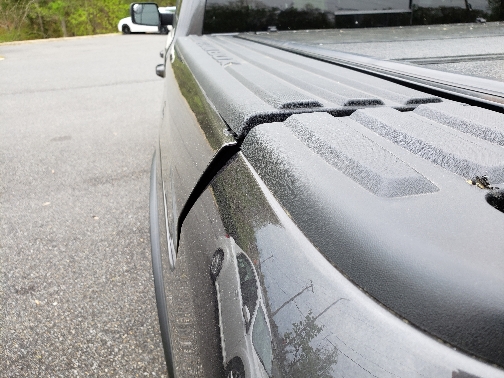
The warping comes from the seam of the 2 major parts not having enough surface material to mate with.

If you purchase a new set (or have the dealership replace them), you have to separate the painted portion and that black upper portion -- which is still going to cause an issue as the 3M tape won't be enough to secure the 2 pieces together - even if clamped in a vise all night.
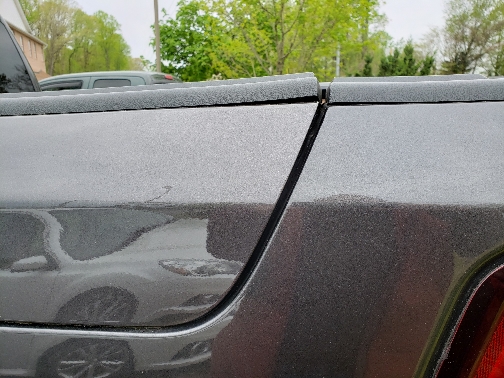
For mine, I also noticed that the painted section is so thin, that the heat and cold effect those as well :

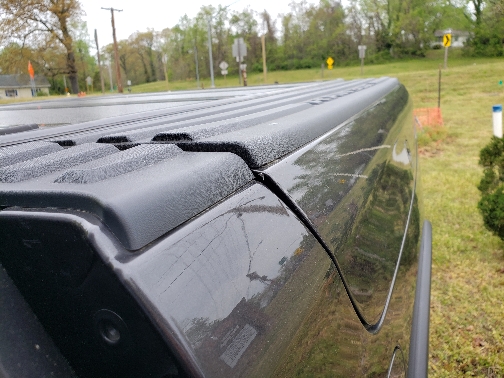
so what I did was mark where there were some possible areas to add some "bump stops" : adjustable with set screws
This was taken prior to backing out the set screw another 3mm for near perfect alignment

The top ones made very little difference, so I added a set at the white arrow (front and rear) .. I coulda just used the sticky ones, but I wanted to be able to always adjust.

For the top portion (which nearly everyone complains about the most), that is still a work-in-progress without ripping one apart (and not being able to order a play-test set).

I have a printed sheet showing how those are to be put together, but am not gonna rip mine apart and ruin them -- I will once I have a replacement ready
I made a set of "ends" that bolt in on the upper part of the hinge and ride up to the top portion shown above. It helps, but another design in my head will be a lot stronger when "slamming" the boxes closed.

If you purchase a new set (or have the dealership replace them), you have to separate the painted portion and that black upper portion -- which is still going to cause an issue as the 3M tape won't be enough to secure the 2 pieces together - even if clamped in a vise all night.
For mine, I also noticed that the painted section is so thin, that the heat and cold effect those as well :
so what I did was mark where there were some possible areas to add some "bump stops" : adjustable with set screws
This was taken prior to backing out the set screw another 3mm for near perfect alignment
The top ones made very little difference, so I added a set at the white arrow (front and rear) .. I coulda just used the sticky ones, but I wanted to be able to always adjust.
For the top portion (which nearly everyone complains about the most), that is still a work-in-progress without ripping one apart (and not being able to order a play-test set).
I have a printed sheet showing how those are to be put together, but am not gonna rip mine apart and ruin them -- I will once I have a replacement ready
I made a set of "ends" that bolt in on the upper part of the hinge and ride up to the top portion shown above. It helps, but another design in my head will be a lot stronger when "slamming" the boxes closed.
I've tested some of my "thoughts" out on how the warpage effects the thinner painted sides. Depending on the cold or heat of the day, they "warp" .. that long with the misfit of the top black plastic not properly secured to the painted instance.
On a side note, I saw this 2020 on the lot today (yes, I had to work on a Sunday for the first time every) :
Look how clean these are (cleaner than mine when I picked mine up last Aug) ...
Its cleaner (def. better than mine), but in the second pic, you can see there are already alignment issues.
Do you have a picture of the lower corners with the "bumps" installed? What exactly did you use and where did you get them?The warping comes from the seam of the 2 major parts not having enough surface material to mate with.
View attachment 54039
If you purchase a new set (or have the dealership replace them), you have to separate the painted portion and that black upper portion -- which is still going to cause an issue as the 3M tape won't be enough to secure the 2 pieces together - even if clamped in a vise all night.
For mine, I also noticed that the painted section is so thin, that the heat and cold effect those as well :
View attachment 54040
so what I did was mark where there were some possible areas to add some "bump stops" : adjustable with set screws
This was taken prior to backing out the set screw another 3mm for near perfect alignment
View attachment 54041
The top ones made very little difference, so I added a set at the white arrow (front and rear) .. I coulda just used the sticky ones, but I wanted to be able to always adjust.
View attachment 54042
For the top portion (which nearly everyone complains about the most), that is still a work-in-progress without ripping one apart (and not being able to order a play-test set).
View attachment 54043
I have a printed sheet showing how those are to be put together, but am not gonna rip mine apart and ruin them -- I will once I have a replacement ready
I made a set of "ends" that bolt in on the upper part of the hinge and ride up to the top portion shown above. It helps, but another design in my head will be a lot stronger when "slamming" the boxes closed.
View attachment 54044
Got mine fixed. The dealer sent me to a body shop and covered the work under warranty. Both the lids and the boxes were replaced. The new lids had a completely different design. Instead of being held together with double sided tape, the new lids use steel clamps and screws. I've got my fingers crossed. It has only been two weeks, but it still looks good.
Sent from my LG-V930 using Tapatalk
Sent from my LG-V930 using Tapatalk
Ellisstrong
Spends too much time on here
Any more info on what yours looked like before? What did they submit as the issue? Any before and after pics?Got mine fixed. The dealer sent me to a body shop and covered the work under warranty. Both the lids and the boxes were replaced. The new lids had a completely different design. Instead of being held together with double sided tape, the new lids use steel clamps and screws. I've got my fingers crossed. It has only been two weeks, but it still looks good.
Sent from my LG-V930 using Tapatalk
Got mine fixed. The dealer sent me to a body shop and covered the work under warranty. Both the lids and the boxes were replaced. The new lids had a completely different design. Instead of being held together with double sided tape, the new lids use steel clamps and screws. I've got my fingers crossed. It has only been two weeks, but it still looks good.
Sent from my LG-V930 using Tapatalk
Do you have any pics of those? How about some part numbers?
Kxlexus
Well-Known Member
We need more information on this new and improved Rambox lid. I wasn’t going to bother having mine replaced with the same ol thing but if they have improved the design you better believe I want them replaced. Parts number, pics and any other documentation to show the service manager would be awesome!
Diamondback
Ram Guru
Its cleaner (def. better than mine), but in the second pic, you can see there are already alignment issues.
2nd pic was before mumping back out the 3mm I stated ..
Do you have a picture of the lower corners with the "bumps" installed? What exactly did you use and where did you get them?
Not yet, totally forgot ..
I grabbed a set of these and used various to get the proper alignment.
8mm (5mm was perfect for the winter) Summer -- I wanted the adjustable kind like the upper portion uses, but they weren't as use friendly. I was using "stickable" ones to find the depth I wanted for mine. Each person's will more than likely be different - thus the reason I was trying to locate adjustable.
Hilitchi 40-Pcs [4-Size] Round Black Rubber Feet Bumpers Pads with Matching Screws with Built in Stainless Steel Washer for Cutting Board Amps Cabinet Desk Tables Couches - - Amazon.com
Hilitchi 40-Pcs [4-Size] Round Black Rubber Feet Bumpers Pads with Matching Screws with Built in Stainless Steel Washer for Cutting Board Amps Cabinet Desk Tables Couches - - Amazon.com
www.amazon.com
We need more information on this new and improved Rambox lid. I wasn’t going to bother having mine replaced with the same ol thing but if they have improved the design you better believe I want them replaced. Parts number, pics and any other documentation to show the service manager would be awesome!
I'll def. need to hit up my parts department and turn mine in for them as well. I still need to get mine seam sealed as well.
Might I add...pretty please with sugar on top!We need more information on this new and improved Rambox lid. I wasn’t going to bother having mine replaced with the same ol thing but if they have improved the design you better believe I want them replaced. Parts number, pics and any other documentation to show the service manager would be awesome!

Here are the "before" shots. I'll send the afters tomorrow. I am not sure where to get part numbers. Perhaps the body shop will send me a copy of the paperwork. All I did was sigh a paper when I dropped it off, and another when I picked it up.
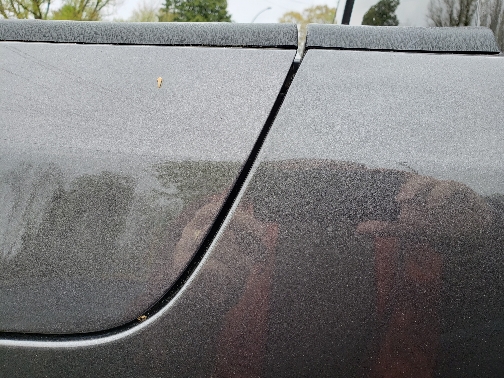

Sent from my SM-N960U using Tapatalk
Sent from my SM-N960U using Tapatalk
Users who are viewing this thread
Total: 1 (members: 0, guests: 1)


