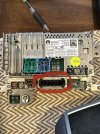
Okay. I seem to have figured out the problem. I believe the wifi antenna (and bluetooth antenna) connects on the back, bottom corner of the module via this interesting double-cable connector on the backside of the circled part here:
View attachment 150256
All the wires are kind of crammed in there, and when I pushed the unit back in, I bent the antenna cables such that some the wiring was showing. Yesterday, I straightened the cables back out and carefully replaced the module so as not to re-bend the cables. So far, that has resolved the problem.
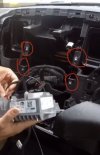
For anyone interested, the antenna itself is actually in the dash above the glove compartment, behind the piece of trim marked in orange here:
View attachment 150257
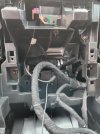
When I was troubleshooting my issue, I also checked to make sure the wires on the antenna-side were secure.


")
")