
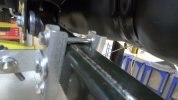
What I’ve done on several air ride and body-dropped vehicles is raise or relocate everything above the top area of the tires. It’s a lot of work and any other option is less labor intensive though.I’m thinking now I’ll with need a taller bumpstop in the strut or change the clip position on the strut. I’m afraid the tire is going to hit the battery box. It’s already wearing holes in the top of the wheel well liners.
5thGenRams Forums
You are using an out of date browser. It may not display this or other websites correctly.
You should upgrade or use an alternative browser.
You should upgrade or use an alternative browser.
Rock Crawler’s 2/4 Drop Saga
- Thread starter Rock Crawler
- Start date
Clv22p
Well-Known Member
Wonder if the difference is in 2wd and 4wd.But it’s weird that yours is over .5 in lower than mine.
Sent from my iPhone using Tapatalk
Took some pics.


Well, I’m having issues with the auto-leveling valves. I can never seem to get them set right and stay at the right height. I’ve been working with Steve at Timber Grove and he is trying to help me figure it out. Fist off, the brackets didn’t mount in the right place and I could not figure out why. After speaking with Steve, we figured out his brackets for the valves are for the short beds. I have the 6’ 4” bed. So, the mounting location for the brackets is in a different location than the short beds. It seems like the valves, although quite sensitive, need more movement than my 4” drop provides. The valves also sit a little offset from the control arm mount as opposed to directly above, which might also be contributing to my issues. It’s a work in progress.
gearhead321
Member
- Joined
- Apr 2, 2022
- Messages
- 24
- Reaction score
- 20
- Points
- 3
- Age
- 50
Not sure if you already tried this. Looking at your photos after installation, and the install video on the Timbergrove website, it appears you have the bracket direction backwards. Flipping the mounting position of the rod and sliding the clamped bracket rearwards them may get you enough movement.Well, I’m having issues with the auto-leveling valves. I can never seem to get them set right and stay at the right height. I’ve been working with Steve at Timber Grove and he is trying to help me figure it out. Fist off, the brackets didn’t mount in the right place and I could not figure out why. After speaking with Steve, we figured out his brackets for the valves are for the short beds. I have the 6’ 4” bed. So, the mounting location for the brackets is in a different location than the short beds. It seems like the valves, although quite sensitive, need more movement than my 4” drop provides. The valves also sit a little offset from the control arm mount as opposed to directly above, which might also be contributing to my issues. It’s a work in progress.
Attachments
Not sure if you already tried this. Looking at your photos after installation, and the install video on the Timbergrove website, it appears you have the bracket direction backwards. Flipping the mounting position of the rod and sliding the clamped bracket rearwards them may get you enough movement.
Correct. The bracket sides have to be swapped due to the fact that they were made for the short bed. They will not work on the standard bed without swapping sides. Also, Steve sent me the original arms that came on the valves since they are longer than the ones he puts on them. This allowed me to push the control arm brackets further down the control arm (about 2-3 inches) to possibly add more movement. It did not make any difference. When Steve and I spoke last, he said he tried several dealers in town and cannot find one in his area that has a truck with a standard bed. He said they allow him to use one for building his kits but didn’t realize the standard bed would be different when it comes to the kit. Do you have his kit? Have you had the same issues at all?
Last edited:
gearhead321
Member
- Joined
- Apr 2, 2022
- Messages
- 24
- Reaction score
- 20
- Points
- 3
- Age
- 50
I don't have this kit. Still using IHC springs in the rear for now. I just pulled all the IHC front components off and installed the Belltech front sport struts set to -3" and installed the Maxtrac camber/caster correcting upper control arms. I got my turning radius back! Rides so much smoother than IHC.Correct. The bracket sides have to be swapped due to the fact that they were made for the short bed. They will not work on the standard bed without swapping sides. Also, Steve sent me the original arms that came on the valves since they are longer than the ones he puts on them. This allowed me to push the control arm brackets further down the control arm (about 2-3 inches) to possibly add more movement. It did not make any difference. When Steve and I spoke last, he said he tried several dealers in town and cannot find one in his area that has a truck with a standard bed. He said they allow him to use one for building his kits but didn’t realize the standard bed would be different when it comes to the kit. Do you have his kit? Have you had the same issues at all?
I made up some cardboard models for the brackets the other day to figure out what I needed. I spoke with Steve at Timber Grove this morning and he is going to fab me some new stainless brackets. These will move the valves back quite a bit where there should be more movement. Hope this works.
The new Stainless brackets are here courtesy of Steven at Timber Grove. Hopefully I’ll get them installed today. Hope this works.


Ok, I got the new brackets installed. They moved the valves back quite a bit so hopefully this will provide more movement. I bent the valve arms back a little to align the rod mounting points so they are not as offset as before. I’m hoping this will help with the valves as well. Fingers crossed.


I’ve ordered and received the BellTech 4922 (1.26” tall x 2.5” OD) progressive bump stops to replace the factory ones. The factory bump stops were hitting the rear axle quite a bit, so I cut them in half a while back, which helped a lot. But, because there is not as much bump stop left, the bump stop cups are occasionally coming in contact with the rear axle. So, I decided to just cut the cups off and install the new bump stops. Hopefully this will work.
Cups on:


Cups cut off, grind, sand, prep for paint:


Paint:


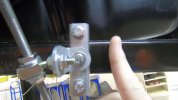
The bump stops came with nylon lock nuts but I decided to use rivnuts instead. The hole in the plate on the truck is the perfect size for the 3/8-16 rivnut I wanted to use, so I didn’t have to modify it at all (win). My rivnut tool wouldn’t really fit in the tight spots so I made my own tool with a bolt, spacer and a couple washers.
Rivnuts installed:


Cups on:
Cups cut off, grind, sand, prep for paint:
Paint:
The bump stops came with nylon lock nuts but I decided to use rivnuts instead. The hole in the plate on the truck is the perfect size for the 3/8-16 rivnut I wanted to use, so I didn’t have to modify it at all (win). My rivnut tool wouldn’t really fit in the tight spots so I made my own tool with a bolt, spacer and a couple washers.
Rivnuts installed:
Last edited:
Done:
I used some blue thread locker on the threads to keep the bump stops from backing out.


Pic of the cups and other brackets I had to cut off for my 4” rear drop.

Job made so much easier this way. I’m old and this thing is a back and joint saver. She even looks good up in the air.

I used some blue thread locker on the threads to keep the bump stops from backing out.
Pic of the cups and other brackets I had to cut off for my 4” rear drop.
Job made so much easier this way. I’m old and this thing is a back and joint saver. She even looks good up in the air.
Users who are viewing this thread
Total: 1 (members: 0, guests: 1)


