5thGenRams Forums

Register a free account today to become a member! Once signed in, you'll be able to participate on this site by adding your own topics and posts, as well as connect with other members through your own private inbox!

LUYED LED- New (Frugal) LED Reverse Light.

securityguy

Legendary member
Joined
Feb 17, 2019
Messages
5,579
Reaction score
4,218
Location
North Florida
clean install!

lets see it tonight boss! i set mine out towards a 45* angle it doesnt look so great visually but the beam width allowed it and at night it lights up a pretty wide area
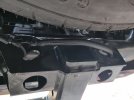
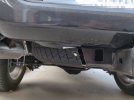
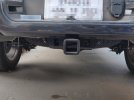
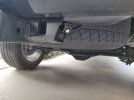
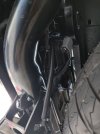
Thanks Saylor...I thought I'd start with them straight back and see what I think. If I feel I need to angle then out about 15-30 degrees, it will be easy to adjust. Very pleased my friend and thanks for sharing. Raining again and dark out now so it will have to wait until tomorrow:(
 

saylor

Well-Known Member
Joined
Jan 5, 2021
Messages
308
Reaction score
232
a heads up for anyone going for this after me + securityguy -

you got to bend the top bracket a scosch in a vice to get it to fit over the lippy on the hitch frame

put it in a vice and bend it wider slightly just a bit

then when you bolt it on the truck, squeeze it back together with a hand and thread the bolt thru the bottom piece and it will square back up and be super tight against the square of the hitch.
 

securityguy

Legendary member
Joined
Feb 17, 2019
Messages
5,579
Reaction score
4,218
Location
North Florida
Just finished up the wiring as the rain held out this morning. This is a follow-up to post #119:

CURT harness T-connector to tap into the trailer wiring
RAM LIGHT WIRING.jpg
CURT 5-pin wiring adapter harness to go from the CURT T-Harness so no wire curling or splicing.
RAM LIGHT WIRING2.JPG
Getting wires ready for connection to CURT harness.
RAM LIGHT WIRING3.JPG
Wiring from CURT harness soldered and heat shrinked.
RAM LIGHT WIRING4.JPG
Weather proof self sealing silicone tape to wrap everything up nicely.
RAM LIGHT WIRING5.JPG
Wires silicone wrapped.
RAM LIGHT WIRING6.JPG
Finished product. All wiring nicely wire tied and finished with a final wrap of silicone tape.
RAM LIGHT WIRING7.JPG
All in, the final cost for materials was about $75.
 
Last edited:

philodog

Member
Joined
Mar 13, 2020
Messages
23
Reaction score
9
Good idea. And are the lights mounted to the bumper? Never thought of that. I wanted mine tucked away as much as possible. But these lights looks great no matter where people mount them.
Yup, I just 3M taped them to a flat part of the chrome bumper on either side of the receiver hitch.You can't see them from eye level. Holding up solid so far.
 

Rlandon

Active Member
Joined
Jun 15, 2021
Messages
87
Reaction score
46
Location
Panama City FL
OK...off to a great start being that it rained on and off today and my hitch bracket just came about an hour ago. I have the bracket installed; the lights mounted; the CURT harness connected up to the truck; the 5-pin extension cable wired up; and all wiring is in a split-loom jacket. If the weather holds out tomorrow (calling for more rain), I plan to get everything wired up and functional. Pics so far:

View attachment 82772
Is that the factory hitch receiver with the 2" bracket? Mine measures out at 2.5 outside width. Since I don't tow or own anything to tow, I may just use the lower holes in the factory bracket for the chains. I can fab up some thick washers to fill the gap.

Thinking of doing the mod for the extra night lighting.
 

securityguy

Legendary member
Joined
Feb 17, 2019
Messages
5,579
Reaction score
4,218
Location
North Florida
Is that the factory hitch receiver with the 2" bracket? Mine measures out at 2.5 outside width. Since I don't tow or own anything to tow, I may just use the lower holes in the factory bracket for the chains. I can fab up some thick washers to fill the gap.

Thinking of doing the mod for the extra night lighting.
All stock
 

Rlandon

Active Member
Joined
Jun 15, 2021
Messages
87
Reaction score
46
Location
Panama City FL
Just finished up the wiring as the rain held out this morning. This is a follow-up to post #119:

Wiring from CURT harness soldered and heat shrinked.
View attachment 82810
So just to verify before I give this a try (parts are now here), Blue to Red (12V) and White to Black (Ground), correct? That's using the Curt harness and adapter. I'll test them also before I solder and heat shrink the wiring. Never hurts to ask. I did go with a different light (same brand) but a three row spot and flood. Hoping it will give a more all around light pattern. Thanks!
 

Beanerxor

New Member
Joined
Jan 10, 2019
Messages
4
Reaction score
6
Just added two of these lights today. Took my time and tried to make it as clean as possible.
 

Attachments

  • IMG_20211205_154912__01.jpg
    IMG_20211205_154912__01.jpg
    99.7 KB · Views: 164
  • IMG_20211205_154926__01.jpg
    IMG_20211205_154926__01.jpg
    98.3 KB · Views: 161
  • IMG_20211205_154934__01.jpg
    IMG_20211205_154934__01.jpg
    103.9 KB · Views: 163
  • IMG_20211205_154923.jpg
    IMG_20211205_154923.jpg
    86 KB · Views: 165
  • IMG_20211205_154907.jpg
    IMG_20211205_154907.jpg
    111.1 KB · Views: 167

LaxDfns15

Ram Guru
Joined
Sep 30, 2019
Messages
1,511
Reaction score
1,242
Location
Memphis, TN
Wanted to bump this again. One of my LUYED lights failed after almost 3 years, so I needed a replacement, and it was to be expected with the cheapness of the lights. I already had the Curt harness, but I wired my lights directly to it. This time I bought these: https://www.amazon.com/dp/B07YZFN925? which have JST 2 pin connectors on them. I had some of those in my garage from working on my motorcycle so I wired that into the Curt harness for easy replacement in case any of those fail. I also have 6 extra lights now so easy swap when one does fail. I 3d printed some little mounts that are taped onto the bottom of the bumper, and unless you're up under the truck you can't see them. Hard to tell from the picture, but they do point down a little bit and they're not as insanely bright as they look so I won't blind anyone backing up.

1673533907333.png 1673533930919.png
 

theblet

Legendary member
Joined
Feb 8, 2021
Messages
5,301
Reaction score
5,016
Have anyone else’s LUYED lights failed thus far?
 

Velocity

Active Member
Joined
Feb 23, 2021
Messages
53
Reaction score
42
Location
Louisiana
For anyone looking for ideas for this I used the Morimoto reverse light bar. It mounts to the license plate holes. I did have to lower mine a little because the tailgate was going to hit it when I put it down with it in the spots where the dealership put the plate originally. Can’t see any holes though. I wired it in like the rest of guys in this thread. I hated how dim the stock reverse lights were, especially if the camera lens got a little dirty. It’s not a problem anymore.

This is the light I used.

Here’s a before and after in the camera view. Huge difference.
 

Attachments

  • A8968897-89E5-449E-91F1-AE2CDA5BFC99.png
    A8968897-89E5-449E-91F1-AE2CDA5BFC99.png
    367.5 KB · Views: 49
  • EFFA1B5F-CC7B-4572-ACE0-420594287750.png
    EFFA1B5F-CC7B-4572-ACE0-420594287750.png
    365.6 KB · Views: 49

theblet

Legendary member
Joined
Feb 8, 2021
Messages
5,301
Reaction score
5,016
Just ordered one for the wife’s car. Hopefully it works well.
 

Users who are viewing this thread

Top