
Dontfront82
Well-Known Member
3.5 rough country lift, 22x9 stocks trac grip m/t 35x12.5r22. zero rubbing or trimming needed, even at full turns or going thru ditches. My tires are 34.8 metric size
Snapped some pictures while modifying the wheel wells today to fit my 35x12.50x20 on a 20x10 -18 offset.
A lot of people ask do they Rub? Answer is Yes, solution is easy since it’s minimal labor.
Tools needed:
Wet towel
8mm socket
Grinder
Spray paint
Heatgun
2 Zip ties
Cold brew of choice!
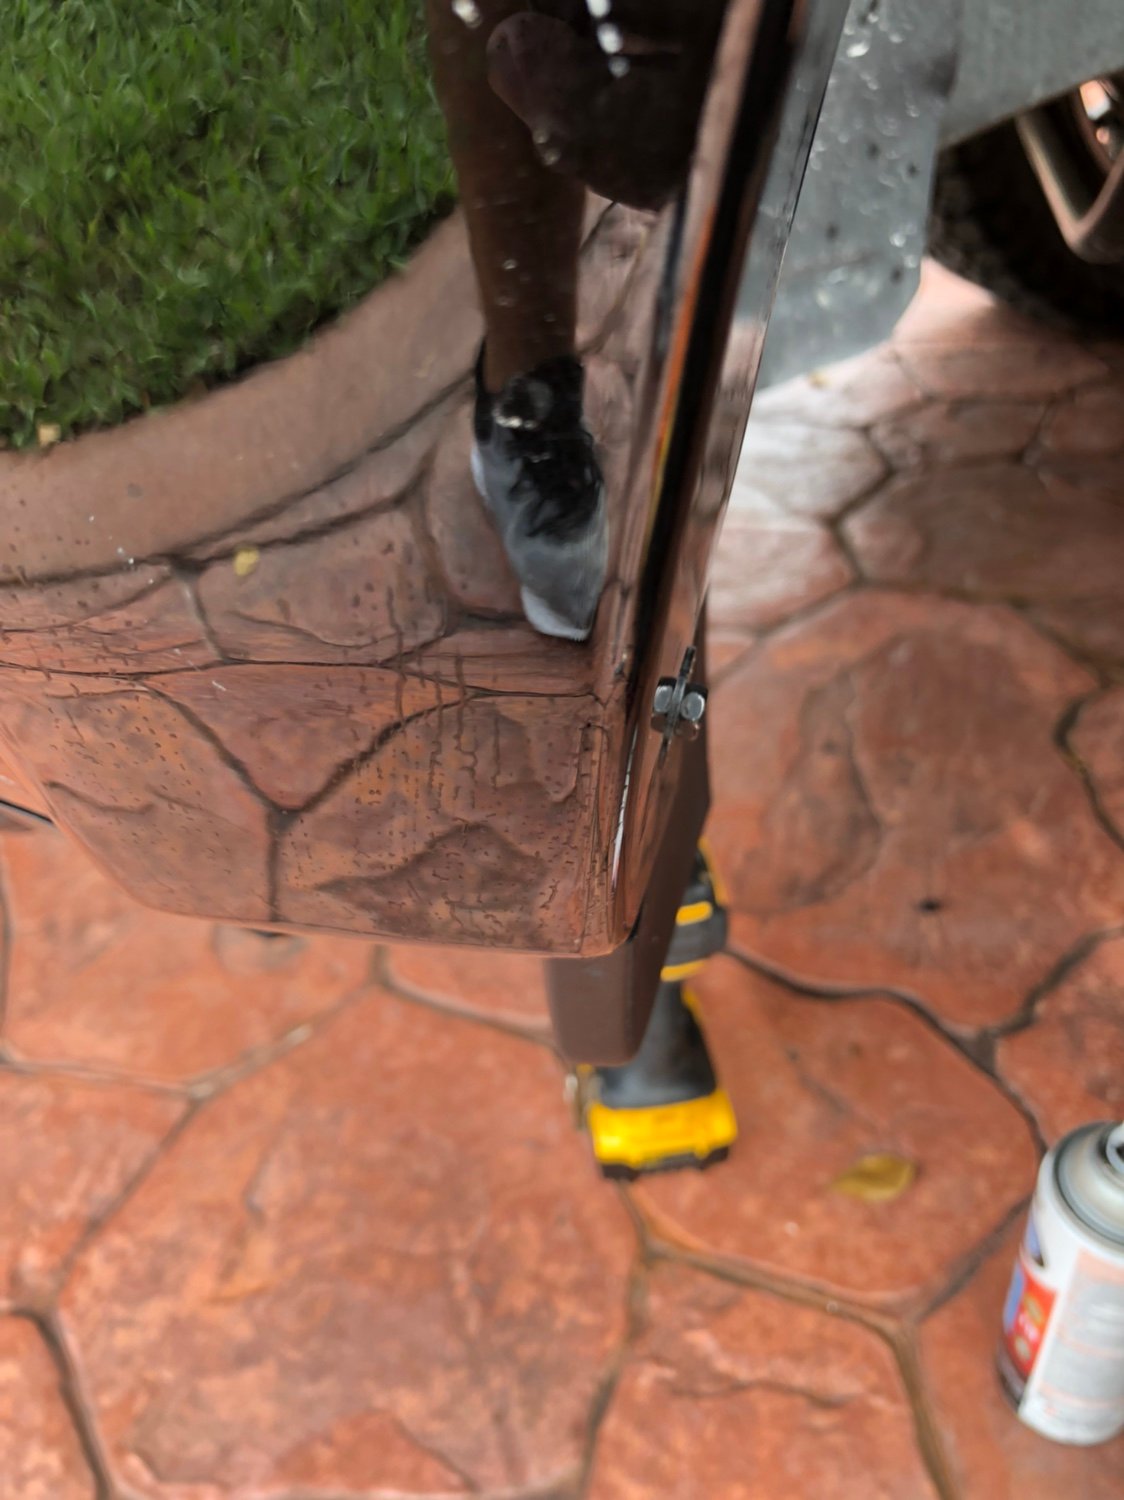
Begin with finding affected areas, for me it was the Molding on rear of fenders, remove the 8mm bolt and the push in fastener in wheel well. Under the molding there are 2 sliding clips so give the piece a tug outward and should slide right out.
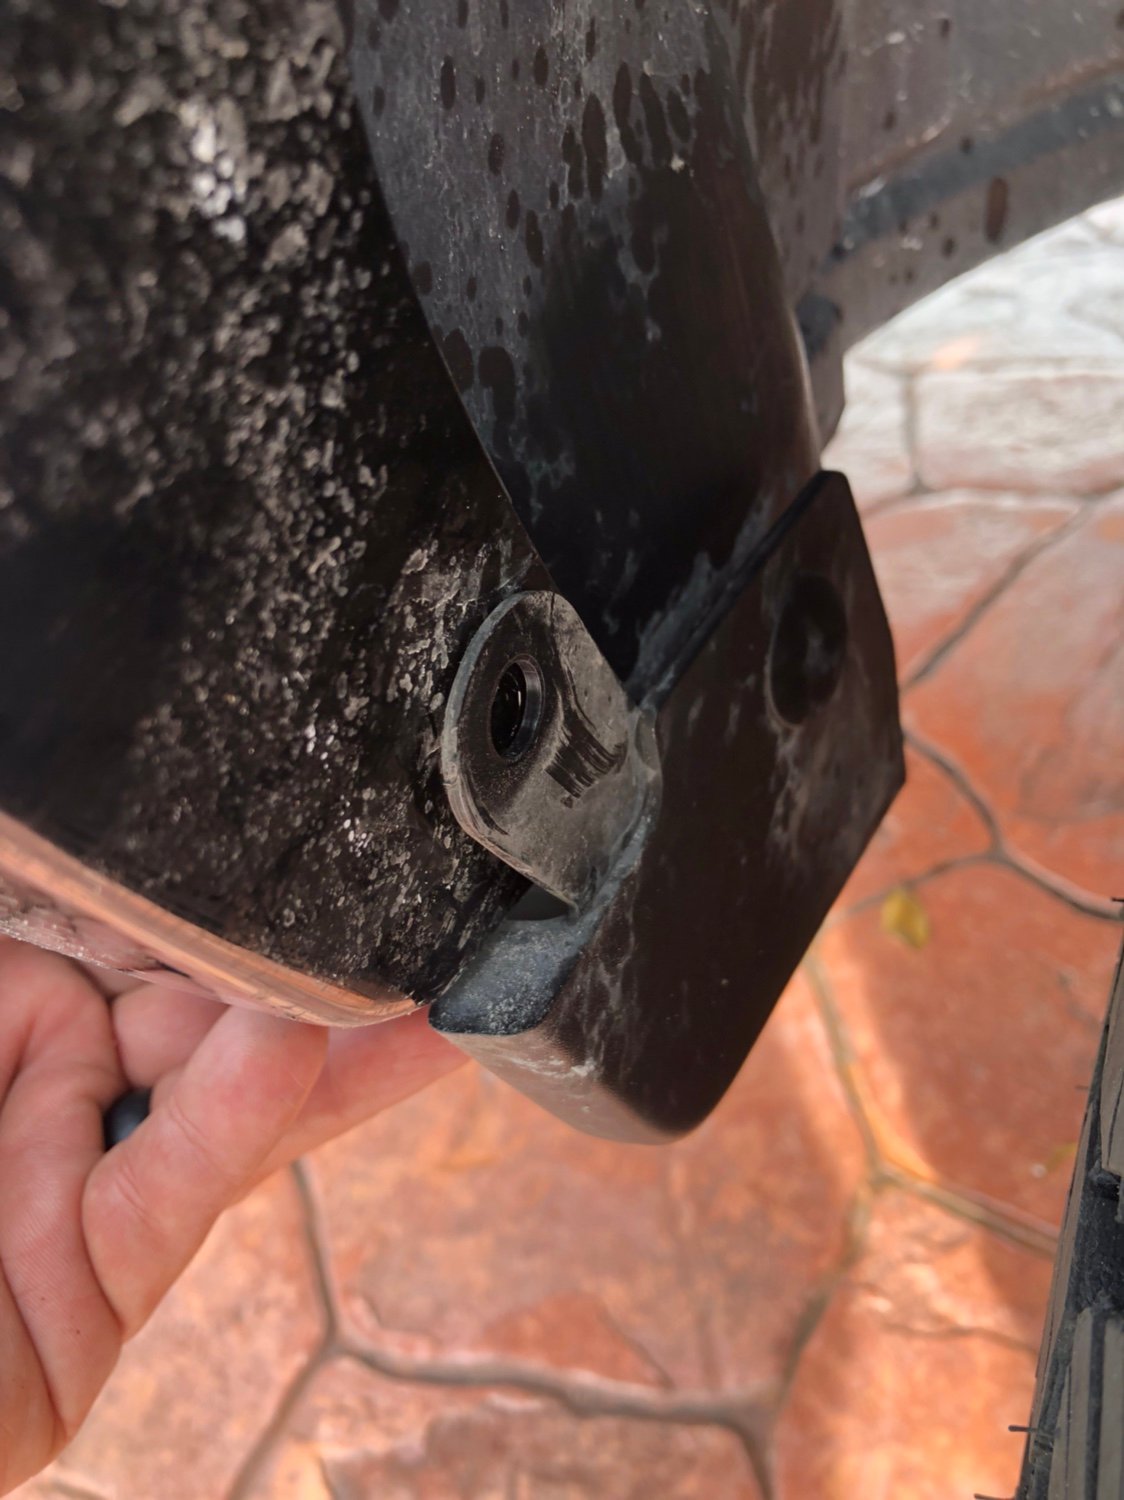
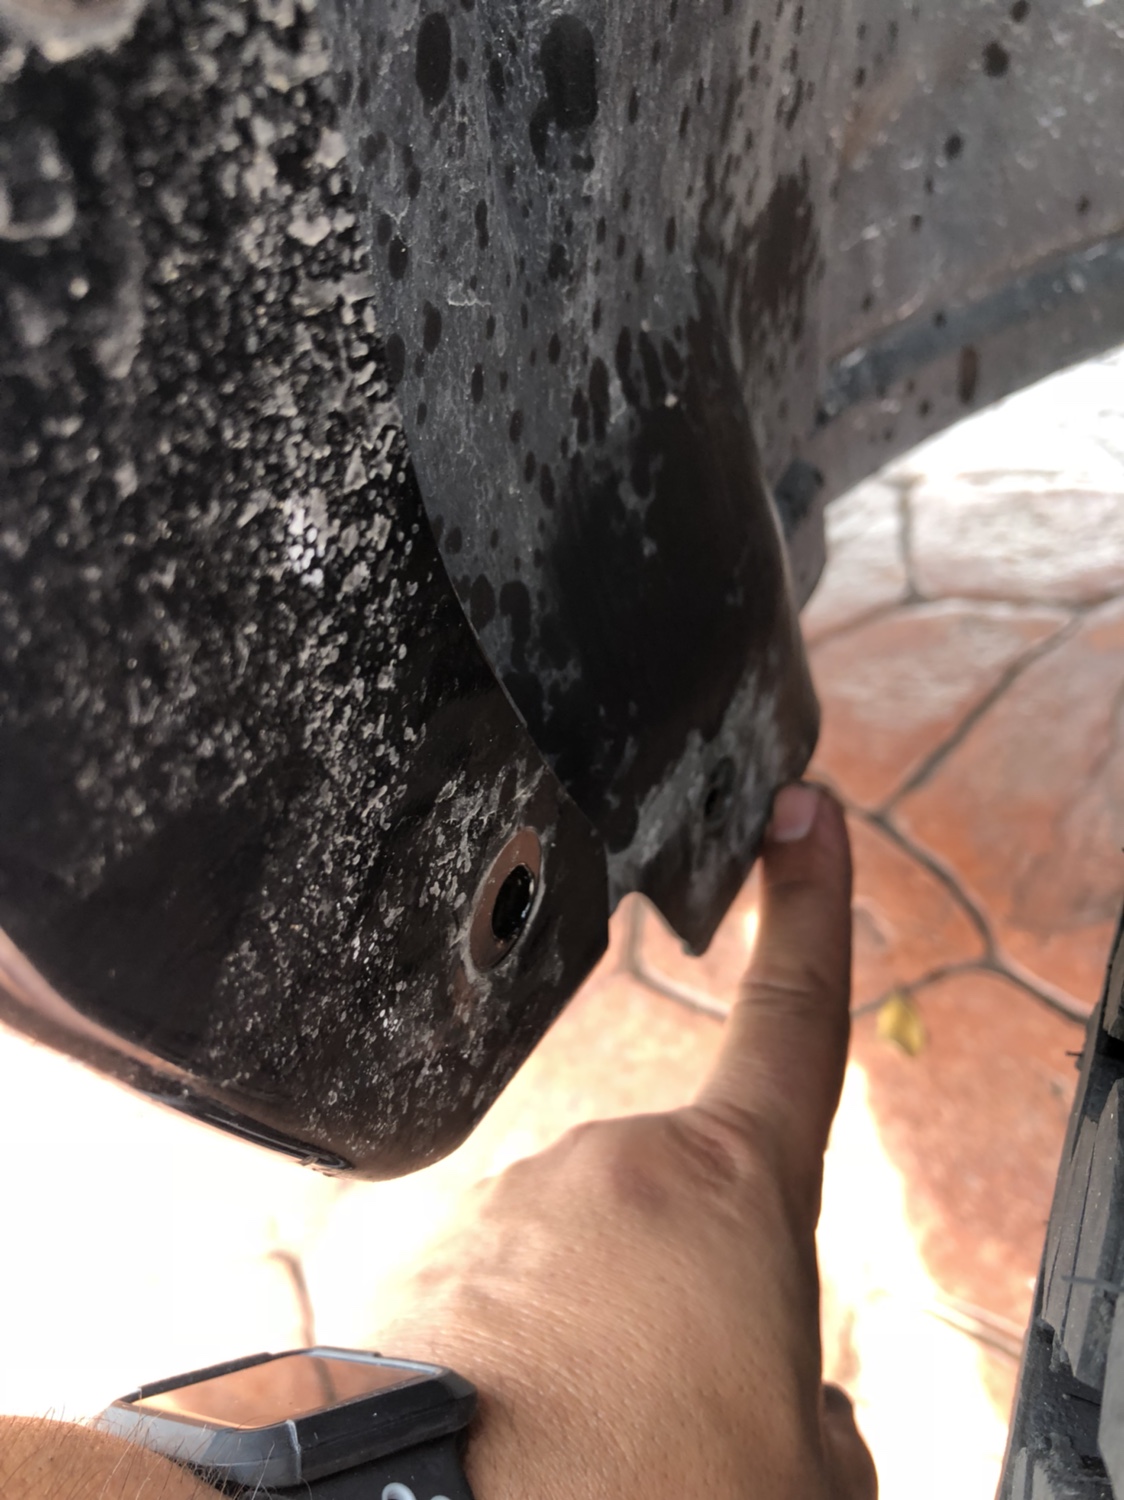
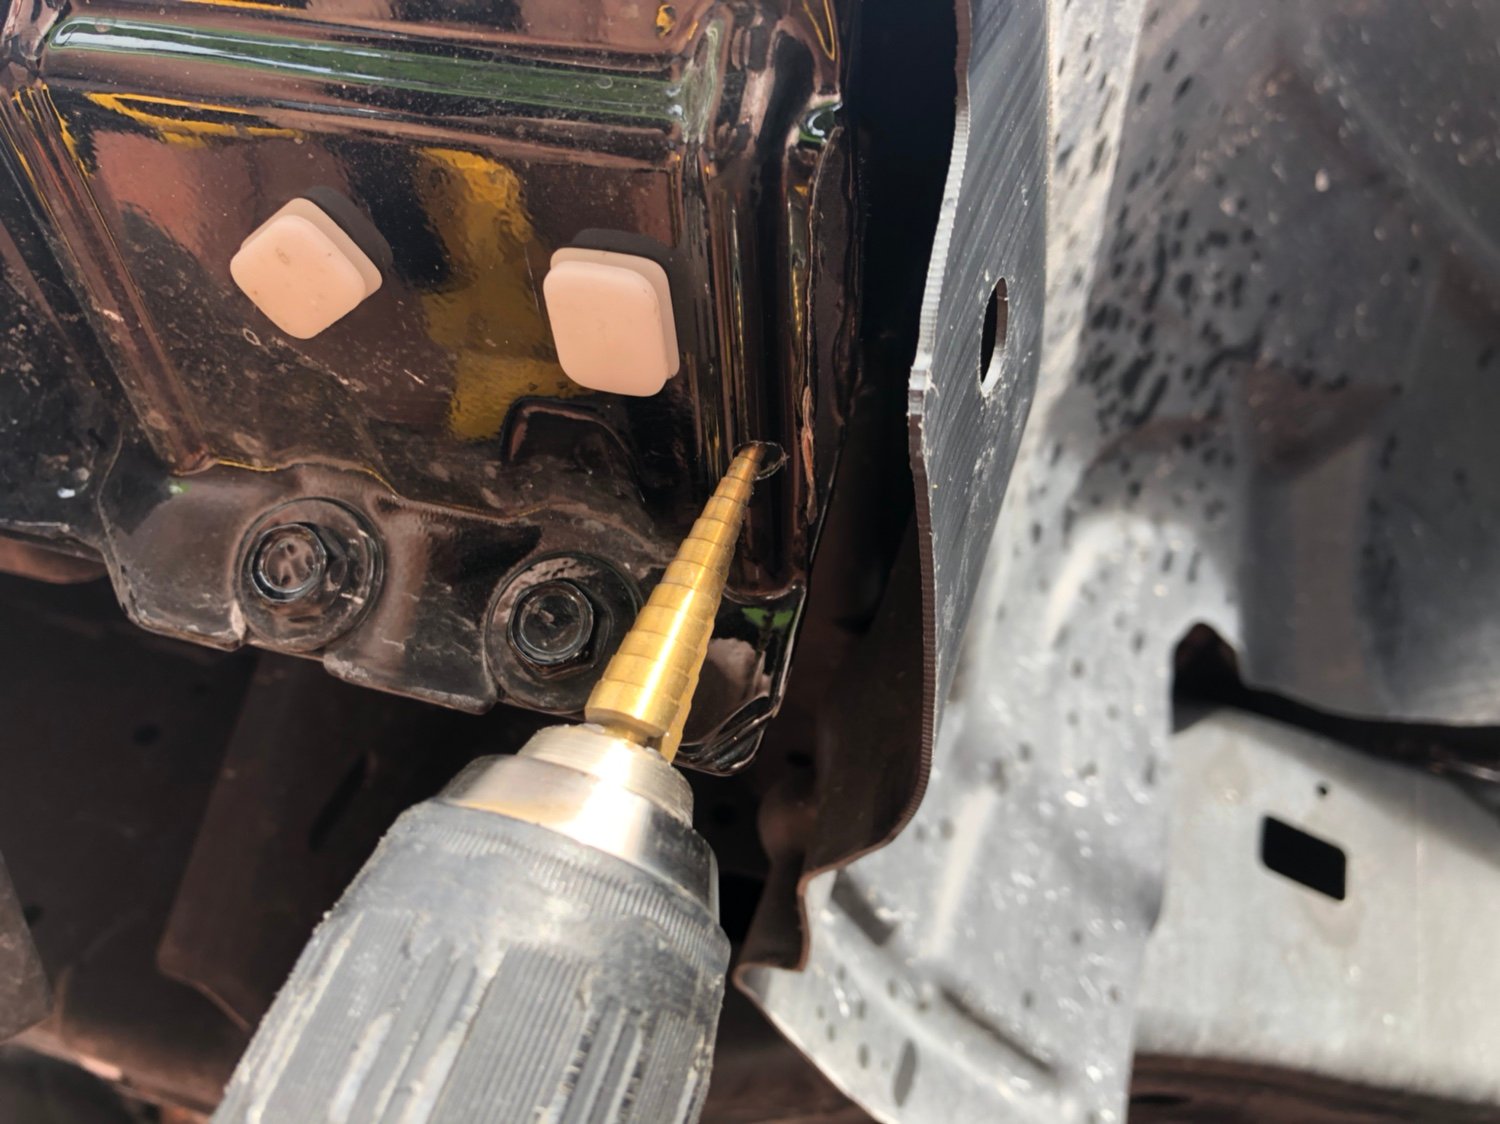
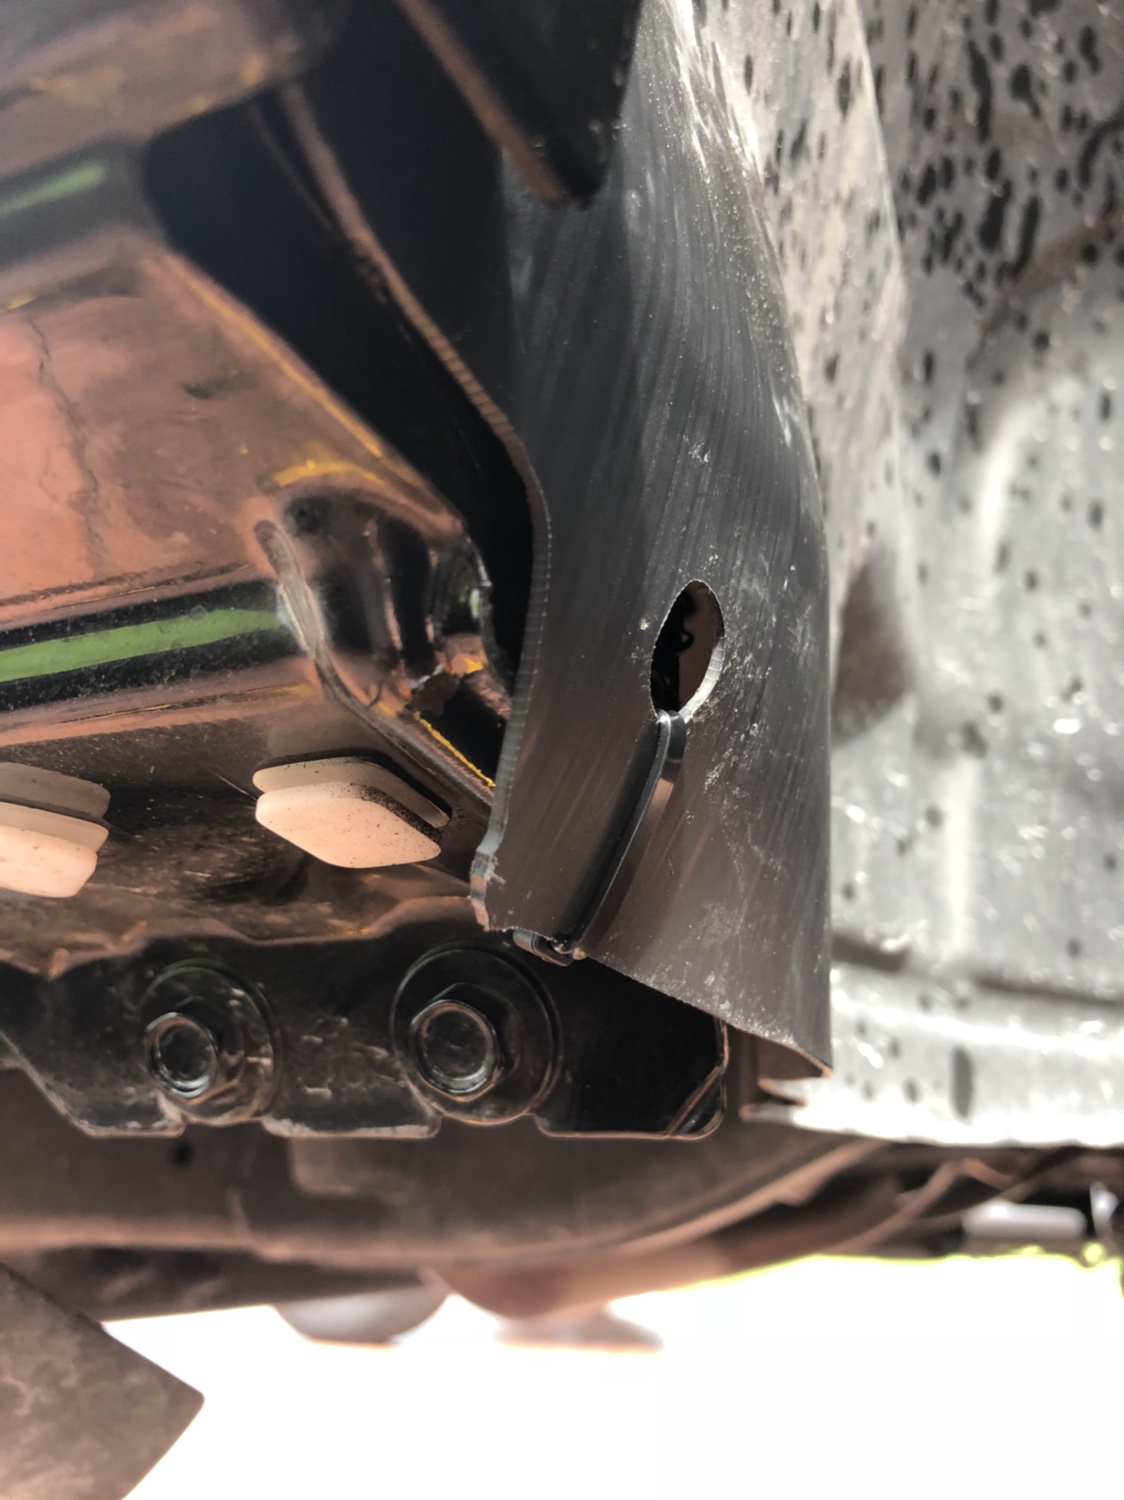
Under the wheel well liner there is a small Metal extension used solely for the retainer clip, this is causing a clearance issue, so I took my grinder and removed it,
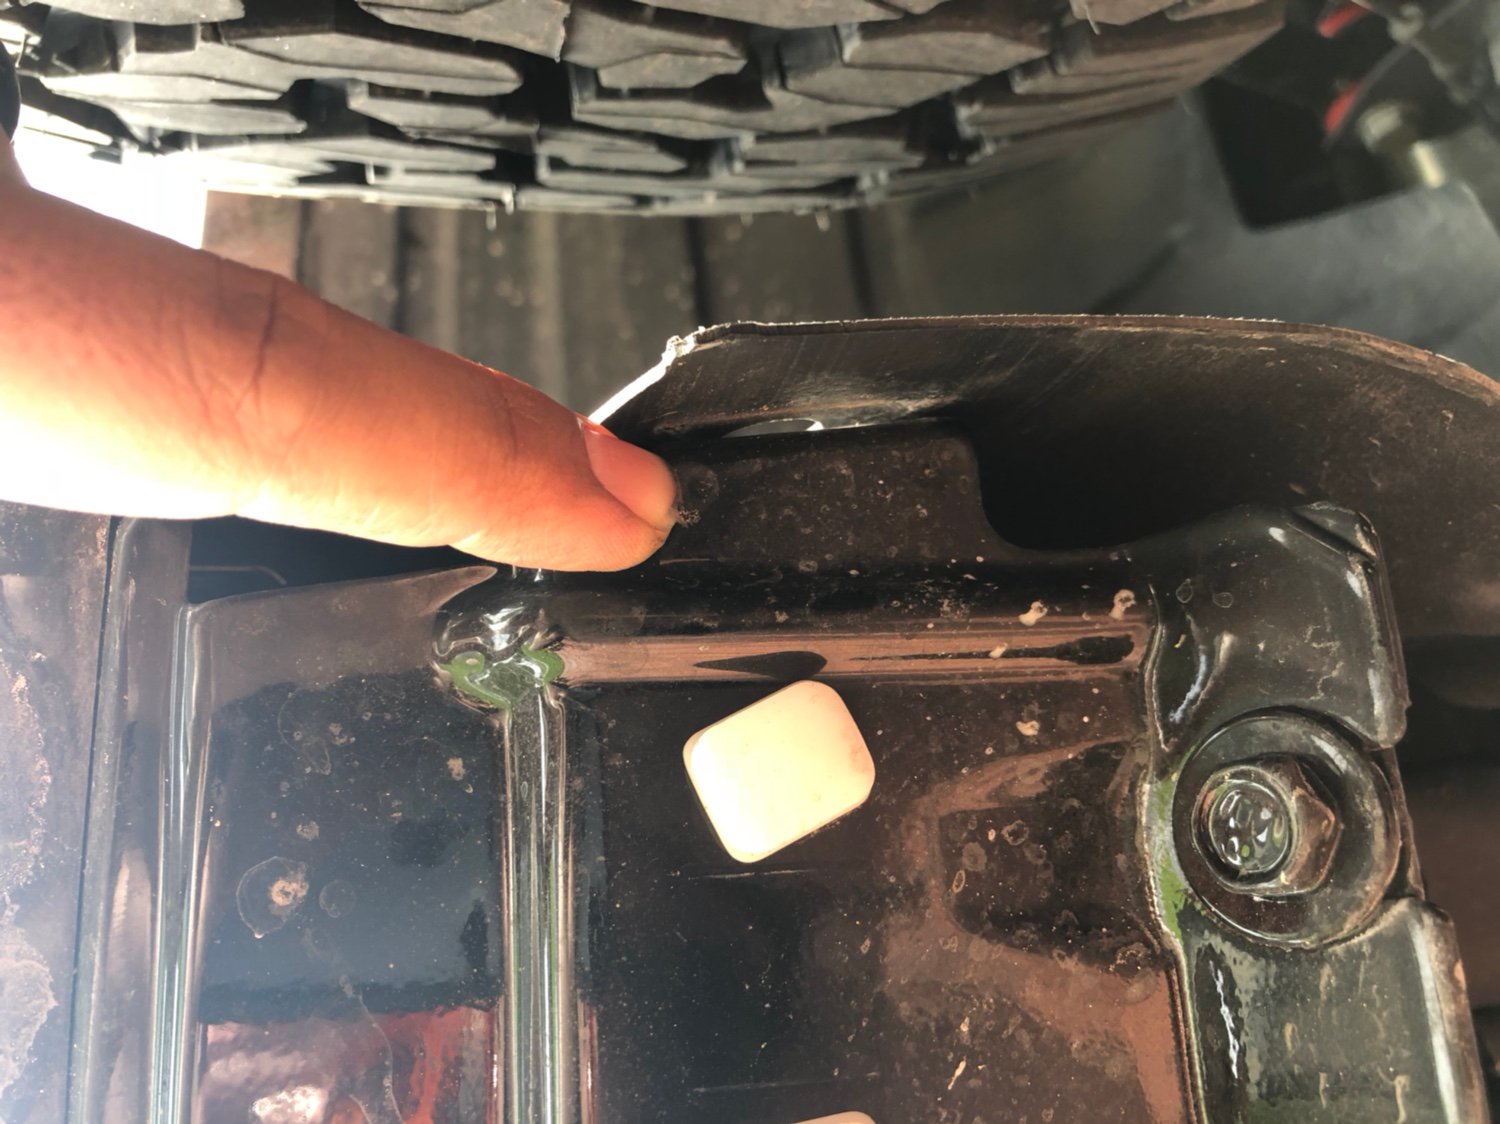
I then drilled a small pilot hole to secure a zip tie to to hold the plastic liner back.
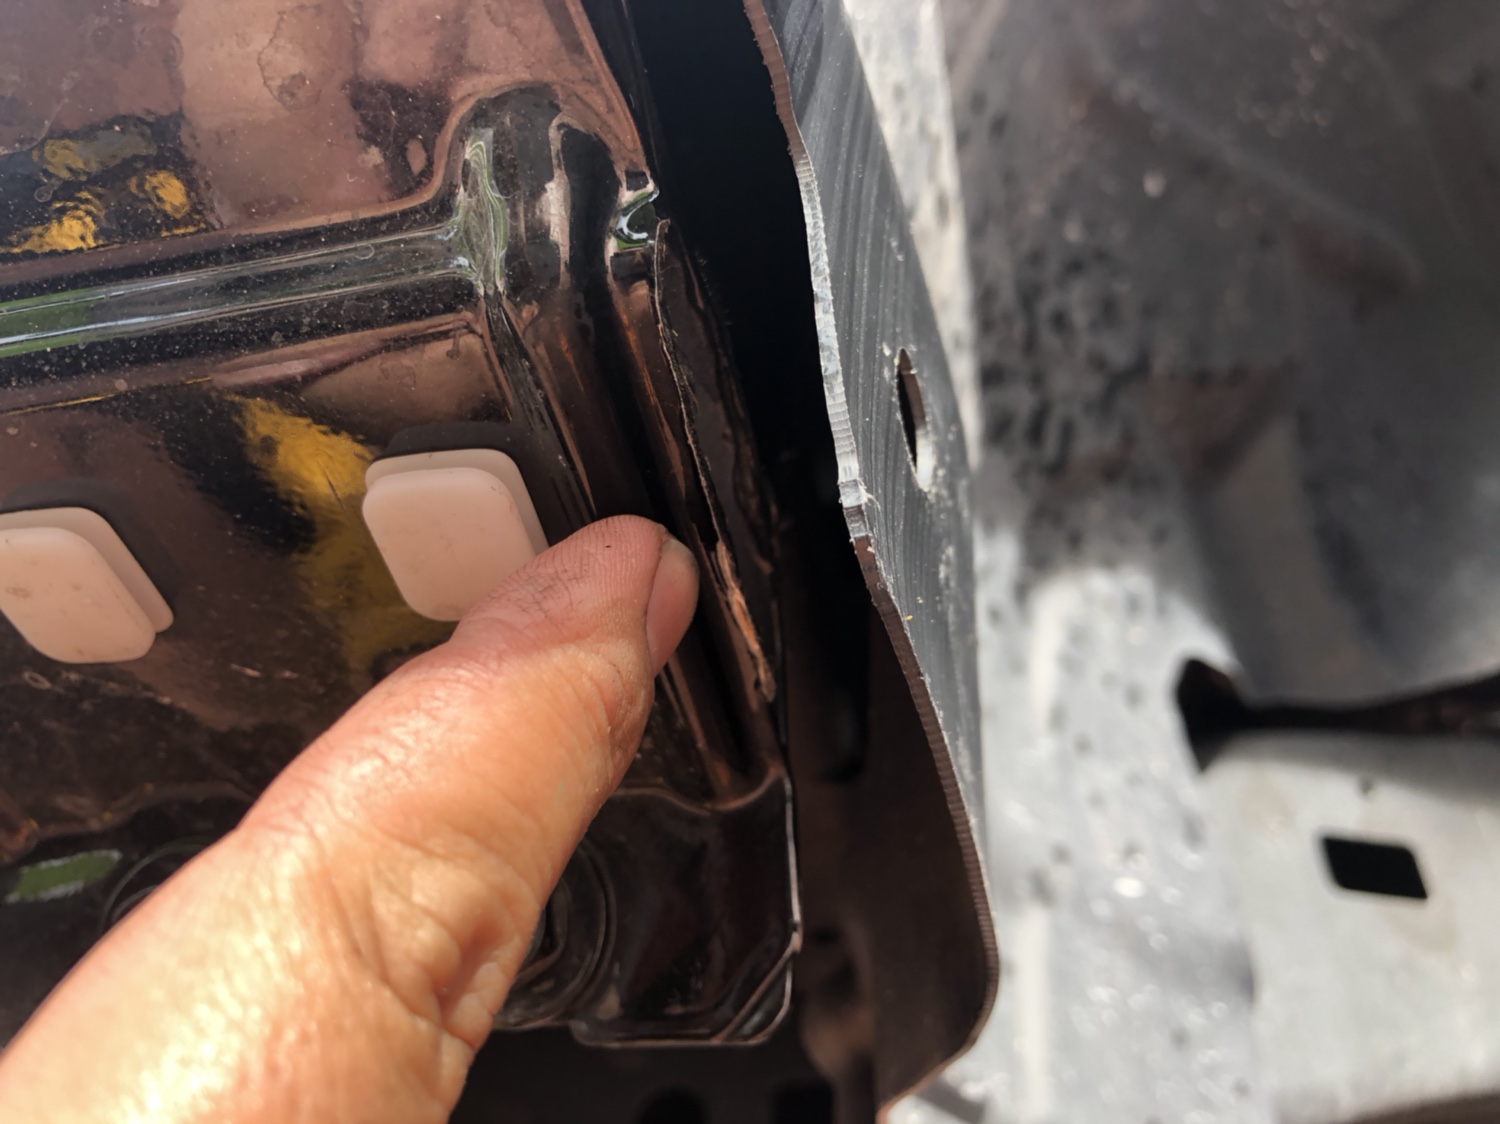
Once done drilling and removing excess sheetmetal apply spray paint of choice to avoid future oxidation.
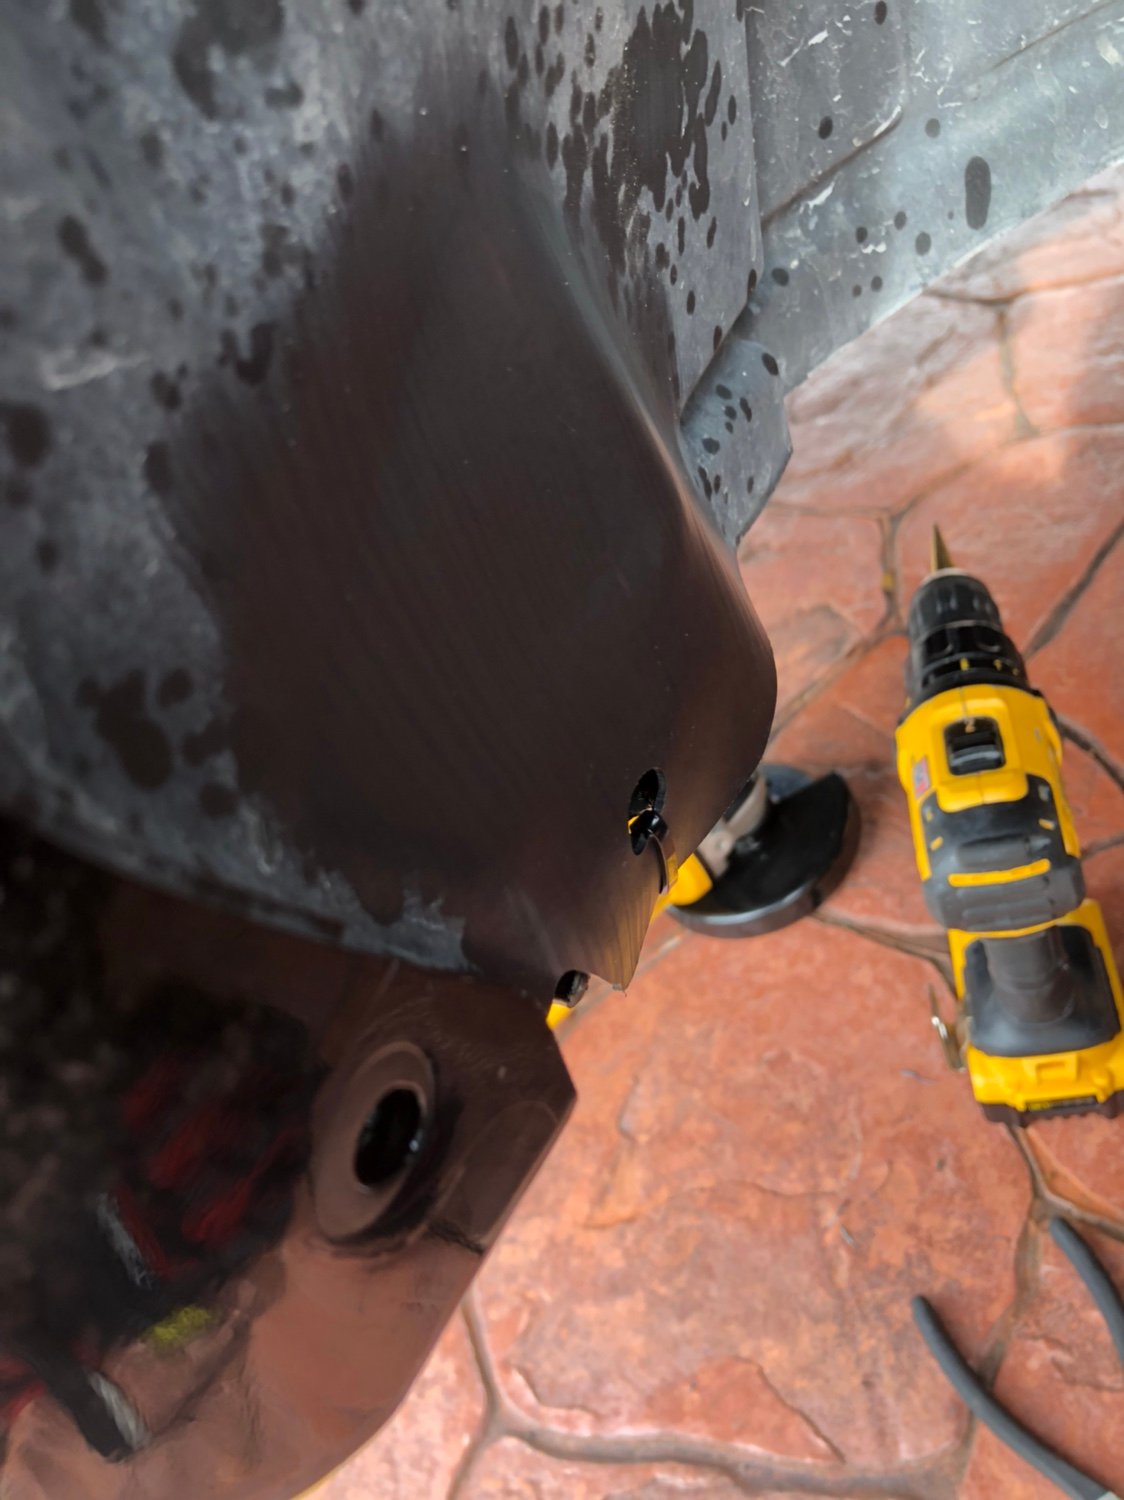
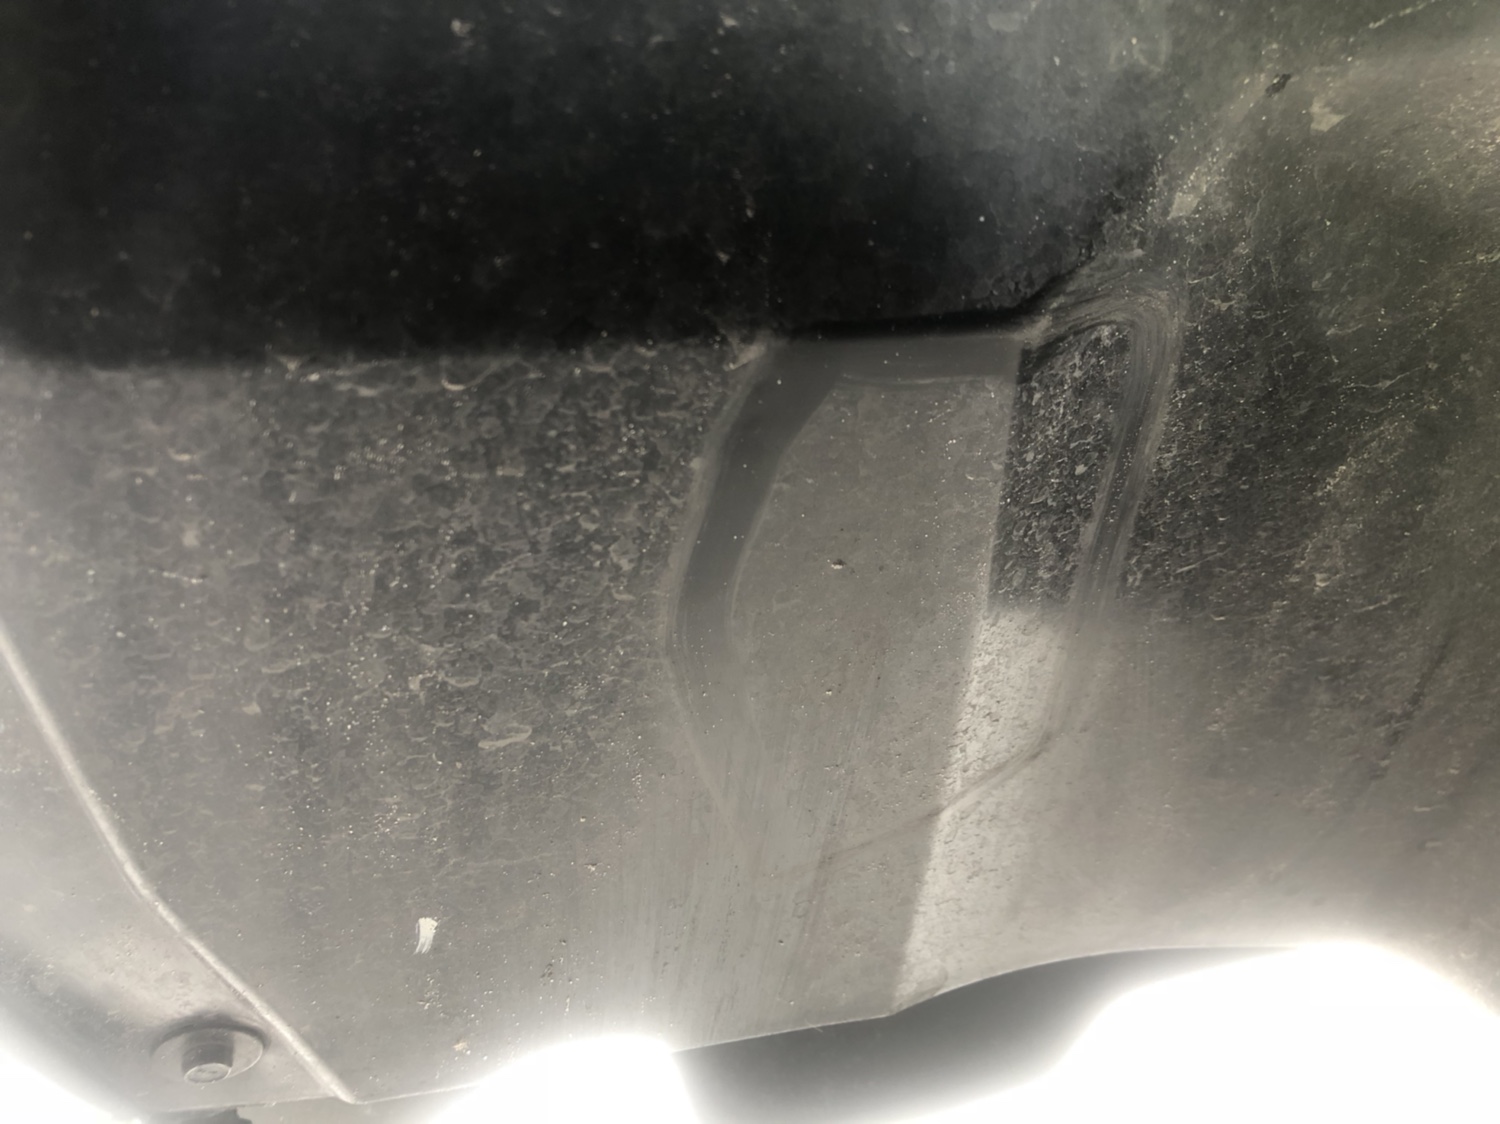
I then proceeded to heat up the plastic liner in the affected area (Clean spot in picture below) as I would heat it up and it would become plyable I then massaged the area with a wet towel in order to mold it back and out of the way giving me more clearance. Move the material around slowly don't heat the area up to much to fast or you can melt it, apply even heat and cool towel pressure will allow you to shape it.
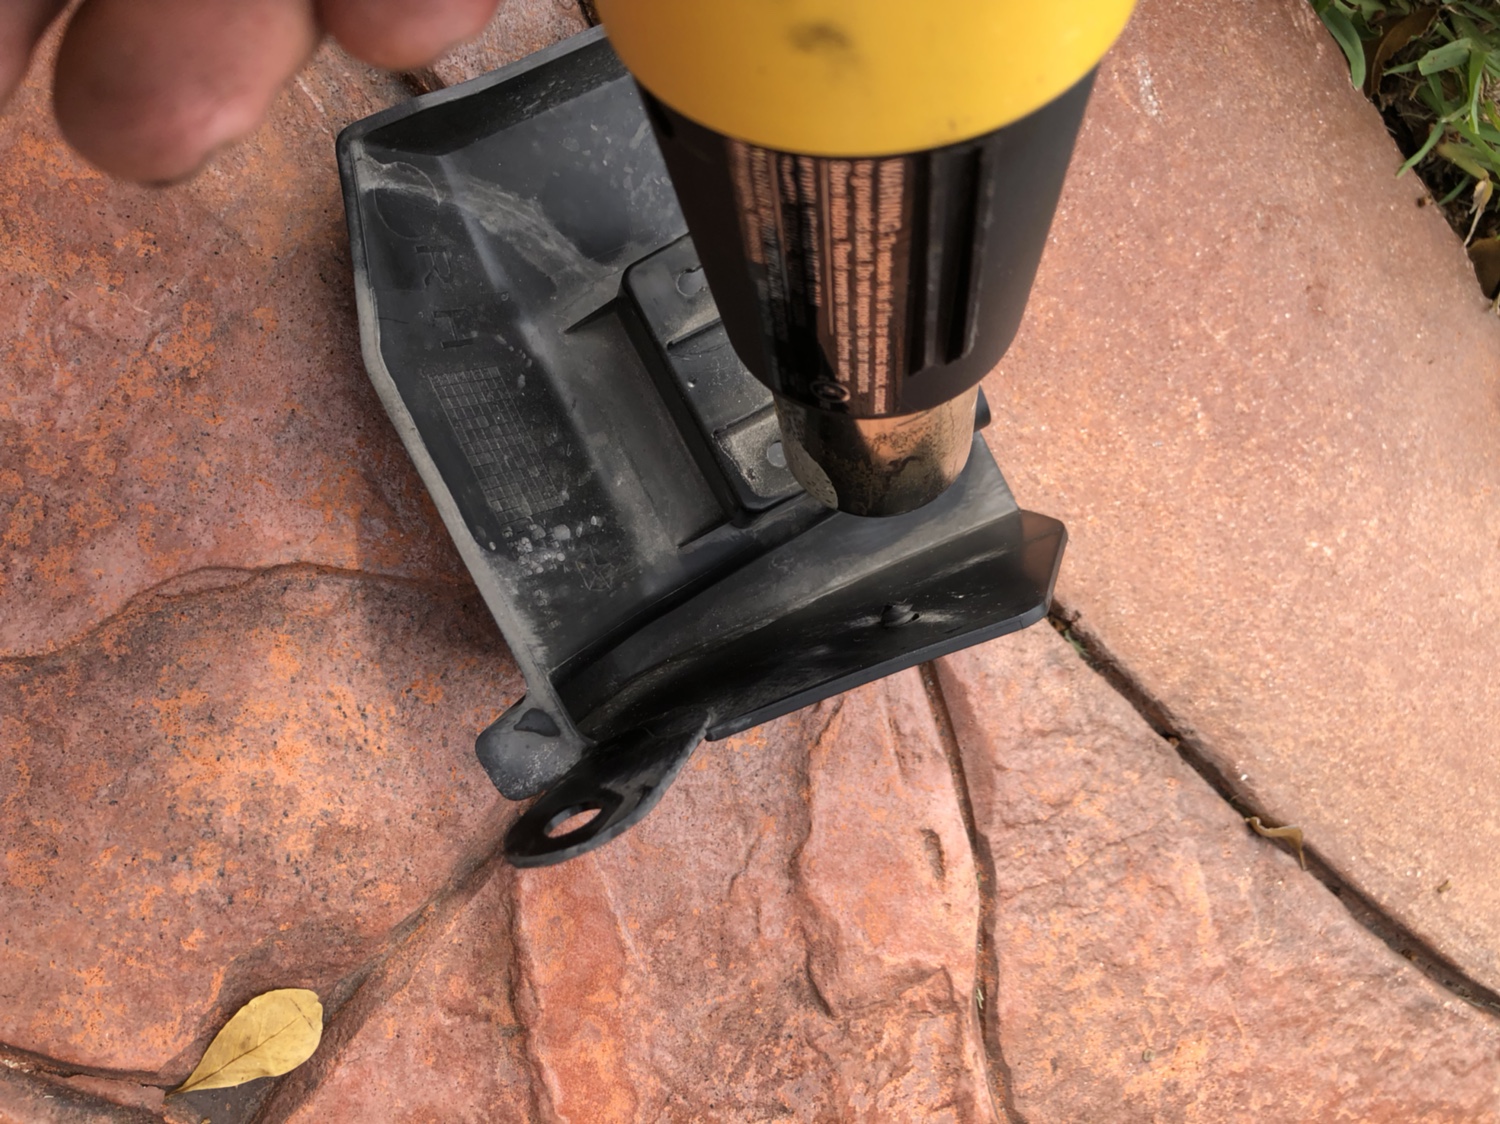
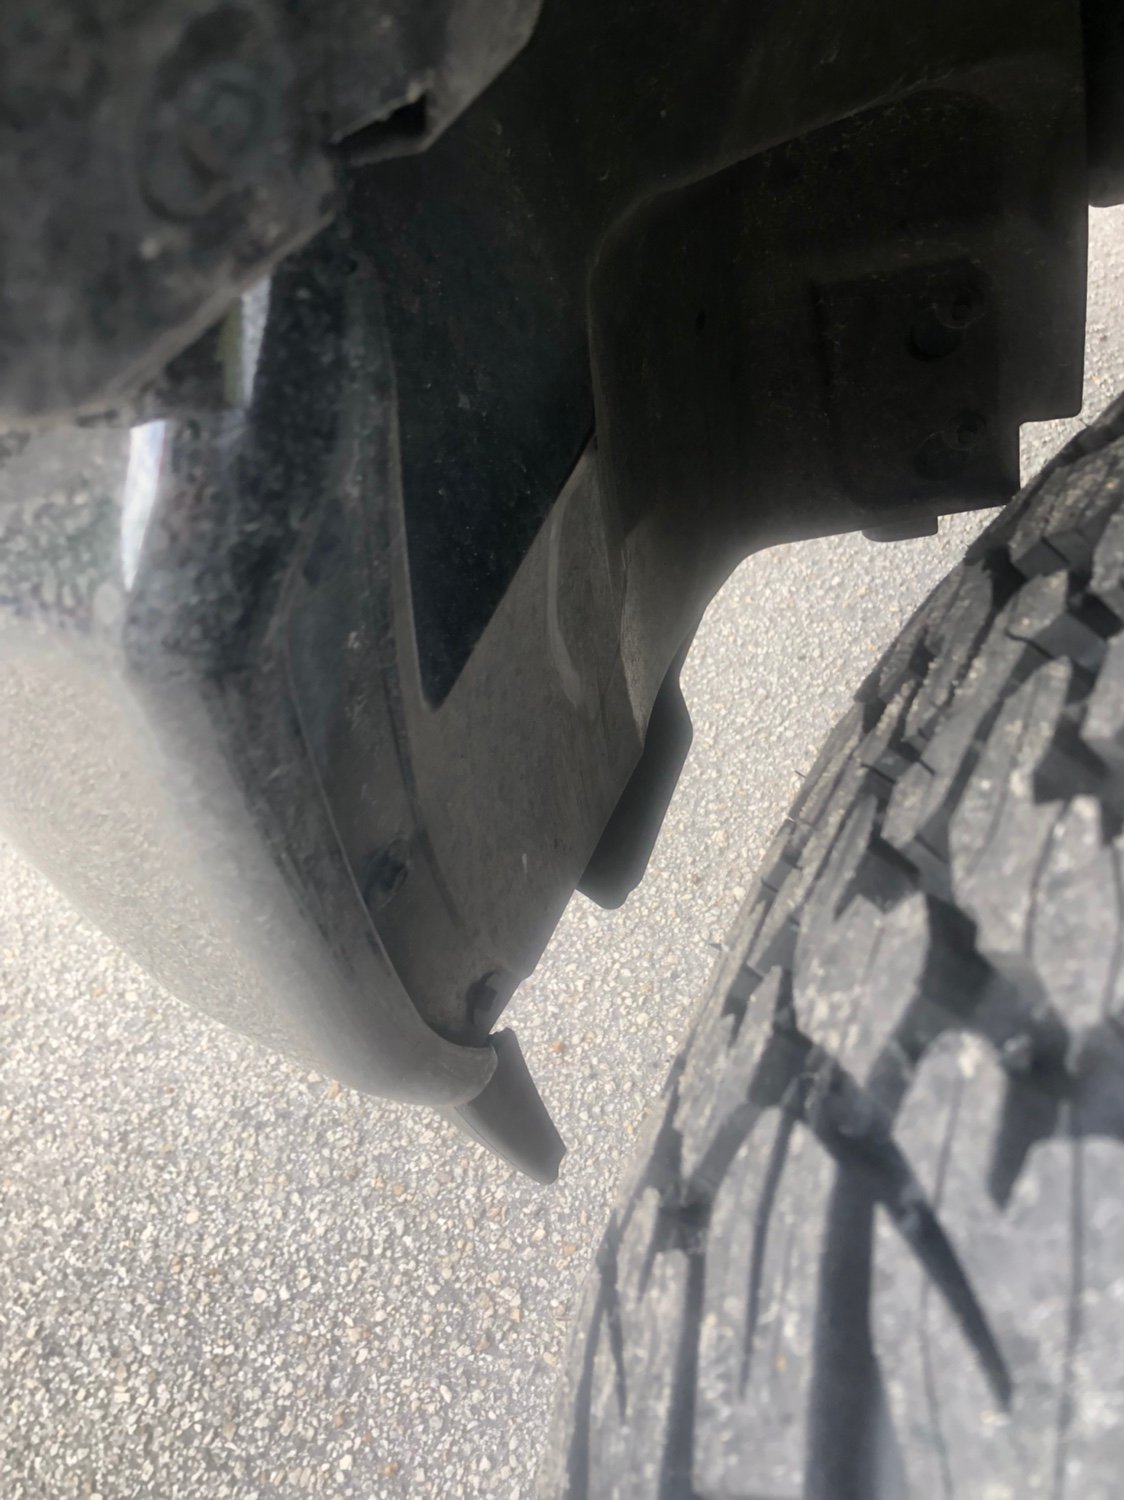
Next item to mold was the plastic trim, I heated the inside area to avoid messing with the finish on it, the lower channel is a bit to wide, so by heating it up and again applying pressure with the wet towel I was able to give myself the play needed to clear the tire.
Once installed here is the final look, no one would know the difference and you don't have to chop up your fender liners.
I also had a little rubbing happening on the front part of the fenders, right on the line (marked with square) so I heated this section up evenly and applied pressure again with a wet towel (Cause its hot, and it cools it down into the shape you want to hold) did this process for a few minutes fine tunning moving the material, letting it cool getting in the truck and turning the wheel all the way and listen for the rub. Once you stop hearing the rub you've completed the project.
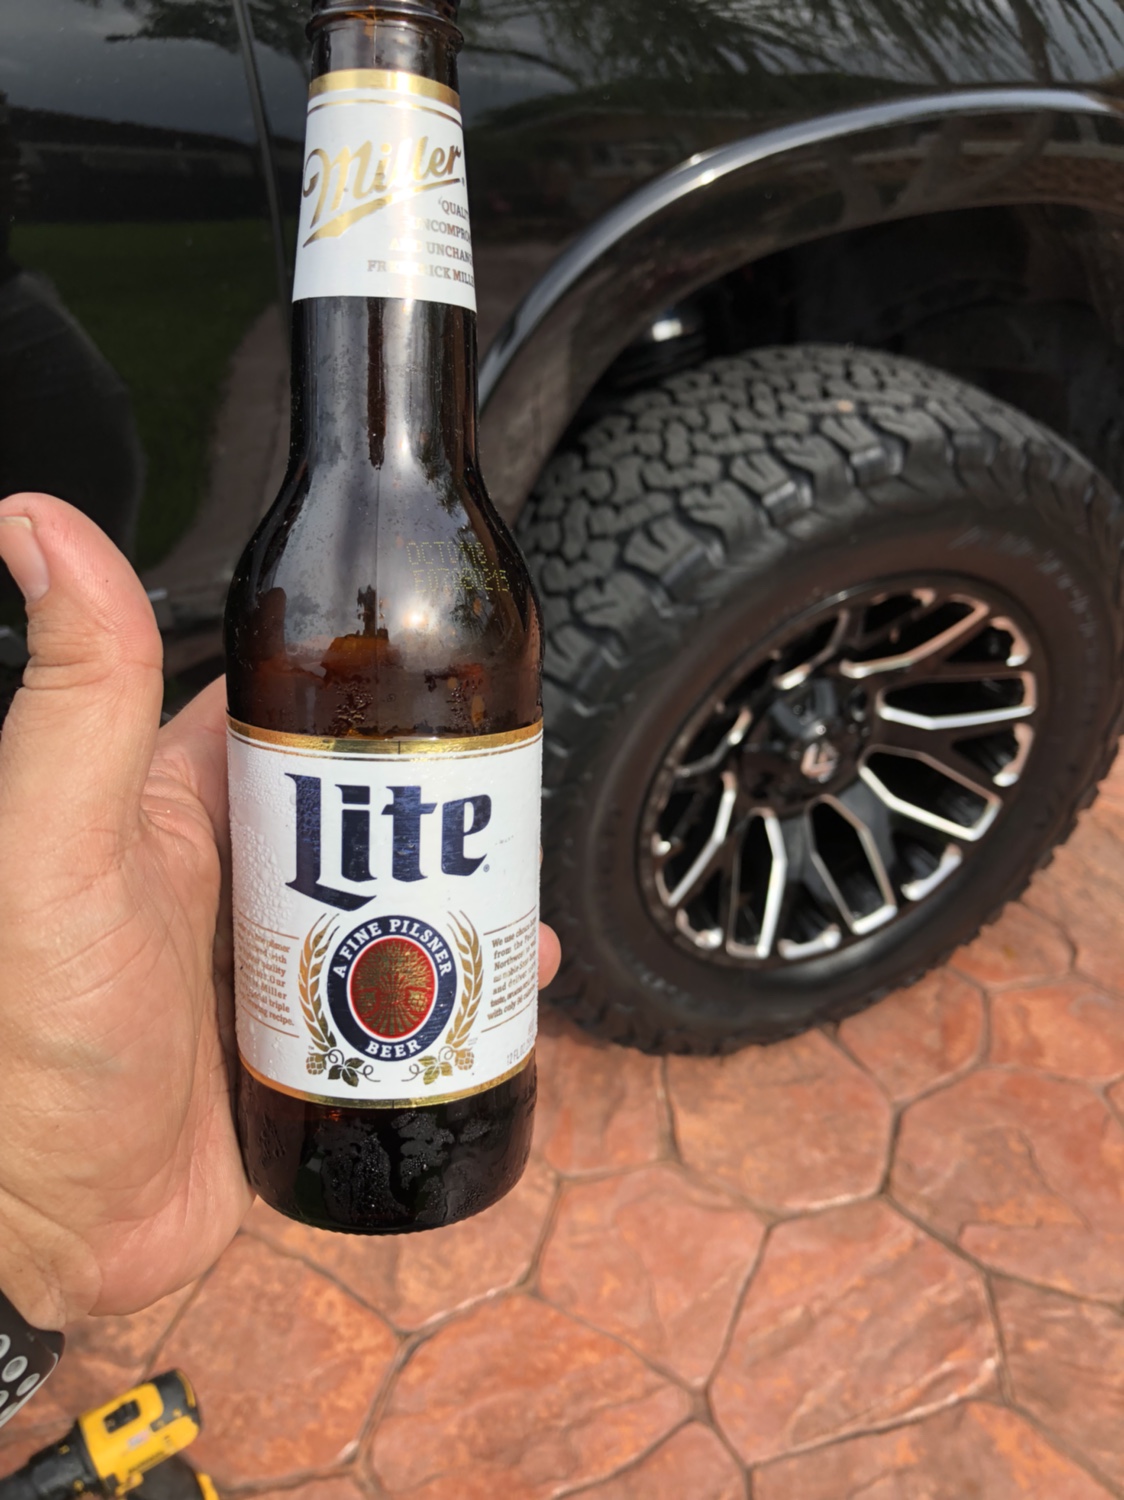
Enjoy your Beer and Rub free ride...
Cheers!
//uploads.tapatalk-cdn.com/20180831/acf688d4281f5a2f151e066478ff5916.
Sent from my iPhone using Tapatalk
Snapped some pictures while modifying the wheel wells today to fit my 35x12.50x20 on a 20x10 -18 offset.
A lot of people ask do they Rub? Answer is Yes, solution is easy since it’s minimal labor.
Tools needed:
Wet towel
8mm socket
Grinder
Spray paint
Heatgun
2 Zip ties
Cold brew of choice!
Begin with finding affected areas, for me it was the Molding on rear of fenders, remove the 8mm bolt and the push in fastener in wheel well. Under the molding there are 2 sliding clips so give the piece a tug outward and should slide right out.
Under the wheel well liner there is a small Metal extension used solely for the retainer clip, this is causing a clearance issue, so I took my grinder and removed it,
I then drilled a small pilot hole to secure a zip tie to to hold the plastic liner back.
Once done drilling and removing excess sheetmetal apply spray paint of choice to avoid future oxidation.
I then proceeded to heat up the plastic liner in the affected area (Clean spot in picture below) as I would heat it up and it would become plyable I then massaged the area with a wet towel in order to mold it back and out of the way giving me more clearance. Move the material around slowly don't heat the area up to much to fast or you can melt it, apply even heat and cool towel pressure will allow you to shape it.
Next item to mold was the plastic trim, I heated the inside area to avoid messing with the finish on it, the lower channel is a bit to wide, so by heating it up and again applying pressure with the wet towel I was able to give myself the play needed to clear the tire.
Once installed here is the final look, no one would know the difference and you don't have to chop up your fender liners.
I also had a little rubbing happening on the front part of the fenders, right on the line (marked with square) so I heated this section up evenly and applied pressure again with a wet towel (Cause its hot, and it cools it down into the shape you want to hold) did this process for a few minutes fine tunning moving the material, letting it cool getting in the truck and turning the wheel all the way and listen for the rub. Once you stop hearing the rub you've completed the project.
Enjoy your Beer and Rub free ride...
Cheers!
Do you have the 4 wheel air suspension? Thank you for the great tutorial!Snapped some pictures while modifying the wheel wells today to fit my 35x12.50x20 on a 20x10 -18 offset.
A lot of people ask do they Rub? Answer is Yes, solution is easy since it’s minimal labor.
Tools needed:
Wet towel
8mm socket
Grinder
Spray paint
Heatgun
2 Zip ties
Cold brew of choice!
Begin with finding affected areas, for me it was the Molding on rear of fenders, remove the 8mm bolt and the push in fastener in wheel well. Under the molding there are 2 sliding clips so give the piece a tug outward and should slide right out.
Under the wheel well liner there is a small Metal extension used solely for the retainer clip, this is causing a clearance issue, so I took my grinder and removed it,
I then drilled a small pilot hole to secure a zip tie to to hold the plastic liner back.
Once done drilling and removing excess sheetmetal apply spray paint of choice to avoid future oxidation.
I then proceeded to heat up the plastic liner in the affected area (Clean spot in picture below) as I would heat it up and it would become plyable I then massaged the area with a wet towel in order to mold it back and out of the way giving me more clearance. Move the material around slowly don't heat the area up to much to fast or you can melt it, apply even heat and cool towel pressure will allow you to shape it.
Next item to mold was the plastic trim, I heated the inside area to avoid messing with the finish on it, the lower channel is a bit to wide, so by heating it up and again applying pressure with the wet towel I was able to give myself the play needed to clear the tire.
Once installed here is the final look, no one would know the difference and you don't have to chop up your fender liners.
I also had a little rubbing happening on the front part of the fenders, right on the line (marked with square) so I heated this section up evenly and applied pressure again with a wet towel (Cause its hot, and it cools it down into the shape you want to hold) did this process for a few minutes fine tunning moving the material, letting it cool getting in the truck and turning the wheel all the way and listen for the rub. Once you stop hearing the rub you've completed the project.
Enjoy your Beer and Rub free ride...
Cheers!
Do you were able to make this clear with just a 2” ready lift? -18 offset?Snapped some pictures while modifying the wheel wells today to fit my 35x12.50x20 on a 20x10 -18 offset.
A lot of people ask do they Rub? Answer is Yes, solution is easy since it’s minimal labor.
Tools needed:
Wet towel
8mm socket
Grinder
Spray paint
Heatgun
2 Zip ties
Cold brew of choice!
Begin with finding affected areas, for me it was the Molding on rear of fenders, remove the 8mm bolt and the push in fastener in wheel well. Under the molding there are 2 sliding clips so give the piece a tug outward and should slide right out.
Under the wheel well liner there is a small Metal extension used solely for the retainer clip, this is causing a clearance issue, so I took my grinder and removed it,
I then drilled a small pilot hole to secure a zip tie to to hold the plastic liner back.
Once done drilling and removing excess sheetmetal apply spray paint of choice to avoid future oxidation.
I then proceeded to heat up the plastic liner in the affected area (Clean spot in picture below) as I would heat it up and it would become plyable I then massaged the area with a wet towel in order to mold it back and out of the way giving me more clearance. Move the material around slowly don't heat the area up to much to fast or you can melt it, apply even heat and cool towel pressure will allow you to shape it.
Next item to mold was the plastic trim, I heated the inside area to avoid messing with the finish on it, the lower channel is a bit to wide, so by heating it up and again applying pressure with the wet towel I was able to give myself the play needed to clear the tire.
Once installed here is the final look, no one would know the difference and you don't have to chop up your fender liners.
I also had a little rubbing happening on the front part of the fenders, right on the line (marked with square) so I heated this section up evenly and applied pressure again with a wet towel (Cause its hot, and it cools it down into the shape you want to hold) did this process for a few minutes fine tunning moving the material, letting it cool getting in the truck and turning the wheel all the way and listen for the rub. Once you stop hearing the rub you've completed the project.
Enjoy your Beer and Rub free ride...
Cheers!
Do you were able to make this clear with just a 2” ready lift? -18 offset?
So if I was doing a Rough Country 5” lift. Would you think a 20x10-24 offset. On 35” tires. Would clear ok? Even if I had to do your process? Or would stick with just -18 offset?
Great write up by the way.
")
This is what I ended up with
2in Rough Country leveling kit
285/70R18 Nitto Ridge Grapplers
I left the fender alone. I don't scrub my fenders either.And you don’t rub at all? Did you do the fender mod or leave it alone?

What did that cost you ? Tires and wheels ?Clears 100%
You are the MAN... own you some beers!!
View attachment 6185View attachment 6186
View attachment 6187
Was wondering if the process looks exactly the same with fender flares? The original poster didn’t have fender flares did he?Wow, did this mod today and completely eliminates the rubbing I had at full turn. My plan was to install the Daystar spacer and make a link. I’m thinking I don’t need either now. The truck is perfect at normal height. 22x12 -40 on 33/12.5/22. I’m going to ride it like this for a week and decide if I want to proceed with the other steps or not. View attachment 24861
Sent from my iPhone using Tapatalk
Works the same way. But, instead of cutting off the tab just bend it up. Then you can drill a hole on the new vertical surface and reuse the body clip to secure the flare and spat.Was wondering if the process looks exactly the same with fender flares? The original poster didn’t have fender flares did he?
This is the part number for the white nylon clip that holds on the fender flare spats:So anybody know where to to get more of these little white clips? Apparently mine were too brittle..or i pulled instead of pushed, either way..i need two more..
I imagine I won’t be able to make enough room to put my weathertech mudflaps back on the front...Works the same way. But, instead of cutting off the tab just bend it up. Then you can drill a hole on the new vertical surface and reuse the body clip to secure the flare and spat.
If you are rubbing now, probably not. Always worth a shot though. May have to go with a higher lift if you want to keep them.I imagine I won’t be able to make enough room to put my weathertech mudflaps back on the front...


