Thanks for chiming in.
Very nice install so far, and with super high quality ingredients. I did my truck awhile back and nobody knows the joy and that feeling when you finish it up and it works. I sunk 2+ weeks into my build, taking PTO from work to be focused. Biggest regret was doing it while it was 100+ *F outside.
We normally never get that hot, and the one summer we are high 90's is the month I decide to install it. Low hundreds in the garage. I think I sweat off 5 lbs lol.
1. Are you pulling the headliner to do the roof at all? If you have the pano sunroof, I'd argue that it might not be worth the effort, but seeing your level of acoustic treatments, I know you will. You can see what you'd be working with in my
build log. Lots of gadgets and dodads up there. Hard to find good places to apply CLD or CCF.
Due to having the pano roof, I really didn't see much improvement that could be made from doing the very small portion of the roof. MLV would be ineffective up there, so it would just be strictly for panel resonance, which there isn't a lot of. I may look into it down the road, but it's a small return on investment in that area. Two Rams ago I just had the small sunroof, and I did opt to do the roof on that truck.
2. Any plans for rear fill? Guessing not with a 3 way front+substage on the DSP3. I finally built a vehicle that had enough midbass punch for my liking by adding midbasses to the rear and feeding them a L-R and R-L signal. I got the chance to listen to the setup without the rears for awhile, and the rears elevated my midbass without adding any coherence problems (with proper time alignment and some help from Dirac Live on my MiniDSP). I see you're squeezing in 8s, so it looks like you're chasing midbass punch too.
I am a huge mid bass nut. I run horn loaded 18" drivers in my theater. Nothing compares to a good chest thump. Rear fill can be super tricky. That's awesome you got it tuned to your liking. I've heard a few vehicles that actually had rear fill done correctly, and it does add a subtle improvement to the overall sound stage. Good mid bass is all about coherent phasing between drivers. When done properly, a 6.5 can work fairly well; and obviously an 8 will do better. I've heard setups that had zero mid bass coming from some pretty capable drivers. A quick REW sweep identified phase issues immediately. I will most likely end up adding a front sub to the truck down the road. I almost wish I would have glassed one when I had the interior gutted. Dumb oversight on my part
3. Have you seen
Thinsulate rolls used in audio applications? I backed off some on CLD and CCF in favor of Thinsulate in my doors for this install. CLD coverage was...don't remember exactly, but I'll guess ~50% coverage in the door vertical surfaces, but with the door card packed with Thinsulate, this install is noticeably better than my previous installs where I went super heavy on CLD, CCF, and MLV. I suspect the Thinsulate is working as a massive decoupler for the exterior touch points on the doors. My midbass is nuts with just the GB60s in the front and GS690s in the rear. On certain mid-80s tracks (Phil Collins for example) it's
almost too much. Lots of bang for minimal weight added to the doors. My 2011 challenger's doors were twice as heavy as they started, and that was an annoyance on a car with long doors like that. The truck door added weight is hardly noticeable. Better results and less side effects.
That's an interesting observation regarding thinsulate. The general consensus with CLD, is a 50% coverage. You're just trying to absorb panel resonance. I have found personally that 100% CLD coverage in the doors does yield an improvement, but I'm sure there are combos that compliment one another more than others. I've never used black hole tiles, but a lot of top installers swear by them, and it's a similar principle to what I use in my theater for sound treatment, so I figured why not.
The SRT I just sold was running full AF; those GB60's are no joke. I ran 60's, GB25, GB10, and GB12. I liked that setup, but never really fell in love with it. I know others swear by them. They are sitting on a shelf right now; I'll probably list them on DIYMA in a bit.
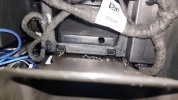
4. I too had to work around the eTorque battery. I didn't pull it to treat the rear wall. MLVs goal is to establish a wall of weight, and the eTorque battery is dense already. I ran my MLV right up to it and tucked it into the cracks, but the battery seems to have done a good job back there for my two GB10D2 subs. The nightmare was running all new wiring throughout the vehicle. Everything on the driver's side had to cross over/under the eTorque battery cabling or underneath the battery pack, and I ran 16 AWG to everything.
I unbolted the etorque battery and moved it forward enough to CLD behind it. I wasn't worried about treating the battery itself, but the cab. What most people don't understand about MLV's designated usage; it's not a dampening material. Applying it to a panel will yield almost zero improvements, if it's not 100% coverage. Applying it without a decoupler, will also yield very little benefit. That's why MLV is so tough to apply properly in a vehicle. If you look at the data, its sound transmission suppression drops exponentially as the coverage goes down. 80% coverage yields very little effectiveness overall. It's really an all or none product. That's why I hung the MLV over the entire rear wall, covering everything. I also made sure to cover the entire floor with full pieces when possible. There is no way to get 100% coverage, but I feel I got a solid 90%, which has shown to lower overall DB's inside the cab by up to 10db's. The other major area that I haven't gotten to yet is the wheel wells. I will be applying sludge and mlv sheets inside the fender liners. This has shown to reduce noise considerably as well inside the cab.
The wiring is a bit tough; the drivers side raceway has very little room to add 1/0 ga cable and a handful of 16 ga wires.
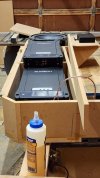
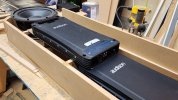
5. Laying out the amp rack was super challenging, and I ended up with my rears on a 4 channel that had no hope of fitting on the back wall. I rigged up an amp rack extension that ran forward, towards my sub box. I mounted the DPS and the rears amp to it and it ended up neat and tidy. If you're still in progress, you might check my build log out for ideas. Added benefit is I can reach the DSP to plug in my laptop, etc. The rear wall amps that power my subs and frontstage are virtually inaccessible with the rear seats in.
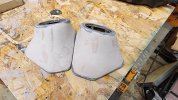
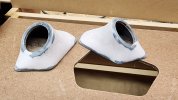
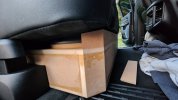
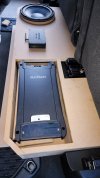
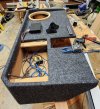
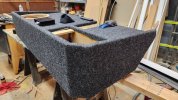
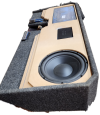
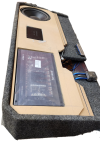
One important thing for me was having the ability to access the DSP and amps for swapping out when I get bored (which I tend to do a lot). I have a final design which houses the sub and amps together in one enclosure/rack, that all fits under the seat. I really waffled back and forth wanting to run 2 subs, but I feel with the seat lift and the GB12 in the mix; I'll be content with bass for an SQ system. Displacement on a single GB12 should be pretty similar to even dual 12" pancake subs. I really wanted to run an AE sbp12, I just don't think I can squeeze 2-3 cf in with the amp rack.
I'll be sure to check out your build thread. Sounds amazing.
6. Be sure you wrap your new wiring in automotive tape. I thought I did an awesome job of that, but when I got it all back together, my own super acoustic treatment made the deficiencies more apparent. I had to take the headliner back off to do a better job of wrapping some wiring I ran up there.
Everything that could be possibly wrapped has been with tessa tape. Between that, butyl, and CCF; I'm hoping everything will be rattle/resonance free.
Super awesome build so far! I'd love to hear this truck when it's done.
Thank you.
