Teeker1927
New Member
- Joined
- Feb 23, 2021
- Messages
- 1
- Reaction score
- 1
- Points
- 3
- Age
- 44
This is one of the main reasons I haven’t done this... let us know how it goes. If it works I’ll try and find a premade block off plug and do the same.@BostonBLS and anyone else interested in a blank plug
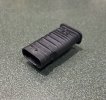
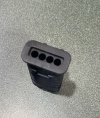
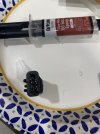
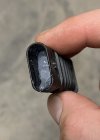
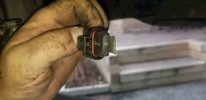
I just removed my active air dam along with the air dam on the bottom of the bumper in order to clear my plow frame. I love the look but I wasn't happy about just taping the active air dam connector so I did some digging and I think I found a solution to make my own blank. I just ordered a part number 0535451528 which is sold as a Mercedes-Benz plug housing but from what I can tell it's the exact same connector. I found a used one on ebay for $5 so I figured I'd give it a shot. I plan to fill the connector pin holes with epoxy to seal them and then just plug it in.
I'll also through this out there-
I found these which appear to be the same connector as well but they were a bit more expensive. I also can't tell what the difference is in the MA vs MB connectors
https://shop.hirschmann-automotive.com/connectors/2070/4way-1.2-sealstar-ma-connector
https://shop.hirschmann-automotive.com/connectors/2071/4way-1.2-sealstar-mb-connector
https://www.amazon.com/Davitu-Connector-Hessmann-872-617-541-805-122-541/dp/B07LD5YRHW
https://www.ebay.com/itm/Connector-...F-Temp-Oxygen-Sensor-HIRSCHMANN-/254655726572
I noticed most of these come from overseas so the shipping time may take a bit. I was lucky and found one in the US.
So I will let you all know either way when I get it, and if it does fit I'll post pictures of the outcome.
No, I didn't notice any change in the way the truck drives or feels.Anyone feel any difference in the steering or the way the truck rides at freeway speeds once you removed both pieces. Just curious.
Following up on my post for you all.@BostonBLS and anyone else interested in a blank plug
I just removed my active air dam along with the air dam on the bottom of the bumper in order to clear my plow frame. I love the look but I wasn't happy about just taping the active air dam connector so I did some digging and I think I found a solution to make my own blank. I just ordered a part number 0535451528 which is sold as a Mercedes-Benz plug housing but from what I can tell it's the exact same connector. I found a used one on ebay for $5 so I figured I'd give it a shot. I plan to fill the connector pin holes with epoxy to seal them and then just plug it in.
I'll also through this out there-
I found these which appear to be the same connector as well but they were a bit more expensive. I also can't tell what the difference is in the MA vs MB connectors
https://shop.hirschmann-automotive.com/connectors/2070/4way-1.2-sealstar-ma-connector
https://shop.hirschmann-automotive.com/connectors/2071/4way-1.2-sealstar-mb-connector
https://www.amazon.com/Davitu-Connector-Hessmann-872-617-541-805-122-541/dp/B07LD5YRHW
https://www.ebay.com/itm/Connector-...F-Temp-Oxygen-Sensor-HIRSCHMANN-/254655726572
I noticed most of these come from overseas so the shipping time may take a bit. I was lucky and found one in the US.
So I will let you all know either way when I get it, and if it does fit I'll post pictures of the outcome.
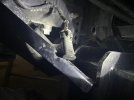
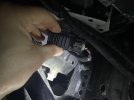
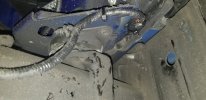
Thx. Have any idea where that wire (going forward to the rubber mount, I assume) actually ties back into the harness? I can’t find a similar branch...The AAD connector is on the lower front left of the engine bay, near the driver side frame rail. I don't have a pic of where it branches off the main harness, but I have a pic of mine taped over another wiring harness to keep it from just hanging there...
View attachment 85093
That damn CRS disease.I'll take a look after work if I have time. My biggest issue is remembering
You da man! THXLooks like the active air dam harness comes off the main lighting harness in the area behind the lef fog light.
View attachment 85244
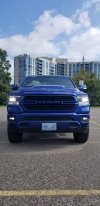
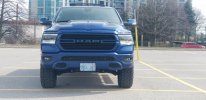


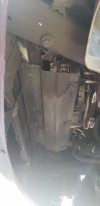
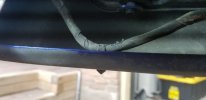
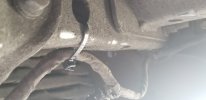
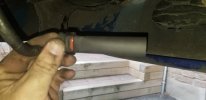
I’m removing my air dam on my ram 1500 2020 night edition. I will be happy to give it to you for free. Is going to the trash anyway.I’d be interested in anyone’s take-off active air dam if you’re looking to get rid of it. I’ll pay the shipping or pick up anywhere near central Florida. Please let me know.
Well I joined the club and removed both my stationary air dam and active air dam. I removed the stationary and its brackets as one piece so I didn't need to remove the front butterfly clips. Took about 45 mins and that was working at a slower easy pace and talking on the phone with a buddy. Could have done it in 20 mins or so.
In the pictures you'll see I removed the wire clips attached to the lower bumper and zip tied them. If I didnt you would see the push pin when looking at the bumper.
To solve the now exposed connector. I had shrink wrap laying around so I just slid that over the connector and then taped it up for added protection. Then zip ties it up high and out of the way.
When I did the removal, I took the active air dam out first as I have seen others remove it after. Let me tell you removing the active air dam makes taking the 10- 10mm bolts and clips out way easier for the stationary air dam I was able to drive on my truck the ramps and then I was able to sit on my butt and work with it and not have to lay down. Way better and easier on your body.
Enjoy.
Before
View attachment 88919
After
View attachment 88945
View attachment 88920View attachment 88931
View attachment 88938View attachment 88939View attachment 88940View attachment 88941View attachment 88942
View attachment 88944Are you having any problems or Engine lights after removing the airdam?
Thanks for the offer but I already got one from another member.I’m removing my air dam on my ram 1500 2020 night edition. I will be happy to give it to you for free. Is going to the trash anyway.
