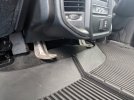
Wanted to get this recorded for anyone else that wants to take the plunge. I got all my parts from another forum member rlc2020 who gave me his center jump seat and all supporting parts in exchange for my center console (his write up is in this thread :
https://5thgenrams.com/community/threads/center-console-conversion.4140/). I'm not going to go into a lot of the mechanics of bolting and unbolting pieces because honestly its super simple and pretty intuitive, especially once you pull all your original parts that you will be discarding, it will be easy for you to see where your new parts will go. From my perspective, these were the parts I needed to remove and swap:
1. Entire front carpet (requires disconnecting the connectors under the front seats and pulling out the seats, unless you decide to cut the carpet)
2. Center console (comes out as one unit with a few bolts in the front and the back, no skill required). If you are doing a swap with someone you will most likely give them the wiring harness that is connected to the console, but you will need this for your install so if you get rid of your original one, you will have to order a replacement from a mopar parts store. The jump seat that I was getting did not have a CD player install, so I was going to lose that capability, but no biggie, I just ordered a wiring harness for the center console without the CD player
3. Silver Bracket at the back of the center console that connects it to the floor (see next picture for reference)
View attachment 16417
This next picture shows why you need to swap the carpeting, trucks with the center console have some of the carpeting cut out under the console.
View attachment 16418
At this point, it was a matter of making sure I had everything I needed to install. That includes:
1: New front center dash storage area/trim were your new USBs and power outlet come from
2. Jump seat
3. AC ducting that goes from the center console along the floor to the jump seat
4. Replacement front carpet
Once you're ready to go, first thing is to place your new bracket that will help anchor your jump seat to the floor. It looks similar to the one you removed but its a bit beefier, obviously because it will be holding more weight. Its a simple "swap one in the place of the other" deal. Once that bracket is in, go ahead and install the AC ducting on the floor and then install your carpet over it (sorry I dont have pictures of this, but you can see where it would connect in the picture above, right below the silver bracket at the bottom of your center dash area).
Once your carpet is all back in, you need to prep your jump seat for install. This requires that you wire in your new (or existing) wiring harness so that you can still play with apple car play and charge all your fancy gadgets. I ordered part #
68362132AC since I did not need a CD player wired in, if you do, it would be part #
68362133AD. You will need to access the under side of your jump seat and unplug the entire wiring harness. This is easy to do with the exception of the one set of wires that run into the lid of the jump seat for the single USB in there. IMO its not worth pulling apart the whole seat (it will take you a LONG time if you can even do it) so when it came to that cluster of wires at the end, I just cut it with the plan to connect my new wires from the new wiring harness directly to the old wires. Here is a picture for reference on what it looks like under the jump seat as it comes from the factory:
View attachment 16425
You will need to do some work to get the OEM jump seat harness disconnected from the back facing USB hub. First, you will need to remove both side plastic panels on the seat (see following picture)
View attachment 16426
Then you will need to loosen/disconnect (but not remove) the black plastic piece that sits below the seat cushion but above the main plastic of the back vent area. I'm pointing at it in the picture below, just stick a pry tool in the there and pry it towards the cushion.
View attachment 16427
Once that is loose, you can pry off the whole back piece
View attachment 16428
Will continue on next post...


