5thGenRams Forums

Register a free account today to become a member! Once signed in, you'll be able to participate on this site by adding your own topics and posts, as well as connect with other members through your own private inbox!

Bed Utility rail installation

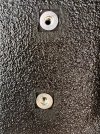
After reading through this and related threads, decided to clear Line-X around hex holes. Rivet nut tool should be here Wednesday. This took me a little over an hour. First one was by far the longest. I looked at some YouTube videos on removing spray-on bedliner. My primary tools were a utility knife and small screw driver. By the 16th hole I was a pro.

Note that spray on bedliner thickness can vary a lot. Using a makeshift caliper, I was able to verify that the material thickness around three of my rivet nut locations was greater than what the rivet nut specs would allow. That means 13 others were fine or marginal. Nonetheless, there is less risk securing the rails steadfastly with the bedliner out of the way.

Next step touch up paint. Update—added picture with touch up paint.
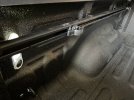
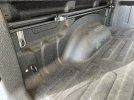
I’m finally done. This was a nerve racking project. Ultimately I got ALL of the rivet nuts in as they were intended. I had to purchase one new rivet nut that halfway crimped, and two hex holes in the bed are round now (but ultimately crimped in firmly). I was super careful to not over torque on final install…I was happy to hear the click 16 times.

My best rivet nut tool ended up being a homemade one with a 30mm m6 bolt and a larger nut/sleeve I had left over from a broken Dorman rivet nut tool. It gave me the best feel and control.

The OEM instructions are bad. I wonder how many of these rails were installed incorrectly or returned? This forum saved me a ton of time.

Thanks all.
 

Attachments

  • D7C1E796-78A6-4B93-9EE8-47B26AACC725.jpeg
    D7C1E796-78A6-4B93-9EE8-47B26AACC725.jpeg
    407.3 KB · Views: 65
  • 461478C3-FA62-4494-8FE8-BB160263F907.jpeg
    461478C3-FA62-4494-8FE8-BB160263F907.jpeg
    237.9 KB · Views: 65
  • 2B64EB8B-E1B6-4B02-8E5E-5279473F6EC5.jpeg
    2B64EB8B-E1B6-4B02-8E5E-5279473F6EC5.jpeg
    331.8 KB · Views: 65
Last edited:
I’m finally done. This was a nerve racking project. Ultimately I got ALL of the rivet nuts in as they were intended. I had to purchase one new rivet nut that halfway crimped, and two hex holes in the bed are round now (but ultimately crimped in firmly). I was super careful to not over torque on final install…I was happy to hear the click 16 times.

My best rivet nut tool ended up being a homemade one with a 30mm m6 bolt and a larger nut/sleeve had left over from a broken Dorman rivet nut tool. It gave me the best feel and control.

The OEM instructions are bad. I wonder how many of these rails were installed incorrectly or returned? This forum saved me a ton of time.

Thanks all.
Back in the day, in the dealership, that's all we used was the bolt and nut method. Back then we didn't know of a special tool being available. They would only have specialized tools like that in the factory.
 
If interested, cleat dimensions here. I want to use mine as a bike rack.


Users who are viewing this thread

Back
Top