5thGenRams Forums
You are using an out of date browser. It may not display this or other websites correctly.
You should upgrade or use an alternative browser.
You should upgrade or use an alternative browser.
Amateur Radio (ham) install
- Thread starter Couchsachraga
- Start date
mountainmonkey
New Member
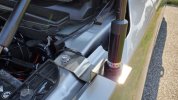
How did you end up grounding this mount? I just mounted mine and appear to not have a solid ground from the mount to the chassis. Did you have to remove paint from inside the stake pocket before installing the mount? Did you utilize the ground screw on the mount clamp? If so where did you route the ground wire to on the vehicle?I don't believe so. This is the model I bought. Breedlove #930
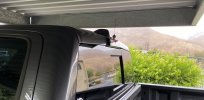
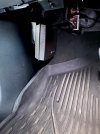
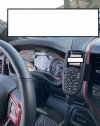
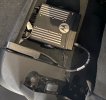
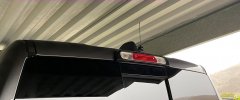
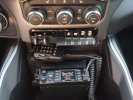
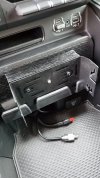
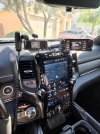
Hey all! Just joined. Thanks for all the great ideas. Here's a couple shots of my install. I am using the newly released "bulletproof diesel no drill antenna mount" which mounts between the body and third brake light assembly! It works incredibly well and gives you an NMO mount and plenty of cable which I ran through the existing 3rd brake light hole and down the pillar right to my radio brick. Didn't have to mess with any of the upholstery and just fished the cable through from the exterior. The gasket on the mount is solid and has stood up to the elements quite well. I am planning on slapping an all band antenna on to go with my all band radio that's coming in. I am using the Proclip heavy duty mount with a standard mic lip to hold the control head/mic.
Attachments
securityguy
Legendary member
You have great taste in equipment. Motorola is my old almamatter...my first job as an Engineer out of college. Great stuff!Hey all! Just joined. Thanks for all the great ideas. Here's a couple shots of my install. I am using the newly released "bulletproof diesel no drill antenna mount" which mounts between the body and third brake light assembly! It works incredibly well and gives you an NMO mount and plenty of cable which I ran through the existing 3rd brake light hole and down the pillar right to my radio brick. Didn't have to mess with any of the upholstery and just fished the cable through from the exterior. The gasket on the mount is solid and has stood up to the elements quite well. I am planning on slapping an all band antenna on to go with my all band radio that's coming in. I am using the Proclip heavy duty mount with a standard mic lip to hold the control head/mic.
Thanks! APX8500 all band going in very shortlyYou have great taste in equipment. Motorola is my old almamatter...my first job as an Engineer out of college. Great stuff!
funtrucker
Member
- Joined
- Jul 5, 2020
- Messages
- 16
- Reaction score
- 7
- Points
- 3
- Age
- 64
I have a kenwood uhf/vhf under the passenger seat and the head is on an arm bolted to the floor bolt. I use a short magnetic dual band antenna mounted the cab.
funtrucker
Member
- Joined
- Jul 5, 2020
- Messages
- 16
- Reaction score
- 7
- Points
- 3
- Age
- 64
need to find a place to run the antenna cable out of the cab without drilling. Any suggestions?
brdima
Active Member
- Joined
- Dec 17, 2018
- Messages
- 95
- Reaction score
- 65
- Points
- 18
There is a removable plug under the carpet in the rear cab driver side. I used that and sealed with some flex seal.need to find a place to run the antenna cable out of the cab without drilling. Any suggestions?
Cheezer
New Member
What antenna are you using? How's it working out? I am looking to do a hood mount as well.Just installed mine today after procrastinating for 6 months
N3CAL
New Member
- Joined
- Mar 9, 2020
- Messages
- 4
- Reaction score
- 8
- Points
- 3
- Age
- 64
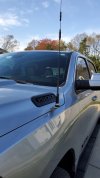
Just finished my install on 2020 1500 Bighorn. The antenna is Diamond CR-320ANMO Tri-Band. The radio is Anytone AT-D578 Tri-Band DMR. Coax and power cable from battery comes in through firewall rubber boot on drivers side. Found the fender mount online at "The Antenna Farm" website. NCG model number DG3ANTNCG for Ram 1500,2500,3500 (2019-2021) Very clean and easy install. SWR on all three bands (2m, 1.2m and 70 cm) are all below 1.3 to 1. The radio has built in Bluetooth and it connects to 1500 radio without any issues both TX and RX through the stereo is nice!
Attachments
Last edited:
deanathpc
New Member
This thread is very helpful. I'll have to see what I can do to find a way out of the cab for power and antenna. Thanks for everyone who posted locations of grommets etc.
Eddie
Member
- Joined
- Feb 28, 2020
- Messages
- 8
- Reaction score
- 11
- Points
- 3
- Age
- 48
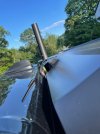
I have been putting off this install quite a while. Passed Technician test Jan 2020. Purchased 1500 Eco Diesel May 2020. Installed Compactenna and 3RD Light Bracket. Ran antenna cable down along rear window, it sits in nicely and up thru grommet beside rear floor storage box.
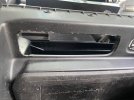
Recently purchased a Yaesu FTM-300DR and yesterday went searching for a place to hide it in truck. I decided to hide it in the space reserved for the CD player. Removed the plastic storage cubby there and using a dremel made the open ever so slightly larger.
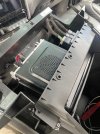
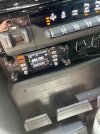
I added a few cable ties and drilled some holes in the plastic underneath to secure it.
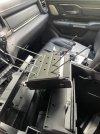
Drilled a hole on drivers side for mic
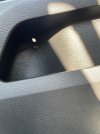
There was an existing access hole in bulkhead grommet I just had to cut the end of it on the engine side.
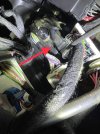
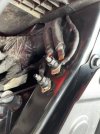
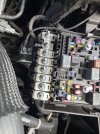
I used the supplied cable from Yaesu and pushed it thru this grommet. Landed the ground under an existing ground point in engine bay near battery. Installed the hot on a spare lug in main fuse box, this is temporary until i get a chance to install a relay that is operated by ignition on. Right now its always hot.
Finished product, now I just need to learn how to use it.
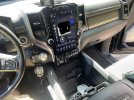


Recently purchased a Yaesu FTM-300DR and yesterday went searching for a place to hide it in truck. I decided to hide it in the space reserved for the CD player. Removed the plastic storage cubby there and using a dremel made the open ever so slightly larger.


I added a few cable ties and drilled some holes in the plastic underneath to secure it.

Drilled a hole on drivers side for mic

There was an existing access hole in bulkhead grommet I just had to cut the end of it on the engine side.

I used the supplied cable from Yaesu and pushed it thru this grommet. Landed the ground under an existing ground point in engine bay near battery. Installed the hot on a spare lug in main fuse box, this is temporary until i get a chance to install a relay that is operated by ignition on. Right now its always hot.


Finished product, now I just need to learn how to use it.


Last edited:
brdima
Active Member
- Joined
- Dec 17, 2018
- Messages
- 95
- Reaction score
- 65
- Points
- 18
Very cool but did you know this radio has a detachable face? So you could separate the radio body from the control face.I have been putting off this install quite a while. Passed Technician test Jan 2020. Purchased 1500 Eco Diesel May 2020. Installed Compactenna and 3RD Light Bracket. Ran antenna cable down along rear window, it sits in nicely and up thru grommet beside rear floor storage box.
View attachment 102970
Recently purchased a Yaesu FTM-300DR and yesterday went searching for a place to hide it in truck. I decided to hide it in the space reserved for the CD player. Removed the plastic storage cubby there and using a dremel made the open ever so slightly larger.
View attachment 102963
View attachment 102964View attachment 102976
I added a few cable ties and drilled some holes in the plastic underneath to secure it.
View attachment 102966
Drilled a hole on drivers side for mic
View attachment 102967
There was an existing access hole in bulkhead grommet I just had to cut the end of it on the engine side.
View attachment 102969
I used the supplied cable from Yaesu and pushed it thru this grommet. Landed the ground under an existing ground point in engine bay near battery. Installed the hot on a spare lug in main fuse box, this is temporary until i get a chance to install a relay that is operated by ignition on. Right now its always hot.
View attachment 102971
View attachment 102972
Finished product, now I just need to learn how to use it.
View attachment 102974
View attachment 102976
Here's my install:
Icom 7100 custom marine mount (eBay): https://www.ebay.com/itm/154551317981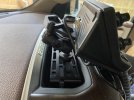
Dashboard mount from Midwesttrx: https://www.instagram.com/midwesttrx/
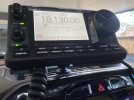
Ram Mounts Short Double socket arm and base: https://www.rammount.com/part/RAM-B-201U-A
3rd Brake light NMO mount from Bulletproof Diesel https://bulletproofdiesel.com/collections/antenna-mounts
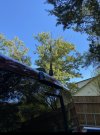
Stake bed mount from Breedlove Mounts https://breedlovemounts.com/store/ols/all
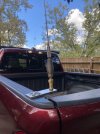
Rig is mounted under the rear seat and I'm using an LDG 200 antenna tuner into the 102" whip. Why a whip? Because I don't drive very much and just can't justify the cost of a $1.5K plus screwdriver antenna and associated mount for as little as I'll be using the antenna. Regardless, I made a contact into Costa Rica on 17 mtrs while testing it out.
It'll do for my needs.
73
Icom 7100 custom marine mount (eBay): https://www.ebay.com/itm/154551317981

Dashboard mount from Midwesttrx: https://www.instagram.com/midwesttrx/

Ram Mounts Short Double socket arm and base: https://www.rammount.com/part/RAM-B-201U-A
3rd Brake light NMO mount from Bulletproof Diesel https://bulletproofdiesel.com/collections/antenna-mounts

Stake bed mount from Breedlove Mounts https://breedlovemounts.com/store/ols/all

Rig is mounted under the rear seat and I'm using an LDG 200 antenna tuner into the 102" whip. Why a whip? Because I don't drive very much and just can't justify the cost of a $1.5K plus screwdriver antenna and associated mount for as little as I'll be using the antenna. Regardless, I made a contact into Costa Rica on 17 mtrs while testing it out.
It'll do for my needs.
73
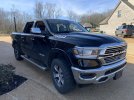
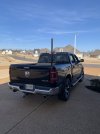
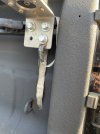
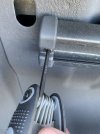
I broke my brain figuring this out.
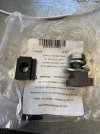
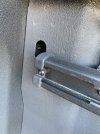
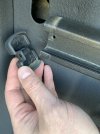
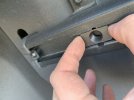
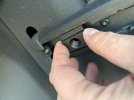
This is my military style 2m antenna. Mounted to the rail with the nuts im showing part number for.
Just got done with it. Will run cable tomorrow.
This is my military style 2m antenna. Mounted to the rail with the nuts im showing part number for.
Just got done with it. Will run cable tomorrow.
Attachments
-
 0A48E4B8-D032-4ED7-921F-9C7777C9E328.jpeg204.4 KB · Views: 138
 -
 E8B3E142-B5F2-4978-B96B-D07DCD0CAEB5.jpeg141.2 KB · Views: 144
 -
 842520D0-E827-42F5-AA93-E33847788FF9.jpeg211.3 KB · Views: 142
 -
 8D676D50-CC15-47EC-8C6A-9EDDF53BA38B.jpeg176 KB · Views: 126
 -
 FE6AF114-20C5-42DB-8AF9-649C6A9C9A9A.jpeg117.9 KB · Views: 123
 -
 5B997C40-2483-46D5-9E01-63385D741138.jpeg209.1 KB · Views: 120
 -
 CDA08922-D2A1-4C29-8FDE-ED1080EAF008.jpeg159 KB · Views: 116
 -
 EF1D611C-C613-4CBB-9A10-451E180A02EB.jpeg98.9 KB · Views: 113
 -
 6A114C88-44E7-43B2-9FD7-7C9F6A07EE3C.jpeg100.8 KB · Views: 116
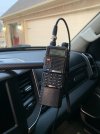
Lil bitty 5ish watt hand held got BIG EARS now. Das all i need for the truck for now.I broke my brain figuring this out.
This is my military style 2m antenna. Mounted to the rail with the nuts im showing part number for.
Just got done with it. Will run cable tomorrow.
Attachments
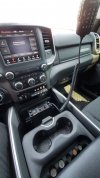
Can you take a better picture of the radio mount. I am trying to do the same.Radio base is on left side underneath dashboard. This is not a good picture, but it gives you an idea.
View attachment 7164
I have ftm-300DR
When you move the chair does it hit the radio mounted underneath ?Okay, I decided on doing a trunk mount just to test it out. Not 100% sold, seems like it's very low on the truck. I'm either going to need a taller antenna, or move this one back to where I was originally planning.
View attachment 20453
The faceplate of the FTM-400XDR is so light, I just ended up using velcro to put it in position. I can also take it off whenever I want and store it away. It allows for the center console to easily slide fully forward, but it does block the bottom buttons. Leaves plenty of space for me to use the right side of the compartment for my phone when I want to use it for CarPlay and plug it in. For now I'm just letting the hand mic sit in the side store compartment, I think that will be good enough.
View attachment 20454
As for where I put the radio, I ended up making a custom mount under the driver seat to secure it. So much electronic stuff down there with the motors, heaters, amps, that it was hard to fit it in.
I do think I'm going to move the antenna to the rear of the truck. Maybe I will spend the cash on the folding antenna bracket.
Actually am in the process of moving the radio to another truck. In process of getting a 2022 ram 2500. Love my ram 1500 but bigger boat needs a bigger truckCan you take a better picture of the radio mount. I am trying to do the same.
I have ftm-300DR
LBTRS
Active Member
Users who are viewing this thread
Total: 1 (members: 0, guests: 1)
Staff online
-
EightyModerator / Dream Killer

