5thGenRams Forums

Register a free account today to become a member! Once signed in, you'll be able to participate on this site by adding your own topics and posts, as well as connect with other members through your own private inbox!

Biggiehorn's Build Thread

Biggiehorn

Ram Guru
Joined
Jun 12, 2021
Messages
977
Reaction score
1,313
Location
Saint Cloud, FL
I bought these same exact lights last week but I got the 32” Light Bar instead of the 22” and I have the AuxBeam as well. Did you get the Adaptor Harness or did you hook up the DRL’s from the Regular Harness with the switch and relay?
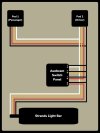
Taking our DM back to the thread because I've had several ask about the wiring piece to all of this with the Auxbeam setup. I’ve also attached my poor excuse at a wiring diagram below, but I’ll try and explain it as simply as I can. Let me know if there is still questions and I’ll do my best to elaborate further. I used 16 gauge (2 color) wire for everything. My recommendation here is to use 4 separate wiring colors though. I only had red and black, so I decided to just make due with what I had. I didn't think it would be that much of a big deal, but trust me, you'll want 4 unique colors just to make things easier to sort out once you have your wires ran. I ended up with a nest of red and black wires towards the end of my project, and I had to go back and test each group of wires individually to identify what everything was and where it should go. I did label everything with masking tape and a marker, but I still strongly recommend using 4 different colors just for simplicity and organization.

What makes this wiring somewhat of a hassle, is that everything will need its own ground to work on the switch panel. I'll explain that in further detail as we go.

Here is the wiring that comes off of each Strands Siberia Light

Strands Light Bar
Black - Ground
Red- Bright Lights
White - White DRL
Yellow - Amber DRL

Strands QB Pods
Black - Ground
Red- Bright Lights
White - White DRL
Yellow - Amber DRL

Before you get too involved with your install, I'd recommend testing the wiring I have mentioned above just to make sure yours matches. It should, but I have seen accessory wires reversed on different products in the past, so I don't like to assume anything.

Install both pods and the light bar so that you have the desired location set. Both of your pods and light bar will come with a jumper lead so that you basically have a quick disconnect at each light if needed. I used all three quick disconnects in my application, and I don’t see any reason why you wouldn’t want to use these.

You'll want to extend and run your wires from your passenger side pod over to your driver side pod. This is where I started first. Again, if you use four separate wiring colors, this will make it painless since both pods match. I soldered all matching wires together (black to black, red to red, white to white,, and yellow to yellow) for the pods. I also soldered in a third leg to this harness so that I could run the 4 wires down to my panel. I basically made it a "T" harness if that makes sense. Leave yourself a good amount of length just so you have some wire to work with. You can always trim it down when you're making your final connections to the fuse box on your Auxbeam switch panel.

At this point I extended the 4 wires from the light bar up to the panel as well. Once I had my desired length, I got to soldering the pods and bar wiring together so that I could make my connections to the panel.

Here is how you'll wire everything. The white from the light bar will connect to the white from your pod harness, the yellow from your light bar will connect to the yellow from your pod harness. These will be for your DRL's. You'll then run a white directly to a 5A switch, and a yellow to the other 5A switch. All of your grounds will connect together, and you’ll need a ground coming off of each switched source on your panel. I basically just cut and ran four ground pigtails and soldered them all back into the main run of ground wires.

The red from the pods will go into its own switch, just as the red from the light bar will go to its own switch too.

If wired like I have below, you can control the brights on your pods and light bar individually with two separate switches. The pod and light bar DRLs will come on together, so whites will come on together on switch A, and ambers will come on together on switch B.

In my case,

  • 30A slot 1 - 22" light bar
  • 30A slot 2 - A pillar light pods
  • 5A slot 1 - white DRLs (bar and pods)
  • 5A slot 2 - amber DRLs (bar and pods)
42CDA4C8-E265-43AF-91FB-37FF747245E7.jpeg


Hope this helps. Just give me a shout if you have any questions during your install and id be happy to help talk you through it.
 
Last edited:

Biggiehorn

Ram Guru
Joined
Jun 12, 2021
Messages
977
Reaction score
1,313
Location
Saint Cloud, FL
Yeah I’m pretty sure it’ll fit but there is only one way to find out! Ha I’ve got everything besides the lights now. How long did it take for you to get yours in?
I want to say I got everything in just under two weeks. It arrived on their estimated delivery date.
 

TheLegend

Well-Known Member
Joined
Feb 11, 2023
Messages
475
Reaction score
340
Taking our DM back to the thread because I've had several ask about the wiring piece to all of this with the Auxbeam setup. I’ve also attached my poor excuse at a wiring diagram below, but I’ll try and explain it as simply as I can. Let me know if there is still questions and I’ll do my best to elaborate further. I used 16 gauge (2 color) wire for everything. My recommendation here is to use 4 separate wiring colors though. I only had red and black, so I decided to just make due with what I had. I didn't think it would be that much of a big deal, but trust me, you'll want 4 unique colors just to make things easier to sort out once you have your wires ran. I ended up with a nest of red and black wires towards the end of my project, and I had to go back and test each group of wires individually to identify what everything was and where it should go. I did label everything with masking tape and a marker, but I still strongly recommend using 4 different colors just for simplicity and organization.

What makes this wiring somewhat of a hassle, is that everything will need its own ground to work on the switch panel. I'll explain that in further detail as we go.

Here is the wiring that comes off of each Strands Siberia Light

Strands Light Bar
Black - Ground
Red- Bright Lights
White - White DRL
Yellow - Amber DRL

Strands QB Pods
Black - Ground
Red- Bright Lights
White - White DRL
Yellow - Amber DRL

Before you get too involved with your install, I'd recommend testing the wiring I have mentioned above just to make sure yours matches. It should, but I have seen accessory wires reversed on different products in the past, so I don't like to assume anything.

Install both pods and the light bar so that you have the desired location set. Both of your pods and light bar will come with a jumper lead so that you basically have a quick disconnect at each light if needed. I used all three quick disconnects in my application, and I don’t see any reason why you wouldn’t want to use these.

You'll want to extend and run your wires from your passenger side pod over to your driver side pod. This is where I started first. Again, if you use four separate wiring colors, this will make it painless since both pods match. I soldered all matching wires together (black to black, white to white, amber to amber, and yellow to yellow) for the pods. I also soldered in a third leg to this harness so that I could run the 4 wires down to my panel. I basically made it a "Y" harness if that makes sense. Leave yourself a good amount of length just so you have some wire to work with. You can always trim it down when you're making your final connections to the fuse box on your Auxbeam switch panel.

At this point I extended the 4 wires from the light bar up to the panel as well. Once I had my desired length, I got to soldering the pods and bar wiring together so that I could make my connections to the panel.

Here is how you'll wire everything. The white from the light bar will connect to the white from your pod harness, the yellow from your light bar will connect to the yellow from your pod harness. All grounds will connect together, and you’ll need a ground coming off of each switched source on your panel. I basically just cut and ran four ground pigtails and soldered them all back into the main run of ground wires.

The red from the pods will go into its own switch, just as the red from the light bar will go to its own switch too.

If wired like I have below, you can control the brights on your pods and light bar individually with two separate switches. The pod and light bar DRLs will come on together, so whites will come on together on switch A, and ambers will come on together on switch B.

In my case,

  • 30A slot 1 - 22" light bar
  • 30A slot 2 - A pillar light pods
  • 5A slot 1 - white DRLs (bar and pods)
  • 5A slot 2 - amber DRLs (bar and pods)

View attachment 157823

Hope this helps. Just give me a shout if you have any questions during your install and id be happy to help talk you through it.
This is great I appreciate the detailed explanation that’s actually one of the two ways I was thinking of doing it. But man I appreciate you seriously making the time to write this up much respect. I’ll definitely give you a shout but I think I got it. I can work my way around electrical but I’m no electrician by any means so I’m actually looking forward to it. I’ll post pics when I’m done.
 

Biggiehorn

Ram Guru
Joined
Jun 12, 2021
Messages
977
Reaction score
1,313
Location
Saint Cloud, FL
This is great I appreciate the detailed explanation that’s actually one of the two ways I was thinking of doing it. But man I appreciate you seriously making the time to write this up much respect. I’ll definitely give you a shout but I think I got it. I can work my way around electrical but I’m no electrician by any means so I’m actually looking forward to it. I’ll post pics when I’m done.
No problem, and agreed! I'm also far from an electrician. I wouldn't doubt for a second that there is probably an easier way to achieve the same result, but as I was testing everything, this seemed to be what made the most logical sense for me based on how I wanted the switches to work. I enjoyed working on all of it too, but let me tell you, I was definitely relieved once I got it all done and cleaned up haha!
 

TheLegend

Well-Known Member
Joined
Feb 11, 2023
Messages
475
Reaction score
340
No problem, and agreed! I'm also far from an electrician. I wouldn't doubt for a second that there is probably an easier way to achieve the same result, but as I was testing everything, this seemed to be what made the most logical sense for me based on how I wanted the switches to work. I enjoyed working on all of it too, but let me tell you, I was definitely relieved once I got it all done and cleaned up haha!
I bet so what was funny is I didn’t even know you had these and I was like yeahhhh I'm going to be original I haven’t seen anyone even mention these lights or have this type of set up grouping the Amber & White DRL’s like that anyways. Then @5thgen.ram put me on you saying that you had some and when I saw them on your truck I was like D*** this is going to look so good.
 

Biggiehorn

Ram Guru
Joined
Jun 12, 2021
Messages
977
Reaction score
1,313
Location
Saint Cloud, FL
I bet so what was funny is I didn’t even know you had these and I was like yeahhhh I'm going to be original I haven’t seen anyone even mention these lights or have this type of set up grouping the Amber & White DRL’s like that anyways. Then @5thgen.ram put me on you saying that you had some and when I saw them on your truck I was like D*** this is going to look so good.
It really is an awesome look, and I can confidently say that I believe I am the only Ram in the U.S. with this specific setup right now. I definitely haven't seen anyone else running them at all which is shocking based on how popular Strands is overseas. They make some awesome products. I already have a few more ideas in mind that I'm tossing around that I think will help bring it all together. I just need to get my parts list together and make some orders haha.
 

TheLegend

Well-Known Member
Joined
Feb 11, 2023
Messages
475
Reaction score
340
It really is an awesome look, and I can confidently say that I believe I am the only Ram in the U.S. with this specific setup right now. I definitely haven't seen anyone else running them at all which is shocking based on how popular Strands is overseas. They make some awesome products. I already have a few more ideas in mind that I'm tossing around that I think will help bring it all together. I just need to get my parts list together and make some orders haha.
Oh 100%!! Yeah that’s everything I read is that they are really well made and big time overseas. They do make some sweet products better not be thinking of the same stuff I am lol. After this project I’m going to get a lift how do you like your ReadyLift?
 

Biggiehorn

Ram Guru
Joined
Jun 12, 2021
Messages
977
Reaction score
1,313
Location
Saint Cloud, FL
Oh 100%!! Yeah that’s everything I read is that they are really well made and big time overseas. They do make some sweet products better not be thinking of the same stuff I am lol. After this project I’m going to get a lift how do you like your ReadyLift?
For a budget friendly setup, I’ve been completely satisfied with it. It’s great at achieving the desired look and stance, but you will take a hit on ride quality. Personally, I don’t think it’s that bad of a trade-off for city and highway use at least. But the roads here in my area of FL are pretty decent which I’m sure helps. If I constantly had to drive on rougher roads I’m sure my opinion would quickly change. I wouldn’t say that I regret the ReadyLIFT, because it has definitely treated me well, but I am also eager to swap for something a little more off road oriented. Haven’t made my mind up on what I want, but upgrading is on the radar.
 

TheLegend

Well-Known Member
Joined
Feb 11, 2023
Messages
475
Reaction score
340
For a budget friendly setup, I’ve been completely satisfied with it. It’s great at achieving the desired look and stance, but you will take a hit on ride quality. Personally, I don’t think it’s that bad of a trade-off for city and highway use at least. But the roads here in my area of FL are pretty decent which I’m sure helps. If I constantly had to drive on rougher roads I’m sure my opinion would quickly change. I wouldn’t say that I regret the ReadyLIFT, because it has definitely treated me well, but I am also eager to swap for something a little more off road oriented. Haven’t made my mind up on what I want, but upgrading is on the radar.
I’ve been going back and forth on what I want to go with I really like Carli’s setups but also was thinking about kind of piece milling my own together but everyone has always told me just fork out the cash for a good lift system the first time.. hence why I’ve been going back and forth for several months lol. But that’s good to know on your ReadyLift.
 

1BADRAMLIMITED

Ram Guru
Joined
Nov 28, 2022
Messages
1,077
Reaction score
860
Location
Oklahoma
Taking our DM back to the thread because I've had several ask about the wiring piece to all of this with the Auxbeam setup. I’ve also attached my poor excuse at a wiring diagram below, but I’ll try and explain it as simply as I can. Let me know if there is still questions and I’ll do my best to elaborate further. I used 16 gauge (2 color) wire for everything. My recommendation here is to use 4 separate wiring colors though. I only had red and black, so I decided to just make due with what I had. I didn't think it would be that much of a big deal, but trust me, you'll want 4 unique colors just to make things easier to sort out once you have your wires ran. I ended up with a nest of red and black wires towards the end of my project, and I had to go back and test each group of wires individually to identify what everything was and where it should go. I did label everything with masking tape and a marker, but I still strongly recommend using 4 different colors just for simplicity and organization.

What makes this wiring somewhat of a hassle, is that everything will need its own ground to work on the switch panel. I'll explain that in further detail as we go.

Here is the wiring that comes off of each Strands Siberia Light

Strands Light Bar
Black - Ground
Red- Bright Lights
White - White DRL
Yellow - Amber DRL

Strands QB Pods
Black - Ground
Red- Bright Lights
White - White DRL
Yellow - Amber DRL

Before you get too involved with your install, I'd recommend testing the wiring I have mentioned above just to make sure yours matches. It should, but I have seen accessory wires reversed on different products in the past, so I don't like to assume anything.

Install both pods and the light bar so that you have the desired location set. Both of your pods and light bar will come with a jumper lead so that you basically have a quick disconnect at each light if needed. I used all three quick disconnects in my application, and I don’t see any reason why you wouldn’t want to use these.

You'll want to extend and run your wires from your passenger side pod over to your driver side pod. This is where I started first. Again, if you use four separate wiring colors, this will make it painless since both pods match. I soldered all matching wires together (black to black, red to red, white to white,, and yellow to yellow) for the pods. I also soldered in a third leg to this harness so that I could run the 4 wires down to my panel. I basically made it a "Y" harness if that makes sense. Leave yourself a good amount of length just so you have some wire to work with. You can always trim it down when you're making your final connections to the fuse box on your Auxbeam switch panel.

At this point I extended the 4 wires from the light bar up to the panel as well. Once I had my desired length, I got to soldering the pods and bar wiring together so that I could make my connections to the panel.

Here is how you'll wire everything. The white from the light bar will connect to the white from your pod harness, the yellow from your light bar will connect to the yellow from your pod harness. These will be for your DRL's. You'll then run a white directly to a 5A switch, and a yellow to the other 5A switch. All of your grounds will connect together, and you’ll need a ground coming off of each switched source on your panel. I basically just cut and ran four ground pigtails and soldered them all back into the main run of ground wires.

The red from the pods will go into its own switch, just as the red from the light bar will go to its own switch too.

If wired like I have below, you can control the brights on your pods and light bar individually with two separate switches. The pod and light bar DRLs will come on together, so whites will come on together on switch A, and ambers will come on together on switch B.

In my case,

  • 30A slot 1 - 22" light bar
  • 30A slot 2 - A pillar light pods
  • 5A slot 1 - white DRLs (bar and pods)
  • 5A slot 2 - amber DRLs (bar and pods)

View attachment 157823

Hope this helps. Just give me a shout if you have any questions during your install and id be happy to help talk you through it.
hell yea awesome write up ! thank u
 

Biggiehorn

Ram Guru
Joined
Jun 12, 2021
Messages
977
Reaction score
1,313
Location
Saint Cloud, FL
hell yea awesome write up ! thank u
Thank you! I’ll try to clean up my wording and get some additional photos so that I can make a dedicated thread for it eventually. I have had several tell me that these lights are on their wishlist and they wanted a wiring guide to reference.
 

1BADRAMLIMITED

Ram Guru
Joined
Nov 28, 2022
Messages
1,077
Reaction score
860
Location
Oklahoma
Thank you! I’ll try to clean up my wording and get some additional photos so that I can make a dedicated thread for it eventually. I have had several tell me that these lights are on their wishlist and they wanted a wiring guide to reference.
oh yea i def. know what im asking my wife for.... birthday/fathers day/christmas :ROFLMAO: :ROFLMAO: :ROFLMAO: :ROFLMAO:
 

Biggiehorn

Ram Guru
Joined
Jun 12, 2021
Messages
977
Reaction score
1,313
Location
Saint Cloud, FL
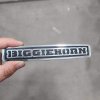
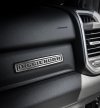
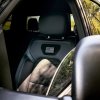
Just a quick (and inexpensive 😅) change I recently made. Decided to go with a custom glovebox emblem. You already know I had to represent haha. I think it adds a nice unique touch, but also could almost pass as factory if someone wasn't paying close enough attention. That was the exact look I was going for. I'm all about those subtle changes, and Jmakes.az crushed it on this one.

22D332E9-BF43-49BA-9979-D626B0CC1E02.jpeg
E99F80A5-A350-4E3C-8FEE-2C07A784E4C1.jpeg
 

TheLegend

Well-Known Member
Joined
Feb 11, 2023
Messages
475
Reaction score
340
Just a quick (and inexpensive 😅) change I recently made. Decided to go with a custom glovebox emblem. You already know I had to represent haha. I think it adds a nice unique touch, but also could almost pass as factory if someone wasn't paying close enough attention. That was the exact look I was going for. I'm all about those subtle changes, and Jmakes.az crushed it on this one.

View attachment 157955
View attachment 157956
That’s sweet man I saw it on your IG and I will say it looks exactly OEM but just subtle differences like this can be some of my favorite mods. He did some good work on that for sure!
 

1BADRAMLIMITED

Ram Guru
Joined
Nov 28, 2022
Messages
1,077
Reaction score
860
Location
Oklahoma
Just a quick (and inexpensive 😅) change I recently made. Decided to go with a custom glovebox emblem. You already know I had to represent haha. I think it adds a nice unique touch, but also could almost pass as factory if someone wasn't paying close enough attention. That was the exact look I was going for. I'm all about those subtle changes, and Jmakes.az crushed it on this one.

View attachment 157955
View attachment 157956
That’s sweet!
 
Last edited:

Biggiehorn

Ram Guru
Joined
Jun 12, 2021
Messages
977
Reaction score
1,313
Location
Saint Cloud, FL
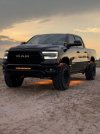
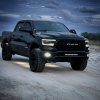
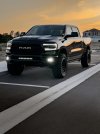
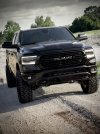
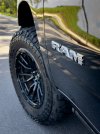
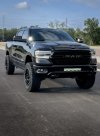
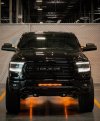
Just a quick photo drop. Only change I think I’ve made since the last update was I finally decided to add a Reflective Concepts matte black overlay to my front Ram emblem and I think it turned out great. It can be seen in some of the photos down below.

I do have a few other things in the works that I’m really looking forward to sharing, but it is likely still a couple weeks out on those. Will update the thread with those changes as soon as I am able.

IMG_6354.jpeg
5EB7D8A6-329C-4119-B90C-38195F0931D7.jpeg
IMG_6791.jpeg
IMG_6891.jpeg IMG_7040.jpeg 7EC965BC-C251-46E0-9CB9-183935916A99.jpeg
IMG_6900.jpeg
9AC1F3B9-1977-42F4-9A43-B314E824D495.jpeg
 

JerryBsizzle

Well-Known Member
Joined
Sep 22, 2019
Messages
289
Reaction score
425
JB, this may or may not be on your radar or your taste, but have you ever looked into the Cab Over America wireless clearance lights? I like them and I'm intrigued but if you have any scoop I want to hear it.
 

Biggiehorn

Ram Guru
Joined
Jun 12, 2021
Messages
977
Reaction score
1,313
Location
Saint Cloud, FL
JB, this may or may not be on your radar or your taste, but have you ever looked into the Cab Over America wireless clearance lights? I like them and I'm intrigued but if you have any scoop I want to hear it.
I know of them, but I haven't looked into them. I'm not really for or against them, but I'm not sure if I would ever plan to add them on mine. I believe @MikeyHo808 has them on his truck. He could probably provide you with better feedback on them if you have specific questions or concerns.
 

MikeyHo808

Ram Guru
Joined
Jun 1, 2021
Messages
884
Reaction score
752
Location
Hawaii
JB, this may or may not be on your radar or your taste, but have you ever looked into the Cab Over America wireless clearance lights? I like them and I'm intrigued but if you have any scoop I want to hear it.
I know of them, but I haven't looked into them. I'm not really for or against them, but I'm not sure if I would ever plan to add them on mine. I believe @MikeyHo808 has them on his truck. He could probably provide you with better feedback on them if you have specific questions or concerns.
Appreciate the shout out. Always happy to assist. I'll try not to completely hijack your thread so I will keep it short.
I had cab lights on my 2004 Laramie. Drilled the 15 holes myself on a 14 month old truck. Love the look, just couldnt see me drilling 15 holes again.
Great concept, great product. Well, after they worked out the bugs with the remote. Mines is the on/ off version. Older versions had a syncing issue.
Is it worth the price? Considering the alternative which is drilling holes, yes. Pricey, yes. But so is bodywork to a rusting roof. Just wish I waited a few more months. I purchased at the higher price.
Pretty easy install, having a pano roof and/or extra eyes will make it that much easier. Overall, about 90 minutes. Can be charged by mother nature or strong garage lighting.
I had issues with one light recently. It just wouldnt hold a charge. Reached out to customer service. Even though I was out of warranty, they offered to replace the bad module, I just had to send it in exchange for the new one. Funny story, but ever since I reached out to them, that light has not given any problems.
Remotes are strong, but the buttons are sensitive. I had one on my key chain but kept turning on the lights while it was in my pocket. The other is mounted right above my starter button. I can turn them on while traveling through a tunnel during my daily commute.
Ok, sorry for the hijack...back to regular programming. 😁
 

Users who are viewing this thread

Top