5thGenRams Forums

Register a free account today to become a member! Once signed in, you'll be able to participate on this site by adding your own topics and posts, as well as connect with other members through your own private inbox!

Biggiehorn's Build Thread

HemiDude

Spends too much time on here
Joined
Jul 5, 2020
Messages
2,570
Reaction score
2,193
Location
Ohio
Thanks brother! I looked at the rubigrid myself just for that added versatility, but I’m going to see what I can come with as far as mounting solutions first. I’d love to get a custom interior A panel “gauge pod” to hold the controller, but I don’t know the feasibility on that. I’ve seen it done with a switch pro controller on the 4th gens and it looks really clean. I found a company that uses OEM parts that will make custom one-off pods, but I’m not ready to drop that kind of money on a piece of plastic! I don’t know what it would cost but I can’t imagine that it would be cheap. I’ve got a couple of other very simple ideas floating around that may work using the included brackets on the Auxbeam, but I haven’t actually measured anything so I’ll have to follow up on that.

Appreciate it on the pods! I like them too and can’t wait to see them lit up at night. Couldn’t find much information on them, but I do know DV8 is a respected name in the jeep and off-road community. We’ll see, but like mentioned, these may just be a previous solution if I end up upgrading to another light I’m looking into.

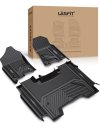
The mats seem to be rubbery and pliable but I’ve never had the OEM slush mats so can’t give a direct comparison. These seem very similar to what I already had, but hey Lasfit offered so I jumped at it. I do think they’re a better product than what I had before, but I’m really looking forward to the first cleanup with them to see how easily they come clean. My other mats were terrible for locking in dirt and sand to the rubber. Really had to sit there and agitate them with an aggressive brush for awhile to break it all loose. Could have sworn I had a picture included of the back but clearly I don’t. Will drop one below.

View attachment 153315

Thanks for the continued support! Looking forward to seeing more of yours once you get those upcoming additions on the truck!
Those are some good looking mats. Can you clarify, do you think that rear mat would interfere with the factory underseat storage?
 

Biggiehorn

Ram Guru
Joined
Jun 12, 2021
Messages
989
Reaction score
1,367
Location
Saint Cloud, FL
Those are some good looking mats. Can you clarify, do you think that rear mat would interfere with the factory underseat storage?
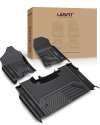
Yes, these specific mats will interfere, but Lasfit does offer a rear mat with the under seat storage in mind (both shown below). I haven’t personally tested the under seat storage version, but it is reviewed well.

Lasfit Floor Mats For Rams Without Under Seat Storage:
EB8F81FA-9E88-48EB-9FF9-AFA3B2A1D218.jpeg

Lasfit Floor Mats For Rams With Under Seat Storage:
338A523F-5F86-422C-8235-EA8AB97DBD78.jpeg
 
Last edited:

JerryBsizzle

Well-Known Member
Joined
Sep 22, 2019
Messages
290
Reaction score
430
Those mats are nice! I may try them. Nothing is really wrong with the mopar mats, but these are something different (and maybe better)
 

Biggiehorn

Ram Guru
Joined
Jun 12, 2021
Messages
989
Reaction score
1,367
Location
Saint Cloud, FL
3/5/2023 - RC Wheel Liners and Lasfit Rock Light Install

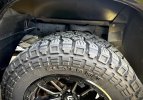
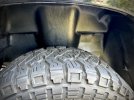
Took this past weekend to knock out the rear wheel liners and rock light install. Starting with the RC liners, very happy with the fitment. As others warned me, they did put up a bit of a fight to get installed, but working slowly and in sections definitely helps. I'd much rather them be a struggle and fit securely, than be a painless install and have poor fitment. A couple of busted up fingers and a few four letter words later, they were in. Really can't believe I put these off for so long. It not only looks better, it serves a great purpose. Looking forward to how much easier it is going to be to keep clean now.
1D88C61E-2A17-478E-85E4-7AC8DE6ABF4C.jpeg
882CA00E-3628-4442-B848-03D8D07992BF.jpeg

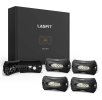
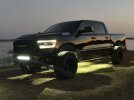
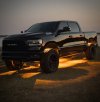
Lasfit Rock Lights - Happy with these so far! I'm running 2 packs (8 total lights). I placed one in each wheel well, and the remaining four are secured to the frame. I have two under the driver's side and two on the passenger side. Like mentioned in previous posts, I originally only wanted white lights. I wasn't considering any other option. I've got to admit though the amber setting on these is actually really cool. I find myself selecting that option more than the white lately. The install was time consuming, but it was also a breeze. The Lasfit wiring harness eliminates the guess work, and it is basically a plug and play system with the included water tight connectors, fused power source, and three position selector switch (off, amber, white). You can run up to 8 lights on one harness which is also a nice touch.

I do think a few more lights are needed to help achieve better coverage. I'm planning to add at least four more. 1 under the front of the truck, 1 under the rear, and 2 more as needed to help clean up some of the shadows and voids. This was my first time installing any sort accent lighting like this, and I probably should have waited until it was somewhat dark outside just to help with proper light placement. So for that reason, I may go back and make some minor adjustments to the existing, in addition to placing a few more lights under the truck. But overall I think they look pretty sweet.

I've only had these installed for a few days, but will provide additional longer-term feedback as I get more time with them. Similar to the floor mats, I was provided with a unique link and 20% discount code that can be stacked with Lasfit's current promotions. Due to forum rules, I will not post publicly. If anyone is interested in the product and wants access to the additional savings, just shoot me a DM on here or on IG, and I’d be happy to share.
97FDE18F-46C8-4C67-A039-D79824A4BC99.jpeg
042E9147-B54E-4ABB-A4FF-A6C07EED1313.jpeg
1EFB7014-C333-4E9C-AE49-CAFCF76A3E8E.jpeg
10B9D478-DABC-45B0-9122-754FA1B6094D.jpeg
 

Biggiehorn

Ram Guru
Joined
Jun 12, 2021
Messages
989
Reaction score
1,367
Location
Saint Cloud, FL
Been awhile, and I got a few truck updates I can share. Finally at a comfortable point to share some of the progress made.

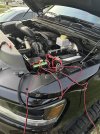
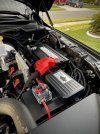
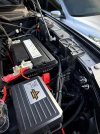
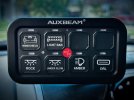
1. I managed to get the Auxbeam switch panel install pretty much completed. Few minor details remain, but the bulk of the wiring and cleanup is done. Once I'm satisfied with everything's placement under the hood, I plan to clean up the main feed of wires leading to the fuse panel just a tad more to make it less cluttered looking and also appear more factory like. I'm running 4 out of the 8 switches currently, and that will soon jump up to 6. I haven't moved the rock light wiring over to this panel yet, but hope to get that addressed soon.

Here is the current wiring setup.
  • 30A slot 1 - 22" light bar
  • 30A slot 2 - A pillar light pods
  • 20A slot 1 - Light bar & pods white DRLs
  • 20A slot 2 - Light bar & pods amber DRLs
  • 10A slot 1 - Rock lights white (not yet hooked up)
  • 10A slot 2 - Rock lights amber (not yet hooked up)
  • 5A slot 1 - Unused
  • 5A slot 2 - Unused
My plan is to move the light bar and pod DRLs down to the 5A's. The DRLs definitely don't need to be on the dedicated 20's, and that will free up the potential to add something there later on down the road. I had the DRL's on the 20's just during my initial testing, and never ended up moving them over.

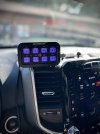
As far as the switch panel goes, that also needs to find a permanent home. I'm testing out different locations for it in the cab to see what I like most, and so far it has lived on my BulletPoint mount for the last week or two. I like the placement there, but I really don't want to lose the phone holder. I use it regularly. Especially for my work cell phone while traveling for work. I'd like to keep the panel on the driver's side if possible, so looking to test out an A pillar option that someone recently shared with me as well. Will update once everything is completely finalized with all of this.

8E6DF17D-83D4-4107-AFBF-A6019EE78E49.jpeg
4E384365-9237-4514-8B50-83C97013C590.jpeg
34AEFDC9-4C96-4DCC-B761-CAA9C4EFA7BE.jpeg


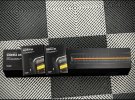
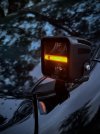
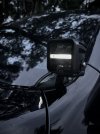
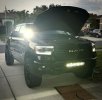
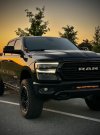
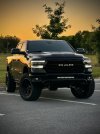
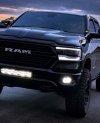
2. New Light Bar and Pod Lights. I know it seems like I just installed the DV8 pod lights, and well, that is because I did just install them. I wired them up and only ran them for a few weeks. Let me tell you, I was very impressed with the light output on these. No complaints from looks or the function, but being the visual person that I am, I found something I wanted more. That led me to purchasing a new set of lights from Strands Lighting Division. Strands is a Sweden based company, and appears to be a pretty popular choice all over Europe, but I couldn't find much information on them at all here in the States. I actually had to purchase these from a seller in Canada, and have them sent to me down here in Florida. Strands makes numerous variations of lighting solutions, but I went with two products that closely matched what I already had just for simplicity.

The specs on these new lights are considerably better than what I had. I haven't really been able to get out and put them to the test yet, so I cannot completely confirm the claims, but they definitely appear to be brighter. My favorite feature about these is the DRL functionality. These have both white and amber DRL settings. the DRL feature on these new lights are basically an exact match to the Lasfit rock lights, so it does an awesome job at bringing everything together from a visual standpoint.

FDBD48EF-89F4-49D8-BF95-0588159ABCEB.jpeg
96E0C707-B50E-422F-A5BA-98AC5CB24DAE.jpeg
24D58FA1-4C12-4A22-952F-50D3F14D33E9.jpeg
F46B86A0-1B6E-4044-939B-D9A845FD46AF.jpeg


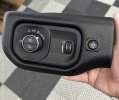
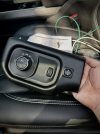
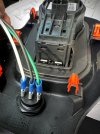
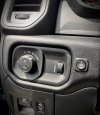
3. Amp Override Switch - Like mentioned a few posts back, I really only purchased this to fill in the hole from my previous light bar switch that I had drilled into the plastic. Once I removed the RC light bar and installed the new bar to the switch panel, I had no use for the on/off switch that remained next to my headlight dial. I didn't want to leave a useless switch installed, and when I realized a replacement headlight switch bezel would run the same amount almost as the Amp switch, I decided to obviously go with the Amp switch. I was hopeful that everything would fit properly, and I was so shocked to see how cleanly it fit in place. The switch is literally the exact same size as what I had, and it popped right into place. I still need to wire this switch to the Amp controller that sits in the engine bay, but as you may imagine, I'm a little burnt out with wiring projects right now lol. I'm planning on getting this wrapped up in a week or two, and will also drop an update on this once complete.

8C289989-5B71-46D3-BEF9-208FAA2C26AB.jpeg


I've got a few other things in the works, but nothing confirmed or actually purchased at this point so will end this post here for now.

12AA8B55-B3DA-4AC0-B44D-D09DD88BE419.jpeg
ACFB323F-D409-43F4-A650-C2E39C525C76.jpeg
 
Last edited:

Biggiehorn

Ram Guru
Joined
Jun 12, 2021
Messages
989
Reaction score
1,367
Location
Saint Cloud, FL
Few more updates.

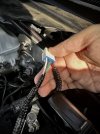
Got the Amp Override switch install complete. I put it off for a week or so and really, it was such a piece of cake to do. Honestly, this override switch could be done on your own as a DIY for significantly less than the $50 Amp charges. Had I known this, I probably would have just made my own, but I’m still really happy with the turnout on mine. I’ve already found it to be super convenient to quickly deploy both running boards when in sketchy parking lots with limited parking spaces, just to help prevent door dings.
79D343E7-8158-4FB0-841D-7ED9C886613D.jpeg
AF202D05-B8F0-45E1-A238-BA81030B115E.jpeg
5314D549-9A0F-4C82-8C81-3AB1868D0E96.jpeg
6CEEDD52-37D7-4C36-AD16-D18BF2902AD7.jpeg


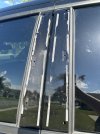
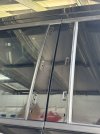
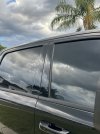
I also recently swapped the matte black B pillars out for the gloss black version. I know some people may say that it may not be the wisest move since the gloss panels scratch and show fingerprints really easily, but I plan to put a protective film on them here soon. I think it’s a better look, especially with the truck being black. Super easy swap. The biggest hassle is removing the adhesive from the previous panels.

9F0EA7E0-9770-44C4-9971-4786F1FDBFA6.jpeg
B18C5261-279D-4228-9B24-E039C2E88AE0.jpeg
0456475F-4014-4A82-AB82-3BA3675B79E4.jpeg

I cleaned up my Auxbeam and auxiliary wiring a tad more, and I’m honestly pretty content with it for now. I do have a few ideas to clean it up further, but I don’t want to get too carried away, and I want to leave everything accessible and easy to work on in the event I need to repair something or make changes. I did swap the DRL settings down the 5A switches and that freed up both 20’s on the panel. In the event I want to add additional accessories, I’ll have those two spots remaining to do so. I’m still sorting out a spot for the switches in the cab. I do like those new 3D printed center console mounts, but I want to try an A pillar setup before deciding on that location.

EEFF5480-6CAF-4803-B518-81AFA9A83CED.jpeg
382DF775-BBB2-4960-AC07-5F14A2D897BE.jpeg
 

MikeyHo808

Ram Guru
Joined
Jun 1, 2021
Messages
902
Reaction score
794
Location
Hawaii
Probably the only thing I miss about the OEM side steps…the door protection it provided. I got a few aux. switches in my tool box and some hookup wire. Gonna try this the next chance I get.
As usual, well done brother! 👍
 

Biggiehorn

Ram Guru
Joined
Jun 12, 2021
Messages
989
Reaction score
1,367
Location
Saint Cloud, FL
Probably the only thing I miss about the OEM side steps…the door protection it provided. I got a few aux. switches in my tool box and some hookup wire. Gonna try this the next chance I get.
As usual, well done brother! 👍
Appreciate it! I’m really liking the override switch. I can’t speak for your rough country steps, but on the amp steps, it’s literally just a 3 wire setup on a 3 position switch. In theory, if you sourced your own 3 position switch and the wire, you could just pin in the wires to the Amp controller harness and run them to your three way switch. I see no difference between that and the switch setup that amp offers.

I’m sure it could be done on the RC setup in some fashion.
 

TheLegend

Ram Guru
Joined
Feb 11, 2023
Messages
500
Reaction score
408
Been awhile, and I got a few truck updates I can share. Finally at a comfortable point to share some of the progress made.

1. I managed to get the Auxbeam switch panel install pretty much completed. Few minor details remain, but the bulk of the wiring and cleanup is done. Once I'm satisfied with everything's placement under the hood, I plan to clean up the main feed of wires leading to the fuse panel just a tad more to make it less cluttered looking and also appear more factory like. I'm running 4 out of the 8 switches currently, and that will soon jump up to 6. I haven't moved the rock light wiring over to this panel yet, but hope to get that addressed soon.

Here is the current wiring setup.
  • 30A slot 1 - 22" light bar
  • 30A slot 2 - A pillar light pods
  • 20A slot 1 - Light bar & pods white DRLs
  • 20A slot 2 - Light bar & pods amber DRLs
  • 10A slot 1 - Rock lights white (not yet hooked up)
  • 10A slot 2 - Rock lights amber (not yet hooked up)
  • 5A slot 1 - Unused
  • 5A slot 2 - Unused
My plan is to move the light bar and pod DRLs down to the 5A's. The DRLs definitely don't need to be on the dedicated 20's, and that will free up the potential to add something there later on down the road. I had the DRL's on the 20's just during my initial testing, and never ended up moving them over.

As far as the switch panel goes, that also needs to find a permanent home. I'm testing out different locations for it in the cab to see what I like most, and so far it has lived on my BulletPoint mount for the last week or two. I like the placement there, but I really don't want to lose the phone holder. I use it regularly. Especially for my work cell phone while traveling for work. I'd like to keep the panel on the driver's side if possible, so looking to test out an A pillar option that someone recently shared with me as well. Will update once everything is completely finalized with all of this.

View attachment 155616
View attachment 155617
View attachment 155618


2. New Light Bar and Pod Lights. I know it seems like I just installed the DV8 pod lights, and well, that is because I did just install them. I wired them up and only ran them for a few weeks. Let me tell you, I was very impressed with the light output on these. No complaints from looks or the function, but being the visual person that I am, I found something I wanted more. That led me to purchasing a new set of lights from Strands Lighting Division. Strands is a Sweden based company, and appears to be a pretty popular choice all over Europe, but I couldn't find much information on them at all here in the States. I actually had to purchase these from a seller in Canada, and have them sent to me down here in Florida. Strands makes numerous variations of lighting solutions, but I went with two products that closely matched what I already had just for simplicity.

The specs on these new lights are considerably better than what I had. I haven't really been able to get out and put them to the test yet, so I cannot completely confirm the claims, but they definitely appear to be brighter. My favorite feature about these is the DRL functionality. These have both white and amber DRL settings. the DRL feature on these new lights are basically an exact match to the Lasfit rock lights, so it does an awesome job at bringing everything together from a visual standpoint.

View attachment 155620
View attachment 155621
View attachment 155622
View attachment 155624


3. Amp Override Switch - Like mentioned a few posts back, I really only purchased this to fill in the hole from my previous light bar switch that I had drilled into the plastic. Once I removed the RC light bar and installed the new bar to the switch panel, I had no use for the on/off switch that remained next to my headlight dial. I didn't want to leave a useless switch installed, and when I realized a replacement headlight switch bezel would run the same amount almost as the Amp switch, I decided to obviously go with the Amp switch. I was hopeful that everything would fit properly, and I was so shocked to see how cleanly it fit in place. The switch is literally the exact same size as what I had, and it popped right into place. I still need to wire this switch to the Amp controller that sits in the engine bay, but as you may imagine, I'm a little burnt out with wiring projects right now lol. I'm planning on getting this wrapped up in a week or two, and will also drop an update on this once complete.

View attachment 155627


I've got a few other things in the works, but nothing confirmed or actually purchased at this point so will end this post here for now.

View attachment 155625
View attachment 155626
I bought these same exact lights last week but I got the 32” Light Bar instead of the 22” and I have the AuxBeam as well. Did you get the Adaptor Harness or did you hook up the DRL’s from the Regular Harness with the switch and relay?
 

Biggiehorn

Ram Guru
Joined
Jun 12, 2021
Messages
989
Reaction score
1,367
Location
Saint Cloud, FL
I bought these same exact lights last week but I got the 32” Light Bar instead of the 22” and I have the AuxBeam as well. Did you get the Adaptor Harness or did you hook up the DRL’s from the Regular Harness with the switch and relay?
Awesome! Post up some photos once you get them installed! These lights are getting a massive amount of attention on my instagram. Looking forward to seeing some more photos of them installed on the Rams. I regret not grabbing the 32, but my existing 20” bracket literally allowed it to drop right in place.

I didn’t purchase the adapter harness. I wired everything directly to my Auxbeam panel. The white DRLs can be controlled on one of the 5A switches, and the amber can be controlled on the other 5A switch. Little bit of a hassle to run all the wiring, but super convenient when done.
 

TheLegend

Ram Guru
Joined
Feb 11, 2023
Messages
500
Reaction score
408
Awesome! Post up some photos once you get them installed! These lights are getting a massive amount of attention on my instagram. Looking forward to seeing some more photos of them installed on the Rams. I regret not grabbing the 32, but my existing 20” bracket literally allowed it to drop right in place.

I didn’t purchase the adapter harness. I wired everything directly to my Auxbeam panel. The white DRLs can be controlled on one of the 5A switches, and the amber can be controlled on the other 5A switch. Little bit of a hassle to run all the wiring, but super convenient when done.
I’ll definitely post pictures when I get done I’m super pumped about it!
 

TheLegend

Ram Guru
Joined
Feb 11, 2023
Messages
500
Reaction score
408
What mounting brackets are you going to use?
I am going to give I a go with Shifts & Grins 30” they say you can get 32.5” so there is a little room for adjustment and the specs on the light are 32.1654”. So, I’m hoping they fit only one way to find out. Lol
 

Biggiehorn

Ram Guru
Joined
Jun 12, 2021
Messages
989
Reaction score
1,367
Location
Saint Cloud, FL
I am going to give I a go with Shifts & Grins 30” they say you can get 32.5” so there is a little room for adjustment and the specs on the light are 32.1654”. So, I’m hoping they fit only one way to find out. Lol
I think you'll be good going that route. Honestly, the 22" Strands Bar is the exact same outside dimensions of the the 20" Rough Country from a length perspective. On the RC bar, the measurement comes from end to end on the lens. The Strands Bar measures from end of housing to end of housing. Once I knew they had the same footprint from each end, I assumed it would fit without much issue. What I hadn't considered was the depth and height of the new bar, but fortunately for me, it dropped right in without any issue.

Obviously we won't know for certain until you test fit yours, but I'm almost positive you'll end up with similar results. Can't wait to see how it turns out.
 

TheLegend

Ram Guru
Joined
Feb 11, 2023
Messages
500
Reaction score
408
I think you'll be good going that route. Honestly, the 22" Strands Bar is the exact same outside dimensions of the the 20" Rough Country from a length perspective. On the RC bar, the measurement comes from end to end on the lens. The Strands Bar measures from end of housing to end of housing. Once I knew they had the same footprint from each end, I assumed it would fit without much issue. What I hadn't considered was the depth and height of the new bar, but fortunately for me, it dropped right in without any issue.

Obviously we won't know for certain until you test fit yours, but I'm almost positive you'll end up with similar results. Can't wait to see how it turns out.
Yeah I’m pretty sure it’ll fit but there is only one way to find out! Ha I’ve got everything besides the lights now. How long did it take for you to get yours in?
 

Users who are viewing this thread

Top