5thGenRams Forums

Register a free account today to become a member! Once signed in, you'll be able to participate on this site by adding your own topics and posts, as well as connect with other members through your own private inbox!

What did you do to your Ram today???

been using starlink for a while on the truck. I had the Gen 2 when I did the Alaska trip last year.
View attachment 208719

Connectivity:​

Even in the north well above Arctic Circle, the Gen 2 has been great with performance as long as the receiver has clear view of the sky. Reason I have to emphasize on above Arctic Circle is because in northern hemisphere, Starlink receivers need to point to the north to receive satellites, and the more north you go, the less suitable satellites out there.
That said, clear view of sky is extremely important when you are far north, but satellite count shouldn't be an issue when you're at lower 48.

The Gen 2 is an actuated unit, so is Gen 3 Standard and high performance (I suspect). That means the dish/ receiver will turn to get best connectivity, even if you're in the woods where you have partial obstruction. On the other hand, the Mini is not actuated, so placement/ clear view of sky will be more important. Some obstruction is okay, but too much obstruction will cause connectivity issues.

I have been powering my Gen 2 using my EcoFlow Delta 2, and to reduce power consumption, I have set it to be flat instead of automatic satellite tracking. This hasn't been an issue for me, even in the woods where I have partial obstruction. Which is what lead me to think the Mini's flat mounting wouldn't be an issue.

Power Consumption:​

One reason I switched from Gen 2 to mini is power consumption. Gen 2 only has AC power input, whereas the Mini accepts 12V DC input. But regardless of AC or DC input, Starlink itself operates on DC power. Further, the conversion from AC to DC is at about 30% loss rate due to inefficiency, and that just reduce my available run time.

Sure, there are conversion kits to both flat mount Gen 2 Actuated units and convert them to 12V DC input, but lets be honest... that would end up costing me more than buying a mini on Black Friday sale ($229+tax, free shipping @ Home Depot. Add $2 for same day delivery) and buying the Trio mount combined. That is like getting a 4"+ lift kit to fit 35s or 37s... all the extra work and money spent for no better performance.

To power my Starlink Gen 2 (or Gen 3 Standard/ High Performance), an AC outlet is needed. This means a dedicated power station (costs $$, but Ecoflow Delta 2 is on sale for $349 right now, basically half off) or a separate battery plus inverter (inverter is such old school tech. I said what I said, and I will die on that hill). Using AC power, Starlink Gen 2 pulls around 60W of power peak and around 50W of power during normal usage.

On the other hand, Mini (or the Gen 3s if they have USB-C/ DC in put capability), a PD certified power bank/ power station can be used. You can use a Anker 300W laptop power brick and call it a day, though your run time will be limited to a few hours. Mini draws about 20-40W, but I am seeing around 20W of consumption only via my LiFEPO4's onboard BMS.

Do NOT, and I repeat, do NOT try to get power from the trailer hitch or your starting battery. It is a good practice that any time you add additional electrical components you do it OUTSIDE of the vehicle's OE wiring. You want to get a fused external loop, just so IF something goes wrong, your vehicle's wiring system is not damaged.

Cable Management, Organization, and Storage:​

I have the Starlink Official Carry Case for the Gen 2, which holds the Dish, the Router, the AC cable, and the Router to Dish cable. The case is foam padded inside and is enormous: it is about the size of two ATX PC cases stacked. Not really an issue for me, since I travel solo and have plenty of space in the truck.

However, setting up the unit at camp every time I stop gets old and annoying. I gotta hook up the router and run the cables, then put the dish on the mount on GFC BEFORE I open the GFC. If I open the GFC before I set it up, then I gotta close the GFC and do it again. The router sits in the cab, so the router to dish cable is pinched in the door when I close the door. The hanging cable when Gen 2 is in use also makes opening the door and GFC panel an annoying task, since I have to make sure the cable is not in the way of anything.

With the Mini, none of those issues exist. Cables are neatly tied down, and there's no setup or take down.

Usage:​

Because Gen 2 & Gen 3 Standard/ High Performance has a dedicated router, the usable range for WiFi Connection is much further than Mini. At the highest, I had over 15 devices connected to my Gen 2 and connectivity still allows for high def video streaming and FaceTime calls.
The Mini, because of its built in router, the usable range for Wifi Connection is shorter, but still can handle over 10 devices connection with high def video streaming and FaceTime calls.

Pricing:​

The Roam plan is at $50 per month for 50G of data, and the Roam Unlimited is at $165 per month for unlimited data. I have the Unlimited because when shared with other people, 50G runs out very quickly and the additional per GB price is just not feasible with group setting. Even when I am solo, my nightly photo dump backup is at at least 15GB per night, so Unlimited makes more sense to me.

Pausing has been my secret weapon when I don't have trips planned. However, they did away with the Pausing plan and replaced it with the monthly $5 Standby Plan. The difference here is, when paused, you will need internet connectivity to unpause your account, which basically requires you to do so before you lose cell signal or before you head out. With the Standby Plan, your Starlink will be connected still, though in a extremely low data mode, and you can unpause it whenever, even in the wild.

Monthly charge is prorated, so you have opportunities to save even more. In my case, my billing date is on the 5th of every month, so if I only turn it back on on the 20th for a weekend, I just need to pay for the amount between this month's 20th until next month's 5th. I don't have to pay the full $165. Therefore, I tend to schedule my trips either toward the end of the month or beginning of the month, before the 5th. What I usually do is I resume service, pay for it, then pause it right away so it will still operate until the billing date, and then the service will automatically pause on the 5th. That way, I will not forget to pause it before new bill is calculated.

Pausing and resuming service is simple, can be done via the app or the web portal.


Hope that helps.
Perfect exactly what I was looking for...good info without the "paid sponsorship" lol. We will be using it mainly in the lower 48 for the next 2-3 years then, it will be mounted to the van for our final trip to Argentina when we move. I have a friend still in the Prudhoe Bay area from when I worked up there so we are going to do the Pan American Hwy for our move.
 
I have never once successfully used these dang things 🤦‍♂️
That makes two of us. I have struggled with them but they do work. It works well if you have the perfect application, but that's extremely rare.
I prefer welding a nut as I have not ever failed that way. It would've made sense to move the garage around and used it from the start.
The other 3 came out no problem. Why it was so stubborn remains a mystery.
 
Perfect exactly what I was looking for...good info without the "paid sponsorship" lol. We will be using it mainly in the lower 48 for the next 2-3 years then, it will be mounted to the van for our final trip to Argentina when we move. I have a friend still in the Prudhoe Bay area from when I worked up there so we are going to do the Pan American Hwy for our move.
hell yeah! i'd love to do Pan American Highway one day!

if you are going to mount it on the van in the future then the mini might be the one for you. BUT that's 2-3 years from now so i'm sure newer and better ones will come out by then. grab whichever one that fit your bill now (mini, gen 3, gen 3 high performance) since there are massive discounts for the unit this week.

edit:
just need to double check if the countries along Pan American Highway are covered under Starlink's service. Technically you can probably still get service if you're in one of those countries that are not approved (ie: not US friendly), but when Starlink find out they will turn your device off.
 
Last edited:
hell yeah! i'd love to do Pan American Highway one day!

if you are going to mount it on the van in the future then the mini might be the one for you. BUT that's 2-3 years from now so i'm sure newer and better ones will come out by then. grab whichever one that fit your bill now (mini, gen 3, gen 3 high performance) since there are massive discounts for the unit this week.
Can you do the Pan American Highway safely? I thought some areas were like a no go zone. I've heard others doing it but I'm just curious
 
Can you do the Pan American Highway safely? I thought some areas were like a no go zone. I've heard others doing it but I'm just curious
personally the answer is no but that is because hablo no ingles and I tend to do it solo. i've also heard from people involving in desert races of stories of things got wrong (ranging from stolen truck to life loss) down in mexico.
When Expedition Overland did their trip, they had pre-arranged armed security in those countries. When Top Gear and Grand Tour did their filming, they also had armed security as well.
But for me, I ain't got that budget to hire a team and I can't bring my pewpew with me, so... that trip is gonna be one of those "one day" thing.
I mean, what I'm trying to say is obviously if I do it I'd still practice the same security habits, even if I can afford a team. It's one of those last-resort insurance type of thing, if you get what I'm saying.

but if he (CH3NO2LOVER) has friends to go with and have more sense of adventure and "f*ck it" than I do, then it's probably ok hahaha.
Ya tengo el idioma español cuidado, y lo que no sé lo puede manejar mi esposa (ella es de Bogotá).

For the most part other than Nicaragua I have "people" in most of the places I plan to stop along the way. The hardest part is going to be selling the van in Ushuaia once we are done so we can get a flight back to BA to go home. I know some people there and the current offer is the van can stay until its sold.

As far as safety...meh for the "average" joe rolling it alone or a small group it isnt to bad, once you add the money of a race team (even a small backyard team), or a big giant overland Sprinter Van people see $$$$ and a easy come up. I have seen that from LA to Tokyo happen.
 
been using starlink for a while on the truck. I had the Gen 2 when I did the Alaska trip last year.
View attachment 208719

Connectivity:​

Even in the north well above Arctic Circle, the Gen 2 has been great with performance as long as the receiver has clear view of the sky. Reason I have to emphasize on above Arctic Circle is because in northern hemisphere, Starlink receivers need to point to the north to receive satellites, and the more north you go, the less suitable satellites out there.
That said, clear view of sky is extremely important when you are far north, but satellite count shouldn't be an issue when you're at lower 48.

The Gen 2 is an actuated unit, so is Gen 3 Standard and high performance (I suspect). That means the dish/ receiver will turn to get best connectivity, even if you're in the woods where you have partial obstruction. On the other hand, the Mini is not actuated, so placement/ clear view of sky will be more important. Some obstruction is okay, but too much obstruction will cause connectivity issues.

I have been powering my Gen 2 using my EcoFlow Delta 2, and to reduce power consumption, I have set it to be flat instead of automatic satellite tracking. This hasn't been an issue for me, even in the woods where I have partial obstruction. Which is what lead me to think the Mini's flat mounting wouldn't be an issue.

Power Consumption:​

One reason I switched from Gen 2 to mini is power consumption. Gen 2 only has AC power input, whereas the Mini accepts 12V DC input. But regardless of AC or DC input, Starlink itself operates on DC power. Further, the conversion from AC to DC is at about 30% loss rate due to inefficiency, and that just reduce my available run time.

Sure, there are conversion kits to both flat mount Gen 2 Actuated units and convert them to 12V DC input, but lets be honest... that would end up costing me more than buying a mini on Black Friday sale ($229+tax, free shipping @ Home Depot. Add $2 for same day delivery) and buying the Trio mount combined. That is like getting a 4"+ lift kit to fit 35s or 37s... all the extra work and money spent for no better performance.

To power my Starlink Gen 2 (or Gen 3 Standard/ High Performance), an AC outlet is needed. This means a dedicated power station (costs $$, but Ecoflow Delta 2 is on sale for $349 right now, basically half off) or a separate battery plus inverter (inverter is such old school tech. I said what I said, and I will die on that hill). Using AC power, Starlink Gen 2 pulls around 60W of power peak and around 50W of power during normal usage.

On the other hand, Mini (or the Gen 3s if they have USB-C/ DC in put capability), a PD certified power bank/ power station can be used. You can use a Anker 300W laptop power brick and call it a day, though your run time will be limited to a few hours. Mini draws about 20-40W, but I am seeing around 20W of consumption only via my LiFEPO4's onboard BMS.

Do NOT, and I repeat, do NOT try to get power from the trailer hitch or your starting battery. It is a good practice that any time you add additional electrical components you do it OUTSIDE of the vehicle's OE wiring. You want to get a fused external loop, just so IF something goes wrong, your vehicle's wiring system is not damaged.

Cable Management, Organization, and Storage:​

I have the Starlink Official Carry Case for the Gen 2, which holds the Dish, the Router, the AC cable, and the Router to Dish cable. The case is foam padded inside and is enormous: it is about the size of two ATX PC cases stacked. Not really an issue for me, since I travel solo and have plenty of space in the truck.

However, setting up the unit at camp every time I stop gets old and annoying. I gotta hook up the router and run the cables, then put the dish on the mount on GFC BEFORE I open the GFC. If I open the GFC before I set it up, then I gotta close the GFC and do it again. The router sits in the cab, so the router to dish cable is pinched in the door when I close the door. The hanging cable when Gen 2 is in use also makes opening the door and GFC panel an annoying task, since I have to make sure the cable is not in the way of anything.

With the Mini, none of those issues exist. Cables are neatly tied down, and there's no setup or take down.

Usage:​

Because Gen 2 & Gen 3 Standard/ High Performance has a dedicated router, the usable range for WiFi Connection is much further than Mini. At the highest, I had over 15 devices connected to my Gen 2 and connectivity still allows for high def video streaming and FaceTime calls.
The Mini, because of its built in router, the usable range for Wifi Connection is shorter, but still can handle over 10 devices connection with high def video streaming and FaceTime calls.

Pricing:​

The Roam plan is at $50 per month for 50G of data, and the Roam Unlimited is at $165 per month for unlimited data. I have the Unlimited because when shared with other people, 50G runs out very quickly and the additional per GB price is just not feasible with group setting. Even when I am solo, my nightly photo dump backup is at at least 15GB per night, so Unlimited makes more sense to me.

Pausing has been my secret weapon when I don't have trips planned. However, they did away with the Pausing plan and replaced it with the monthly $5 Standby Plan. The difference here is, when paused, you will need internet connectivity to unpause your account, which basically requires you to do so before you lose cell signal or before you head out. With the Standby Plan, your Starlink will be connected still, though in a extremely low data mode, and you can unpause it whenever, even in the wild.

Monthly charge is prorated, so you have opportunities to save even more. In my case, my billing date is on the 5th of every month, so if I only turn it back on on the 20th for a weekend, I just need to pay for the amount between this month's 20th until next month's 5th. I don't have to pay the full $165. Therefore, I tend to schedule my trips either toward the end of the month or beginning of the month, before the 5th. What I usually do is I resume service, pay for it, then pause it right away so it will still operate until the billing date, and then the service will automatically pause on the 5th. That way, I will not forget to pause it before new bill is calculated.

Pausing and resuming service is simple, can be done via the app or the web portal.


Hope that helps.
Hey I like what you did with your amber lights in the front bumper, do you mind sharing how you did it? I'm New to this, don't know if I have to drill holes and if i need special mounting.
Thanks on the info starlink too, our team has been thinking about getting it for when we go to Baja at the dunes, we always lose cel signal and it is a little scary.
 
20251126_165718.jpg20251126_160449.jpg
Do these numbers/letters contain any secret codes or special features?
Just curious. I've almost completed the rear brakes then I have control arms, sway bar end links, Timber grove bags, shocks springs etc. 😵‍💫
 
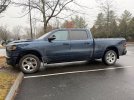
Winter setup activated. took off the 22” Night Edition wheels wrapped in Michelin Defender tires and for the 20” Big Horn wheels wrapped in Bridgestone Blizzak Tires

IMG_8484.jpeg

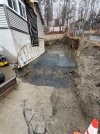
Also, house project update, site work is done, footings get done on Friday, foundation pour on Monday:
IMG_8486.jpeg

I do not make money on YouTube and am not an influencer but I’m doing weekly videos as we do this house project. Here’s the YT Playlist -
 
Hey I like what you did with your amber lights in the front bumper, do you mind sharing how you did it? I'm New to this, don't know if I have to drill holes and if i need special mounting.
Thanks on the info starlink too, our team has been thinking about getting it for when we go to Baja at the dunes, we always lose cel signal and it is a little scary.
Baja Designs lp9 Pro kit (20% off now):

Wired to Switch Pro 9100, use one switch that is programmed to turn on and off with IGN (that is also my trigger wire for the DC-DC w/ MPPT for the camper), low beam on a second switch, and high beam on a third switch. Given it is a switch pro 9100, there is no need to run relay or get power from battery:
(Use code BLACKFRIDAY for 20% off)
yes there are cheaper options (what i call - switch amateur - aka, auxbeams, RC, and the like. same junk, different skin), but this one is made in US in Southern California and race proven, the wires and components used are of much higher quality - wires are much stiffer and sturdier and match the amp rating. Those china ones may say it's rated for X amp but the actual amperage capacity is under the posted rating. After installing, replacing and troubleshooting all those switch amateurs for customers all these years I just tell them straight up at install: I will see you again for this and you will end up paying more because labor.
Also, for high amperage lights like these (basically anything BD Squadron XL, BD Light Bars (20"+), BD LP series) I always run harness and relay, and only use the switch amateur as trigger. That makes wiring organization a lot more difficult. Yes, you can wire those lights direct to switch amateur, but again, cheap components. Using harness and relay only delays the inevitable panel failure.
 
Last edited:
Ya tengo el idioma español cuidado, y lo que no sé lo puede manejar mi esposa (ella es de Bogotá).

For the most part other than Nicaragua I have "people" in most of the places I plan to stop along the way. The hardest part is going to be selling the van in Ushuaia once we are done so we can get a flight back to BA to go home. I know some people there and the current offer is the van can stay until its sold.

As far as safety...meh for the "average" joe rolling it alone or a small group it isnt to bad, once you add the money of a race team (even a small backyard team), or a big giant overland Sprinter Van people see $$$$ and a easy come up. I have seen that from LA to Tokyo happen.
oh yeah hahaha I had to google translate that LOL

and yeah i was told that too by seasoned travellers, and they look at my truck (any my friend's 3rd gen cummins that has similar setups) and said "nope, your trucks will attract a lot of attentions"
 
Last edited:
Installed one of the LED hood badges from @CZmenghe_Official @CZmenghe_Team_John

Install went fairly well. The instructions aren't 100% clear on taking the old badge off. You need to pop the bottom two tabs first, not the top. Then it just comes right off.

Installing the new badge wasn't as straightforward either. The top did not want to pop in, and with the 3m tape to help hold them on took a little bit. Had to get a little aggressive to get the tabs to pop in.

Finding the connector on headlight was easy, and I chose to route the wires through the fender to hide them as much as possible. Where they çome off the hood hinge to the hole, there not much you can do. I might revisit this isn't the future to try and **** it up better.

Comparison of stock badge to the LED badge . Plastic does feel cheaper. I might miss the purple overlays, but kid of like he flagish look of the LEDs. View attachment 208722View attachment 208723

New badge installed. There is some gap on the rear I'm not 100% happy with, it it's not horrible either. View attachment 208724View attachment 208725View attachment 208730View attachment 208731

Here is my wire routing. I have a fish tape from previous job I used to pull the wire through the fender. Could use a coat hanger as well. This was connection to test the light.

View attachment 208726View attachment 208727

Here is the final route by the hinge.View attachment 208728View attachment 208729
Purple definitely looks great! So, how about purple LEDs?
 
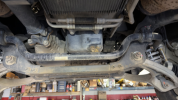
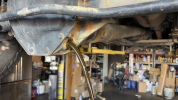
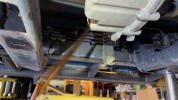
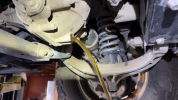
Day off today - shop closed for Thanksgiving all week so... finally got time to do my own truck... with only 3 hours of sleep.
1764221676119.png
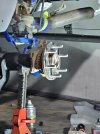
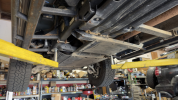
yeap, that RCI cross member is bent. I used that as landing pad earlier this year. Was going against the sun and didn't see it. Skid plates did their job though.
1764221850142.png
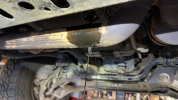
Drained engine oil. Refilled with 5w-40 oil that boss uses for his TRX and 392.
Blurry picture because I just got my 17 Pro Max and currently running it naked, and my hands are not used to how thin it is naked. This is the result of taking photo with single non-dominant hand.
1764221997971.png

Drained rear diff. Refilled with Mopar fluid
Oil pretty dirty for 50.3k miles.
1764222056875.png
Drained T-Case. Refilled with Mopar fluid
again, single non-dominant hand. Also you can see the "damage" on the RCI cross member. Oil not too dirty.
1764222136837.png

Drained front diff. Refilled with Mopar fluid.
Oil's clean.
What does that tell us? I send too much and not crawl enough!

1764222532901.png
Drained transmission, replaced pan, and refilled with Mopar fluid.
Getting the pan out wasn't difficult with the right tools. But the whole procedure of climbing in and out and waiting for it to hit the range was the pain in the as* part when doing it solo.

also checked treadwear... on my AT3W full tread is 16/32in according to google, currently i'm at 14/32 all around... so that equates to... 87% left with 50k miles on them.
some sources say AT3W full tread is 19/32in, so even then i'm at ~74% left with 50k miles on them...

well... my friend just swapped his 37x12.5R18 KM3 for 35x12.5R18 on his G Wagon... should i... hmm.
 

Users who are viewing this thread

Back
Top