5thGenRams Forums

Register a free account today to become a member! Once signed in, you'll be able to participate on this site by adding your own topics and posts, as well as connect with other members through your own private inbox!

Vented seat module?

Swicago

Active Member
Joined
Sep 26, 2020
Messages
87
Reaction score
67
Thanks for the numbers. I've been looking for the seat harness on the connector link above but it's a little cryptic with some names. My understanding of canbus is somewhat limited but I'm curious if the switch signal could jump onto the bus at any location? Meaning I could hijack power/ground and the canbus signal from another location... It would need suitable current load capability, but it seems doable if that's a sound theory. It'd need to be an unused or lightly used bus in order to avoid conflicts, I'm sure. Maybe something like the unused etorque harness...
Your welcome.
If I am not mistaken, the switches are ground pin control like everything else. Each time you push the button, it pulls a pin on some ecu to ground. And that ecu then sends the signal via canbus to the heater/vent modul as to what level it should be at. The other pins on the buttons are for indicators and voltage for the indicators. But I could be wrong and it is also some canbus type module.
If we had the schematics for the entire control, we could confirm if it all talks canbus or not, but from what I found in alphaobd, it apears to be a option to enable, so most likely canbus. However schematics would be nice to be able to make a diy harness, basically that last mile!
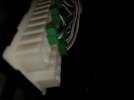
Other option I see, is make a diy module, that accepts the the factory switches and does every the factory module does w/o need of canbus or body ecu knowing it has this option. Basically make it stand alone, but use factory parts. Should not be to hard to figure out what each pin does on each harness.
If you know where to find the factory schematics let me know, I can help decode them. I did a few similar factory retro fits on my FJ cruiser. DIY harness etc.
 
Last edited:

Evank33

Active Member
Joined
Oct 14, 2019
Messages
78
Reaction score
24
Location
Canada
Would it work to take seats from a higher trim and put them in your truck? Would save a lot of time. Is it plug and play for the higher trim seats?
 

Daverous

Well-Known Member
Joined
Sep 14, 2020
Messages
384
Reaction score
244
It would work for the front, that's 100% tested and functional using alphaobd. The rear require a little more work due to the physical buttons in the center console. Because of a lack of wiring in the rear on my truck that's where I'm currently frozen. I can't test further until I figure out the harness.
 

Malodave

Ram Guru
Joined
Oct 4, 2020
Messages
1,113
Reaction score
605
Location
Rindge NH
I started looking at adding the Vented Parts to my 2021 Laramie. I thought
when you got the rear heated seats you also go the Vented too. Each muffin
fan and bracket are running $85 Each, Then you have the switch panel and
other parts in the seats. So I am going to pass on the upgrade for now. I
don't have many passengers to carry.

Malodave
 

Swicago

Active Member
Joined
Sep 26, 2020
Messages
87
Reaction score
67
It would work for the front, that's 100% tested and functional using alphaobd. The rear require a little more work due to the physical buttons in the center console. Because of a lack of wiring in the rear on my truck that's where I'm currently frozen. I can't test further until I figure out the harness.
Found an interesting PDF document someone made that shows how to make the canbus wire/plug and where it goes(last page) would be easy to make a wire and route it to the back seats for the rear module (this would add that missing last mile I mentioned with body wiring).
It also appears that if you already have blind spot detection, then the canbus wire could be tapped from under drivers seat, but imo I make a clean wire and plug it into the canbus hub under the dash.

EDIT: it appears these instructions for the canbus were for the 2019, which may or may not be the same on 2020 or 2021 models. I did look under my laramie dash and saw what looks like a green canbus distribution block and also a white one next to it
 
Last edited:

Daverous

Well-Known Member
Joined
Sep 14, 2020
Messages
384
Reaction score
244
Nice. I'll give it a read when I get a few minutes. Thank you.
 

Swicago

Active Member
Joined
Sep 26, 2020
Messages
87
Reaction score
67
Nice. I'll give it a read when I get a few minutes. Thank you.
found it in the Laramie...it is in the same spot as in the pdf. It is literally behind plastic trim just below the BCM. The other two that are visible w/o panel removed might be CAN C or something else. Maybe CAN before gateway. You have to remove the plastic trim piece to access the CAN IHS distribution block as per that PDF. From there you could can easily make a CAN Cable that you can run to the back seats.
 

Attachments

  • IMG_20201220_140906415.jpg
    IMG_20201220_140906415.jpg
    155.7 KB · Views: 37
  • IMG_20201220_140849017.jpg
    IMG_20201220_140849017.jpg
    36.9 KB · Views: 37

Daverous

Well-Known Member
Joined
Sep 14, 2020
Messages
384
Reaction score
244
Negative, ghost rider. I actually paused to work out the 360 camera and digital rear view mirror. Digital mirror was a bust but about done with the 360.

After running down the wiring part it seems very doable with a new harness. Just too many projects and not enough time so far.
 

5G Rebel

New Member
Joined
May 24, 2020
Messages
4
Reaction score
1
Negative, ghost rider. I actually paused to work out the 360 camera and digital rear view mirror. Digital mirror was a bust but about done with the 360.

After running down the wiring part it seems very doable with a new harness. Just too many projects and not enough time so far.
@Daverous I just started a conversation with you on the seats.
 

deerob1980

New Member
Joined
May 17, 2022
Messages
1
Reaction score
0
10k didn't hurt! It was definitely the chrome and the tiny looking headlights that got me in the end. Yours looks much better in all black.

Not to put words in the OP mouth(and another hearty thank you!) but I did ask via PM and it is now working. Looks like one of the control modules was in the passenger seat(which I'm guessing wasn't plugged up at the time of the test?). Also took a few cycles for my vented button to appear, after activating with alfaobd, on the screen but it's now there as well. And FYI to anyone that finds this via Google like me the rebel 12 leather does seem to work just fine once you get the vented parts added under them.

I'll try the rear next.
Sorry to reanimate an old thread, but I am preparing to do this exact thing with my Rebel. What I really want to do is add a ventilated *driver's* seat (no one else in my family cares about this or has my swamp-a** problem!). Given how much these seats seem to go for on the secondary market ($700-$1000 apiece as far as I can tell) I thought I could save some money by doing driver's side only. But this post makes it seem like the controls (which I have already added via AlfaOBD) will not spring to life unless driver-side AND passenger-side ventilated hardware is installed. Do I have that right? In other words, if I am going to add a ventilated driver seat to my Rebel, am I required to add the passenger side, too?
 

Daverous

Well-Known Member
Joined
Sep 14, 2020
Messages
384
Reaction score
244
Passenger is required. The module is under there. I'm sure you could rig something, but the cost saving would be nominal.
 

HookedonRam

Active Member
Joined
Oct 3, 2020
Messages
118
Reaction score
32
Location
NV
I need to replace my passenger side seat cover however, I can't figure out how to remove it. Is there a write-up on how to tackle this by any chance? TIA
 

PhillyPhan

Well-Known Member
Joined
Jan 27, 2021
Messages
250
Reaction score
156
Location
Mesa, AZ
Did anyone figure out a way to install the ventilated seat parts on the existing Rebel seats yet? Or is buying Laramie or higher seats still required? I would think you could just add the blower fans to the existing fans and plug them in, but I'm sure it's not that simple.
 

Daverous

Well-Known Member
Joined
Sep 14, 2020
Messages
384
Reaction score
244
The parts list exceeds the cost of buying a used set and requires just as much work. Unless you're a fan of wasting time and money I'd suggest swapping covers and cushions should you desire. I recouped all but about 200 bucks selling my old stuff after the swap. I also gained wireless charging and a CD player(that I've never used haha) with the set I bought... So I guess that means for my time I actually pocketed about 125 bucks?
 

FNG5

New Member
Joined
Dec 23, 2022
Messages
3
Reaction score
0
I’m interested in doing the laramie seat swap into a big horn to get ventilated fronts. Can this be done with the 8.4” screen? I read somewhere the 12” screen was required.
 

Swicago

Active Member
Joined
Sep 26, 2020
Messages
87
Reaction score
67
I’m interested in doing the laramie seat swap into a big horn to get ventilated fronts. Can this be done with the 8.4” screen? I read somewhere the 12” screen was required.
I don't see why you need a 12" unit for seat controls. I have a laramie with the 8.4" head unit and seat controls (vented/heated) are real buttons
 

FNG5

New Member
Joined
Dec 23, 2022
Messages
3
Reaction score
0
I don't see why you need a 12" unit for seat controls. I have a laramie with the 8.4" head unit and seat controls (vented/heated) are real buttons
Do you also have the controls for ventilation on your 8.4 screen? I think that is what they were getting at. Since the physical buttons for ventilated seats wouldn’t be there, they would be programmed to the 12” screen. I just don’t know if they can also be programmed to the 8.4 screen.
 

Daverous

Well-Known Member
Joined
Sep 14, 2020
Messages
384
Reaction score
244
The vented and heated are accessible via the 8.4 screen. While having the buttons would sure be nice, from a programming standpoint not having them wouldn't be prohibitive.
 

Users who are viewing this thread

Top