5thGenRams Forums

Register a free account today to become a member! Once signed in, you'll be able to participate on this site by adding your own topics and posts, as well as connect with other members through your own private inbox!

Reverse lighting upgrade

Thanks. I want to attach the wires from the lights to a male 5 pin connecter and plug the male 5 pin connector into the female 5 pin, which comes with the curt 56584. Having a hard time visualizing how to connect both sets of light wires to male 5 pin connector. My apologies for the questions. If it's not already obvious, I have zero experience doing something like this.
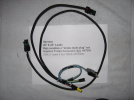
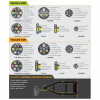
I am assuming you are wiring up an auxiliary reverse light. Hope the picture helps.
The wire nuts are not recommended for exterior connections however.
There are 2 wire nuts if you look close. The blue wire from the harness is the reverse power and the white is the ground. If you are using VLEDS the black wire from the VLEDS harness is the ground. So you connect the VLEDS black with the harnesses' white.. Than attach the black/white VLEDS wire with the blue harness wire. The other wires are not used, covered individually with electrical tape and taped together.
In this set up the plugs are connected to the compatible plugs on the lights.


1639833504687.png

1639833992044.png
 
Last edited:
Thanks. I want to attach the wires from the lights to a male 5 pin connecter and plug the male 5 pin connector into the female 5 pin, which comes with the curt 56584. Having a hard time visualizing how to connect both sets of light wires to male 5 pin connector. My apologies for the questions. If it's not already obvious, I have zero experience doing something like this.
That shouldn’t be to hard, just buy the trailer portion of a 5pin plug and it’ll come with a few feet of wiring. You’ll still have to do it all under the truck or remove the plastic trim piece your installing the lights in as the wire will go straight through it. A bit of solder, or water proof crimp connectors should get the job done.
 
That shouldn’t be to hard, just buy the trailer portion of a 5pin plug and it’ll come with a few feet of wiring. You’ll still have to do it all under the truck or remove the plastic trim piece your installing the lights in as the wire will go straight through it. A bit of solder, or water proof crimp connectors should get the job done.
Understood. But how to get the black and red wires from both lights to 5pin plug white and blue wires? I could connect the passengers side lights to the 5pin, but how to connect the drivers side lights to the same 5pin when the wires are too short?
 
If you strip off enough insulation a few inches from the connector and connect you passenger side light at that point you can run the remaining wire from the adapter across to the drivers side. The lights are only a couple of feet apart and don’t require much to bridge them together.
 
Understood. But how to get the black and red wires from both lights to 5pin plug white and blue wires? I could connect the passengers side lights to the 5pin, but how to connect the drivers side lights to the same 5pin when the wires are too short?
If the wires aren't long enough, any parts store or even Walmart will have wire you can buy.
 
I just got my lights this week and I also ordered the replacement bumper filler panels. Instead of installing the lights to the filler panel (as seen in post 1), I'm thinking about cutting an opening the size of the lens only, and mounting them on the backside with with only the light exposed. I could still drill the holes for the screws, but I was going for a more finished look. Anybody know how I can secure the light to the backside of the panel? Will a 2 part epoxy hold it there?
 
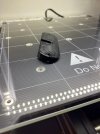
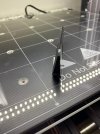
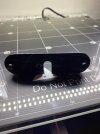
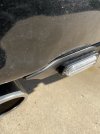
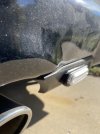
I did this mod a few weeks ago. Definitely helped light up the area directly behind the bumper. However, I felt the lights were angled too low when mounted to the lower valance on the bumper. I decided to try and use a wedge to fit between the bumper valance and the light to improve the angle. Of course, no one sells this type of wedge, so I decided to put my 3D printer to work. I designed this wedge and printed it out.

IMG_2244.jpgIMG_2245.jpgIMG_2246.jpg

I installed them on the truck today (I know - it's flithy! Going in for a cleaning and ceramic coat next week).

IMG_2241.jpgIMG_2242.jpg

I will see what effect they have tonight, but it looks like the angle is much better now.
 
I did this mod a few weeks ago. Definitely helped light up the area directly behind the bumper. However, I felt the lights were angled too low when mounted to the lower valance on the bumper. I decided to try and use a wedge to fit between the bumper valance and the light to improve the angle. Of course, no one sells this type of wedge, so I decided to put my 3D printer to work. I designed this wedge and printed it out.

View attachment 114621View attachment 114622View attachment 114623

I installed them on the truck today (I know - it's flithy! Going in for a cleaning and ceramic coat next week).

View attachment 114626View attachment 114627

I will see what effect they have tonight, but it looks like the angle is much better now.
Looks good, exactly the thing a 3d printer is meant for.
 
I did this mod a few weeks ago. Definitely helped light up the area directly behind the bumper. However, I felt the lights were angled too low when mounted to the lower valance on the bumper. I decided to try and use a wedge to fit between the bumper valance and the light to improve the angle. Of course, no one sells this type of wedge, so I decided to put my 3D printer to work. I designed this wedge and printed it out.

View attachment 114621View attachment 114622View attachment 114623

I installed them on the truck today (I know - it's flithy! Going in for a cleaning and ceramic coat next week).

View attachment 114626View attachment 114627

I will see what effect they have tonight, but it looks like the angle is much better now.
I just installed this today and I agree they don't produce light very far out. Care to share your wedge, I have a friend that is always looking to use his 3d printer. This looks like it would help.
 
I just installed this today and I agree they don't produce light very far out. Care to share your wedge, I have a friend that is always looking to use his 3d printer. This looks like it would help.
I can share the file, but I don't think that I can attach it on the forum. Shoot me a PM with your email address, and I'll send it to you.
 
Why hasn’t Ram fixed the crappy reverse lights in the led taillights. They are garbage. I feel I am gonna swap the bumper to get some decent light back there. I back up everywhere and was like why are they angled out to sides and not at the bumper?
 
I see these from VLEDs are these similar to the ones on the factory led taillights?
 
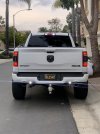
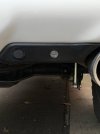
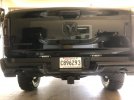
I used some rock lights and mounted them behind the plastic trim to make it a little more discreet. I’m happy with how they look but I do wish they shined a bit farther. I have 2 more hooked up but just ziptied out of the way for now, I still have to drill the holes on the side of the bumper for them.
 

Attachments

  • AB71F864-6B1A-4C8F-86F2-F121B10F3574.jpeg
    AB71F864-6B1A-4C8F-86F2-F121B10F3574.jpeg
    144 KB · Views: 225
  • 32775F20-CB51-4767-9192-37B40378BA63.jpeg
    32775F20-CB51-4767-9192-37B40378BA63.jpeg
    79.3 KB · Views: 223
  • 99F3B908-5E93-4161-B7B0-9C9831BB8464.jpeg
    99F3B908-5E93-4161-B7B0-9C9831BB8464.jpeg
    85.1 KB · Views: 222
I see these from VLEDs are these similar to the ones on the factory led taillights?
I see you just joined the 5th gen forum. Plenty of options to add lighting. Welcome aboard and best of luck.
 
I see you just joined the 5th gen forum. Plenty of options to add lighting. Welcome aboard and best of luck.
Yes thank you. Just got a 2021 Laramie crew cab.
 
I used some rock lights and mounted them behind the plastic trim to make it a little more discreet. I’m happy with how they look but I do wish they shined a bit farther. I have 2 more hooked up but just ziptied out of the way for now, I still have to drill the holes on the side of the bumper for them.
That looks pretty good. Do you by any chance have a link to those lights?
 
I used some rock lights and mounted them behind the plastic trim to make it a little more discreet. I’m happy with how they look but I do wish they shined a bit farther. I have 2 more hooked up but just ziptied out of the way for now, I still have to drill the holes on the side of the bumper for them.
I may steal your idea, my problem is mine shine too far. I need more light up close.
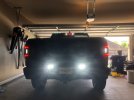
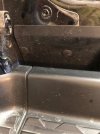
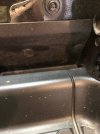
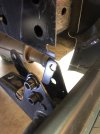
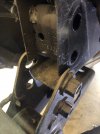
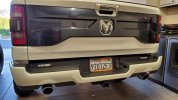
If you haven't installed your other 2, may I suggest this location when you do?
IMG_1484.jpg
IMG_1483.jpg
IMG_1508.jpg
IMG_1505.jpg
 
How did you mount those? Are they screwed on?
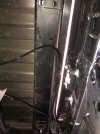
I removed that panel piece and cut them for the lights to fit with a jig saw and then drilled the bolt holes through and bolted them on.
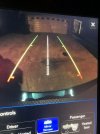
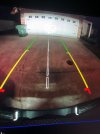
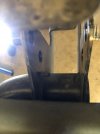
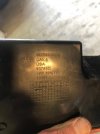
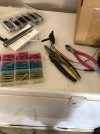
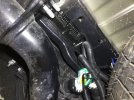
Here are the pics I could find from the install...Randomish order.
IMG_1464.jpg
IMG_1467.jpg
IMG_1468.jpg
IMG_1472.jpg
IMG_1473.jpg
IMG_1475.jpg
IMG_1476.jpg
IMG_1478.jpg
IMG_1495.jpg

IMG_1471.jpg
I've since added a strip of 1/4" rubber acting as a shim on top of the light to angle them down some to get them to shine closer to the truck, but it is still not what I would call optimal.
 
Last edited:
Users who are viewing this thread

Back
Top