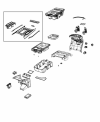
I haven't seen this information yet all in one post and spent a few hours searching various posts to find this all, so I figured I'd take a second to write it up all up and put it here for reference. Hopefully, this helps someone looking to do this. I know my dealer had problems locating what I was looking for when I was describing the parts to them since they pull things up based on VIN and whatever you have is what will come up for them.
Disclaimer: Always double-check your parts and install instructions to make sure they are right for your vehicle.
Parts Information:
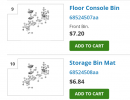
Bin: 68524507aa
Rubber Mat for Bin: 68524508aa
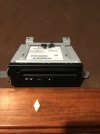
CD Player: 68335565AB
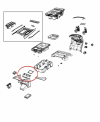 Various pictures:
The bin (from Google):
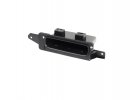
The bin installed (Rsorrell2, post #121):
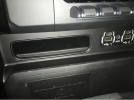
The CD player (osage921, post #135):
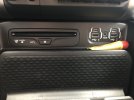
The CD player installed (tobyw, post #7, "Anyone Removed CD Player?"):
Part numbers on Mopar (Jonwiggle, post #169):
 Installation Instructions:
Instructions from Aseras in post #129 on how to access and replace the CD player or bin:
"Pull trim from both sides of center console. The thin strips. There’s 2 10mm bolts there. Then take out the 4 squares at each corner of the center console and remove those four 10mm bolts. Now you can slide the whole console back a foot easy. Cd player or cubby is two screws right on top. Its a 5 minute job."
Factory instructions on how to remove the center console (skip the ram charger parts and the infotainment removal):
Pictures and instructions from post #234 (my own post and pictures):
A couple of updates and some new pictures as I just finally went through the install process.
There are, as listed, six total bolts to then slide the console back (at least on my 19 Limited). They are all under trim pieces in the following locations:
Front of the console (left and right):
Rear of the console (slide your seat all the way forward):
While this next part may not be technically required, I found it infinitely easier to remove the CD player this way. I removed six total screws in the order shown below.
1 and 2 allowed the back of the CD player to be free.
3 and 4 allowed the thin trim along the console sides to be lifted up and removed (pro tip, lift your center console first or it will gouge your leather).
5 and 6 allow the ram charger plastic piece to be lifted up.
7 and 8 (on the bottom side of the plastic) allow the CD player to be removed and then the cubby to be installed.
I'm still waiting on the plastic mat to come into the dealer, (yes, it a separate part you need to order) but I'm calling this one 99% complete:
Hope this helps anyone looking to complete this, I'm extremely happy with the results and the ease of install.


