5thGenRams Forums
You are using an out of date browser. It may not display this or other websites correctly.
You should upgrade or use an alternative browser.
You should upgrade or use an alternative browser.
New member with rear defrost problem
- Thread starter Hexman62
- Start date
CMil527
Spends too much time on here
Welcome... does the switch light up when you press it? could be disconnected from the back somehow?
Dr. Jim
Ram Guru
- Joined
- Aug 16, 2018
- Messages
- 770
- Reaction score
- 561
- Points
- 93
- Age
- 78
There seems to be an open break somewhere between the fuse and the rear window. You probably will have to trace the wiring all along the way. How is the window grid grounded to make a complete circuit? You should check that as well.
crusher
Ram Guru
- Joined
- Mar 2, 2022
- Messages
- 1,470
- Reaction score
- 626
- Points
- 113
- Age
- 42
- Location
- st-jean quebec canada
hello and welcome, congrats on the new ride, hope you find your defrost problem soon
6of36
Spends too much time on here
I was a chrysler mechanic long long ago, so things may be different. Now so many things are actually controlled by the BCM. Back in the day, there was a relay. It could have 1 fuse for switch power, and another, high amperage one for the actual grid power. Maybe you will get lucky, and a more current mechanic will chime in.
Hexman62
Member
- Joined
- Feb 18, 2023
- Messages
- 14
- Reaction score
- 2
- Points
- 3
Right, some discreet switches still remain but not many! Just find it hard to believe a wire would be open somewhere but that's where I'm headed....I was a chrysler mechanic long long ago, so things may be different. Now so many things are actually controlled by the BCM. Back in the day, there was a relay. It could have 1 fuse for switch power, and another, high amperage one for the actual grid power. Maybe you will get lucky, and a more current mechanic will chime in.
Look very very carefully at all the lines. If anything scratched the glass and removed the conductive coating it breaks the circuit. Usually you only loose a line or two but a break in the right place can knock the whole thing out.Bought a 2019 Ram 1500 quad cab and love it. Only thing is rear defrost does not work. No power at connector on rear glass and fuse is OK. Doesn't seem like there's a relay either. Any advice?
Hexman62
Member
- Joined
- Feb 18, 2023
- Messages
- 14
- Reaction score
- 2
- Points
- 3
Good advice thanks. However, not even getting 14v to the window connector. Seems like an open wire somewhere between the fuse and the connector.Look very very carefully at all the lines. If anything scratched the glass and removed the conductive coating it breaks the circuit. Usually you only loose a line or two but a break in the right place can knock the whole thing out.
Ratchet
Well-Known Member
6of36
Spends too much time on here
Ratchet's post pretty much confirms my earlier post. It looks like fuse 11 is for control circuit. ( feeds low power of relay, making it switch on, and feeding the light on the switch) Fuses 46 and 46 would be the high draw side of the relays. ( actually powering defroster ) Check those 2 fuses. If they are good, check the relay. If it is working, you have a break in the wiring.
Hexman62
Member
- Joined
- Feb 18, 2023
- Messages
- 14
- Reaction score
- 2
- Points
- 3
This is excellent advice guys! Not sure why I couldn't find this circuit via surfing?Ratchet's post pretty much confirms my earlier post. It looks like fuse 11 is for control circuit. ( feeds low power of relay, making it switch on, and feeding the light on the switch) Fuses 46 and 46 would be the high draw side of the relays. ( actually powering defroster ) Check those 2 fuses. If they are good, check the relay. If it is working, you have a break in the wiring.
Hexman62
Member
- Joined
- Feb 18, 2023
- Messages
- 14
- Reaction score
- 2
- Points
- 3
6of36
Spends too much time on here
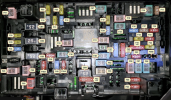
Haven't worked on them in years, so I can't help, but when I just referred back to Rachets post, to see if there was a clue, I noticed fuse number 47 under the hood is also in that circuit. Check it too.Any chance you know the relay number?View attachment 153121
Hexman62
Member
- Joined
- Feb 18, 2023
- Messages
- 14
- Reaction score
- 2
- Points
- 3
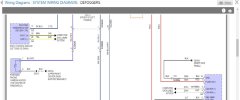
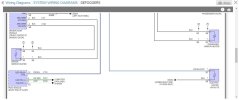
I found the fuses! Will check them, thanks again!Here is the defogger circuit. This should help ya out a lil bit.
Ratchet
Well-Known Member
Anytime.I found the fuses! Will check them, thanks again!
Biggacejvg
New Member
- Joined
- May 10, 2024
- Messages
- 1
- Reaction score
- 0
- Points
- 1
- Age
- 40
I'm having the same issue with my 2016 Ram 2500, were you able to resolve your issue?I found the fuses! Will check them, thanks again!
Thanks,
Hexman62
Member
- Joined
- Feb 18, 2023
- Messages
- 14
- Reaction score
- 2
- Points
- 3
No, I kinda stopped trying to fix it when weather warmed up.I'm having the same issue with my 2016 Ram 2500, were you able to resolve your issue?
Thanks,
Rebel2022
Well-Known Member
Kind of the same problem here, since the truck was new many of the ‘lines’ in the window didn’t defrost and now its down to only 1 or 2 that do. Finally remembered to ask the service department about in on last service and they have ordered a whole new window under warranty.
stevecon
Active Member
- Joined
- Feb 4, 2024
- Messages
- 27
- Reaction score
- 9
- Points
- 3
- Age
- 66
- Location
- Metro Boston & Lakes Region NH
I found that the passenger side contact "button" came off the solder pad of the rear defroster when I pushed the rear seatback forward to inspect it. After seeing mixed reviews from owners using Permatex & Loctite conductive adhesive solutions, I have decided to go the solder route instead. The adhesive methods all seem to require at least several hours of cure time in a 50 to 80 degree ambient (longer if colder); that's simply not practical in the 3rd week of December here in New England.
A rosin core solder and a 100W to 200W soldering iron (or a butane fueled type) should make fairly quick work of this with zero curing time required. I'll use a popsicle stick (or similar item) to hold the hot contact button in position for 10 - 15 seconds after the heat source is removed. I'll be able to reconnect and use the defroster immediately afterwards. I'll use a heat gun (or blow dryer) to heat up the glass a bit from the outside to help keep the cold glass from acting like a heat sink while I'm trying to melt the solder inside. A cold-solder joint will likely fail sooner rather than later.
If you decide to go this route, make sure you do not use plumber's soldering paste or flux as they contain acid and it will eat through electrical connections and cause them to fail over time. I've read online that in a pinch, white petroleum jelly (Vaseline), lemon juice or even WD-40 are acceptable flux substitutes (I haven't tried them - so I can't say how well they work) and would be better than plumber's types. Rosin is a popular flux used in soldering operations in the electronics industry and when it is incorporated in the core of solder - it is a no-mess way to apply it.
Users who are viewing this thread
Total: 1 (members: 0, guests: 1)
Members online
Total: 2,757 (members: 7, guests: 2,750)


