5thGenRams Forums

Register a free account today to become a member! Once signed in, you'll be able to participate on this site by adding your own topics and posts, as well as connect with other members through your own private inbox!

Amateur Radio (ham) install

toastytoast

New Member
Joined
Jul 20, 2022
Messages
1
Reaction score
0
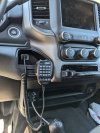
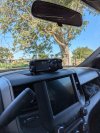
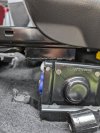
Got my Yaesu FTM-300D installed in the truck finally. I'm happy with it and it came out really clean. Radio body is up under the dash on the drivers side right above my left foot.
View attachment 129975
Great install pics. How did you route the wire through the dash to the head unit? About to install a Yaesu in my RAM this week.
 

LBTRS

Active Member
Joined
Nov 24, 2018
Messages
39
Reaction score
56
Location
Phoenix, AZ
Great install pics. How did you route the wire through the dash to the head unit? About to install a Yaesu in my RAM this week.
I unplugged and removed the cigarette lighter and ran it through the hole that it left. I left the cigarette lighter cover on there and just removed the socket so it looks stock there just isn't a lighter socket to plug into anymore.
 

2019Raven

Active Member
Joined
Jun 22, 2022
Messages
97
Reaction score
119
Got my Yaesu FTM-300D installed in the truck finally. I'm happy with it and it came out really clean. Radio body is up under the dash on the drivers side right above my left foot.
View attachment 129975
With that Bulletproof mount how wide is your remote radio head? My remote head is 5” wide. Would love to use this type of mount for my FT-8900.
 

First_RAM

Member
Joined
Feb 7, 2023
Messages
10
Reaction score
30
Location
Ganado, TX
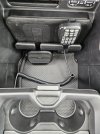
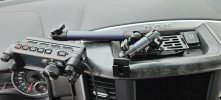
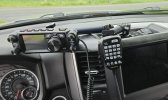
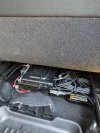
Hi folks. I wanted to share a few pics from my installation on a 2023 Ram 1500 Limited. I took a slightly different approach and discovered the sliding drink tray inside of the console provided enough clearance to mount the transceiver underneath it. I removed the rubber mat from the bottom of the console, used a piece of thin plastic for support on the underside of the mat, and mounted the radio bracket on the topside of the mat.

The first two pictures show a top-down view looking into the console with the drink tray fully closed and 1/2 open - and I am still able to fully close the console if I desire. You can see a bit of the transciever (Icom 2730) in the fully closed position.

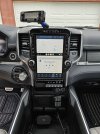
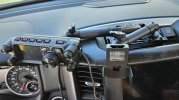
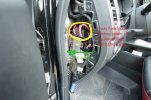
The third picture shows the accessory speaker in the console and the control head mounted with a BulletPoint Mounting solution. The BulletPoint mount is a great product! You may also notice that I am using the Scanner Radio App with Android Auto to monitor my local Public Safety departments.

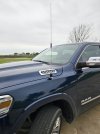
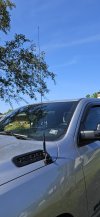
The last picture shows the no hole, fender mount dual band 5/8 wave antenna installation.

All in all, I'm quite happy with the installation.

73, de W5iTZ
 

Attachments

  • drink_tray_closed.jpg
    drink_tray_closed.jpg
    155.5 KB · Views: 110
  • drink_tray_extended.jpg
    drink_tray_extended.jpg
    152.8 KB · Views: 110
  • interior_installation.jpg
    interior_installation.jpg
    145.7 KB · Views: 115
  • fender_mount.jpg
    fender_mount.jpg
    107.3 KB · Views: 115

deathbug74

New Member
Joined
Oct 25, 2023
Messages
4
Reaction score
1
Location
Middle of California
Thanks everyone for all the install pics, great food for thought. Recently picked up a 2023 Big Horn, and pondering installs. Lots of good ideas, I just need to decide which radio(s) I want in the truck.

Currently have 2m, 70cm, and GMRS covered in my old truck (Icom 2730a/Anytone AT779uv). Still debating with myself between rolling the Icom over, or swapping in the FTM-400 that's currently a base to have APRS.
 

Luv2fly3

Member
Joined
Jul 26, 2023
Messages
12
Reaction score
2
I'm preparing to mount an IC-7100 into my '22 1500 Laramie. Can anyone who has done an HF rig install speak to how the RAM does as far as noise in the radio and how bonding parts together helped? I know on a prior vehicle I had a Yaesu FT-857 installed, I even put braid over the spark plug wires to shield them. My RAM has eTorque and I'm wondering if that might be better or worse for noise as well. Just curious how anyone has found their HF setups to work and what bonding did to help that specifically.
 

boogielander

Spends too much time on here
Joined
Jun 29, 2022
Messages
2,014
Reaction score
2,812
I'm preparing to mount an IC-7100 into my '22 1500 Laramie. Can anyone who has done an HF rig install speak to how the RAM does as far as noise in the radio and how bonding parts together helped? I know on a prior vehicle I had a Yaesu FT-857 installed, I even put braid over the spark plug wires to shield them. My RAM has eTorque and I'm wondering if that might be better or worse for noise as well. Just curious how anyone has found their HF setups to work and what bonding did to help that specifically.
I have icom ic-2780a and no issues without doing any of that.
 

boogielander

Spends too much time on here
Joined
Jun 29, 2022
Messages
2,014
Reaction score
2,812
I run a icom ic-2780a.
The way I did it is pretty unconventional to what most guys did but it opens up a lot more possibilities to add more accessories in the future.
1713689768585.jpeg
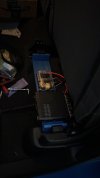
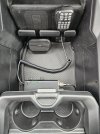
I built a custom mount with scrap wood that goes under the driver side rear seat, ran 8 gauge power and ground to the engine bay and also fed the antenna cable along (I also fed my switch-pros 9100 controller cable through as well).
I connected the power to the battery via a circuit breaker, and ground to body inside engine bay and connected the 8 gauge to a BLUE SEA FUSE BLOCK WITH GROUND. This will serve as the center for my interior power distribution block. Then I mounted the ham right next to it, ran the 3.5mm speaker extension wire to front passenger side where I mounted my speaker, and utilized TWO CAT6 extensions for both the display and the mic.
I ran both display and mic extension under the center console. The mic comes out of driver side footwell and the display comes out from top of the dashboard.
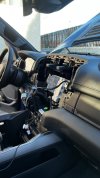
1713690045074.jpeg
To do that, radio removal is required. I took this opportunity to also install ICS Dash Mount to hold the display
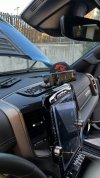
1713690117467.jpeg
I also drilled the bezel next to the ciggy plug to feed the Cat6 cable through.
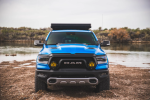
1713690255367.png
To mount the antenna, since I'm running A-pillar lights, I utilized SDHQ A-Pillar light mounts with Rago Fabrication HAM Radio Antenna Mount extension. SDHQ plus Rago combo has been a tried and true solution for a-pillar setup, and have proven to work extremely well. I ran the same combo on my previous rig.
Reason to mount at A-pillar are:
1. I can see the antenna. I've seen antennas incorrectly or improperly installed flew off on the trail when doing high speed trail runs. This is due to vibrations and lack of threadlocker. Though, I have to say, on my previous rig I did not use any thread locker and I had no problem with the antenna coming loose.
2. Bed side is reserved for other things, like the camper.
3. Not messing with 3rd brake light especially when we already have leaky third brake light issue.

This is probably overkill for most guys, but I do also run a DC-DC charger and an EcoFlow system that gives me 3000Wh of power capacity inside the cab for fridge and to power my StarLink and charge my drones, so I did this from the get-go and serve as the foundation for my interior build. All these were done with only 300 miles on the clock and I'm at 21k right now, with plenty of trail mileages. So far so good.

Parts used in addition to iCom HAM:
Speaker: Amazon.com
(I chose one with the mount like that for ease of installation)
3.5mm Extension: Amazon.com
Cat6 Extension: https://a.co/d/5VP8MWI
Cat6 Extension: Amazon.com
Tram Antenna: Amazon.com
Tram Antenna Cable: Amazon.com
Rago Fab Ham Antenna Extension: Ham Antenna Ditch Bracket Extension
SDHQ A-Pillar Mount: '19-23 Ram 1500 SDHQ Built A-Pillar Light Mounts
 

rebel70

Active Member
Joined
Feb 6, 2021
Messages
26
Reaction score
43
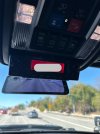
I recently changed from a handheld control head (pictured in my previous post), to a full control head. I did this by removing the sunglass compartment door. The bracket is mounted inside the compartment so the only thing visible is a floating control head. Wires are ran through the compartment and under the headliner, down the a pillar, and back to the radio brain underneath the rear seat.
 

Attachments

  • IMG_2249.jpeg
    IMG_2249.jpeg
    95.8 KB · Views: 19

mikes911

Member
Joined
Feb 18, 2024
Messages
23
Reaction score
55
Finally put a radio in. Yaesu FTM-500, liked it a lot in my Jeep, so went with the same one. Bulletpoint RubiGrid dash mount. Got both the mic mount and the handheld mount (options are good). Diamond SBB-5NMO and a Comet mount, also same as my Jeep. Still have to hide the control head cable, but happy with it.
 

Attachments

  • 20240506_172718.jpg
    20240506_172718.jpg
    94.6 KB · Views: 16
  • 20240506_172703.jpg
    20240506_172703.jpg
    124.2 KB · Views: 16
  • 20240429_180802.jpg
    20240429_180802.jpg
    112.4 KB · Views: 19
  • 20240604_100106.jpg
    20240604_100106.jpg
    98 KB · Views: 18

MitchK

New Member
Joined
Apr 2, 2024
Messages
2
Reaction score
0
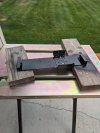
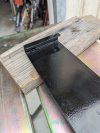
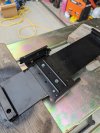
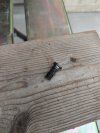
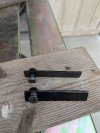
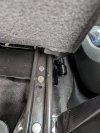
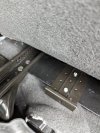
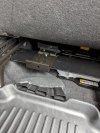
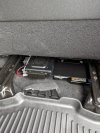
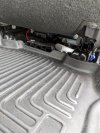
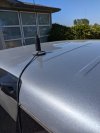
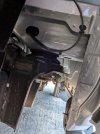
Hi all. New to this group, but not new to amateur radio. I purchased a new 2024 Ram 3500 tradesman the first of April. I had been considering the various options to install my Yaesu FTM-500. I ended up making a custom mounting plate for under the front passenger seat that allowed the jack storage to remain in place. The radio mounting bracket is on top of the custom plate. The plate is 4" wide and runs between the two seat tracks. I split a piece of 1" square tubing and welded to the ends of the 4" wide by 1/8" thick plate. There are two 12mm holes in the seat rails just in front of the rear mount that I used a reduced height socket head cap screw to hold the plate to the bottom of the seat rails. Once the plate and radio body were installed, I ran a control head extension and mic cable extension forward under the center seat assembly, then up into the area behind the radio display. I drilled a hole in the back of the small cubby hole to the right of the steering column and installed a panel mount phone jack. The end of the extension plugs into the back of the jack, and the mic cable plugs into the front side. The control head cable runs to the top of the radio bezel and exits a hole to plug into the radio head. I made an aluminum plate mount to hold the radio head. Unfortunately, the head bounces on this mount. When I did this install, Bullet Point was sold out of the single ball and plate mount. I have that mount now, just need to install it. The coax from the radio runs under the floor door trim to the back cab wall, then turns forward and exits a plastic floor plug and currently runs up the back of the cab to a mag mount on the roof. I have plans to install a headache rack behind the cab that the antenna will be permanently mounted to. I just haven't ordered the rack yet. Power to the radio runs directly from the battery through the rubber plug that the hood release runs through then follows the control cables to the radio. There is a 20A fuse at the battery for wiring protection. So far other than the control head mount, and an interference issue with the seat adjusting hardware. I can reach the mic without having to lean forwards while sitting in the drivers seat. All in all, a nice clean install. Here are some pictures to show how everything is configured.
 

Attachments

  • PXL_20240528_215359505.jpg
    PXL_20240528_215359505.jpg
    145.6 KB · Views: 2
  • PXL_20240528_215410028.jpg
    PXL_20240528_215410028.jpg
    144.3 KB · Views: 2
  • PXL_20240528_215416420.jpg
    PXL_20240528_215416420.jpg
    145 KB · Views: 2
  • PXL_20240528_215503328.jpg
    PXL_20240528_215503328.jpg
    140.4 KB · Views: 2
  • PXL_20240528_215529250.jpg
    PXL_20240528_215529250.jpg
    131 KB · Views: 2
  • PXL_20240528_222851507.jpg
    PXL_20240528_222851507.jpg
    150.4 KB · Views: 2
  • PXL_20240528_222854496.jpg
    PXL_20240528_222854496.jpg
    150.8 KB · Views: 2
  • PXL_20240528_222859157.jpg
    PXL_20240528_222859157.jpg
    223 KB · Views: 2
  • PXL_20240528_222919075.jpg
    PXL_20240528_222919075.jpg
    228.9 KB · Views: 2
  • PXL_20240528_222948599.jpg
    PXL_20240528_222948599.jpg
    178.5 KB · Views: 2
Last edited:

MitchK

New Member
Joined
Apr 2, 2024
Messages
2
Reaction score
0
I do need to remove the mount and move the radio bracket about 2" to the right. After everything was installed, I discovered that when you lift the seat positioning lever to move the seat forward and back. a small metal lever drops down and will hit the coax fitting on the radio during seat movement. 2" lateral movement should be enough to clear the coax. Currently, the radio is part way in its bracket and held in place by a tie wrap. The seat bottom clears the radio in this position as well. Other than the coax clearance issue, the location under the passenger seat works well. The mounting plate has enough room to mount two radios if I want to. For now, 2M and 440 is all I want. HF mobile may be in the future though.
 

Attachments

  • PXL_20240702_224439794.jpg
    PXL_20240702_224439794.jpg
    130.9 KB · Views: 1
  • PXL_20240702_224358579.jpg
    PXL_20240702_224358579.jpg
    141.5 KB · Views: 1
  • PXL_20240702_224233142.jpg
    PXL_20240702_224233142.jpg
    167.8 KB · Views: 1
  • PXL_20240702_224201005.jpg
    PXL_20240702_224201005.jpg
    154.1 KB · Views: 1
  • PXL_20240702_224157016.MP.jpg
    PXL_20240702_224157016.MP.jpg
    178.3 KB · Views: 1
  • PXL_20240702_224124008.jpg
    PXL_20240702_224124008.jpg
    158.1 KB · Views: 1
  • PXL_20240528_223031666.jpg
    PXL_20240528_223031666.jpg
    177.6 KB · Views: 1
  • PXL_20240702_230349721.MP.jpg
    PXL_20240702_230349721.MP.jpg
    219.2 KB · Views: 1
Last edited:

Users who are viewing this thread

Top