5thGenRams Forums

Register a free account today to become a member! Once signed in, you'll be able to participate on this site by adding your own topics and posts, as well as connect with other members through your own private inbox!

Desert Dawg Ram Rebel Build

"Linex" the skid plate a matte black or leave the factory silver color?

  • Paint or Linex skid plate matte black

    Votes: 62 71.3%
  • Leave skid plate silver

    Votes: 24 27.6%
  • Other (reply in thread)

    Votes: 1 1.1%

  • Total voters
    87
  • Poll closed .

Desert Dawg

Well-Known Member
Joined
Aug 16, 2018
Messages
494
Reaction score
1,313
Location
Albuquerque, NM
I previously posted in the general discussion thread but thought I would share it here as this brief adventure really reinforced why I am looking to go "Round-3" on dialing in a suspension system that will meet my needs.

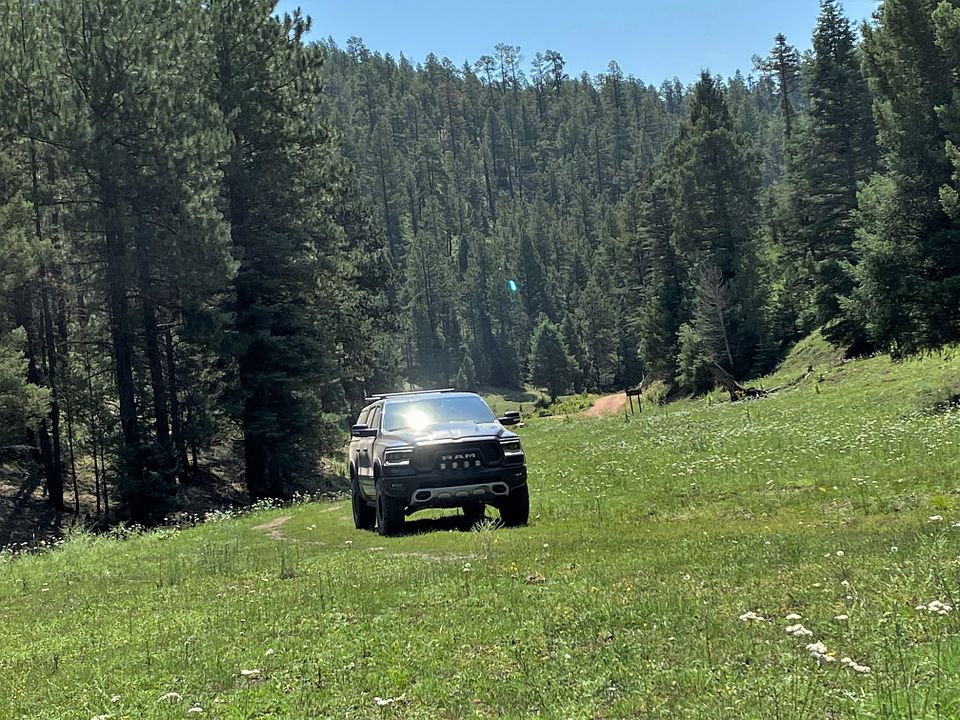
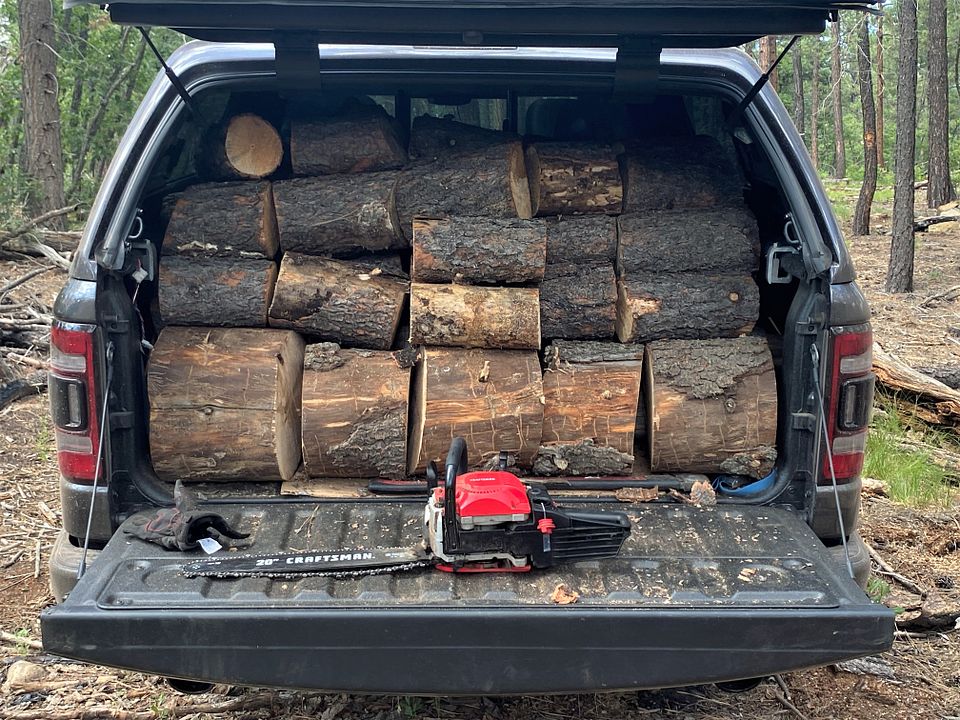
I usually go up to the mountains not far from my home to cut dead wood about twice a year. I have had the Ram for over a year and a half now but this is the first time I took it for wood hauling. Of course, I have taken the Rebel off-road many times, but not with a full load in the bed.

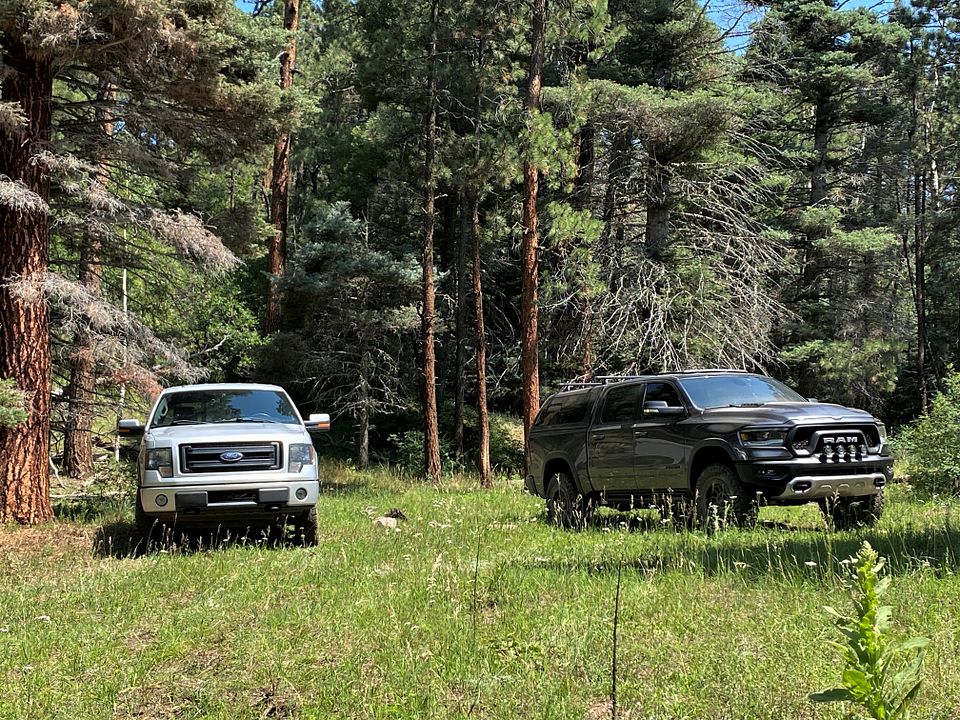
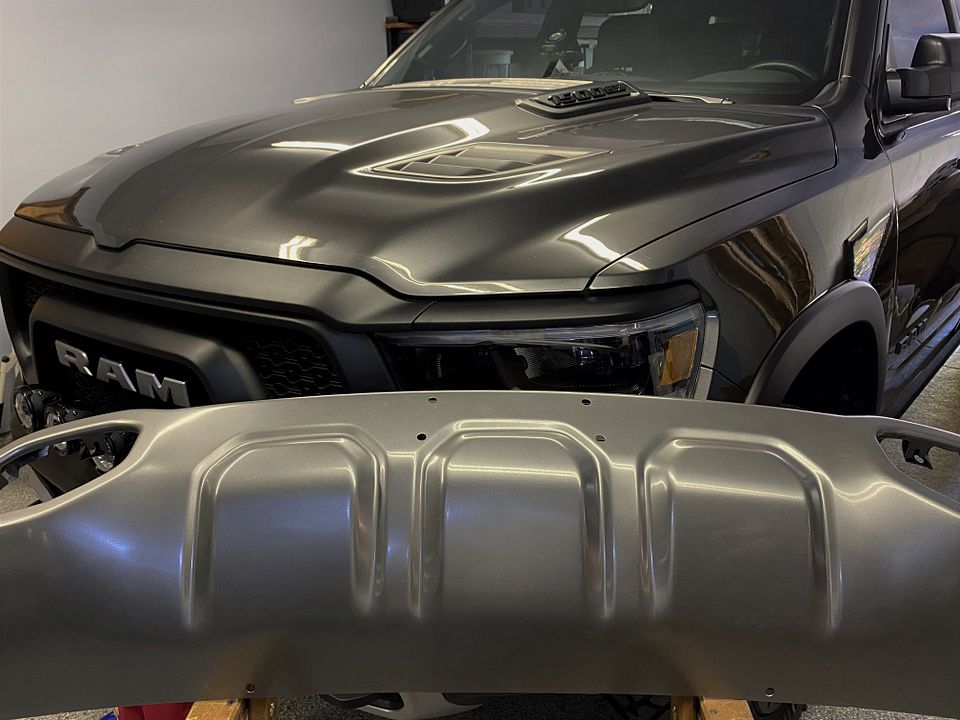
I estimated that most of my load was pine with some measure of fir and birch thrown in so I used a lower averaged density of 30 lbs./cu.ft. with about 85% of the capped truck bed being filled (.85 x 5 ’x 3’ x 5.5’ = 70 cu.ft.) for a total haul of ~2100 lbs. The Rebel is rated at 1930 lbs. of payload capacity, so when I add in the weight of the topper and gear that I typically haul around with me (~300 lbs.), and myself (~230 lbs.), I figured I was pushing over 2600 lbs. or +700 lbs. overcapacity. Not the best scenario but the Rebel did very well. The stiffer Dirt Logic front coilovers really helped maintain control and the rear factory springs actually did very well too with all things considered (the rear definitely sagged but did not bottomed out). Still, I’ll need to really be careful once I add my winch and mounting hardware as that will greatly reduce my capacity even more.

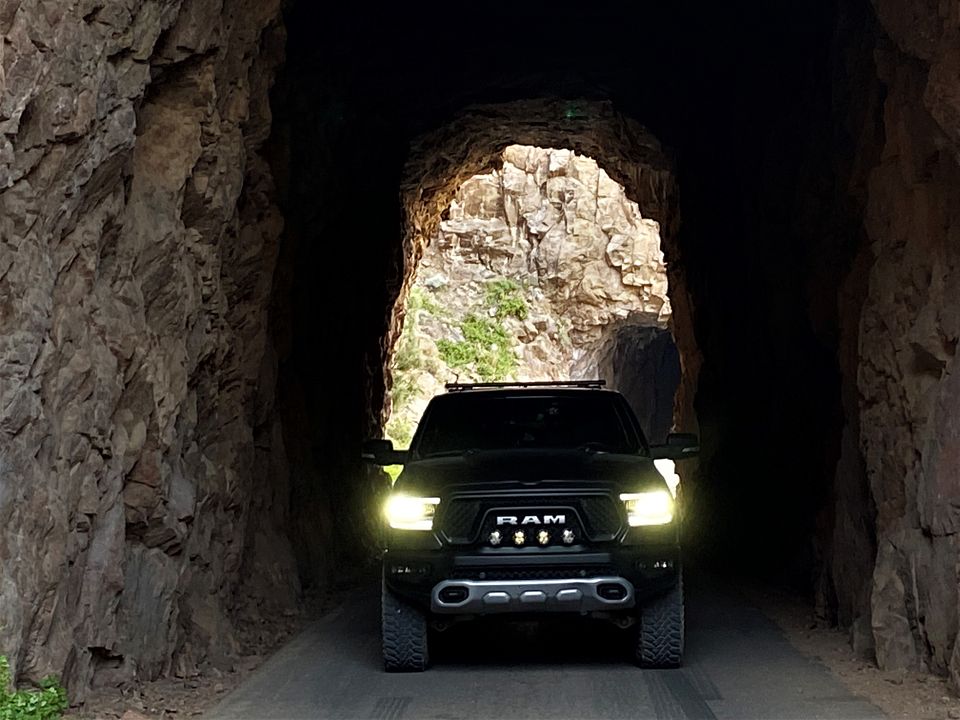
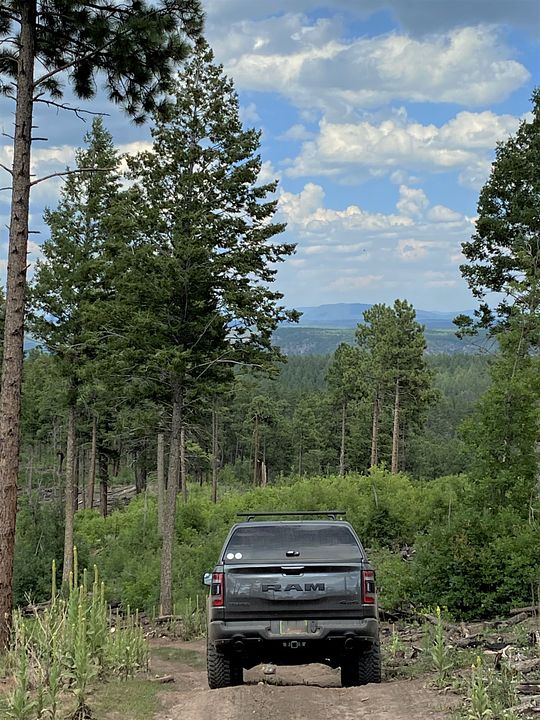
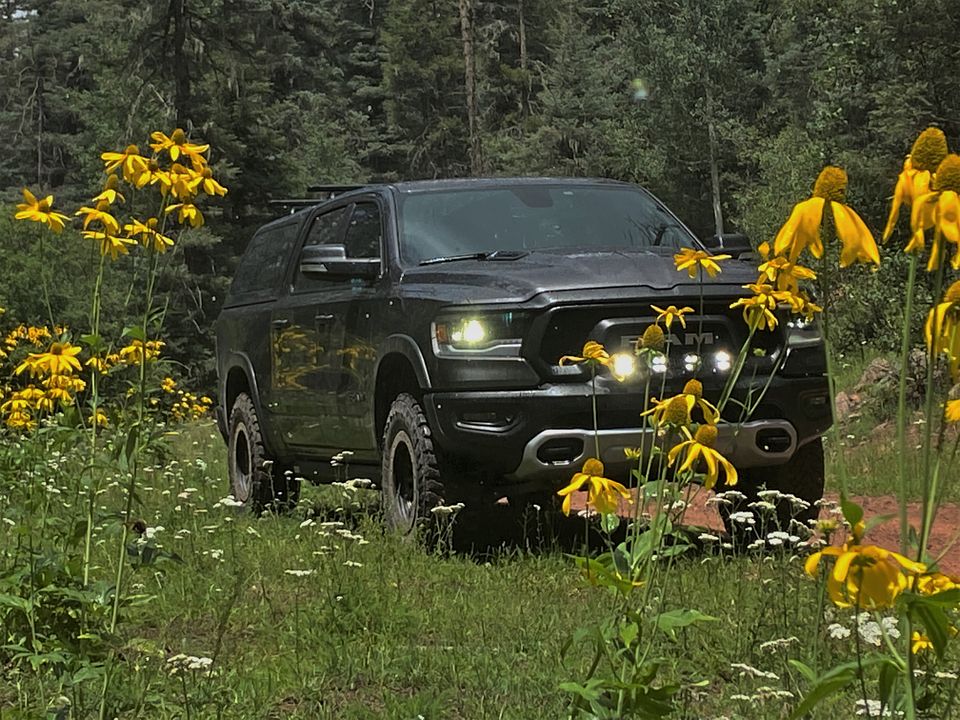
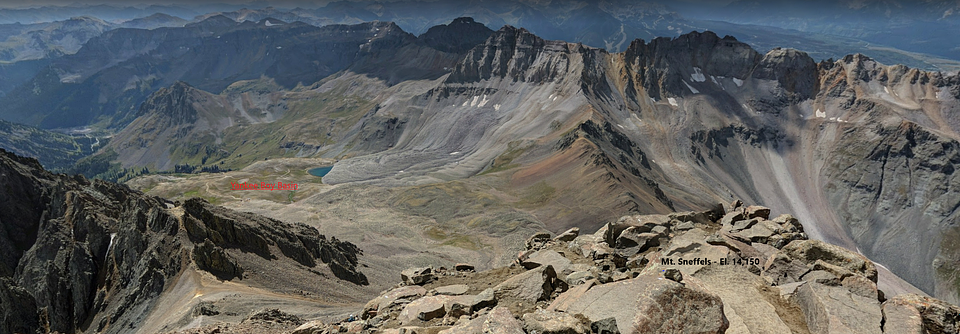
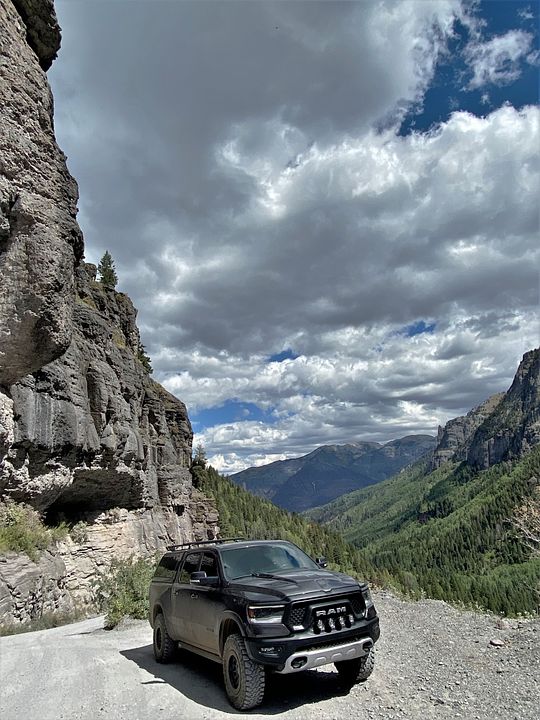
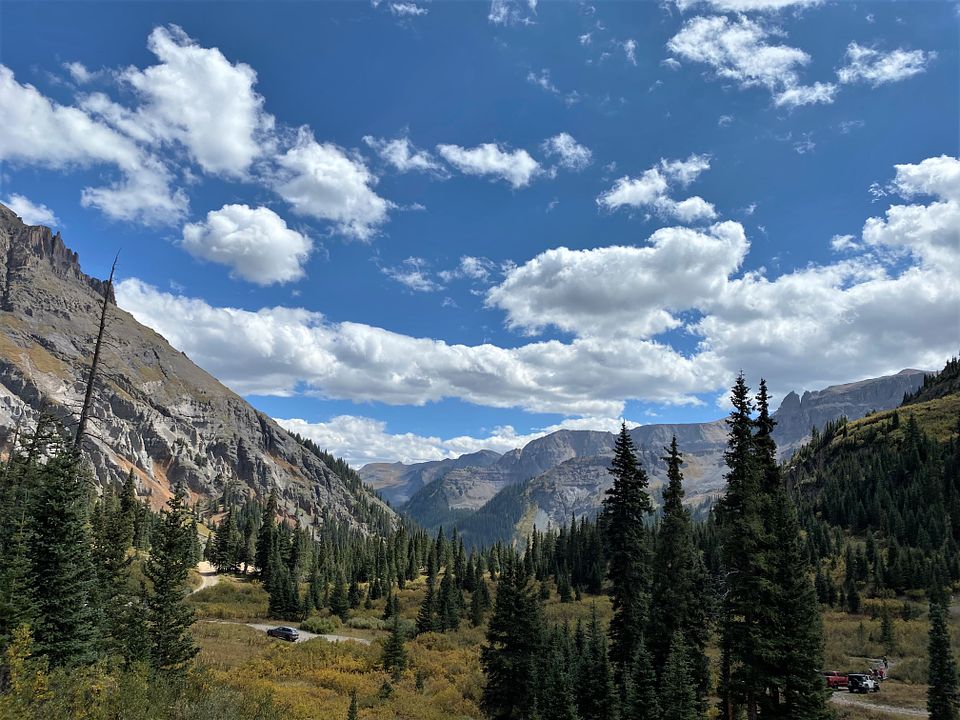
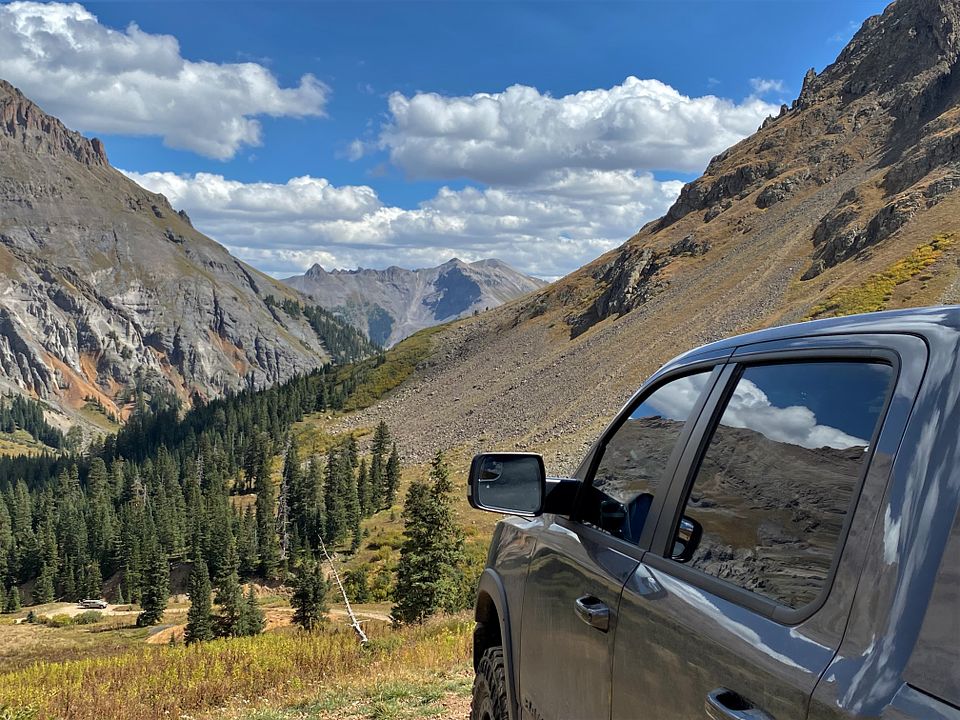
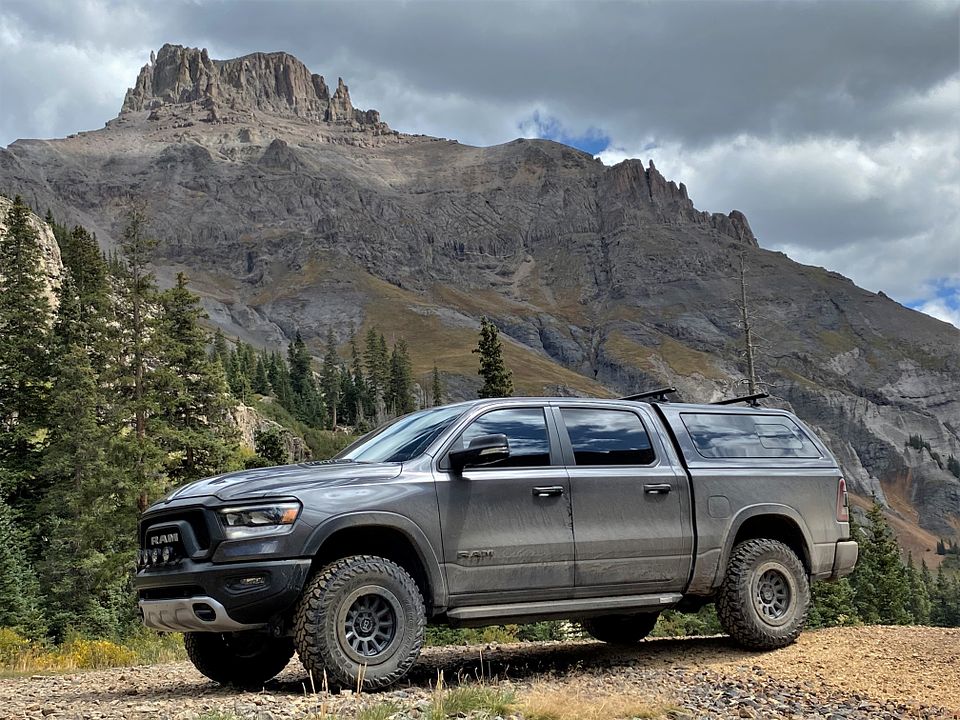
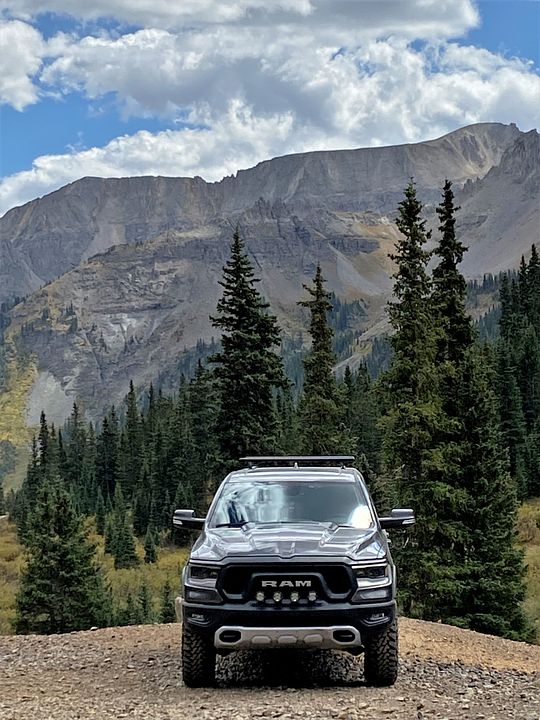
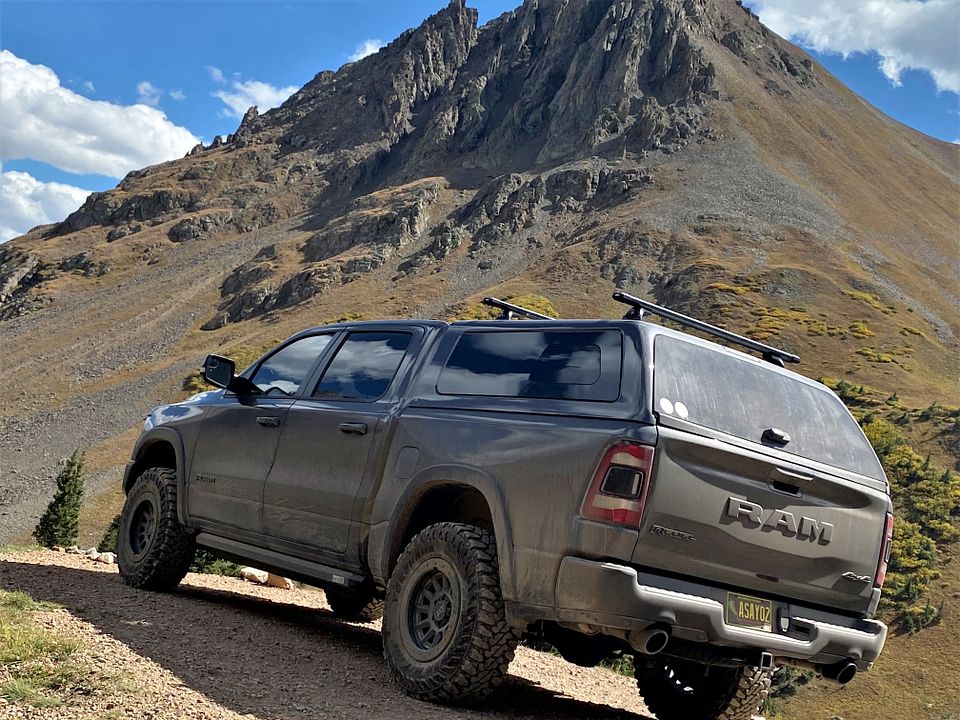
But made it home in one piece so I get to share some of the views (with the Ram of course):


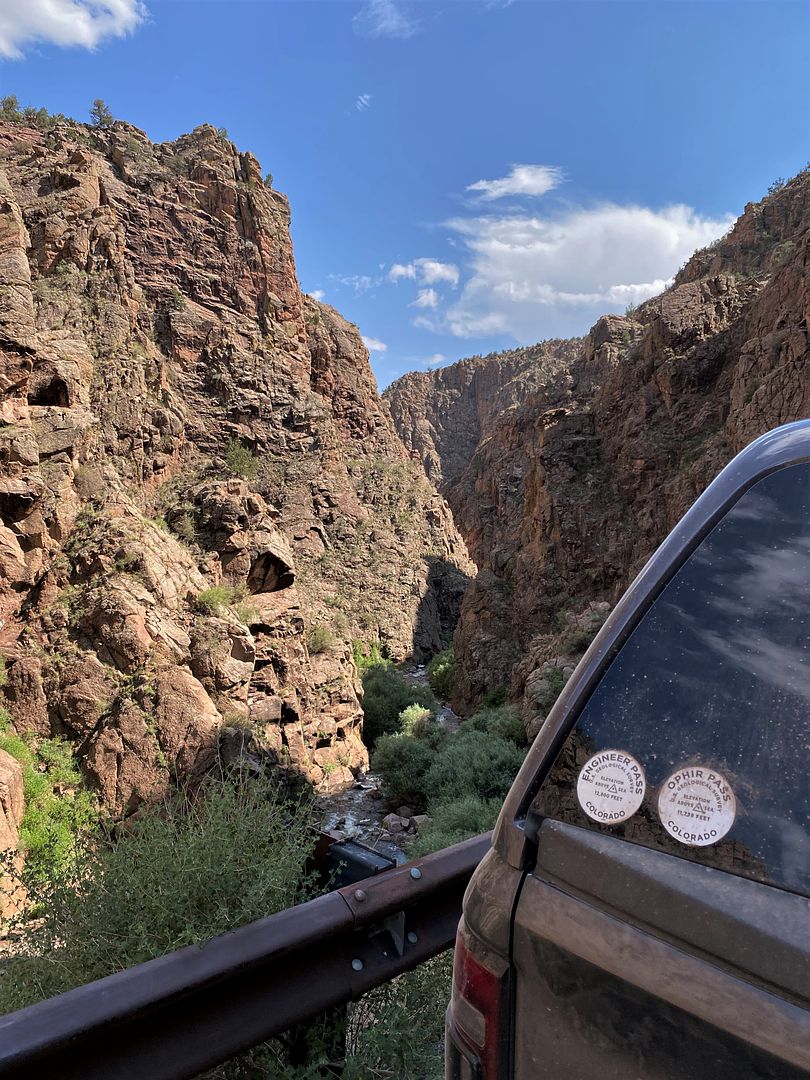
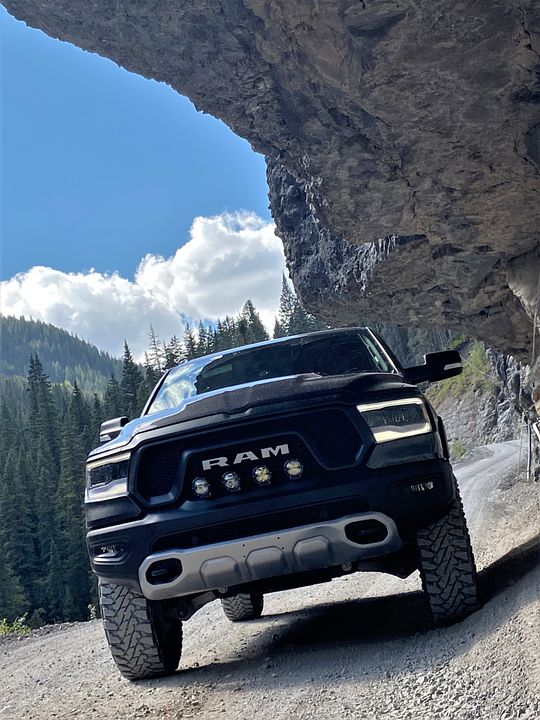
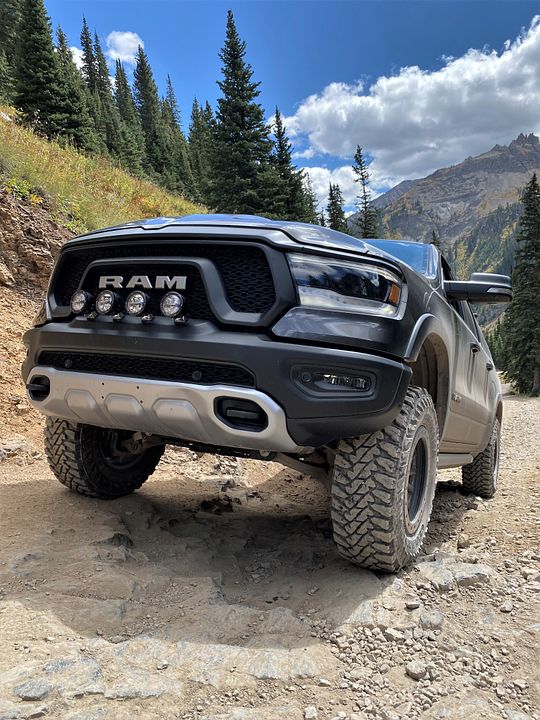
What I did experience was exactly how the Dirt Logics are tuned. Both when tackling the slow boulder/rock climb of the lower section for Engineer Pass and then the slow mountain trail comprised of long, washboard sections experienced during this trip, the truck rode horribly as the Dirt Logics are really tuned for fast speed runs (i.e., desert washes and trails). On the slower stuff, the Dirt Logics are just too stiff and really beat you up! I sort of knew this of course but was very interesting to see how the Dirt Kings responded on the washboard sections. Kind of reminded me of the Icons I ran except on a couple of prior builds but even those were smooth in comparison. So really hoping to decide on what I am going to do with this Rebel next as I get ready to tackle another mountain pass soon.

Edit: Corrected calculations
 
Last edited:

Desert Dawg

Well-Known Member
Joined
Aug 16, 2018
Messages
494
Reaction score
1,313
Location
Albuquerque, NM
Suspension decision.

I couldn't do it; I finally decided the BDS 6-inch Fox 2.5 coilover lift is just too high for towing, high speed highway driving, and off-canter four wheeling while the Fox Elite Performance 2.5 coilover system was going to be just too low (lowers my current ride by an inch which also decreases my approach/departure angles when off-roading).

I talked with Fabtech today and told them that I want to replace my current 3-inch lift Dirt Logic 2.5 Coilovers with their 3-inch Lift Dirt Logic 2.5 Remote Reservoir Coilovers but with custom valving to provide just a tad more compression response to soften the ride for daily driving (but keeping the rebound settings for off-roading). They can start right away but will take 10-12 weeks to make the new coilovers and perform the custom valving due to demand right now; the cool thing is that Dirt Logics are made in the USA so not waiting for anything to be shipped from China.

Also, I get to retain the Fabtech 3-inch lift specific UCAs and keep my current ride height. Fabtech also said there is plenty of adjustability in the coilovers to compensate for the added weight when I install my winch setup.

And speaking of winches, I dropped off my black skid plate and hidden winch mount at the powder coating shop today so looking forward to getting my 12k winch installed soon!
 

Desert Dawg

Well-Known Member
Joined
Aug 16, 2018
Messages
494
Reaction score
1,313
Location
Albuquerque, NM
Actually installed the TRX red push start button a couple of weeks ago but forgot to add to my build thread (posted in General Discussion).


I had watched @Waterfowler41 video a couple of times and read some of the threads, but for the life of me I could not get my hands up into the dash and squeeze the three tabs to push out the start button. I wasted an hour trying until I finally decided to just remove the dash panels and center stack adjoining the start button assembly. I have the 12-inch display screen which is very easy to remove (remove the two top screws by the power outlet and gently pull forward) but I also decided to remove the center console as I am looking to relocate my 3-way off-road light switch to the console (also easy to remove).

Center stack and console removed:


This is the area where I could get my hand and small screwdriver behind the stock push start button and press on tabs (once pressed, start button pulls straight out and you can remove the silver trim ring to reinstall on the TRX start button):


Installed TRX red start button:


Luckily, also found out that there is plenty of clear space in the front of the center console to mount larger 3-way switches but since then I decided there might be a better location then down on the center console. I should have my lights rewired soon to show off the Rigid 360 Series backlighting.
 

traveller09

Active Member
Joined
Jul 12, 2019
Messages
149
Reaction score
101
Location
Seattle area
Actually installed the TRX red push start button a couple of weeks ago but forgot to add to my build thread (posted in General Discussion).


I had watched @Waterfowler41 video a couple of times and read some of the threads, but for the life of me I could not get my hands up into the dash and squeeze the three tabs to push out the start button. I wasted an hour trying until I finally decided to just remove the dash panels and center stack adjoining the start button assembly. I have the 12-inch display screen which is very easy to remove (remove the two top screws by the power outlet and gently pull forward) but I also decided to remove the center console as I am looking to relocate my 3-way off-road light switch to the console (also easy to remove).

Center stack and console removed:


This is the area where I could get my hand and small screwdriver behind the stock push start button and press on tabs (once pressed, start button pulls straight out and you can remove the silver trim ring to reinstall on the TRX start button):


Installed TRX red start button:


Luckily, also found out that there is plenty of clear space in the front of the center console to mount larger 3-way switches but since then I decided there might be a better location then down on the center console. I should have my lights rewired soon to show off the Rigid 360 Series backlighting.

Ha...if I have to do all that there is no way I am doing this mod!
 

Waterfowler41

Ram Guru
Joined
Jan 3, 2020
Messages
833
Reaction score
2,338
Location
Chicago
Ha...if I have to do all that there is no way I am doing this mod!

Typically this is a 5 minute job at most. Unbolt the lower panel under steering wheel, reach up and unclip push bottom, push it out of the opening, swap bezels and reinstall.

[mention]Desert Dawg [/mention] we’re you not able to squeeze your hand in from the lower panel?
 

Desert Dawg

Well-Known Member
Joined
Aug 16, 2018
Messages
494
Reaction score
1,313
Location
Albuquerque, NM
Ha...if I have to do all that there is no way I am doing this mod!
Yeah, it was frustrating at first as Waterfowler41 and others posted that they could simply reach up under the dash and push on the start button tabs; simply wasn't happening for me! I guess my hands are just big enough to not be able to do that, but quite honestly it really is pretty easy to remove the center stack (and you don't have to remove the center console as I just wanted to see what was behind it).

It is kind of funny what we'll do even for the little mods...lol.
 

Desert Dawg

Well-Known Member
Joined
Aug 16, 2018
Messages
494
Reaction score
1,313
Location
Albuquerque, NM
Typically this is a 5 minute job at most. Unbolt the lower panel under steering wheel, reach up and unclip push bottom, push it out of the opening, swap bezels and reinstall.

[mention]Desert Dawg [/mention] we’re you not able to squeeze your hand in from the lower panel?
Exactly! I could not get my hand up under there at all after removing the lower panel. I could touch the button with a finger but couldn't get my hand far enough to get to all the tabs...lol.

But I did appreciate your video as it convinced me it was the thing to do!
 

Waterfowler41

Ram Guru
Joined
Jan 3, 2020
Messages
833
Reaction score
2,338
Location
Chicago
Exactly! I could not get my hand up under there at all after removing the lower panel. I could touch the button with a finger but couldn't get my hand far enough to get to all the tabs...lol.

But I did appreciate your video as it convinced me it was the thing to do!

Dang! Well at least you got it installed!
 

Desert Dawg

Well-Known Member
Joined
Aug 16, 2018
Messages
494
Reaction score
1,313
Location
Albuquerque, NM
Yankee Boy Basin

Posted this in the General Discussion thread so apologize for the repeat here if already viewed.

Anyway, took the Rebel off-roading up to Yankee Boy Basin at the base of Mount Sneffels (Elevation 14,150 ft.), Colorado for the day after going up to Silver Jack Reservoir the previous day (pics to come).


The Basin is pretty easy to access for most 4x4 trucks/SUVs with good tires although the further in you go, the rougher it gets (heavy rock trails). Most of the trail was populated by Jeeps and ATVs of course with the lower (easier) sections including Subarus and SUVs but they thinned out once you got to the rocky sections. Beyond that, it was all Jeeps, 4Runners, ATVs, and just a handful of built-up trucks. I finally had to turn around at the point where access is limited to highly lifted, short-wheelbase, 4x4s. While I have no issue with my suspension and tire setup along with my off-roading chops to go further, I couldn't risk damaging the truck or getting stuck trying to get over the the high breakover ridges. Nonetheless, was a great time!
 
Last edited:

NHjake98

Active Member
Joined
Mar 2, 2019
Messages
186
Reaction score
138
Location
New Hampshire
Yankee Boy Basin

Posted this in the General Discussion thread so apologize for the repeat here if already viewed.

Anyway, took the Rebel off-roading up to Yankee Boy Basin at the base of Mount Sneffels (Elevation 14,150 ft.), Colorado for the day after going up to Silver Jack Reservoir the previous day (pics to come).


The Basin is pretty easy to access for most 4x4 trucks/SUVs with good tires although the further in you go, the rougher it gets (heavy rock trails). Most of the trail was populated by Jeeps and ATVs of course with the lower (easier) sections including Subarus and SUVs but they thinned out once you got to the rocky sections. Beyond that, it was all Jeeps, 4Runners, ATVs, and just a handful of built-up trucks. I finally had to turn around at the point where access is limited to highly lifted, short-wheelbase, 4x4s. While I have no issue with my suspension and tire setup along with my off-roading chops to go further, I couldn't risk damaging the truck or getting stuck trying to get over the the high breakover ridges. Nonetheless, was a great time!
What beautiful country!
 

Desert Dawg

Well-Known Member
Joined
Aug 16, 2018
Messages
494
Reaction score
1,313
Location
Albuquerque, NM
So been a little remiss and distracted to keep my mods moving along. But I did finally get the skidplate facia powder coated and started assembly of the hidden winch mount.

For the skidplate, the results of the poll overwhelming favored the black powder coating over leaving it stock. But when I took the parts down to the powder coating shop, I just couldn't commit to an all back lower facia as I still like how the Rebel is instantly recognizable from the other models in large part to the front grille and lower skid plate facia. So I took some inspiration from the TRX and compromised with a gun metal grey color that doesn't black out the entire front end in order to still provide some contrast; I thought the color will also work well with my Black Rhino wheel selection as I plan on painting the wheel rings the same color (providing a bit more definition between the wheels and tires) and also tie in with the gun metal grey of the winch hook (per below).


The other thing of note is that I also had the Vice Design mounting brackets powder coated a matte black to blend in more with the matte black grille and trim colors. Since the mount facing will be fully exposed out in front of the lower bumper, I had all of the exposed welds ground smooth prior to the powder coating for a very finished look.


Finally, I wanted a 1.5-inch thick fairlead to provide a tad more separation from the the front bumper. I went with a Warn Hawse-style fairlead also in matte black married up to a gun metal grey Factory 55 Ultrahook.


Now I just need to make time to take apart the front bumper and install with new winch setup!

Edit: Grammatical correction
 
Last edited:

NHjake98

Active Member
Joined
Mar 2, 2019
Messages
186
Reaction score
138
Location
New Hampshire
So been a little remiss and distracted to keep my mods moving along. But I did finally get the skidplate facia powder coated and started assembly of the hidden winch mount.

For the skidplate, the results of the poll overwhelming favored the black powder coating over leaving it stock. But when I took the parts down to the powder coating shop, I just couldn't commit to an all back lower facia as I still like how the Rebel is instantly recognizable from the other models in large part to the front grille and lower skid plate facia. So I took some inspiration from the TRX and compromised with a gun metal grey color that doesn't black out the entire front end in order to still provide some contrast; I thought the color will also work well with my Black Rhino wheel selection as I plan on painting the wheel rings the same color (providing a bit more definition between the wheels and tires) and also tie in with the gun metal grey of the winch hook (per below).


The other thing of note is that I also had the Vice Design mounting brackets powder coated a matte black to blend in more with the matte black grille and trim colors. Since the mount facing will be fully exposed out in front of the lower bumper, I had all of the exposed welds grinded smooth prior to the powder coating for a very finished look.


Finally, I wanted a 1.5-inch thick fairlead to provide a tad more separation from the the front bumper. I went with a Warn Hawse-style fairlead also in matte black married up to a gun metal grey Factory 55 Ultrahook.


Now I just need to make time to take apart the front bumper and install with new winch setup!
Good choice on the color. I have the same color truck and I want to get mine paint matched. How much of a ***** is it to take that skid plate off?
 

Desert Dawg

Well-Known Member
Joined
Aug 16, 2018
Messages
494
Reaction score
1,313
Location
Albuquerque, NM
Good choice on the color. I have the same color truck and I want to get mine paint matched. How much of a ***** is it to take that skid plate off?
Not hard, but definitely time consuming as there are quite a few hard to reach fasteners and bolts.

To get an idea, check out @HammerdownYouTube video;

You can also check out @VICE design excellent video on removing the entire front bumper (including working the fender flares). You can skip to the 5.31 minute mark and of course ignore all the other work related to installing the winch mount;

I am waiting for when I have a couple of straight days to install mine since I am also going to be doing some custom fitting with the stock lower grille insert, so going to be a long process for everything.
 

Ccm12

Active Member
Joined
Jul 11, 2020
Messages
178
Reaction score
89
How did you install/mount those front bumper lights?
 

Goat@Dxb

Member
Joined
Oct 5, 2020
Messages
7
Reaction score
20
Suspension decision.

I couldn't do it; I finally decided the BDS 6-inch Fox 2.5 coilover lift is just too high for towing, high speed highway driving, and off-canter four wheeling while the Fox Elite Performance 2.5 coilover system was going to be just too low (lowers my current ride by an inch which also decreases my approach/departure angles when off-roading).

I talked with Fabtech today and told them that I want to replace my current 3-inch lift Dirt Logic 2.5 Coilovers with their 3-inch Lift Dirt Logic 2.5 Remote Reservoir Coilovers but with custom valving to provide just a tad more compression response to soften the ride for daily driving (but keeping the rebound settings for off-roading). They can start right away but will take 10-12 weeks to make the new coilovers and perform the custom valving due to demand right now; the cool thing is that Dirt Logics are made in the USA so not waiting for anything to be shipped from China.

Also, I get to retain the Fabtech 3-inch lift specific UCAs and keep my current ride height. Fabtech also said there is plenty of adjustability in the coilovers to compensate for the added weight when I install my winch setup.

And speaking of winches, I dropped off my black skid plate and hidden winch mount at the powder coating shop today so looking forward to getting my 12k winch installed soon!
Hiya Desert Dawg
thanks for the great threads and detailed posts ,
I went with the Dirt Logic remote reservoir set up on my Rebel .
Live in the UAE , so mostly desert and Dune driving.
But unfortunately a small pothole at 30mph resulted in a snapped shaft on my driver side coil-over.
My buddy hit the same pothole right behind me in his F150 ( FX4 with Fox 2.5 coil-overs and no drama)
The snapped shaft tore the boot of my CV joint and that ended up having to be replaced too.
Attached a couple of pictures for all to have a look at.
Still waiting on a lead time time for the replacement of the coil-over.
No knock on the Dirt Logics , these things happen , but I am looking at getting another brand of shocks should the lead time be too long . IMG_1945 2.jpg IMG_1944 2.jpg IMG_2002.jpg IMG_2001.jpg IMG_1999.jpg
 

Derek Dredger

Active Member
Joined
Jan 22, 2020
Messages
65
Reaction score
81
Location
United Arab Emirates
Damm!!!!! That's worrying. I've got the FOX 2.5 PE+DSC front and rear on my 19 Rebel. I live the UAE also. I guess these things do happen but that must have some frikin pothole to snap the shaft like that!
 

c3k

Ram Guru
Joined
Jul 22, 2020
Messages
1,084
Reaction score
1,149
Hiya Desert Dawg
thanks for the great threads and detailed posts ,
I went with the Dirt Logic remote reservoir set up on my Rebel .
Live in the UAE , so mostly desert and Dune driving.
But unfortunately a small pothole at 30mph resulted in a snapped shaft on my driver side coil-over.
My buddy hit the same pothole right behind me in his F150 ( FX4 with Fox 2.5 coil-overs and no drama)
The snapped shaft tore the boot of my CV joint and that ended up having to be replaced too.
Attached a couple of pictures for all to have a look at.
Still waiting on a lead time time for the replacement of the coil-over.
No knock on the Dirt Logics , these things happen , but I am looking at getting another brand of shocks should the lead time be too long .
(I deleted your pix for brevity.)

Interesting that your buddy hit the same pothole at the same speed and had no evident damage. Some random thoughts on that...
1. Maybe he hit it a slightly different angle/location.
2. Your vehicle dynamic may have made it worse. (As in, your vehicle was on a down motion at impact and his was not...damping rates, phugoid, etc.)
3. Perhaps your coilover strut had a manufacturing flaw. Any evidence of casting flaw or weakness where it broke?

These failures, especially juxtaposed with a non-failure on the same road feature, are what make engineers stay awake at nights. ;)
 

Desert Dawg

Well-Known Member
Joined
Aug 16, 2018
Messages
494
Reaction score
1,313
Location
Albuquerque, NM
Hiya Desert Dawg
thanks for the great threads and detailed posts ,
I went with the Dirt Logic remote reservoir set up on my Rebel .
Live in the UAE , so mostly desert and Dune driving.
But unfortunately a small pothole at 30mph resulted in a snapped shaft on my driver side coil-over.
My buddy hit the same pothole right behind me in his F150 ( FX4 with Fox 2.5 coil-overs and no drama)
The snapped shaft tore the boot of my CV joint and that ended up having to be replaced too.
Attached a couple of pictures for all to have a look at.
Still waiting on a lead time time for the replacement of the coil-over.
No knock on the Dirt Logics , these things happen , but I am looking at getting another brand of shocks should the lead time be too long . View attachment 112149 View attachment 112150 View attachment 112151 View attachment 112152 View attachment 112153
Dang, you must have hit that pothole just at the right angle to shear like that! I have run in/out of potholes and into rock ledges/crevices (even dropped the entire truck off some boulders) and into hard pack without any issue (except for some damage on the truck itself but nothing on the Dirt Logics). That being said, there also could have been issues within the tempering for a certain batch used for manufacturing the shafts which is not good either.

I am pretty happy with the Dirt Logics but they really are set up for desert runs so I am looking to upgrade as well for improved ride and response during slower rock crawling (also, need slight more increase in approach/departure angles). So been waiting on Fox to make similar coilovers for the BDS 4-inch system (if ever, so might have to move on).

Sorry that happened!
 

Users who are viewing this thread

Top