Thanks!
Keep in mind, I have never done this, but I am pretty good with my hands.
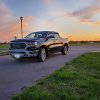
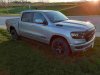
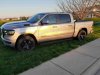
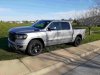
That level 4 is pretty accurate, patience and time are needed. The material is easy to work with, but the shape and curves of these lights make it difficult to get everything perfect, well as perfect as you can. They aren't perfect, and I'm hoping the next few days sitting in the sun and I continue to work them they will get better. From 10 feet away and at night they look terrific, in the bright sun, you can see the textures, imperfections and some air pockets. I'll poke some small holes if I have to. the top edge is the biggest challenge, the curvature there. I can't get the film to lay and stay without lifting in the curved area. I may end up trimming it some, giving it a bit to warm and do what it's going to do in the sun...If you want perfection, either bring it to someone and pay for install, or have them tint painted.


")


 .i had to "Wing it"guys ,but it fits.doesnt take long.but it would have ben nice if "Mopars"would have been included
 !
!