Waterfowler41
Ram Guru
Can you post a link to the specific rear fender liners you installed?
A link to each liner is in the video description.
Sent from my iPhone using Tapatalk
Can you post a link to the specific rear fender liners you installed?
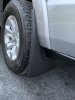
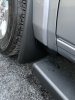
Sure can, once you remove the clips the area that holds the clip on the back side of the flare is slightly recessed and lower then the outer edge. I was originally hoping to put a piece of double sided tape on there and have that replace the clip to hold it on tight, but that did not work at all. Then i tried to move the tape to the outside edge of the flare and that worked but it created a noticeable gap between the flare and the fender. I played around with a couple of other ideas such as doubling up the tape but no bueno with it on.Nice job on the fender flares. I was thinking of doing the flares. Can you elaborate on what happened with the tape and flare welding?
 www.bushwacker.com
She got her first snow experience. Not a whole lot but to people in Seattle this is like snowmageddon. View attachment 44008
Worked around Seattle and the PNW in construction for years, and that wet snow is really a problem for most if not all. Fun to watch Seattlites sliding down the hills on a 1/2 inch of snow on the nightly news. I live on the East side where it is a dry snow most of the time, but I still see a lot of 4WD rigs upside down in the medians.I work for one of the big techs out there, it’s literally the end of the world for some people who work in Seattle.
Good luck!
Sent from my iPhone using Tapatalk
Worked around Seattle and the PNW in construction for years, and that wet snow is really a problem for most if not all. Fun to watch Seattlites sliding down the hills on a 1/2 inch of snow on the nightly news. I live on the East side where it is a dry snow most of the time, but I still see a lot of 4WD rigs upside down in the medians.


I kept the stock UCA.Kept the same UCA’s? And you wouldn’t happen to be in Florida I imagine?
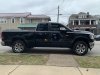
Today's projects
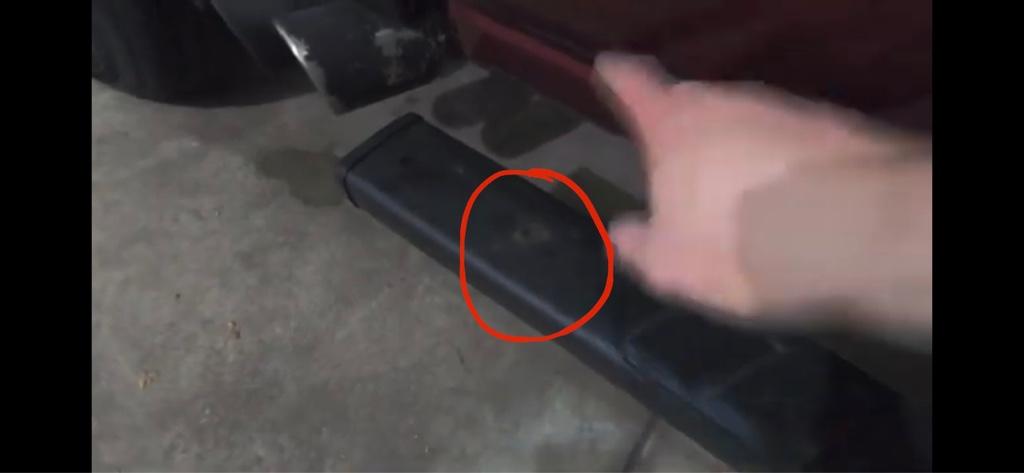
Tyger 4 inch running boards (very pleased, easy install)
Tecoom splash guards (very pleased fit like a glove, cheap and easy install)
AVS flush mount hood protector ( another easy install, this one is OK)
Harley sticker on the back window
Did it make the overall sound of your exhaust deeper or louder?Resonator delete. Little drone at 2000 Rpm. Got rid of exhaust leak annoying hissing sound.
I did the same thing. Purchased three LED bar lights on Amazon. Positioned one like you then put the other two on the rear pillars on both sides of the tailgate facing the back of the cab.Instead of adding the OEM bed lights, cutting the bed rug, running wires...etc threw a rechargeable led motion light bar on the underside of the cover with some Velcro.View attachment 44062View attachment 44063
Perfect amount of light for what I need and it has two colors and 3 brightness settings, I can see the back corners no problem. Pretty cool, easy and cheap.
Got to have that Harley stickerToday's projects
Tyger 4 inch running boards (very pleased, easy install)
Tecoom splash guards (very pleased fit like a glove, cheap and easy install)
AVS flush mount hood protector ( another easy install, this one is OK)
Harley sticker on the back window
")

Today's projects
Tyger 4 inch running boards (very pleased, easy install)
Tecoom splash guards (very pleased fit like a glove, cheap and easy install)
AVS flush mount hood protector ( another easy install, this one is OK)
Harley sticker on the back window
Yes it is louder. Speaking of deep tone it sounded better with resonator on but weep holes hissing noise was taking over exhaust notes.Did it make the overall sound of your exhaust deeper or louder?