5thGenRams Forums

Register a free account today to become a member! Once signed in, you'll be able to participate on this site by adding your own topics and posts, as well as connect with other members through your own private inbox!

What did you do to your Ram today???

Holy ****! You're Travis Toy, Nashville steel player for Rascal Flatts/Luke Combs and others!!! I've played lead in several local C&W bands here and attempted to learn steel many years ago. I had a Sho-bud for a while.

Ok... back to normal. Those lights look really cool. Are they easy to install for someone who doesn't have any experience installing lights?
Ha! Guilty as charged, and also a RAM guy. ;-)

Experience installing lights wasn’t necessary. To do it super properly, taking the grill off was. Not for mounting the letters themselves, but for running the wiring effectively and neatly. Hooking everything up is very simple, and the connections are nice. It’s a fun addition. 10/10.
 
Only 48 payments left for me!

(BTW, I would never do a 72 month loan, but when I got my truck in June 2021, I was able to get 0%, so why not?)
0% wasn’t available when I bought my truck. I did a 3 year term at 4.6%. put money down and did $1124 per month payments. Knocked it off in the 36 months as of next month.
 
Last edited:
Raptor Tough Undercoating spray day… I now know how difficult spray paint Art is.. all I had to do was spray the whole thing one color and kept getting drips / streaks etc.. can’t imagine creating art 😅
for painting stuff like that key is to do thin coats each passing, wait for dry/ cure, then do more thin coats. It's okay you don't cover everything in each passing.

That way you don't have drips and streaks. Can't rush these type of painting lol
 
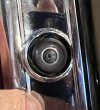
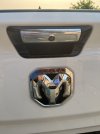
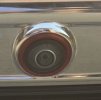
Tried swapping the tailgate handle from painted non passive to chrome passive….
The camera and mount plate is different!!!
I dont have the correct camera….so the whole day is shot. Gotta put it all back together and wait for a camera delivery.

ARGH!!!


Or maybe i can print an adapter…..hmmmm


3d printer to the rescue!!

10 min of cad…..and 15 printed iterations….
Total of about 2 hours design time figuring out the shapes and how they interface with the bracket…

Problem solved…

Attachments​

  • IMG_4123.jpeg
    IMG_4123.jpeg
    131.9 KB · Views: 4
  • IMG_4142.jpeg
    IMG_4142.jpeg
    88.9 KB · Views: 0
  • IMG_4143.jpeg
    IMG_4143.jpeg
    79.5 KB · Views: 0
I love having a 3d printer but I'm terrible with cad.
 
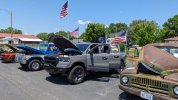
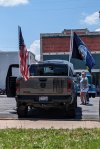
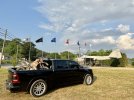
Got my lift, wheels, and tires done today I must say I love the look and it’s coming all together still have a few things left to do and she’ll be complete…. Lol don’t let me lie I’m going to keep buying things.

Yokohama Geolandar X-AT 37x13.50R20
Vossen HF6-4 20x10 -18
Rough Country 6” Lift
Bro we need some measurements on that thing because it looks HUGE! 🤣 so sweet though, congrats!
 
👍🏻

I use Solidworks. Have my personal copy and a work copy. Spend most of my time just drawing pictures. Very little shop time these days.
 
I put a new starter in this morning at 51,000 miles. Whole thing took me about 2.5 hours to finish including taking truck on and off lift and starting a couple times while noting amp draw on new starter. I’m sure someone has posted notes elsewhere on install but here are mine. If anyone is looking to replace theirs make sure you have plenty of extensions, wobbles, and a power or air ratchet makes life immensely easier. Use a 20” extension with 15mm deep socket and a wobble for bottom starter bolt routed up and over the exhaust pointed towards the driver’s door. Don’t remove the lower guard plate that routes up to engine mount there’s more than enough room to route starter up and over the transfer case and out.
 

Users who are viewing this thread

Back
Top