5thGenRams Forums

Register a free account today to become a member! Once signed in, you'll be able to participate on this site by adding your own topics and posts, as well as connect with other members through your own private inbox!

The Raptor Has A Cool Aux Switch Bank - So Can The RAM!

  • Thread starter Thread starter sbourne
  • Start date Start date
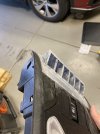
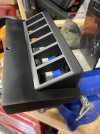
Wow that looks amazing! im going to try and duplicate your amazing work when I get my switches in. Two quick questions... what are the dimentions for that little hex head screw? and when you sanded the second time after the filler primer was it wet or dry sand?
The Screw I designed it for is a 6-32 x 1-3/4" Flat Head.
You can use a Phillips or the Hex Flathead.

Malodave
 
The Screw I designed it for is a 6-32 x 1-3/4" Flat Head.
You can use a Phillips or the Hex Flathead.

Malodave
okay great thank you! ive yet to pull my interior apart to figure out the best way to get the wires from up top to under the dash. which way are you planning on going?
 
okay great thank you! ive yet to pull my interior apart to figure out the best way to get the wires from up top to under the dash. which way are you planning on going?
just unscrew the side handle and then you can tie a wire and pull all wires down.
 
Wow that looks amazing! im going to try and duplicate your amazing work when I get my switches in. Two quick questions... what are the dimentions for that little hex head screw? and when you sanded the second time after the filler primer was it wet or dry sand?
#6-32 x 1 3/4” hex flat head. And I just did a dry sand after filler primer. Just enough to smooth it out.
 
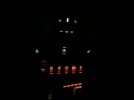
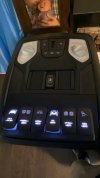
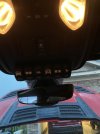
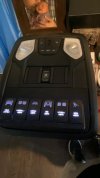
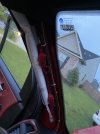
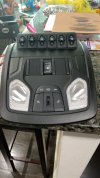
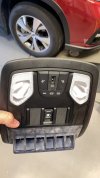
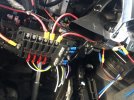
Finally got mine in and working, although the only item I have right now are the interior lights I’m super happy with the system overall. I ran a wire with fuse from the engine bay fuse box NO2 stud which is a spare stud according to the diagram. A power distribution block off Amazon is where everything is connected. I made the wiring harness from the switch rack to distribution block exactly 7 feet and it worked perfect for me. (The distribution block is mounted under the interior fuse box) Do yourself a favor and drop the headliner on the driver side instead of spending 20 minutes trying to feed it through to the A-Pilar like I tried to. All it takes pulling the A-pilar, dropping the sun visor and one bolt above where the switch rack would go. I managed to hide three relays under the dash as well for the fuel pump, air compressor and light bar. I used a fuse tap on interior fuse F54B which powers the 12 volt outlet on top of the dash above the hazards switch. It’s normally always on but if you shift the fuse from the left and middle slot to the middle and right slots power will only come on with the truck in Acc.

If anyone wants more photos or details let me know :)
BAACE975-D061-4291-905D-36EB0DE52AD2.jpeg380310D3-1D5D-45F6-8058-F9B527825FF3.jpeg691F330B-BFB3-428F-9600-C1B72BBC6056.jpeg0CD8FA46-A970-4A2E-9163-FDF3A8919D03.jpeg
 
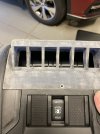
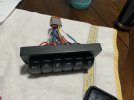
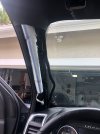
Got my panel installed this week and ran wires through pillar and headliner. I wish I had taken a picture of behind the switches. I did 2 molex plugs on mine, a 3 pin and a 6 pin. The 3 pin carries a ground, ambient light wire to light the letters on the switch when they are off and a main power wire for switch power in. Then the 6 pin carries all of the individual switch power outs. I have relays for the larger accesories but I ran a heavy enough (14ga) wire for power in to run smaller accessories on just switched power out if I want. For the screw and nut I used a small #6 floating clip nut and a normal 6-32 screw cut to length. I just popped the latch mechanism out for the sunglasses holder and slid the clip nut over the screw hole. Hope to have some more boxes show up this weekend to start hooking up things. The switches I anted to use are on backorder till october (white LED Otrattws) so I had to order their red ones and some 12v 5mm white LEDs and make them myself. I will say that after taking theirs apart and taking apart the CE Chinese ones apart to compare, the Chinese ones are built a lot better with a board and LED vs just a thin strand of copper wire to a spring soldered to the led in mine.
 

Attachments

  • F462FAF8-79A9-49B9-A3DB-F0D66C3DA9EE.jpeg
    F462FAF8-79A9-49B9-A3DB-F0D66C3DA9EE.jpeg
    72.6 KB · Views: 234
  • 2C5E7B87-F782-4D53-AF8F-62E64D5B2480.jpeg
    2C5E7B87-F782-4D53-AF8F-62E64D5B2480.jpeg
    100.4 KB · Views: 241
  • 557D06E5-1E6F-419A-A99E-EEE4C1EED4A2.jpeg
    557D06E5-1E6F-419A-A99E-EEE4C1EED4A2.jpeg
    71.5 KB · Views: 229
  • AA24CDC2-A38B-40DA-B072-2D220E47196F.jpeg
    AA24CDC2-A38B-40DA-B072-2D220E47196F.jpeg
    115.1 KB · Views: 233
  • 009BB13D-016E-40A6-A42C-E61596915DB9.jpeg
    009BB13D-016E-40A6-A42C-E61596915DB9.jpeg
    101.1 KB · Views: 218
  • 93D17359-B618-4958-A48A-14CF5263BE8B.jpeg
    93D17359-B618-4958-A48A-14CF5263BE8B.jpeg
    170.9 KB · Views: 220
  • AC8AE8AA-5D29-42FC-A164-DD87D87DD993.jpeg
    AC8AE8AA-5D29-42FC-A164-DD87D87DD993.jpeg
    89.7 KB · Views: 210
  • DB647EC2-5F73-4C63-9A82-5A29A7A77DA3.jpeg
    DB647EC2-5F73-4C63-9A82-5A29A7A77DA3.jpeg
    109.3 KB · Views: 207
  • DF55DE66-11DD-44C4-B501-FF16C0EE2DC7.jpeg
    DF55DE66-11DD-44C4-B501-FF16C0EE2DC7.jpeg
    107.1 KB · Views: 225
Got my panel installed this week and ran wires through pillar and headliner. I wish I had taken a picture of behind the switches. I did 2 molex plugs on mine, a 3 pin and a 6 pin. The 3 pin carries a ground, ambient light wire to light the letters on the switch when they are off and a main power wire for switch power in. Then the 6 pin carries all of the individual switch power outs. I have relays for the larger accesories but I ran a heavy enough (14ga) wire for power in to run smaller accessories on just switched power out if I want. For the screw and nut I used a small #6 floating clip nut and a normal 6-32 screw cut to length. I just popped the latch mechanism out for the sunglasses holder and slid the clip nut over the screw hole. Hope to have some more boxes show up this weekend to start hooking up things. The switches I anted to use are on backorder till october (white LED Otrattws) so I had to order their red ones and some 12v 5mm white LEDs and make them myself. I will say that after taking theirs apart and taking apart the CE Chinese ones apart to compare, the Chinese ones are built a lot better with a board and LED vs just a thin strand of copper wire to a spring soldered to the led in mine.

Looking good!

Malodave
 
Hier sind die Zip-Dateien für die Switch-Panels, sowohl DXF als auch STL.

Tut mir leid, Forum lässt mich das ZIP-Archiv nicht posten. Du wirst
muss mir eine PN schicken um die Dateien zu bekommen.

Maloda
Hi ,
Ich finde deine 3D-Konsole wirklich toll !!!
 
Last edited:
Looking good everyone!

Malodave, Can you post the project files on a Google drive and share it out by making it public?
 

Users who are viewing this thread

Back
Top