MikeyHo808
Ram Guru
Just completed installation of a set of RC Retract Powered Steps. Replaced a set of OEM wheel to wheel Stainless steps that came with the truck.
Went with the Rough Country for a few reasons:
1) About $500 cheaper than the Amp Steps
2) I like how they swing out
3) I like the look of how they sit when retracted
I would rate the install about a 3.5 out of 5. I had easier time with the passenger side than the driver side. For some reason the driver side step wouldn't fall into the channel nicely, so a lot of cussing ensued for the next 45 minutes. Seemed I had the idler arms on too tight at first, but even after loosening it all up, the step took a while to sit into the channel completely.
Instructions were decent, and not many videos available to reference. I did find one youtube video(he may be a forum member), and took notes where needed. I took my time, and basically installed these steps over 2 days, the last of it today just tying up the LED wiring under the cab and final tweaking to get them in time and tucked up as high as possible. If I had to estimate how long, I'd say about 6 hours, give or take an hour. I had to remove the OEM steps first, so it took a bit longer.
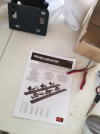
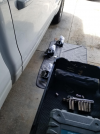
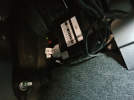
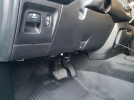
-Mounted the control box to the dash frame behind the center console
-Ran the power wire through the grommet in the firewall.
The wiring harnesses were well labeled, but there is a 2 pin connector that plugs into the factory harness behind the kick panel. That wire was tape wrapped to the passenger side LED wire, so it made for a difficult run across the cabin to the driver side.
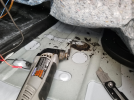
Here is where it helped it helped to have the right tools. Instructions has you pull back the carpet to expose that floor plug that is about 2/3rds covered with sound deadening to run your wiring.
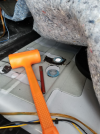
-I used my DREMEL tool to remove the sound deadening that was covering the plug in the floor. Then used a chisel to pop it out. Passenger side was even easier. This tool was a time saver. The sound deadening was way too thick to cut through. Using the proper blade attachment, I just scraped and leveled it until the floor plug was clear and I could pop it out freely.
-With the plug out it made it easier to drill the hole for the motor and LED wiring.
-I used clear RTV sealant to close the exposed hole in the floor plug before I replaced the carpet back down.
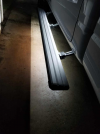
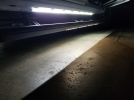
Once I finally got both sides installed, each sided needed to be positioned so when retracted the step sits centered under the cab.
The built in LED's in the step, with my LED strips under the cab. It is pretty bright!
After adjusting idler arms, step is tucked up pretty good. Nicely centered on both sides.
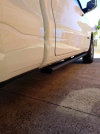
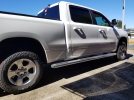
The RC steps, when fully retracted, tuck under the cab nicely. Do miss the wheel to wheel look, but the OEM steps stuck out a TON!
I like how the RC's sit under the cab retracted compared to the AMP step, and I dig how they swing out when activated, like wings, lol. Each to his own, I guess...
So far, so good. Happy how it looks and functions, will see how they hold up. Steps feel pretty robust, thick and sturdy. I have lost some shin skin to it already during this install.
Definitely changed the look of the truck, and only shiny parts left are my tailgate and grill emblems and lug nuts.
Last on the list, wheels and tires. Well, last on the list for this quarter, lol.
Went with the Rough Country for a few reasons:
1) About $500 cheaper than the Amp Steps
2) I like how they swing out
3) I like the look of how they sit when retracted
I would rate the install about a 3.5 out of 5. I had easier time with the passenger side than the driver side. For some reason the driver side step wouldn't fall into the channel nicely, so a lot of cussing ensued for the next 45 minutes. Seemed I had the idler arms on too tight at first, but even after loosening it all up, the step took a while to sit into the channel completely.
Instructions were decent, and not many videos available to reference. I did find one youtube video(he may be a forum member), and took notes where needed. I took my time, and basically installed these steps over 2 days, the last of it today just tying up the LED wiring under the cab and final tweaking to get them in time and tucked up as high as possible. If I had to estimate how long, I'd say about 6 hours, give or take an hour. I had to remove the OEM steps first, so it took a bit longer.


-Mounted the control box to the dash frame behind the center console
-Ran the power wire through the grommet in the firewall.
The wiring harnesses were well labeled, but there is a 2 pin connector that plugs into the factory harness behind the kick panel. That wire was tape wrapped to the passenger side LED wire, so it made for a difficult run across the cabin to the driver side.

Here is where it helped it helped to have the right tools. Instructions has you pull back the carpet to expose that floor plug that is about 2/3rds covered with sound deadening to run your wiring.
-I used my DREMEL tool to remove the sound deadening that was covering the plug in the floor. Then used a chisel to pop it out. Passenger side was even easier. This tool was a time saver. The sound deadening was way too thick to cut through. Using the proper blade attachment, I just scraped and leveled it until the floor plug was clear and I could pop it out freely.
-With the plug out it made it easier to drill the hole for the motor and LED wiring.
-I used clear RTV sealant to close the exposed hole in the floor plug before I replaced the carpet back down.


Once I finally got both sides installed, each sided needed to be positioned so when retracted the step sits centered under the cab.
The built in LED's in the step, with my LED strips under the cab. It is pretty bright!
After adjusting idler arms, step is tucked up pretty good. Nicely centered on both sides.


The RC steps, when fully retracted, tuck under the cab nicely. Do miss the wheel to wheel look, but the OEM steps stuck out a TON!
I like how the RC's sit under the cab retracted compared to the AMP step, and I dig how they swing out when activated, like wings, lol. Each to his own, I guess...
So far, so good. Happy how it looks and functions, will see how they hold up. Steps feel pretty robust, thick and sturdy. I have lost some shin skin to it already during this install.
Definitely changed the look of the truck, and only shiny parts left are my tailgate and grill emblems and lug nuts.
Last on the list, wheels and tires. Well, last on the list for this quarter, lol.

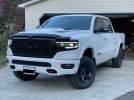
 When I saw my first set of Mopar Power Running Boards, I was thrilled. They work as intended and they don't take away from the clean lines of the truck.


