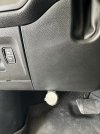
Yes. I wanted to lower the truck but did not want to lose the ability to tow. So far it is working great. This on-board auto-leveling kit will keep the ride height the same no matter what the load.
5thGenRams Forums
You are using an out of date browser. It may not display this or other websites correctly.
You should upgrade or use an alternative browser.
You should upgrade or use an alternative browser.
Rock Crawler’s Build
- Thread starter Rock Crawler
- Start date
I finally got the Timber Grove Automatic Air System installed on the truck today. Pretty straight forward and the install video on their website is really good. Took me a good part of the day just because I have a serious case of OCD. This could probably be done in a few hours.
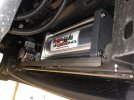
The air tank/compressor assembly fits perfectly behind the front bumper. Once everything is tightened down, it’s very sturdy.
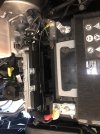
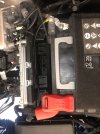
I ran the power and ground up to the battery and tried to integrate it as much as possible to keep it looking stock. Then removed the active air dam so I could tuck the extra wiring in behind the bumper.
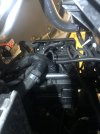
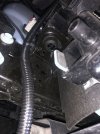
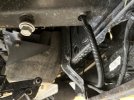
For a clean look and air line protection, I ran the air line inside the frame on the drivers side. There was an unused bolt hole at the bumper so it went in there and came out at the rear right where the leveling valve mounts. The Haldex leveling valves look to be high quality. Running the air line is pretty easy, but it’s hard to make it look really clean because the lines cannot be bent much at all without kinking them.
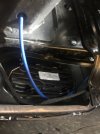
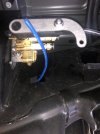
The air tank/compressor assembly fits perfectly behind the front bumper. Once everything is tightened down, it’s very sturdy.

I ran the power and ground up to the battery and tried to integrate it as much as possible to keep it looking stock. Then removed the active air dam so I could tuck the extra wiring in behind the bumper.


For a clean look and air line protection, I ran the air line inside the frame on the drivers side. There was an unused bolt hole at the bumper so it went in there and came out at the rear right where the leveling valve mounts. The Haldex leveling valves look to be high quality. Running the air line is pretty easy, but it’s hard to make it look really clean because the lines cannot be bent much at all without kinking them.


Last edited:
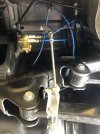
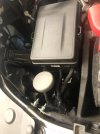
I ran the compressor air filter to a remote location under the hood to keep it in a dry and fairly clean environment.
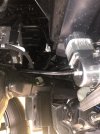
The final step is to adjust the leveling valves to keep the truck at the correct ride height. I had to run them up and down a few times each the bleed them. Setting them is a bit tedious, but not too bad. Now the truck will stay level front-to-back and side-to-side automatically when loaded or empty. Yes, the kit is expensive, but it is very high quality and Steve offers incredible customer service.
Last edited:
Well, I’m having issues with the auto-leveling valves. I can never seem to get them set right and stay at the right height. I’ve been working with Steve at Timber Grove and he is trying to help me figure it out. Fist off, the brackets didn’t mount in the right place and I could not figure out why. After speaking with Steve, we figured out his brackets for the valves are for the short beds. I have the 6’ 4” bed. So, the mounting location for the brackets is in a different location than the short beds. It seems like the valves, although quite sensitive, need more movement than my 4” drop provides. The valves also sit a little offset from the control arm mount as opposed to directly above, which might also be contributing to my issues. It’s a work in progress.
This post is a combination of a few posts I made in the suspension section regarding my build.
12/02
I made up some cardboard models for the brackets the other day to figure out what I needed. I spoke with Steve at Timber Grove this morning and he is going to fab me some new stainless brackets. These will move the valves back quite a bit where there should be more movement. Hope this works.
Yesterday 12/16
The new Stainless brackets are here courtesy of Steven at Timber Grove. Hopefully I’ll get them installed today. Hope this works.


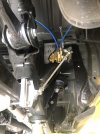
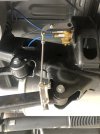
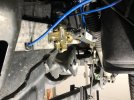
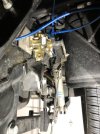
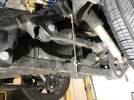
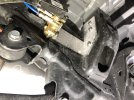
Ok, I got the new brackets installed. They moved the valves back quite a bit so hopefully this will provide more movement. I bent the valve arms back a little to align the rod mounting points so they are not as offset as before. I’m hoping this will help with the valves as well. These brackets moved the valves back enough that the control arm mounts are now roughly in the middle of the control arms. Much better than when I first started. The first location was all the way at the front pivot point of the lower control arm. Not nearly enough movement. The second location, with the longer valve arms, moved the control arm mount back some as you can see in the pics (the sort of clean area on the control arm). Fingers crossed.
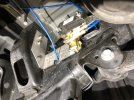
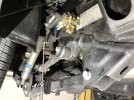
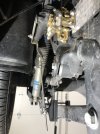
12/02
I made up some cardboard models for the brackets the other day to figure out what I needed. I spoke with Steve at Timber Grove this morning and he is going to fab me some new stainless brackets. These will move the valves back quite a bit where there should be more movement. Hope this works.
Yesterday 12/16
The new Stainless brackets are here courtesy of Steven at Timber Grove. Hopefully I’ll get them installed today. Hope this works.
Ok, I got the new brackets installed. They moved the valves back quite a bit so hopefully this will provide more movement. I bent the valve arms back a little to align the rod mounting points so they are not as offset as before. I’m hoping this will help with the valves as well. These brackets moved the valves back enough that the control arm mounts are now roughly in the middle of the control arms. Much better than when I first started. The first location was all the way at the front pivot point of the lower control arm. Not nearly enough movement. The second location, with the longer valve arms, moved the control arm mount back some as you can see in the pics (the sort of clean area on the control arm). Fingers crossed.


Last edited:
Two days of exterior detail.
Power wash (rinse) to remove dirt and other debris
Foam Cannon to help loosen remaining dirt and debris (Adam’s Mega Foam)
Power wash (rinse) again to remove foam and loosened debris
Hand wash wheels and tires (microfiber towel with Chemical Guys Clean Slate - brush for tires)
Hand wash paint (two bucket method and microfiber mitt with Chemical Guys Clean Slate)
Bug and Grime Removal (Schaefer’s Citrol)
Clay Bar paint and all exterior glass (Chemical Guys OG bar and Clay Luber)
Polish (Sonax Perfect Finish with Rupes Fine Polishing Pad)
IPA Wipe Down (CarPro Eraser)
Ceramic Coating paint and wheels (Avalon King Armor Shield)
Clean Glass (Invisible Glass)
Tire and Trim Treatment (Chemical Guys VRP)
I have XPEL PPF on the front bumper, grill, front fenders, mirrors, headlights, cowl below headlights and full hood. So, can‘t run polisher on it but still did clay bar, IPA wipe and ceramic coating. My washes from now on will probably be done with CarPro Reset since it is safe for coatings. The Clean Slate is a wash used to aid in removing waxes and other coatings.
I forgot to post a while back, but I had installed and Air Designs tailgate spoiler and I really like the way it looks.
I’ve ordered and received the BellTech 4922 (1.26” tall x 2.5” OD) progressive bump stops to replace the factory ones. The factory bump stops were hitting the rear axle quite a bit, so I cut them in half a while back, which helped a lot. But, because there is not as much bump stop left, the bump stop cups are occasionally coming in contact with the rear axle. So, I decided to just cut the cups off and install the new bump stops. Hopefully this will work.
Cups on:


Cups cut off, grind, sand, prep for paint:


Paint:


The bump stops came with nylon lock nuts but I decided to use rivnuts instead. The hole in the plate on the truck is the perfect size for the 3/8-16 rivnut I wanted to use, so I didn’t have to modify it at all (win). My rivnut tool wouldn’t really fit in the tight spots so I made my own tool with a bolt, spacer and a couple washers.
Rivnuts installed:


Cups on:
Cups cut off, grind, sand, prep for paint:
Paint:
The bump stops came with nylon lock nuts but I decided to use rivnuts instead. The hole in the plate on the truck is the perfect size for the 3/8-16 rivnut I wanted to use, so I didn’t have to modify it at all (win). My rivnut tool wouldn’t really fit in the tight spots so I made my own tool with a bolt, spacer and a couple washers.
Rivnuts installed:
Done:
I used some blue thread locker on the threads to keep the bump stops from backing out.


Pic of the cups and other brackets I had to cut off for my 4” rear drop.

Job made so much easier this way. I’m old and this thing is a back and joint saver. She even looks good up in the air.

I used some blue thread locker on the threads to keep the bump stops from backing out.
Pic of the cups and other brackets I had to cut off for my 4” rear drop.
Job made so much easier this way. I’m old and this thing is a back and joint saver. She even looks good up in the air.
ThanksNice work. you have a great looking truck!
Well, we could never get the self leveling system working properly. Keeping the truck even, side to side, within an inch or less had proven to be almost impossible. The valves are not that precise. On a standard height or lifted truck, you probably would never notice, but on a lowered truck it is very noticeable. The system worked pretty well, but just not good enough. When I would add a load, the system would automatically add air to keep the truck level. But, when the load was removed it would not lower back down evenly. It really became annoying. I spoke with Steven on multiple occasions and he has been extremely helpful. He told me he contacted the company that makes the valves (Haldex) and they pretty much blew him off. He has since stopped doing the self leveling kits. So, he custom built me a system that uses his new kit and allows me keep the on-board air tank as one assembly. It uses a wireless remote system to air up the bags individually to whatever pressure I need at the time. I just recently removed the valves, ran new air lines inside the frame and installed the new system with my air tank. It’s going to be a learning curve but hopefully this setup will work well.
This is what his new on-board air kits look like now.
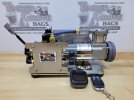
This is the kit he built for me that keeps my tank where it was.
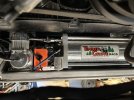
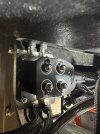
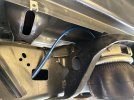
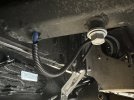
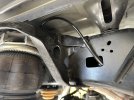
This is what his new on-board air kits look like now.

This is the kit he built for me that keeps my tank where it was.


IGotaBigHorn1
Member
- Joined
- Jun 6, 2023
- Messages
- 6
- Reaction score
- 5
- Points
- 3
- Age
- 42
What a great thread so far…. You did a great job with exp and thanks for adding that detail., beautiful truck man.
What a great thread so far…. You did a great job with exp and thanks for adding that detail., beautiful truck man.
Thanks. It’s a work in progress.
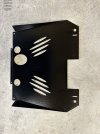
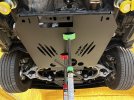
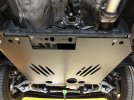
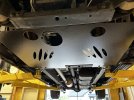
Changed the oil in the truck and installed a Skeerdy Cat catalytic converter anti-theft skid plate.
The pros:
Install was pretty easy
Seems like it will deter thieves from cutting off my catalytic converters
The cons:
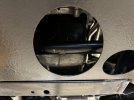
Due to the genius design of the Ram 1500, they placed the oil drain plug directly above the front sway bar. This makes it a little difficult to drain oil without making a mess. The skid plate has a hole to access the drain plug, but I see it making it even harder to not make a mess, due to restricted access.
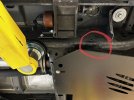
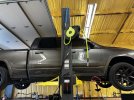
The design of the skid plate covers the front of the frame, on both sides, where I usually place the arms/pads when I put my truck on the lift. This is causing me to move the front lift points back about 1 foot. It might be ok, but I’d much rather have the lift points as far forward in the front as possible and as far back in the rear as possible. It still seems pretty stable though. The red circle is the lift point I usually use.


CHeYeNNe71
Spends too much time on here
Looking good and great information 
I'm still on the fence about the 2/4 drop, mostly because of the rear and I added the Leer Topper now. I want simple, but overthink and would probably end up doing everything you did....

I'm still on the fence about the 2/4 drop, mostly because of the rear and I added the Leer Topper now. I want simple, but overthink and would probably end up doing everything you did....
Looking good and great information
I'm still on the fence about the 2/4 drop, mostly because of the rear and I added the Leer Topper now. I want simple, but overthink and would probably end up doing everything you did....

Why would the Leer top keep you from lowering?
CHeYeNNe71
Spends too much time on here
I see many talk about hitting bump stops with an empty bed and the topper adds around 200lbs. I know I can do airlift bags, which is a possible, but I've been down the road of opening up a sh*t can of issues. I like your setup, but I hate the cost!!Why would the Leer top keep you from lowering?
I see many talk about hitting bump stops with an empty bed and the topper adds around 200lbs. I know I can do airlift bags, which is a possible, but I've been down the road of opening up a sh*t can of issues. I like your setup, but I hate the cost!!
I'd probably be in around $5k all said and done..... Just a number throwing out there.
Yeah, I found that I had to completely cut off the bump stop cups to keep the truck from bottoming out. I have not hit the new bump stops since. I have not really towed anything heavy yet to see if it will under a load.
Users who are viewing this thread
Total: 1 (members: 0, guests: 1)
Members online
Total: 1,761 (members: 7, guests: 1,754)

