5thGenRams Forums

Register a free account today to become a member! Once signed in, you'll be able to participate on this site by adding your own topics and posts, as well as connect with other members through your own private inbox!

Josh Edgar Designs - 2020 RAM 1500 build and adventures

jedgar81

Active Member
Joined
Sep 15, 2020
Messages
47
Reaction score
66
Location
Bend, OR
Hi all. Wanted to document my build and become a part of this forum too!

I previously had a built Jeep and just used a JeepSleep when camping, but with our family growing I decided to change it up and do more mellow camping trips rather than so much rock crawling. I decided a 2020 RAM 1500 bighorn with both the sport and off road packages fir the bill. A few weeks after purchasing it I took a trip to do some exploring around Stanley Idaho.
pinyon.jpeg

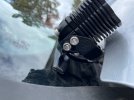
The truck did great but it was very clear that I needed to do some modifications to get a bit more off-road performance. The front air dam was hitting everywhere of course and the 20" wheels made for a rough ride that limited how much I could air down. Once I got home I added an Addictive Desert Designs Stealth Fighter front bumper. I did a Rough Country lightbar mostly to just fill the hole in the bumper.
add.jpeg

I loved the look and install, but the frame brackets that the electronic air damn mounted to were super visible to i ended up cutting those off the frame.
frame-chop.jpeg

I also got some factory 18" wheel used and mounted them with a set of 33" duratracs to get a bit more sidewall. The next test for the truck was a trip across the Magruder Corridor, which is easy dirt roads, but long and remote. There was one off-shoot to a fire tower that offered some light wheeling.
mcgruder.jpeg

We also did Railroad Ridge on the way home which was an awesome scenic drive although it ended up a bit snowy!
railroad.jpeg

I also had decided that I wanted a Go Fast Camper for the truck. lucked out and found one for my truck pretty quickly and mounted it up.
gfc.jpeg

After this trip I had some more ideas of what I wanted to do next.
 

jedgar81

Active Member
Joined
Sep 15, 2020
Messages
47
Reaction score
66
Location
Bend, OR
I am a User Interface Designer for work and the factory RAM knob bugged me with how similar it was to the volume knobs. I added an AJT Design knob to change it up.
ajt.jpeg

I also wanted to hook up the light bar and some other accessories so I got a Trigger4+ to handle the switching needs. I like the wireless controller as well as the ability to use the app if I am not in the cab. It has a magnetic back so I covered the tiny storage cubby with a small plate for a mounting location.
trigger.jpeg
trigger2.jpeg

Once I had the Trigger in I added some KC Cylones as underhood lighting and also as bed lighting. For under the hood I removed the sound deadening and ran the wired throiugh the hood supports. I added some nutserts into the hood to mount the lights directly to the hood. These make working on the truck so much nicer and can be turned on via the switch panel, the main Trigger unit under the hood or the app.
hood1.jpeg
hood2.jpeg
hood4.jpeg

I also decided that I wanted some ditch lights, but i didn't like how high all the available options were. I made up some super low profile brackets that mount to the hood mounts and sit just above the hood. I mounted some KC flex lights to these.
ditch1.jpeg

The only other electrical thing I wanted to do was to add a 12V plug to the backseat as well as in the bed for easy powering of my Dometic CFX. For the backseat I spliced into the 12V plug on the top of the dash and added the Dometic hardwiring kit to the back of the center console. I ended up pulling the console out and the center dash off to get a clean install. I also swapped the fuse position so the plugs only had power when the ignition was on.
plug2.jpeg
plug3.jpeg

more to come...
 

Attachments

  • ditch2.jpeg
    ditch2.jpeg
    101 KB · Views: 82

jedgar81

Active Member
Joined
Sep 15, 2020
Messages
47
Reaction score
66
Location
Bend, OR
For the bed plug I used another of the Dometic Hardwiring kits, but rather then go direct to the battery I added a relay and used a fuse tap of the ECM fuse so that it again only had power when the truck was running.
plug1.jpeg

These are out of order, but i had previously installed a BedRug Impact Liner to make it more comfortable with the Go Fast Camper, and also the Mopar Bed Rails.
rails.jpeg

I had been waiting to do 35s until I could get a lift, but with all the current delays I decided just to get some and see if they fit. I got a set of Duratracs in 285/75/18 which is a narrow 35. I added some 1.5" wheel spacers to the factory wheels, and did a fair amount of trimming to clear them. As of now I have zero rubbing, but have yet to fully flex the truck.
35s.jpeg

I wanted a full size spare but really didnt want the spare taking up room in the bed, so I decided to see if I could stuff the 35 underneath. I ended up having to trim off a bit of the back of the hitch, and take all the air out of the tire, but i was able to stuff it in the factory spot. I have an ARB compressor in the truck always so I can always fill it up if needed.
spare2.jpeg
spare1.jpeg

The last 2 changes I made was one selling the Go Fast Camper (just doesn't really work for my family as I expected), and then adding a Delthoff Transmission skid. Both Jeep and RAM seem to love to leave the transmission unprotected and this is a great simple install that gives me some confidence off road.
skid-before.jpeg
skid-after.jpeg

That is it so far. I have some upper control arms and FOX coilovers with DSC coming in the next few weeks, as well as an RSI Smartcap and White Knuckle Off Road Sliders on the way. Thanks for taking a look at my build and hope to share more in the future.
 

Desert Dawg

Well-Known Member
Joined
Aug 16, 2018
Messages
494
Reaction score
1,313
Location
Albuquerque, NM
Welcome to the forum and great job on the build so far! Will be interesting to see what your final decision on a lift will be seeing you actually take the truck off road!
 

jedgar81

Active Member
Joined
Sep 15, 2020
Messages
47
Reaction score
66
Location
Bend, OR
Finally got a chance to install my winch onto the truck. Addictive Desert Designs only has one winch they recommend to use, and I really didn't want the one they recommended. I have always had great luck with Warn (ran an M series on the Jeep and used it a ton), so I wanted to stick with them. I decided to do a VR Evo 10s since it will see limited use on this truck vs a rock crawling a Jeep, and even though it is made in China I still want to support a local Oregon company if I can.

Everything fit up fine as far as clearance with the truck, but the inner opening in the bumper for the line to pass though was too small, and on the outer wrap of the winch drum it was making light contact. I ended up cutting out a section of the bumper's winch plate to get the clearance I needed.
IMG_2339.jpg
IMG_2340.jpg

With that modification it fit in great and had plenty of clearance. Here it is bolted to the bumper.
IMG_2341.jpg
Stuck the bumper back on, wired it up, and then finished it off with a Factor 55 Flat Splicer. This was my first time splicing synthetic line and with the Fast FID tool it was super easy and I like how clean and simple the connection is. I am so glad to finally not have an empty hole in the front of the truck!
IMG_2343.jpg

More updates coming very soon as I am going to pick up a used RSI SmartCap this week and just got an email that my suspension shipped after 6 weeks of waiting!
 

Desert Dawg

Well-Known Member
Joined
Aug 16, 2018
Messages
494
Reaction score
1,313
Location
Albuquerque, NM
Sweet! I am excited for you...lol.

Still trying to figure out what I am going to do but this system high on list. I wonder if my Fabtech UCAs would work and/or if comparable with the BDS UCAs. Are the BCA UCAs sourced from Moog?
 

jedgar81

Active Member
Joined
Sep 15, 2020
Messages
47
Reaction score
66
Location
Bend, OR
I am not sure who makes the UCAs. They have a part number on them that I cant find any extra info, but they do have a Moog ball joint. The Fabtech ones actually look a bit nicer with some extra gussets. If you ever need any measurements Id be happy to help.
IMG_2362.jpg
IMG_2363.jpg
 

Desert Dawg

Well-Known Member
Joined
Aug 16, 2018
Messages
494
Reaction score
1,313
Location
Albuquerque, NM
Okay, maybe I have been too harsh on the Fabtech ones but my reference has been when comparing to the build quality of other aftermarket versions like Total Chaos, SPC, Icon, etc. But pretty sure the Fabtech and BDS UCAs are an upgrade over the factory, not to mention a necessity at least for the 3-inch lift I have.

Yeah, I am going to be really curious as to your final lift measurements; hope you take some before and after readings.

Also been thinking about the ADD bumper! I had the ADD Stealth on one of my prior F150 builds and loved it except I had to go with higher load springs to counter the bumper and winch weight. How do you like yours? Can't wait to see the whole thing when you're done.
 

jedgar81

Active Member
Joined
Sep 15, 2020
Messages
47
Reaction score
66
Location
Bend, OR
Havent had time to do the suspension install yet, but did pick up a used RSI Smartcap! Loving the look and impressed with the quality. The platform rack came with the sale, but it felt a little too "overland" for my taste so I was able to convert it into two crossbars. Pretty cool design.
IMG_2370.jpg
 

jedgar81

Active Member
Joined
Sep 15, 2020
Messages
47
Reaction score
66
Location
Bend, OR
Wasnt a fan of how large the branding on the RSI is so took a few minutes to peel off the logos. Rather than just doing the logo as a cutout sticker they wrap the panel with black wrap and have to logo printed on it. It is a nice extra protection to the paint, but made for a lot of peeling and residue removal. Looks WAY better in my opinion. You can see the crossbars as well.
IMG_2375.jpg

The only thing missing from converting the platform rack to crossbars was the end caps for the bars. Rather than wait to get some shipped to me I decided to just print 4 of them with the 3D printer. Looks much more finished with them installed.
IMG_2372.jpg
IMG_2373.jpg

Next update will be the suspension!
 

silverWS6

Ram Guru
Joined
Apr 20, 2020
Messages
668
Reaction score
1,378
Location
EPTX
Nice build! I'm hoping to pick up the same bumper here soon, how long was the wait for the bumper?
 

jedgar81

Active Member
Joined
Sep 15, 2020
Messages
47
Reaction score
66
Location
Bend, OR
Nice build! I'm hoping to pick up the same bumper here soon, how long was the wait for the bumper?
Thanks! I ordered it about a year ago and from them direct and they had one in stock luckily so only took a few days
 

SKT Customs

5thGenRams Vendor
5thGenRams Vendor
Joined
Jun 14, 2018
Messages
1,213
Reaction score
1,618
Location
San Diego
Now here’s a guy who likes to do everything RIGHT and make it look OEM! I aspire to be on your level one day lol, I love the super clean installs and I’m trying to learn more & acquire more tools so that I can be on your level! Can’t wait to see more!
 

jkm312

Well-Known Member
Joined
Mar 6, 2019
Messages
264
Reaction score
251
Watching your transformation/evolution of your truck in this thread was fun. Where did you learn your craft? It is impressive!
Well done and done right.
 

jedgar81

Active Member
Joined
Sep 15, 2020
Messages
47
Reaction score
66
Location
Bend, OR
Watching your transformation/evolution of your truck in this thread was fun. Where did you learn your craft? It is impressive!
Well done and done right.
Lots more to come soon hopefully! Thanks for the kind words. I just enjoy working on things mostly.
 

jedgar81

Active Member
Joined
Sep 15, 2020
Messages
47
Reaction score
66
Location
Bend, OR
Ended up with a few hours of free time this morning so I decided to install the suspension. The kit was higher quality than I initially gave it credit for with some nice machined parts, and locations to hold ABS wires. Took 2:45 minutes to do both the front and rear.

The only real challenge is getting the knuckle free from the UCA. I have always just hit the knuckle with a hammer until it popped free, but with the aluminum knuckle I didn't dare. Since the ball joint was getting replaced with the new UCAs I just hit the ball joint stud with the mini-sledge and it popped free.
IMG_2423.jpg

Other than that it was super easy to remove the UCA and slide the factory coilover out. Not a huge difference between the two, other than the giant remote reservoir!
IMG_2426.jpg

This was one of the pieces I was impressed by. Expected a plastic cap and this is machined aluminum with an o-ring.
IMG_2428.jpg

And installed! They included a nice bracket to mount the remote reservoir also. If they work as good as they look I'll be sold! All the clickers are full soft and i just drove it to the alignment shop so not much to report other than it felt like factory at 25mph on pavement. I should have some time after work this week to go hit some dirt so I will post what my opinions are.
IMG_2430.jpg
 

Users who are viewing this thread

Top