
5thGenRams Forums
You are using an out of date browser. It may not display this or other websites correctly.
You should upgrade or use an alternative browser.
You should upgrade or use an alternative browser.
Hood Bezel removal
- Thread starter tdokmo
- Start date
d15nonvtec
Active Member
- Joined
- Nov 18, 2018
- Messages
- 132
- Reaction score
- 105
- Points
- 43
- Age
- 43
The whole plastic piece needs to be removed and switched with a Rebel version. the piece clips in and front what I gather it breaks upon removal if you were looking to reuse down the line.
wildh24
Ram Guru
- Joined
- Dec 23, 2018
- Messages
- 581
- Reaction score
- 306
- Points
- 63
- Age
- 46
I got them off. There is adhesive on the back side and it's very sticky. Just heat it up quite a bit with a heat gun or blow dryer and use a plastic trim tool to slowly pry it off. You'll bugger the adhesive (or at least I did) and need to remove it and replace with some 3m mounting tape off you want to paint them and reuse. Otherwise toss them. I don't think they're available individually though.... It only comes as one big piece last time I checked.


PorBoy
Spends too much time on here
I saw someone on here had removed theirs entirely and the hood was still down. I’ll have to see if I can find that photo again.
You can buy just the badge. I've seen them for sale in a lot of places. Here is one...
 parts.moparonlineparts.com
Edit:
Sorry, those may just be for the non-sport hood.
Select Parts Category - 2019 Ram 1500 | Mopar Online Parts
parts.moparonlineparts.com
Edit:
Sorry, those may just be for the non-sport hood.
It's not as bad as one might expect. Just go slow and I'd recommend using fairly rigid plastic pry tools that have a good curved "pry" end. I used some painters tape to protect the hood.
I pried free the outside corners first and then as far back toward the center of the hood as I could comfortably reach using the pry tools. Once it was free on both ends, I pretty much just lifted the bezel the rest of the way to release the remaining clips toward the center of the hood.
You just have to lift until the clips fail or break free. You can see that some of the clips shattered or broke and some were still intact in the hood.
If you need for me to elaborate on how to install the replacement bezel, I suggest you put down the pry tools and walk away from your vehicle.")
.jpg")
.jpg")
.jpg")
.jpg")
.jpg")
.jpg")
.jpg")
.jpg")
.jpg")
.jpg")
I pried free the outside corners first and then as far back toward the center of the hood as I could comfortably reach using the pry tools. Once it was free on both ends, I pretty much just lifted the bezel the rest of the way to release the remaining clips toward the center of the hood.
You just have to lift until the clips fail or break free. You can see that some of the clips shattered or broke and some were still intact in the hood.
If you need for me to elaborate on how to install the replacement bezel, I suggest you put down the pry tools and walk away from your vehicle.
Last edited:
KY2021Laramie
Member
I love the color of your truck.It's not as bad as one might expect. Just go slow and I'd recommend using fairly rigid plastic pry tools that have a good curved "pry" end. I used some painters tape to protect the hood.
I pried free the outside corners first and then as far back toward the center of the hood as I could comfortably reach using the pry tools. Once it was free on both ends, I pretty much just lifted the bezel the rest of the way to release the remaining clips toward the center of the hood.
You just have to lift until the clips fail or break free. You can see that some of the clips shattered or broke and some were still intact in the hood.
If you need for me to elaborate on how to install the replacement bezel, I suggest you put down the pry tools and walk away from your vehicle.
View attachment 79809
View attachment 79808
View attachment 79810
View attachment 79811
View attachment 79812
View attachment 79813
View attachment 79815
View attachment 79816
View attachment 79817
View attachment 79818
CMil527
Spends too much time on here
Curious does anyone know if the hood vents are removable as well?
securityguy
Legendary member
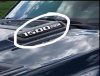
No...I think he did mean the badge and not the entire plastic shroud.I think tdokmo was referring to removing the entire bezel, not just the emblems on the bezel. I too am looking to do the same thing but it seems this clips into the hood. View attachment 28503View attachment 28504
Yes, they are removable.Curious does anyone know if the hood vents are removable as well?
CMil527
Spends too much time on here
Thank you sir!Yes, they are removable.
Thank you. This is exactly what I needed to see. I was worried about denting the hood with a pry tool. I thought maybe going in under the hood and clipping off the ends of the clips but someone else posted they are not all exposed.It's not as bad as one might expect. Just go slow and I'd recommend using fairly rigid plastic pry tools that have a good curved "pry" end. I used some painters tape to protect the hood.
I pried free the outside corners first and then as far back toward the center of the hood as I could comfortably reach using the pry tools. Once it was free on both ends, I pretty much just lifted the bezel the rest of the way to release the remaining clips toward the center of the hood.
You just have to lift until the clips fail or break free. You can see that some of the clips shattered or broke and some were still intact in the hood.
If you need for me to elaborate on how to install the replacement bezel, I suggest you put down the pry tools and walk away from your vehicle.
View attachment 79809
View attachment 79808
View attachment 79810
View attachment 79811
View attachment 79812
View attachment 79813
View attachment 79815
View attachment 79816
View attachment 79817
View attachment 79818
Users who are viewing this thread
Total: 1 (members: 0, guests: 1)


