5thGenRams Forums

Register a free account today to become a member! Once signed in, you'll be able to participate on this site by adding your own topics and posts, as well as connect with other members through your own private inbox!

Door handle install

Ranger482

Active Member
Joined
Jan 12, 2019
Messages
127
Reaction score
113
Awesome, thanks for taking additional pics. Looks good.
I may look into the black handles vs the color match. Had that on my last truck.
I have the passive entry though and I"m not sure if that makes it more complicated or more expensive.
 

Glenn54

Well-Known Member
Joined
Apr 12, 2019
Messages
252
Reaction score
107
Location
Deep East Texas
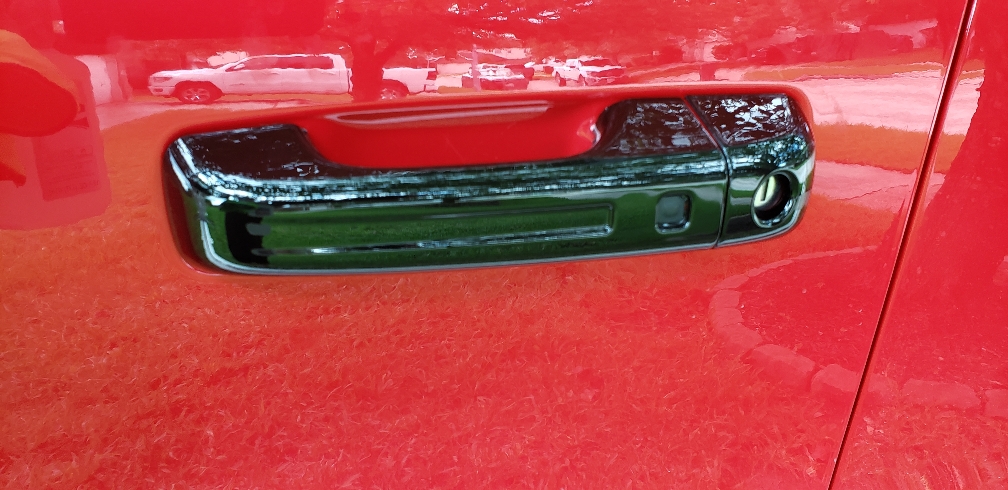
Is this a brush on or spray on Plastidip product? If it's brushed, I can't tell it. It looks good.

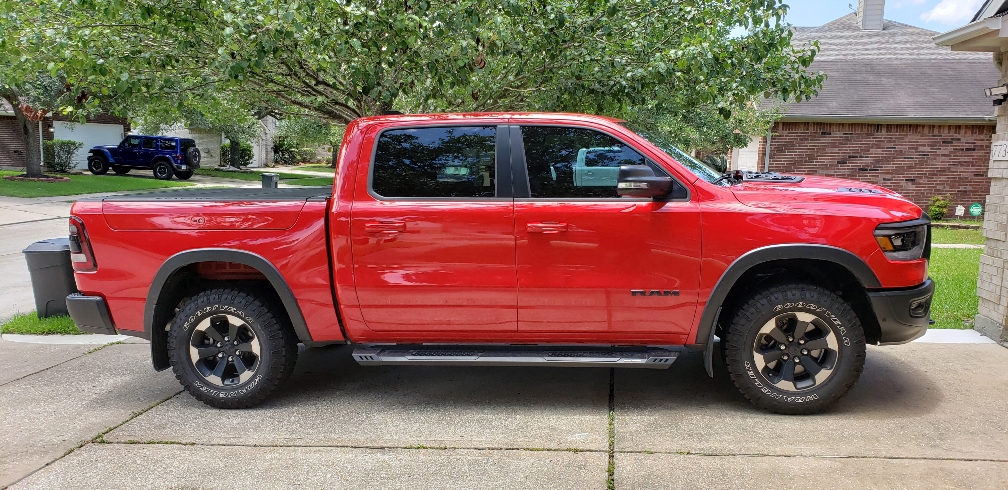
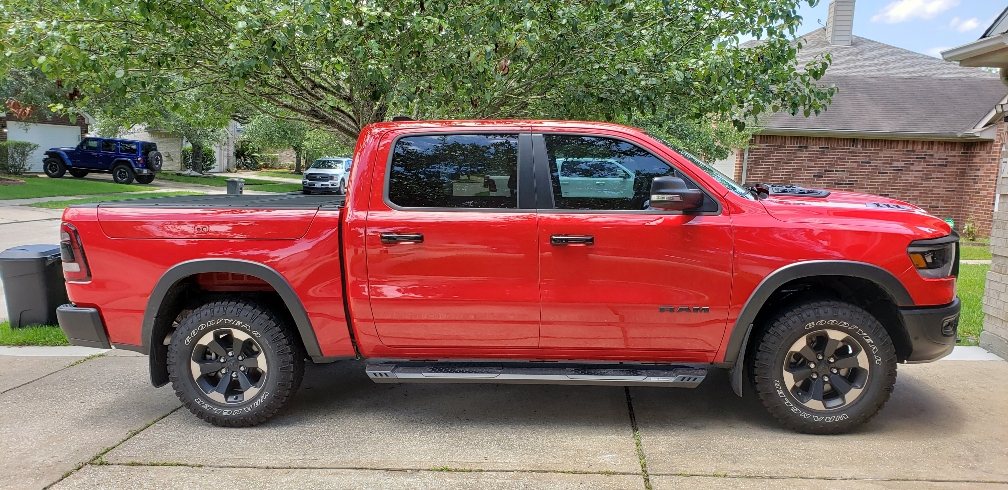
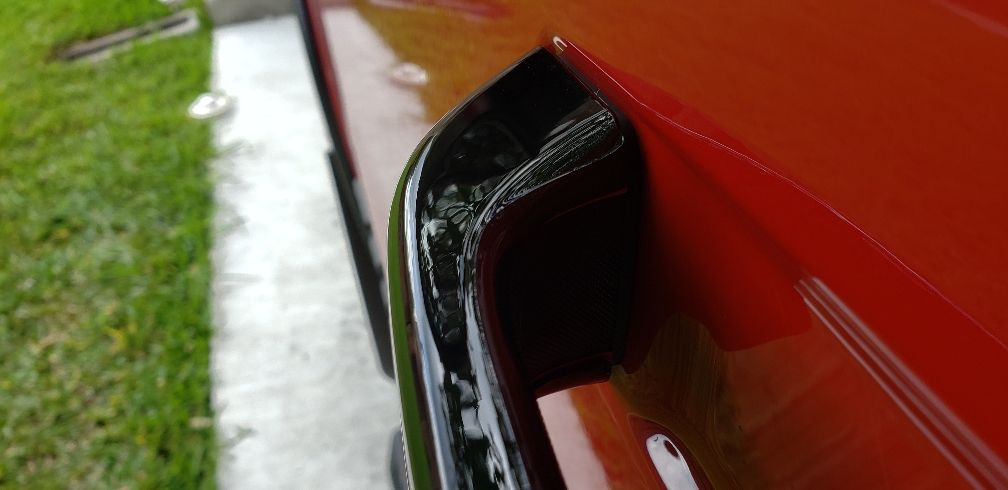
Just the inserts I will get a better picture for you all later. I was thinking about getting all black handles was quoted $55 for all 4 but I like the 2 tone look.

Sent from my SM-G965U using Tapatalk
 

brawler1588

Well-Known Member
Joined
Aug 28, 2019
Messages
217
Reaction score
163
Is this a brush on or spray on Plastidip product? If it's brushed, I can't tell it. It looks good.
It's a spray on I taped them off sprayed it and than peeled it since there is a gap between the chrome piece it peeled right off.

Sent from my SM-G965U using Tapatalk
 

Marky Mark

Active Member
Joined
Aug 11, 2019
Messages
113
Reaction score
58
Anyone want to change the chrome handle for body color?
Remove screw from both handles,
Separate and replace....done.
@cjfioren Any more info on the replacement how to. And part numbers for just the insert? I thought we had to buy whole handle. Thanks!
 

brawler1588

Well-Known Member
Joined
Aug 28, 2019
Messages
217
Reaction score
163
Looking to dechromed my longhorn too. too much chrome
Have you seen some of my other posts I dechromed my stuff. Let me know if you have and questions.

Sent from my SM-G965U using Tapatalk
 

yankeefan31569

Ram Guru
Joined
Apr 21, 2020
Messages
529
Reaction score
402
I jus ordered some layovers
 

Attachments

  • 81FF8997-9F5E-4149-856B-7F5C96E477AB.png
    81FF8997-9F5E-4149-856B-7F5C96E477AB.png
    250.3 KB · Views: 147

jvoid4

Active Member
Joined
Apr 18, 2020
Messages
48
Reaction score
22
Has anyone else removed the door handle?
I took the T9 screw out and popped that part of the handle up, however I didn't remove the whole thing. I don't know how the other side is attached, and didn't want to break it.
 

asylvest

Member
Joined
May 23, 2020
Messages
6
Reaction score
6
Has anyone else removed the door handle?
I took the T9 screw out and popped that part of the handle up, however I didn't remove the whole thing. I don't know how the other side is attached, and didn't want to break it.
Has anyone else removed the door handle?
I took the T9 screw out and popped that part of the handle up, however I didn't remove the whole thing. I don't know how the other side is attached, and didn't want to break it.

New to the site, but I joined specifically to contribute here, as I was frustrated that I couldn’t get this seemingly easy task accomplished. I’ve played with this for a few hours now, and the original poster is correct in that this can be accomplished simply by removing the T9 screw at the end (exposed when you pull the handle). The process is nearly identical for the front doors with proximity sensors and lock button (I’ll elaborate below). I bought x4 handle assemblies as others have pointed out above, because I could not figure out the part number for ONLY the handle cover. The body matched handles are one piece and do not have the insert. The chrome insert can be removed but not without breaking the insert itself, and the finish behind is such that you couldn’t just take the insert out and clean off the adhesive. There is an abundance of adhesive behind it and as a result you must pry too hard and the cheap plastic piece will break which eliminates the chances of painting it separately.

1) Pull the handle to expose and remove the T9 screw. I shoved a small microfiber towel between the handle and door to hold it in the pulled position.
2) With the handle pulled out and the screw removed, pull the cover out (pry with minimal force at both the top and bottom). The key is to minimize the outward travel once it “pops”, and to only pull from the rear of the handle
3) As others have noted, now the front part will become a pivot point, allowing the rear to pull outward, and you will be tempted to continue pulling and leveraging it out BUT DON’T. 4)There are two plastic tabs at the front end that are NOT made to be pried outward. I learned this through trial and error, and broke both tabs, but luckily I did this on the covers I was replacing so I didn’t care. Rather than using force and breaking these tabs, I would practice taking it off correctly so you get a feel for how it will go back on. With the handle released in (I took my towel out), you will need to pull out on the handle every-so-slightly (10-20% of the way) and slide the handle toward the front of the truck. It takes more force than you would expect, and the angle is such that it may feel like you are pushing the cover into the truck door but the tabs are only 1mm long and it doesn’t have to travel forward very far before it comes off
5) The sensor itself is fully housed and will hang by the wires once the cover is off. Once you have removed your new cover from the handle assembly you purchased, you can play around with the fit of the sensor before putting it on. The square-looking button must face out, and at the end there literally a square peg that fits into the square hole of the cover. A retention spring on the sensor will hold it loosely in place.
6)To put the new one on, you have to start by sliding the front side on. This was the part I couldn’t figure out for a while, because you have to get it overlayed just right, with maybe 10% overhanging to the front, and there isn’t a natural way for it to slide on. Instead the plastic on the front part of the cover needs to wiggled and bent slightly so the tabs can slide in. This will make more sense when you experience it first hand. Again, it slides on, but with the handle slightly pulled and open
7) once the tabs are slid into place and the cover is all the way back, release the handle, and snap the rear into place. Then pull the handle and put the T9 screw back. You are done!

Tips: leave the back part of the door handle (where the key goes on the driver door) alone. Also, you will see another T4 screw behind the handle that goes into the door. You may think this needs to be removed, it doesn’t, leave it alone
 

Attachments

  • 5DC7A90F-2BB1-4988-8B27-14FA7F92ECE9.jpeg
    5DC7A90F-2BB1-4988-8B27-14FA7F92ECE9.jpeg
    105.5 KB · Views: 193
  • 00D8EDAB-8F23-4A58-A5D7-FC92305C2D49.jpeg
    00D8EDAB-8F23-4A58-A5D7-FC92305C2D49.jpeg
    89.9 KB · Views: 189
  • 88D44D54-5C52-4DF2-9F02-56427FF8846C.jpeg
    88D44D54-5C52-4DF2-9F02-56427FF8846C.jpeg
    118.1 KB · Views: 191

jvoid4

Active Member
Joined
Apr 18, 2020
Messages
48
Reaction score
22
New to the site, but I joined specifically to contribute here, as I was frustrated that I couldn’t get this seemingly easy task accomplished. I’ve played with this for a few hours now, and the original poster is correct in that this can be accomplished simply by removing the T9 screw at the end (exposed when you pull the handle). The process is nearly identical for the front doors with proximity sensors and lock button (I’ll elaborate below). I bought x4 handle assemblies as others have pointed out above, because I could not figure out the part number for ONLY the handle cover. The body matched handles are one piece and do not have the insert. The chrome insert can be removed but not without breaking the insert itself, and the finish behind is such that you couldn’t just take the insert out and clean off the adhesive. There is an abundance of adhesive behind it and as a result you must pry too hard and the cheap plastic piece will break which eliminates the chances of painting it separately.

1) Pull the handle to expose and remove the T9 screw. I shoved a small microfiber towel between the handle and door to hold it in the pulled position.
2) With the handle pulled out and the screw removed, pull the cover out (pry with minimal force at both the top and bottom). The key is to minimize the outward travel once it “pops”, and to only pull from the rear of the handle
3) As others have noted, now the front part will become a pivot point, allowing the rear to pull outward, and you will be tempted to continue pulling and leveraging it out BUT DON’T. 4)There are two plastic tabs at the front end that are NOT made to be pried outward. I learned this through trial and error, and broke both tabs, but luckily I did this on the covers I was replacing so I didn’t care. Rather than using force and breaking these tabs, I would practice taking it off correctly so you get a feel for how it will go back on. With the handle released in (I took my towel out), you will need to pull out on the handle every-so-slightly (10-20% of the way) and slide the handle toward the front of the truck. It takes more force than you would expect, and the angle is such that it may feel like you are pushing the cover into the truck door but the tabs are only 1mm long and it doesn’t have to travel forward very far before it comes off
5) The sensor itself is fully housed and will hang by the wires once the cover is off. Once you have removed your new cover from the handle assembly you purchased, you can play around with the fit of the sensor before putting it on. The square-looking button must face out, and at the end there literally a square peg that fits into the square hole of the cover. A retention spring on the sensor will hold it loosely in place.
6)To put the new one on, you have to start by sliding the front side on. This was the part I couldn’t figure out for a while, because you have to get it overlayed just right, with maybe 10% overhanging to the front, and there isn’t a natural way for it to slide on. Instead the plastic on the front part of the cover needs to wiggled and bent slightly so the tabs can slide in. This will make more sense when you experience it first hand. Again, it slides on, but with the handle slightly pulled and open
7) once the tabs are slid into place and the cover is all the way back, release the handle, and snap the rear into place. Then pull the handle and put the T9 screw back. You are done!

Tips: leave the back part of the door handle (where the key goes on the driver door) alone. Also, you will see another T4 screw behind the handle that goes into the door. You may think this needs to be removed, it doesn’t, leave it alone
Great write up! I went with just the the covers for now. I want the whole door handle black. Which means removing the part where the key hole is. If I don't like the covers, I may go down this road.

Sent from my SM-G965U using Tapatalk
 

asylvest

Member
Joined
May 23, 2020
Messages
6
Reaction score
6
Thanks jvoid4! Let us know how the aftermarket covers work out. As I was playing around with this, did remove the back piece as well (part where the key hole is). I can’t seem to find part numbers for that piece for anyone that would want to replace them but maybe someone will have better luck searching than I have.

When you pull the handle out, it exposes a plastic retaining tab that is holding the back piece on. You don’t have much room to press this down because the handle itself gets in the way. Typically I would use a plastic tool to pry, but with the limited amount of room none of my pry tools were strong enough to apply the needed amount of force without bending... So I had to use a small flat head screwdriver, came in from the bottom, then twisted it to apply force. Again, you can’t push inward from the side because the handle is in the way.

Like the OEM handle covers, with this tab pushed in, the next step in removing the back/key hole cover Is to slide the cover (do not pull or pry). Only this time you slide it to the rear of the vehicle. Putting it back on requires the 90/10 overlap you use on the front, but in reverse, as you will slide it forward to put it back on. This piece has similar alignment tabs that must be lined up before sliding, with the plastic cover flush/perpendicular to door.

Word of caution to anyone that finds the part number and wants to replace these back pieces vs throwing on an aftermarket overlay... looking at the design here, yet another instance where removal has a 50/50 chance of damage. This time you are most likely to break the parts that remain on the truck, not the part you are replacing (I would guess the retention tab you have to push back REALLY FIRMLY will break easily). The tab is part of plastic backing plate and the entire assembly is held on from inside the door (you would have to remove outer door panels, the window, and inner door panels to access it and replace it. With the use of this plastic tab, it is easy to put the piece back on, but hard to remove, and it didn’t “feel” like it was meant to be removed. I’d liken the experience to using Christmas Tree type fasteners. Quick and easy to put on, holds strong, but feels like it isn’t made to come off without causing damage. Hope that all makes sense and helps anyone wanting to try.

Not saying it can’t be done, or that you couldn’t glue the broken retention piece if you snapped it, but this is high risk. My curiosity got the best of me, so I tried, but i got lucky I didn’t break anything.

If you are just getting rid of chrome, this isn’t needed, but if you want a complete color swap I’d avoid this hassle and use aftermarket overlays.
 
Last edited:

jvoid4

Active Member
Joined
Apr 18, 2020
Messages
48
Reaction score
22
Thanks jvoid4! Let us know how the aftermarket covers work out. As I was playing around with this, did remove the back piece as well (part where the key hole is). I can’t seem to find part numbers for that piece for anyone that would want to replace them but maybe someone will have better luck searching than I have.

When you pull the handle out, it exposes a plastic retaining tab that is holding the back piece on. You don’t have much room to press this down because the handle itself gets in the way. Typically I would use a plastic tool to pry, but with the limited amount of room none of my pry tools were strong enough to apply the needed amount of force without bending... So I had to use a small flat head screwdriver, came in from the bottom, then twisted it to apply force. Again, you can’t push inward from the side because the handle is in the way.

Like the OEM handle covers, with this tab pushed in, the next step in removing the back/key hole cover Is to slide the cover (do not pull or pry). Only this time you slide it to the rear of the vehicle. Putting it back on requires the 90/10 overlap you use on the front, but in reverse, as you will slide it forward to put it back on. This piece has similar alignment tabs that must be lined up before sliding, with the plastic cover flush/perpendicular to door.

Word of caution to anyone that finds the part number and wants to replace these back pieces vs throwing on an aftermarket overlay... looking at the design here, yet another instance where removal has a 50/50 chance of damage. This time you are most likely to break the parts that remain on the truck, not the part you are replacing (I would guess the retention tab you have to push back REALLY FIRMLY will break easily). The tab is part of plastic backing plate and the entire assembly is held on from inside the door (you would have to remove outer door panels, the window, and inner door panels to access it and replace it. With the use of this plastic tab, it is easy to put the piece back on, but hard to remove, and it didn’t “feel” like it was meant to be removed. I’d liken the experience to using Christmas Tree type fasteners. Quick and easy to put on, holds strong, but feels like it isn’t made to come off without causing damage. Hope that all makes sense and helps anyone wanting to try.

Not saying it can’t be done, or that you couldn’t glue the broken retention piece if you snapped it, but this is high risk. My curiosity got the best of me, so I tried, but i got lucky I didn’t break anything.

If you are just getting rid of chrome, this isn’t needed, but if you want a complete color swap I’d avoid this hassle and use aftermarket overlays.
Again great job! I was wondering if the OEM handles were that hard to get off on the key side. I don't think I would want to take that chance. As you said 50/50 is not good enough chances for me. I don't want to break anything on a $60k truck. Lol

As soon as I get the covers I'll post some pics.

Sent from my SM-G965U using Tapatalk
 

jvoid4

Active Member
Joined
Apr 18, 2020
Messages
48
Reaction score
22
I got them installed a few days ago. I did have to cut out a little black vinyl to go around the lock buttons, because the openings are a little off.
54b8fbd1ae823846053c5c509c1764a4.jpg
e6a86e480fa1db6fdf35d11492f79efb.jpg
e096557a97c54c01a904fa9b8af66b09.jpg
f74ab923a91ca032f6fd3294678e99a9.jpg


Sent from my SM-G965U using Tapatalk
 

asylvest

Member
Joined
May 23, 2020
Messages
6
Reaction score
6
Those look great, and I am a big fan of the black on red. Nicely done and thanks for posting the pictures
 

asylvest

Member
Joined
May 23, 2020
Messages
6
Reaction score
6
Some folks on this thread have masked it off and painted the chrome insert. I swapped out the handle covers with color-matched OEM handles and jvoid4 used aftermarket layovers. If you look above I have a picture of the handle on the door, after I pried the chrome insert off. It has to be masked & painted/plastidipped as there is too much adhesive behind the insert to remove it without damaging it.
 

yankeefan31569

Ram Guru
Joined
Apr 21, 2020
Messages
529
Reaction score
402
Overlays...
 

Attachments

  • D04EED07-9F5A-410C-8CD8-EB1A4B61BC96.jpeg
    D04EED07-9F5A-410C-8CD8-EB1A4B61BC96.jpeg
    260.1 KB · Views: 110
  • 257AAF8D-D84C-4704-AA52-85EFF0E02473.jpeg
    257AAF8D-D84C-4704-AA52-85EFF0E02473.jpeg
    240.8 KB · Views: 116
  • 0410D717-9BFB-4BEC-BFAD-F3844E51B621.png
    0410D717-9BFB-4BEC-BFAD-F3844E51B621.png
    234.4 KB · Views: 120

KINGOFVA

Member
Joined
Jul 14, 2020
Messages
10
Reaction score
0
Anyone want to change the chrome handle for body color?
Remove screw from both handles,
Separate and replace....done.
My Chrome insert fell off. Ram will not replace even though truck is under warranty. I can't find a new insert online anywhere. Does anyone have a clue where to find?
 

Triton2k3

Active Member
Joined
May 31, 2021
Messages
35
Reaction score
4
Anyone want to change the chrome handle for body color?
Remove screw from both handles,
Separate and replace....done.
How easy did the shell separate from the handle? Did you have to pry it?
 

Users who are viewing this thread

Top