clazer
Well-Known Member
- Joined
- Feb 21, 2019
- Messages
- 297
- Reaction score
- 210
- Points
- 43
- Age
- 40
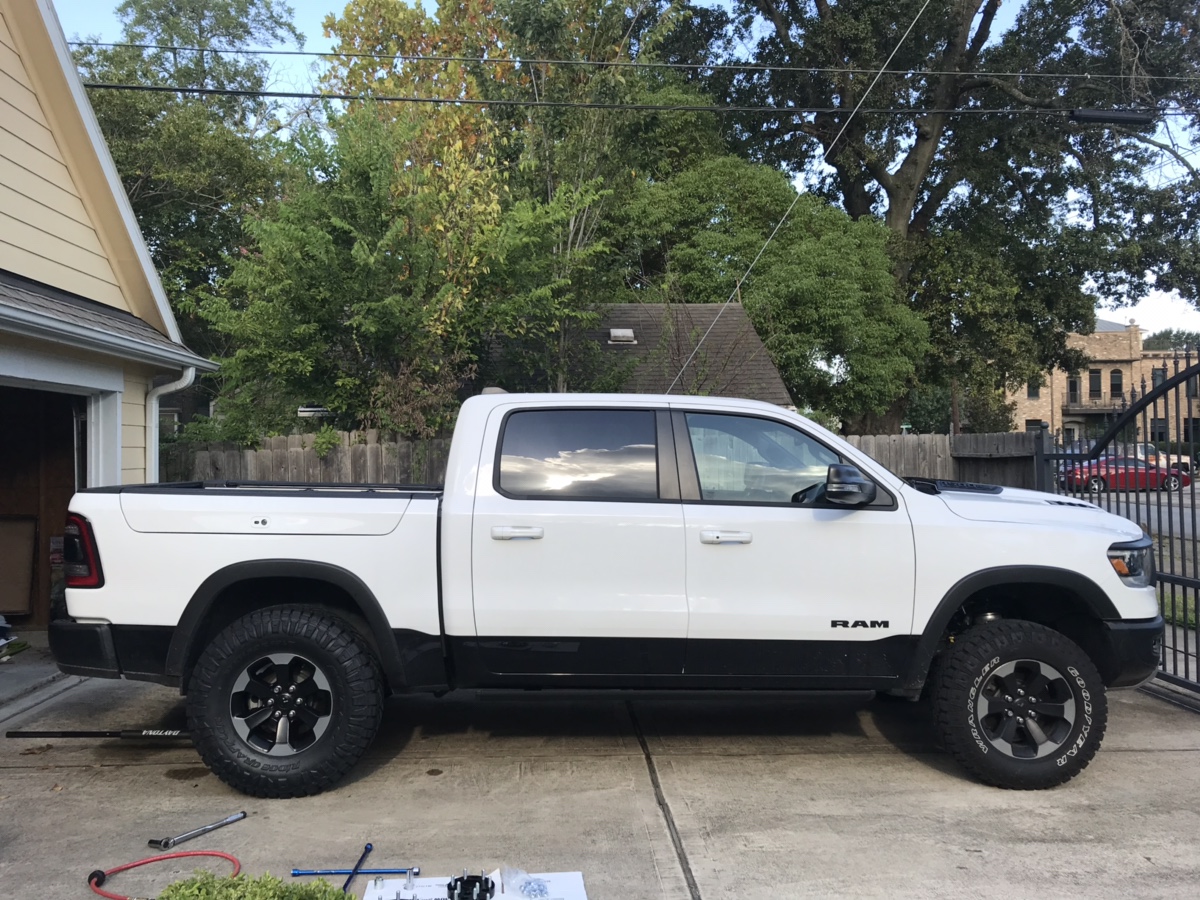
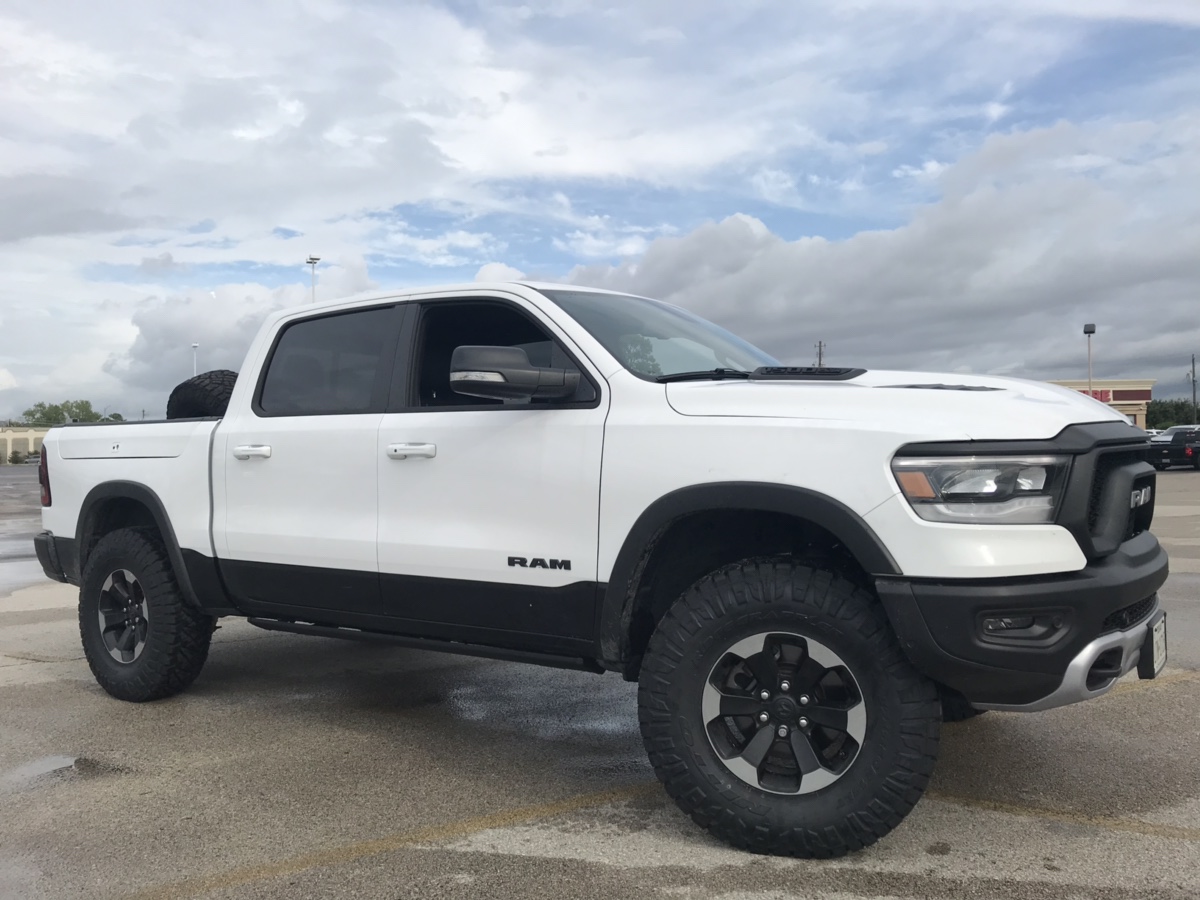
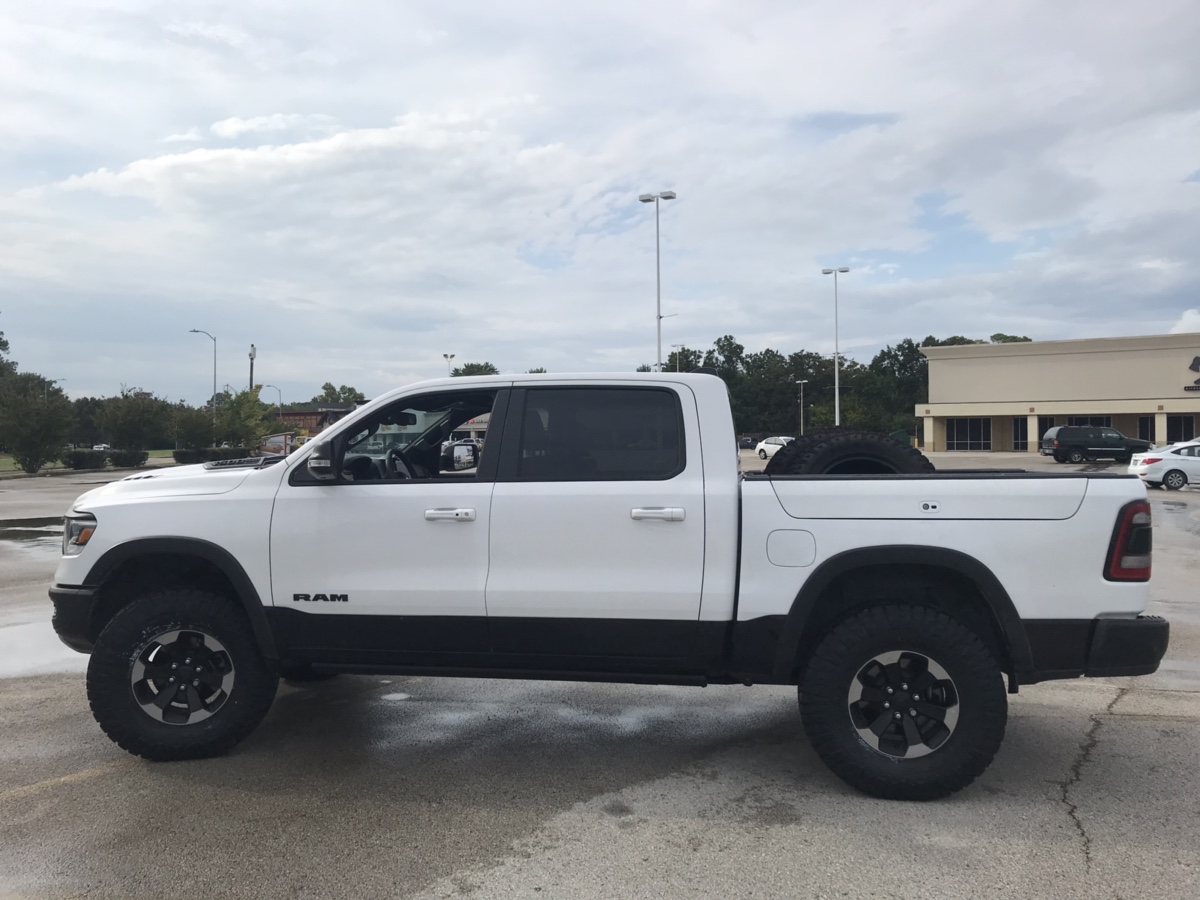
First, big shout out to DieselDak and a bunch of other people in this forum for all of the great info on leveling the Rebel air suspension. Once I saw that 37s could fit on my air ride Rebel, I’ve been working on how to make it happen.
To complicate it a little more, my parking garage has a clearance of 83”/6’11”, so I’ve also been toying with how to not hit the crossbars.
Here’s my general walkthrough with a few pictures and a bunch of measurements. Hope it’s helpful for anyone else interested in lifting their air suspension fifth gen.
Stock measurements to fender over wheel center (front/rear):
Off-road 39.5”/41.5”
Normal 38.5”/40.5”
Aero 38”/39.75”
Entry 35.5”/37.75”
Fin is 79” high in normal, about 2.5” above roof line. 80” in off-road.
At this point, mark a spot on your garage door that shows where your headlights shine before the level. Makes it a lot easier. I backed to the end of the driveway and used masking take on the garage door.
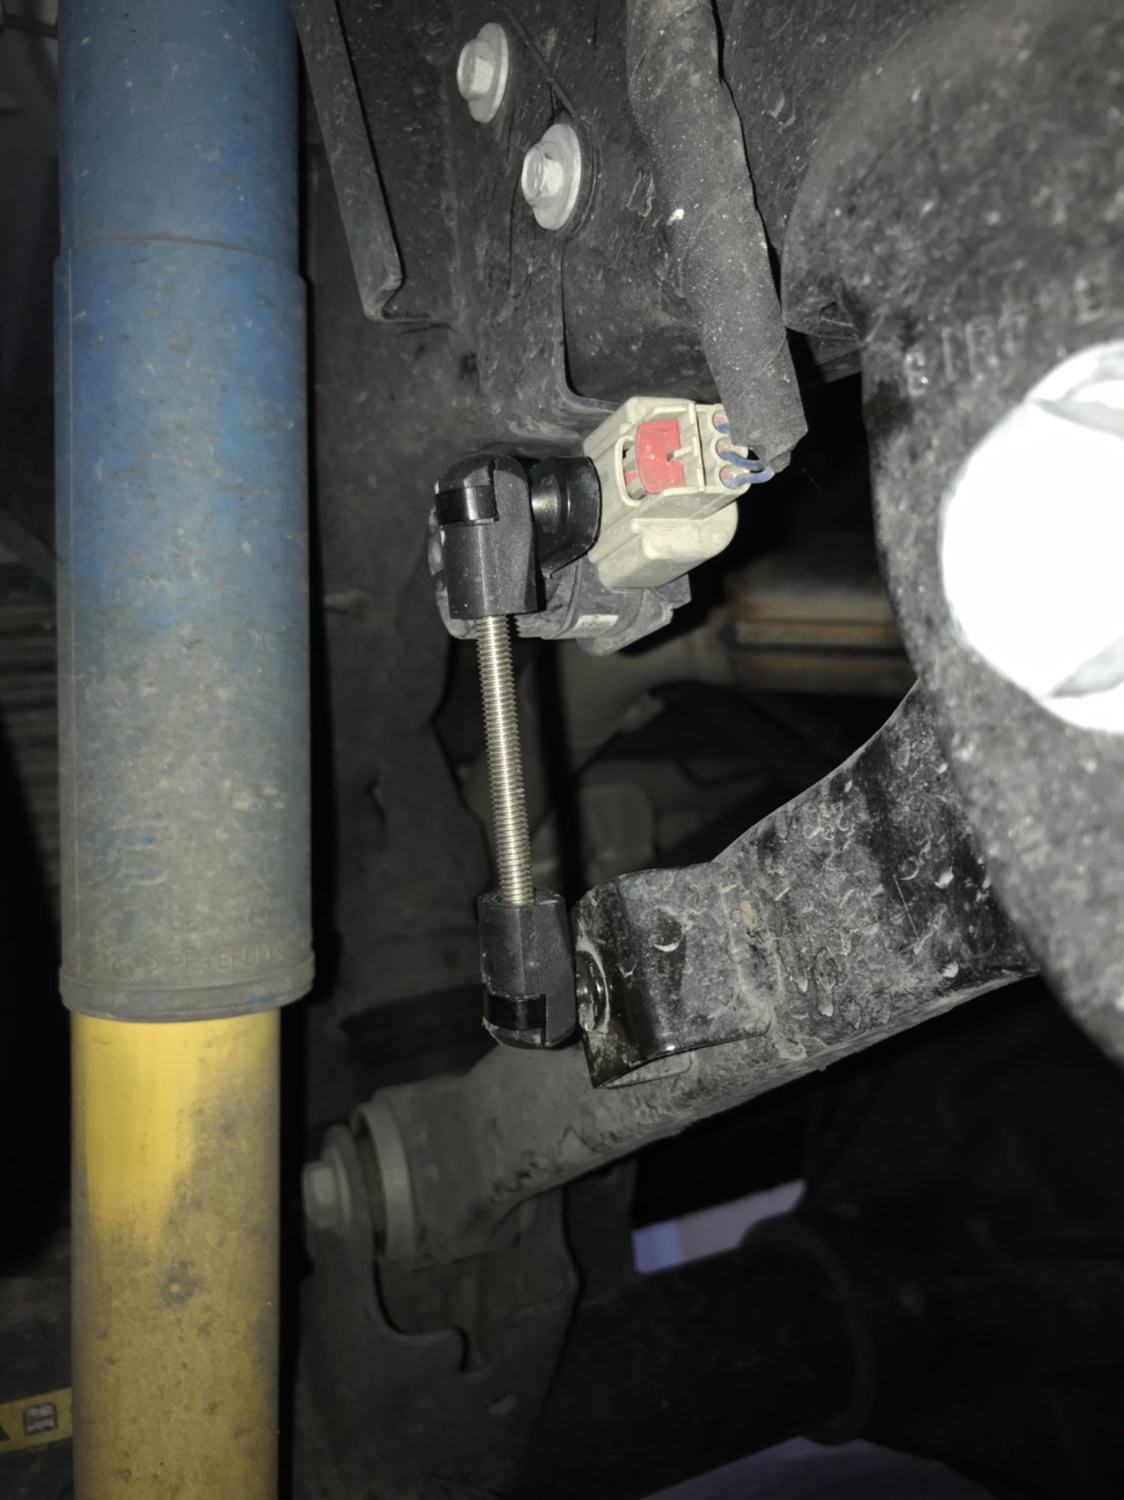
Step 1: make the air ride links from some ball sockets ordered online and some all-thread rod (M6x1.0 stainless). I’ll post up the link once I find it. I’d recommend ordering some spare ball socket ends (they are super cheap) in case you break one of them during adjustment. I found it easiest to use two eyeglasses sized small flat bit screwdrivers to move the retaining clip. I always remove the solid end first (not attached to the sensor) to minimize risk of damaging the sensor.
Front link can be seen on the right (shorter makes your truck taller)
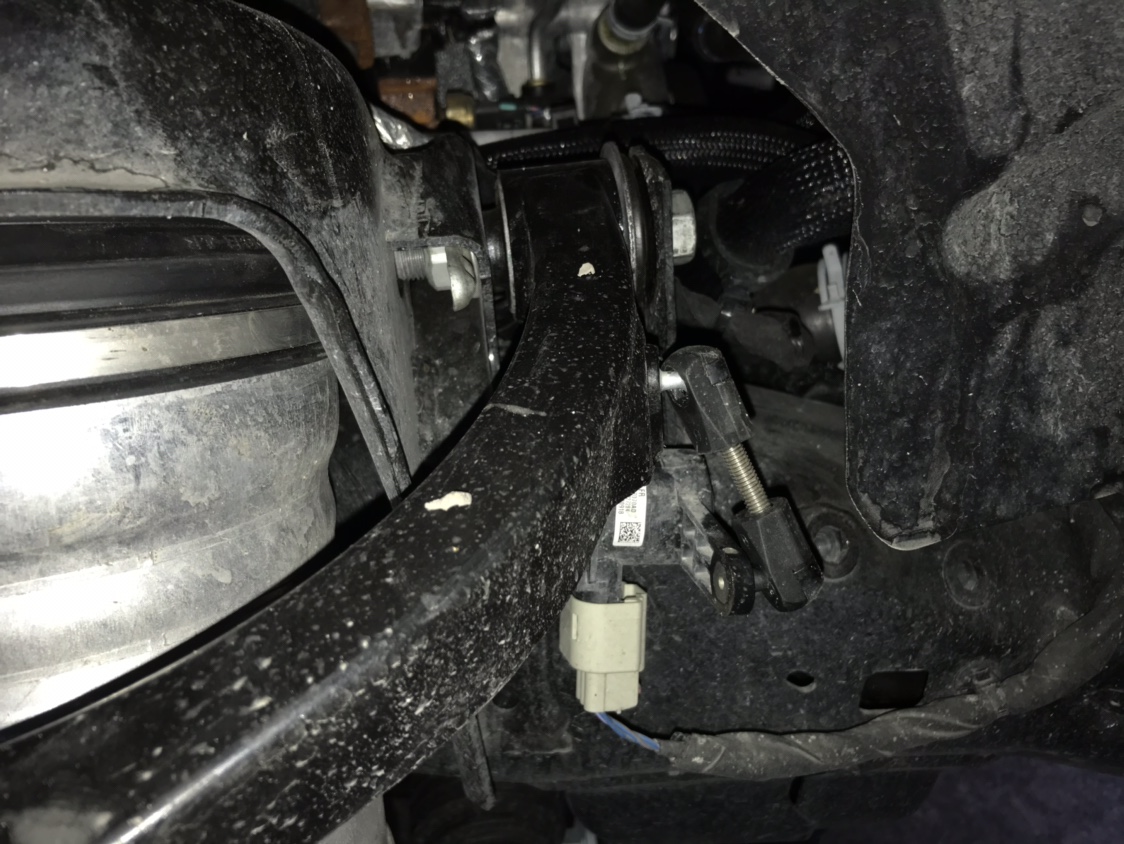
Rear link (longer makes your truck taller)

 www.liftsupportsdepot.com
All in, I think it was $30. Leveled the truck like this but the ride was awful with the airbags completely full, even in aero mode.
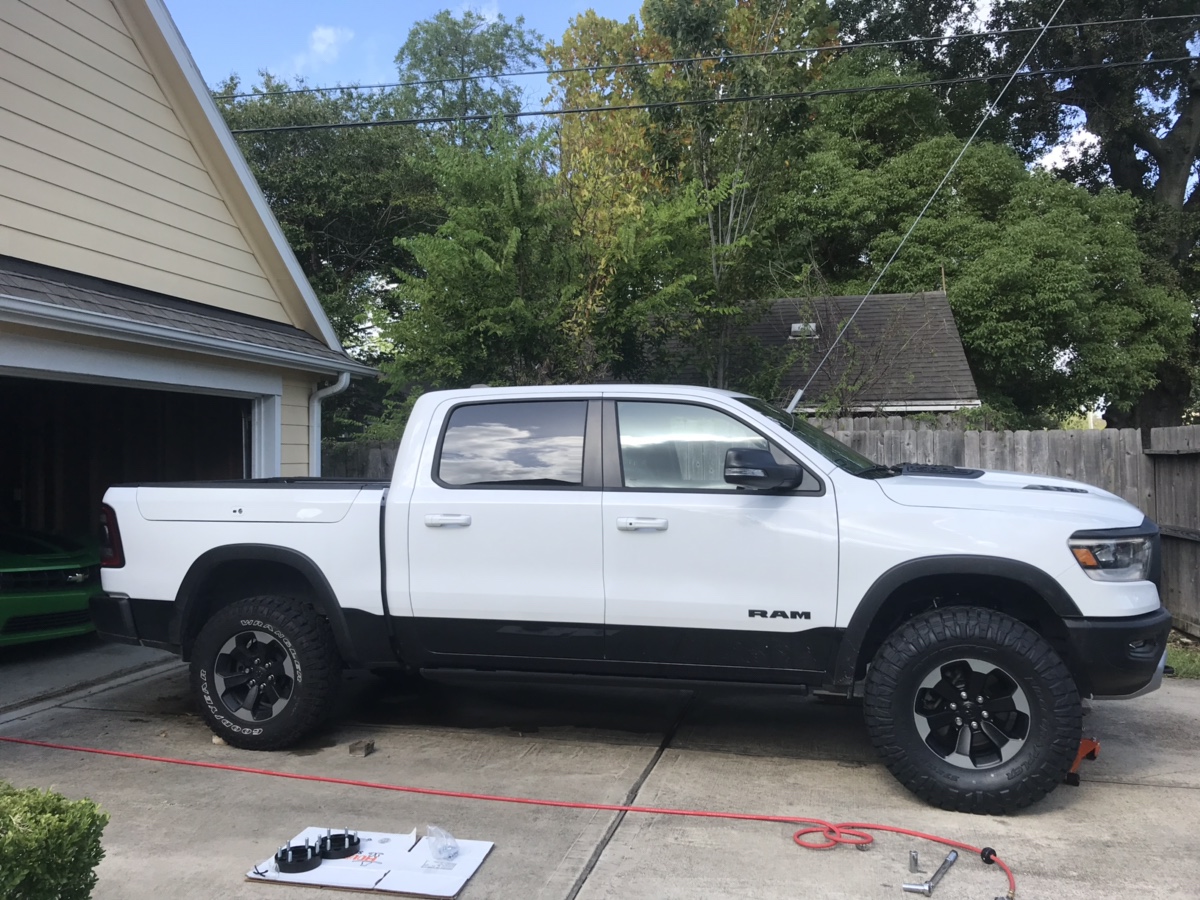
Step 2: install Daystar leveling kit (KC09139BK for front and rear, only used the front) and Mopar 2” Lift Upper Control Arms (68323530AA and 68323531AA). There’s much debate over the arms, but it was $130 so I bought them.
Called around and had a wide variety answers. Dealers said they would install for $1000 or higher. I found a shop that installed plus aligned the truck for $350.
$350 labor+ $125 Daystar +$120 UCA = $595 for this step.
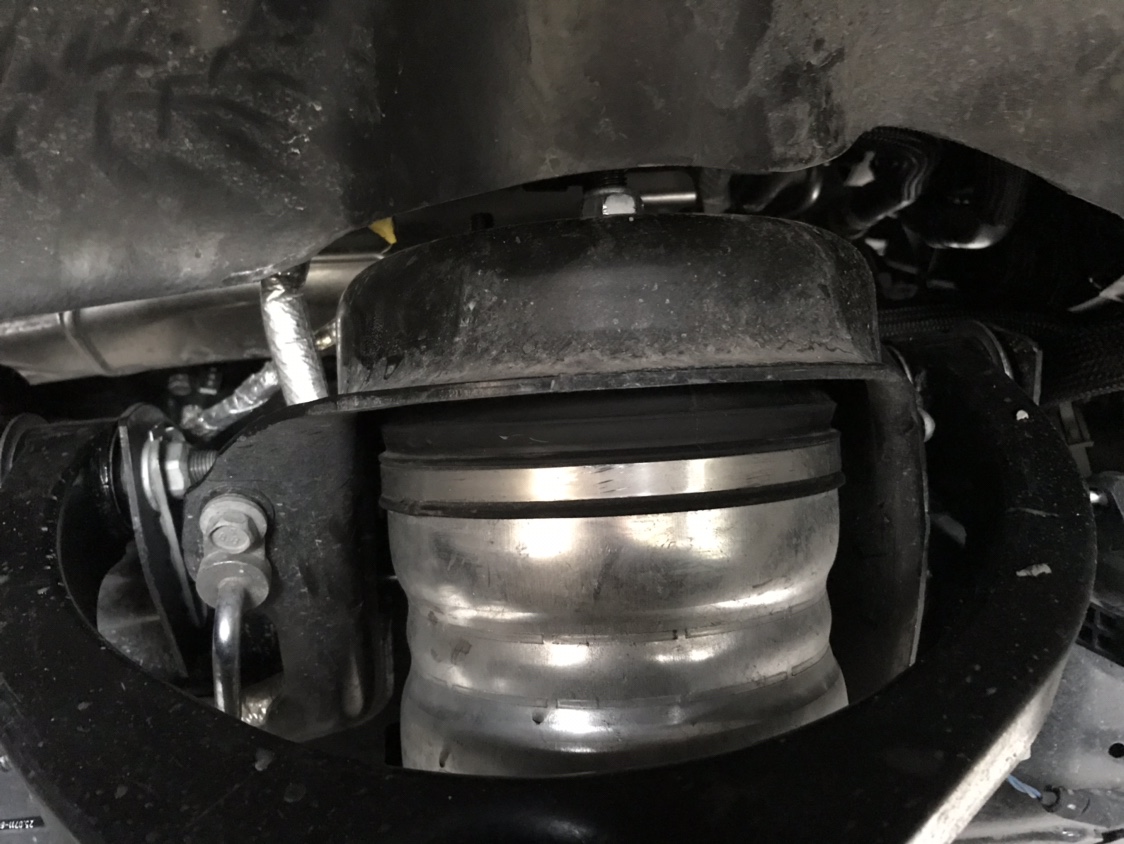
Air bags with the spacer pucks mounted on top
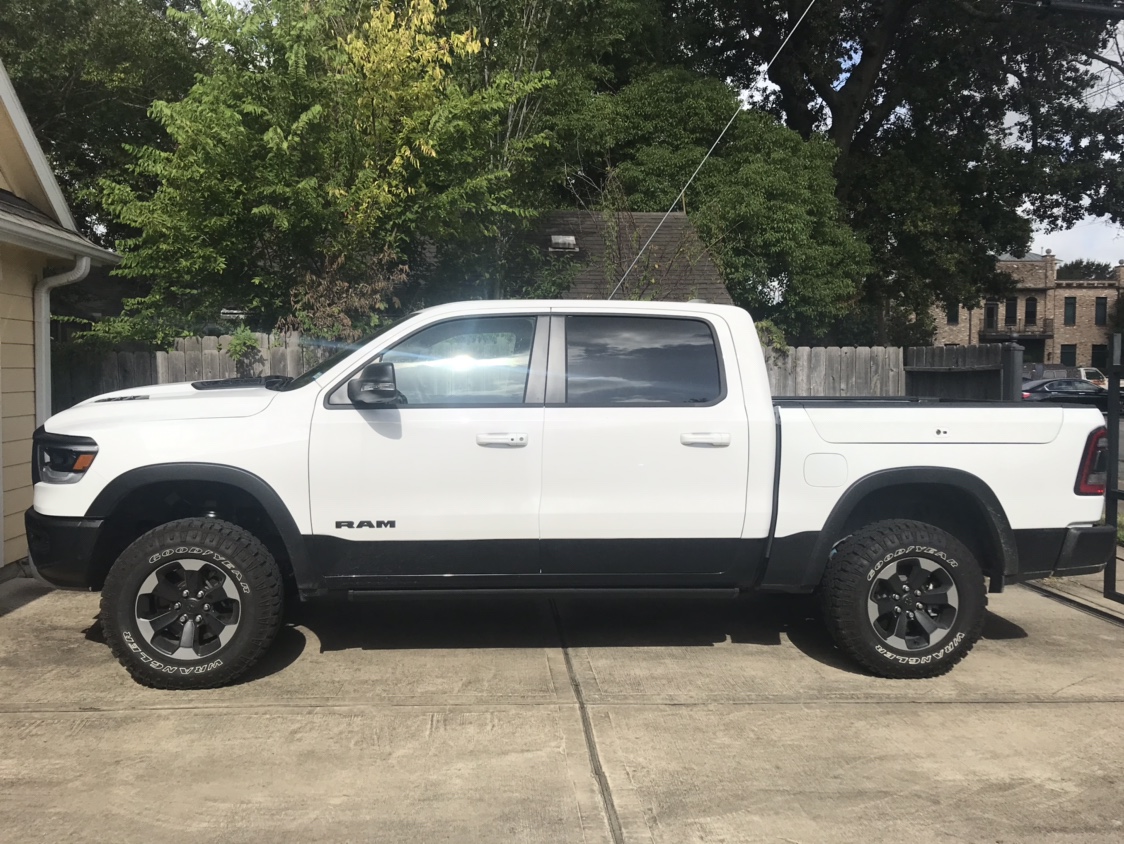
I tweaked the height a little more and here are the final measurements. It drives really close to stock.
New measurements with level and factory tires:
Aero 40.125” front and rear
Normal 40.5” front 41.25” rear (may raise the nose a little more)
80” fin in normal 79” in aero
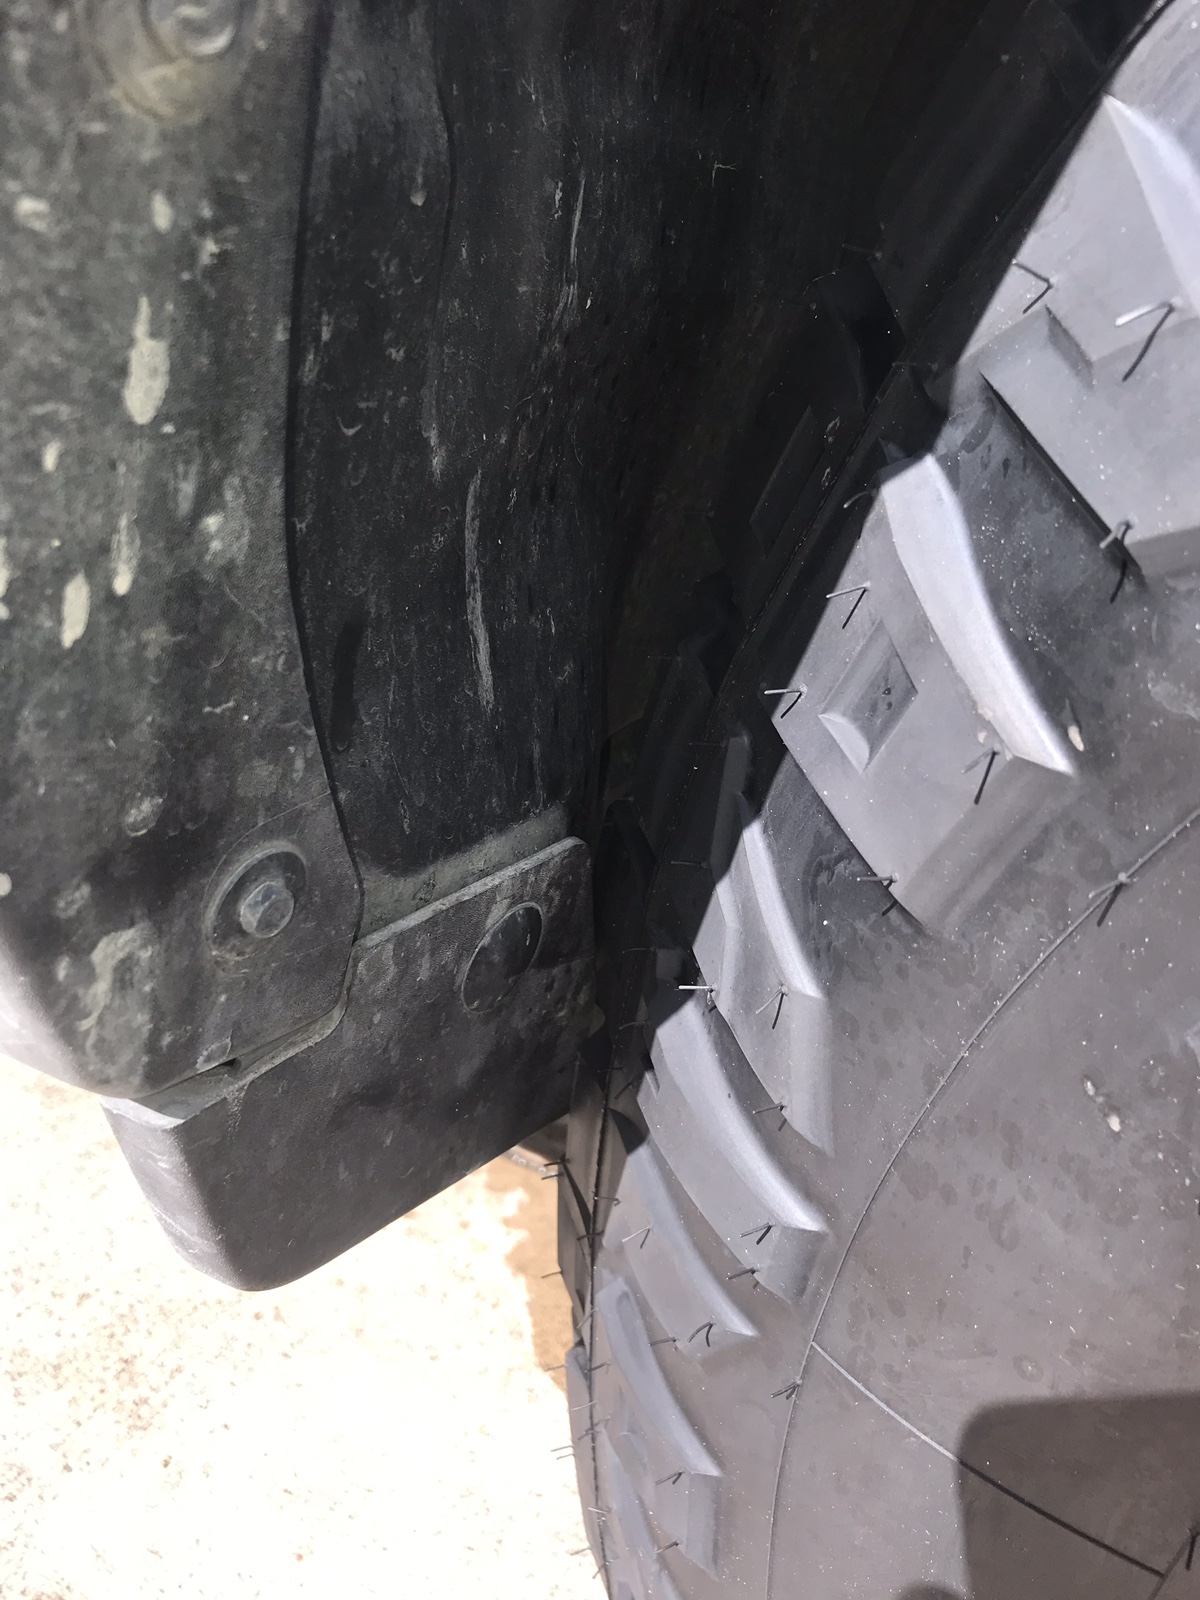
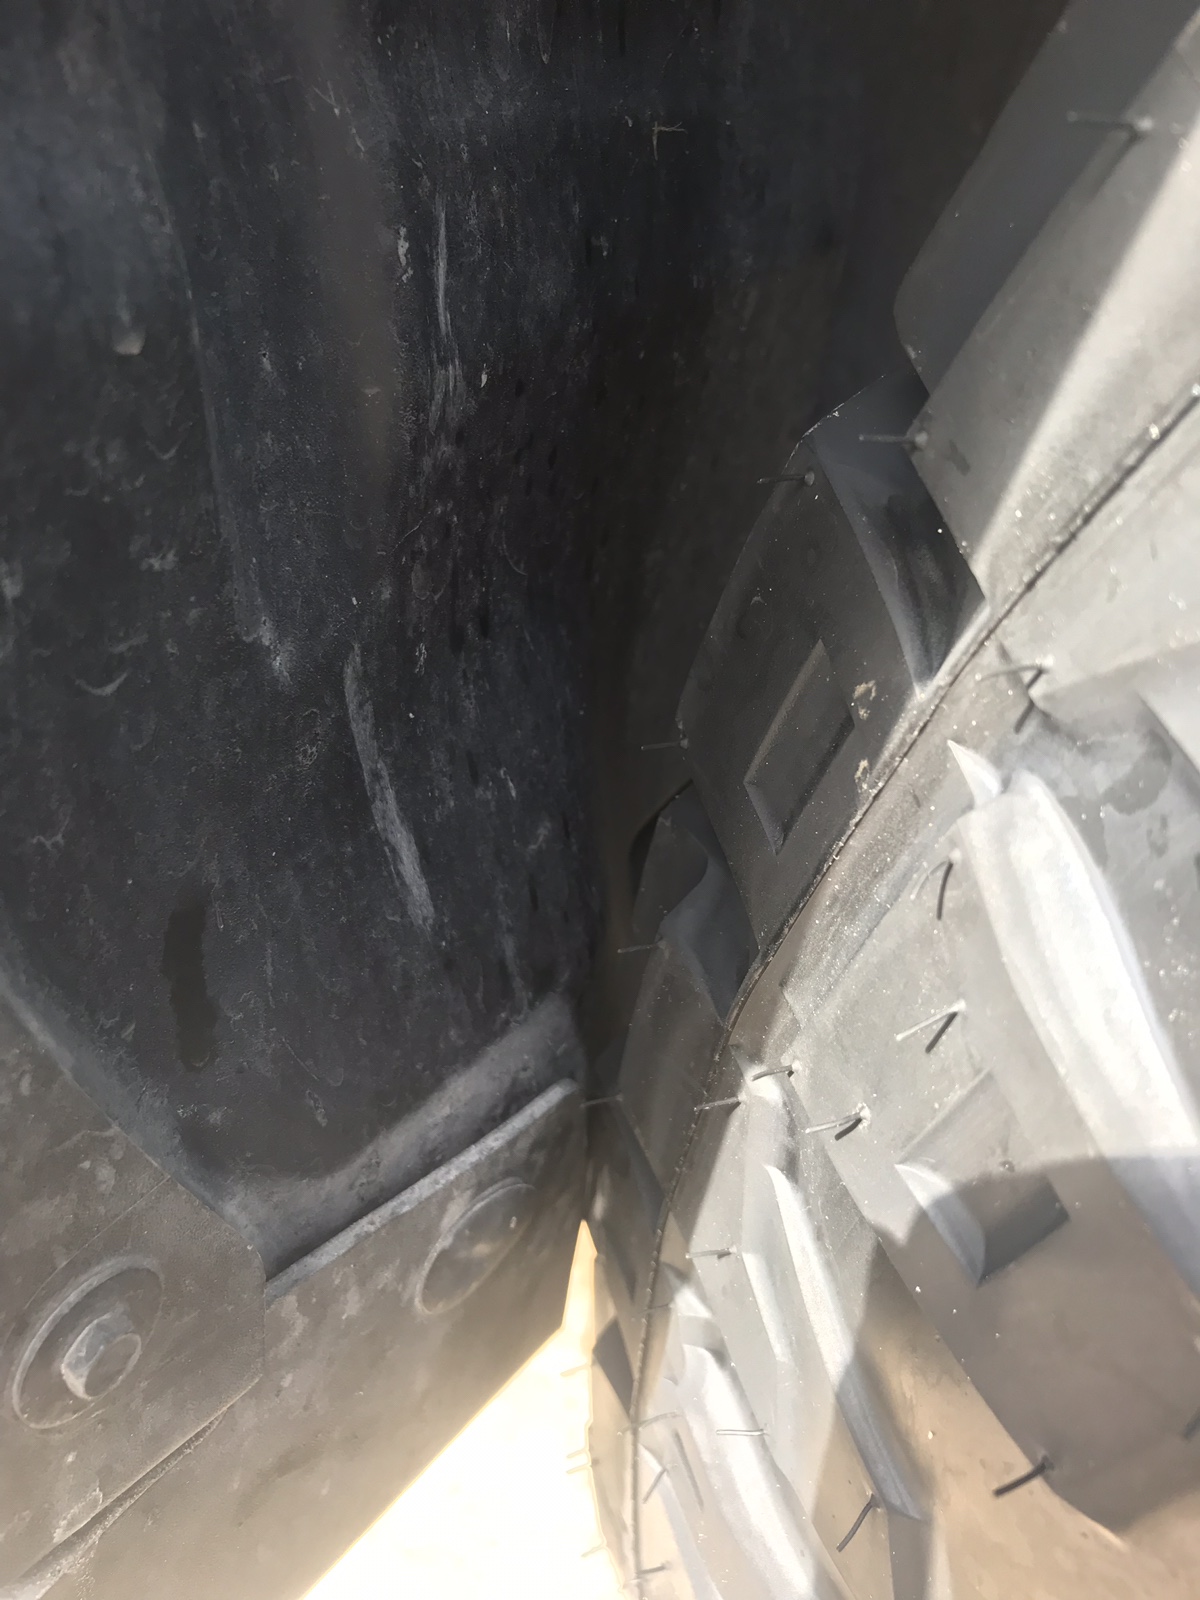
Drove the truck to work and wow is it close to the parking garage cross beams. So close that I opted for an experiment. A little bit of tape and a laminated piece of cardstock and I made a feeler 2” taller than the fin. It definitely hits, so going straight to 37s isn’t an option with the shark fin antenna there.
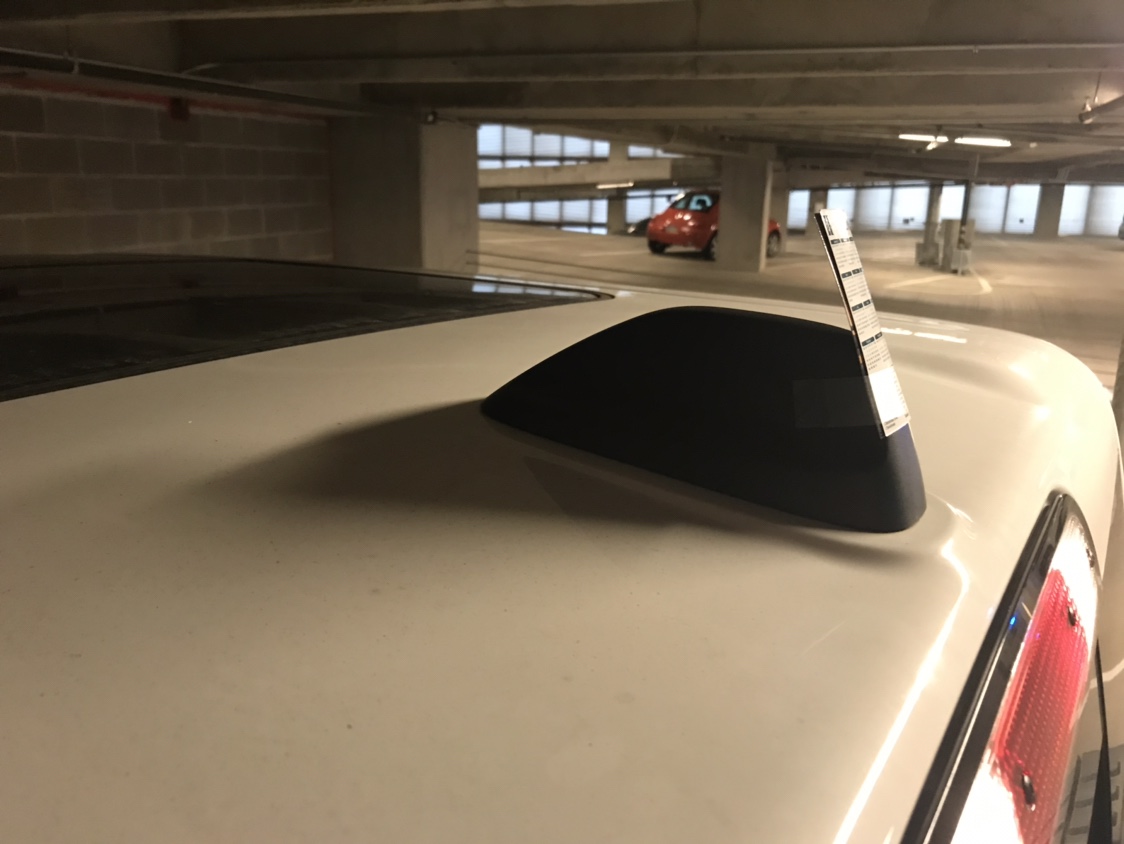
Now I’m researching switching to the Puck style antenna with a cell antenna delete. Some folks are saying that they still get (weaker) cell signal by plugging in the delete connector on the roof end of the wire. More to come. Let me know if anyone knows about replacing or relocating the shark fin antenna.
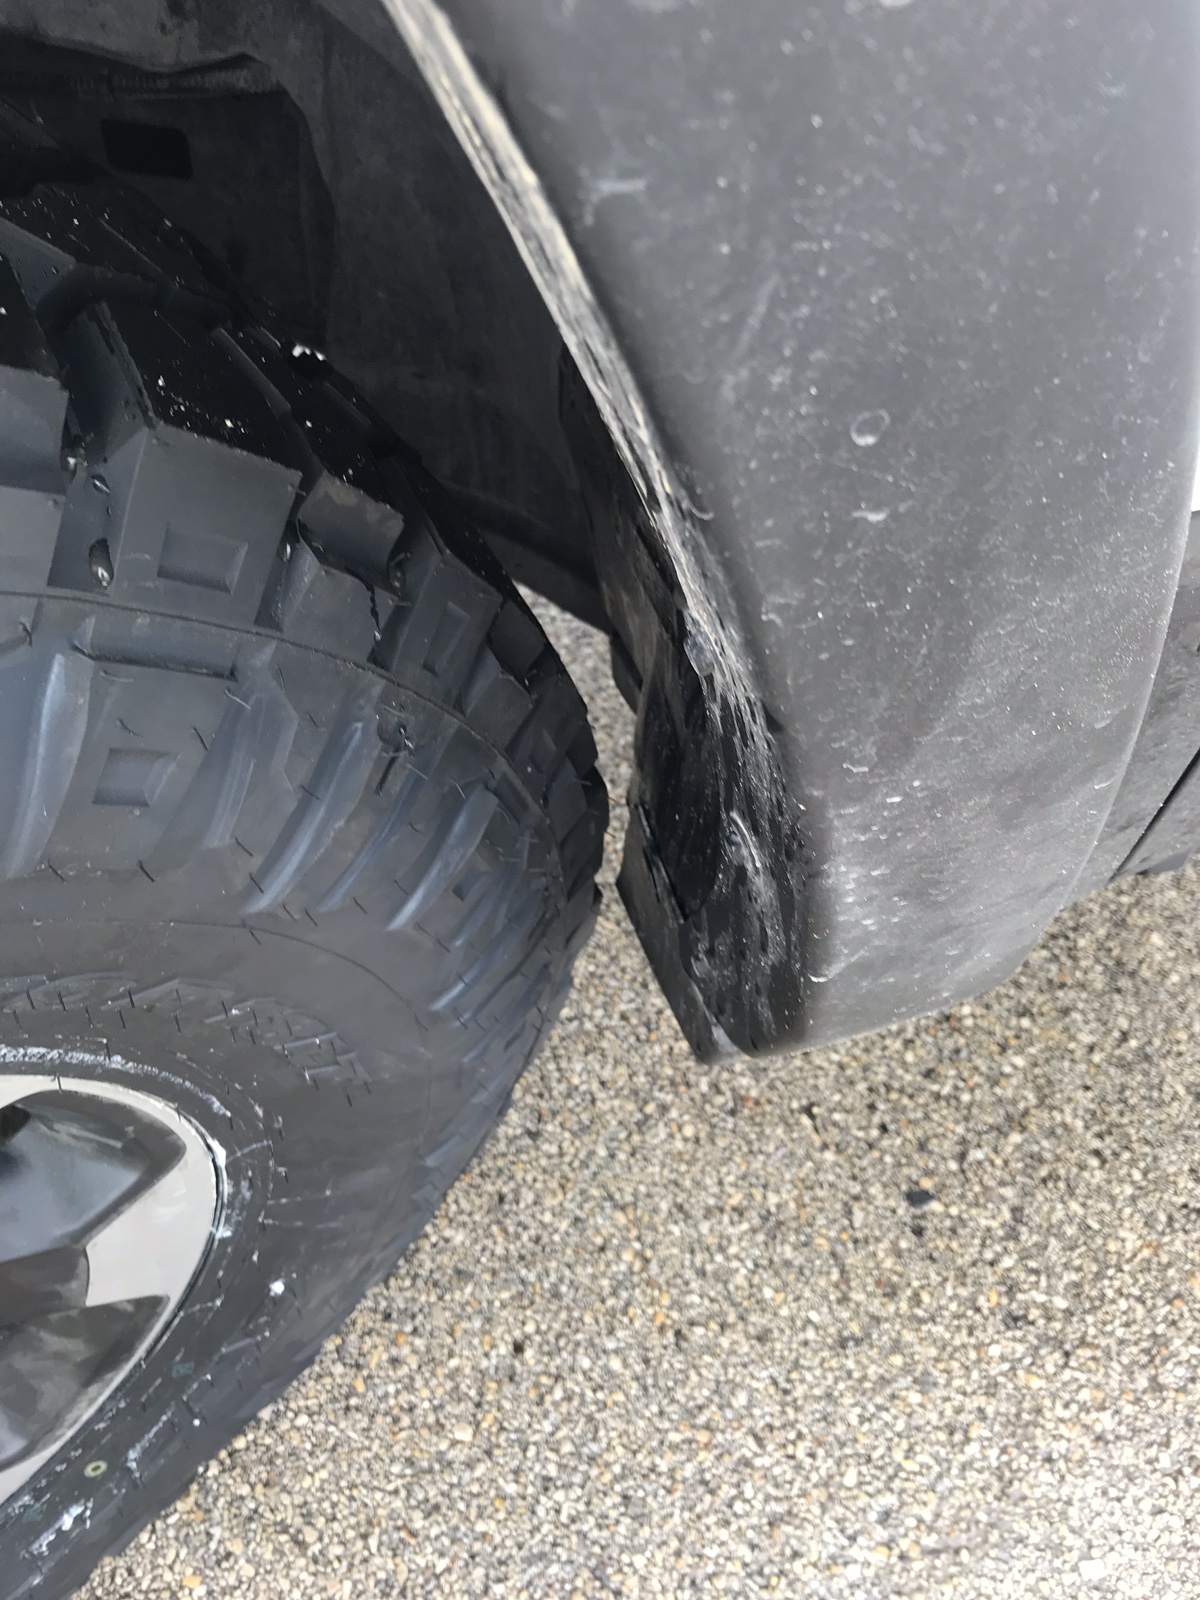
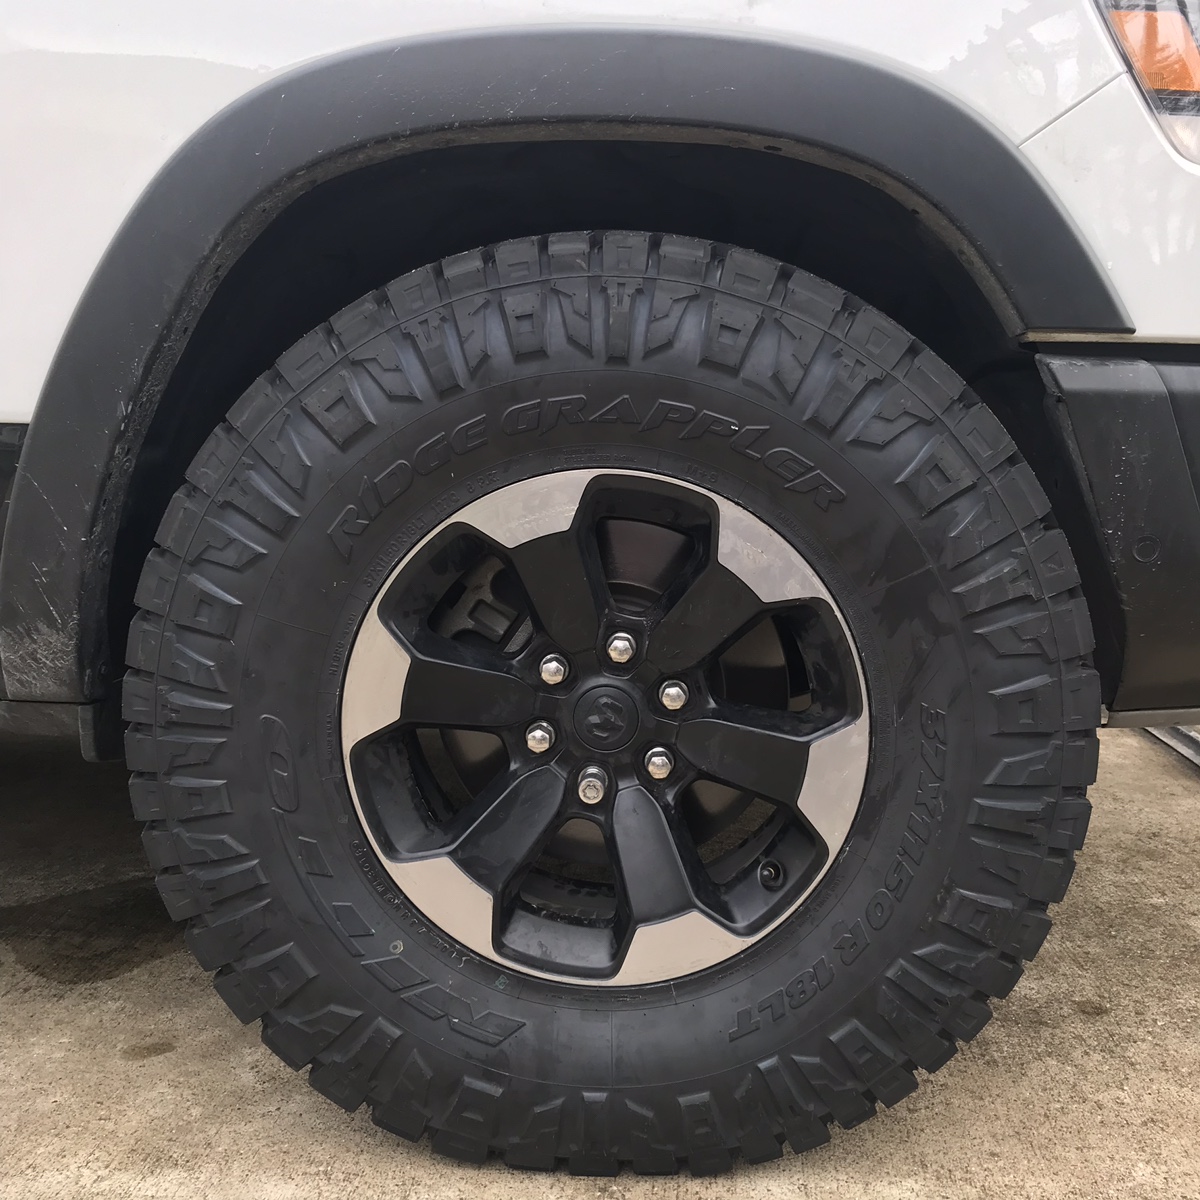
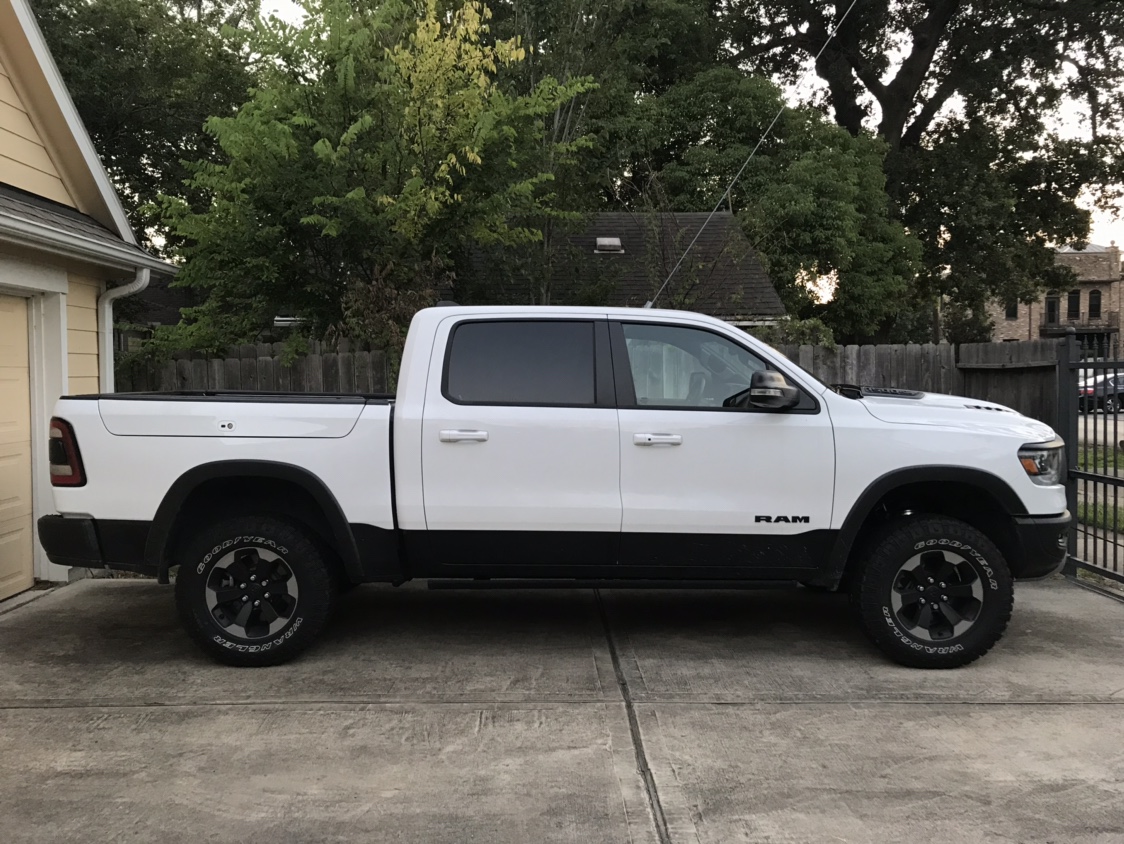
The truck already looks way better but now the wheel wells are looking empty. Hope this can help some people out.
To complicate it a little more, my parking garage has a clearance of 83”/6’11”, so I’ve also been toying with how to not hit the crossbars.
Here’s my general walkthrough with a few pictures and a bunch of measurements. Hope it’s helpful for anyone else interested in lifting their air suspension fifth gen.
Stock measurements to fender over wheel center (front/rear):
Off-road 39.5”/41.5”
Normal 38.5”/40.5”
Aero 38”/39.75”
Entry 35.5”/37.75”
Fin is 79” high in normal, about 2.5” above roof line. 80” in off-road.
At this point, mark a spot on your garage door that shows where your headlights shine before the level. Makes it a lot easier. I backed to the end of the driveway and used masking take on the garage door.
Step 1: make the air ride links from some ball sockets ordered online and some all-thread rod (M6x1.0 stainless). I’ll post up the link once I find it. I’d recommend ordering some spare ball socket ends (they are super cheap) in case you break one of them during adjustment. I found it easiest to use two eyeglasses sized small flat bit screwdrivers to move the retaining clip. I always remove the solid end first (not attached to the sensor) to minimize risk of damaging the sensor.
Front link can be seen on the right (shorter makes your truck taller)
Rear link (longer makes your truck taller)
Qty (1) 8mm Ball Socket, Nylon End M6x1.0 Black with Black Band
This Various Manufactures PC1456 fits a wide variety of vehicles and includes a 1 year warranty. Free ground shipping on orders $29+ or $6.99 Express.
www.liftsupportsdepot.com
All in, I think it was $30. Leveled the truck like this but the ride was awful with the airbags completely full, even in aero mode.
Step 2: install Daystar leveling kit (KC09139BK for front and rear, only used the front) and Mopar 2” Lift Upper Control Arms (68323530AA and 68323531AA). There’s much debate over the arms, but it was $130 so I bought them.
Called around and had a wide variety answers. Dealers said they would install for $1000 or higher. I found a shop that installed plus aligned the truck for $350.
$350 labor+ $125 Daystar +$120 UCA = $595 for this step.
Air bags with the spacer pucks mounted on top
I tweaked the height a little more and here are the final measurements. It drives really close to stock.
New measurements with level and factory tires:
Aero 40.125” front and rear
Normal 40.5” front 41.25” rear (may raise the nose a little more)
80” fin in normal 79” in aero
Drove the truck to work and wow is it close to the parking garage cross beams. So close that I opted for an experiment. A little bit of tape and a laminated piece of cardstock and I made a feeler 2” taller than the fin. It definitely hits, so going straight to 37s isn’t an option with the shark fin antenna there.
Now I’m researching switching to the Puck style antenna with a cell antenna delete. Some folks are saying that they still get (weaker) cell signal by plugging in the delete connector on the roof end of the wire. More to come. Let me know if anyone knows about replacing or relocating the shark fin antenna.
The truck already looks way better but now the wheel wells are looking empty. Hope this can help some people out.
Last edited: